
Create a Server-to-Server Oauth App from Your Zoom Account
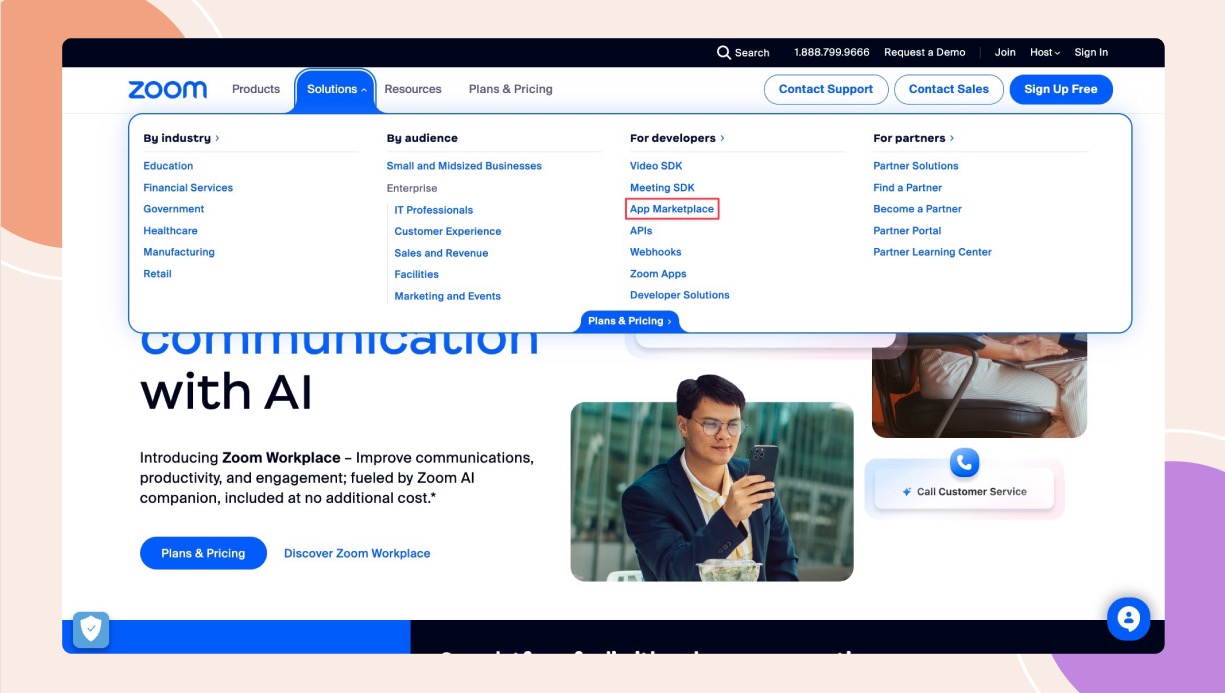
From your Zoom account, click Solutions then App Marketplace.
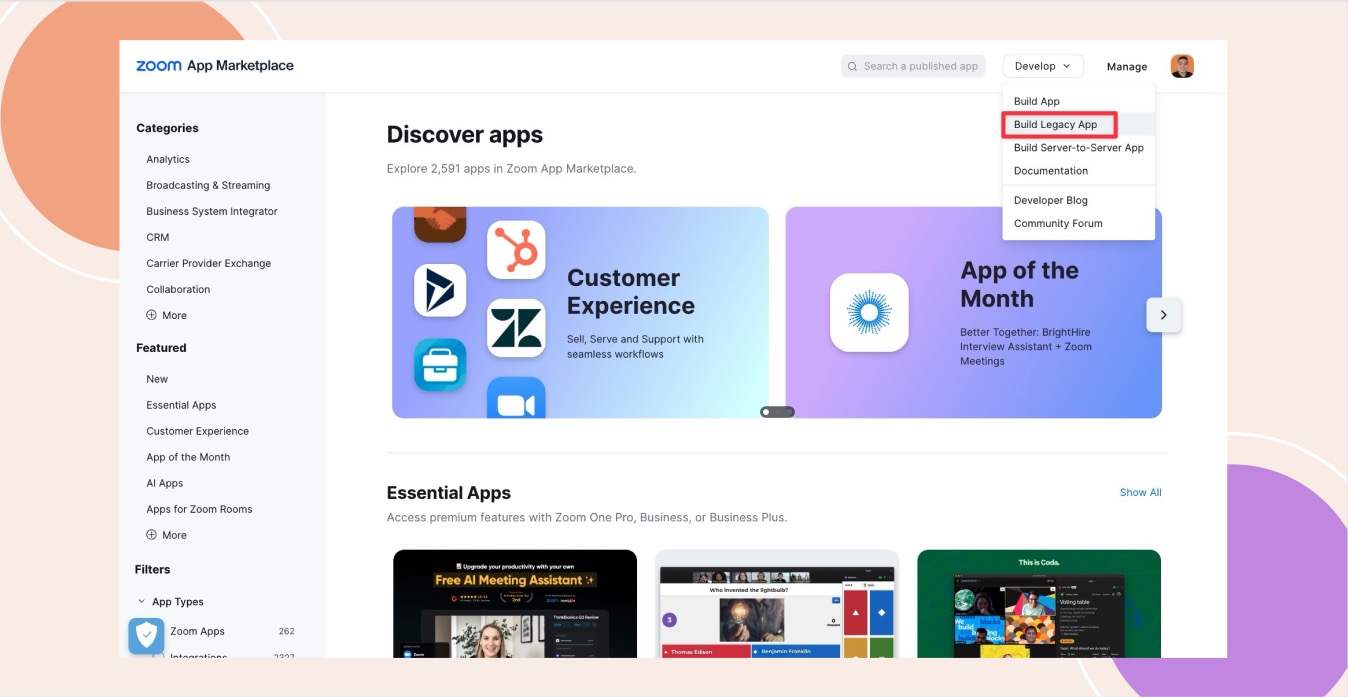
Log into your Zoom account, then under the Develop dropdown menu, select Build Legacy App.
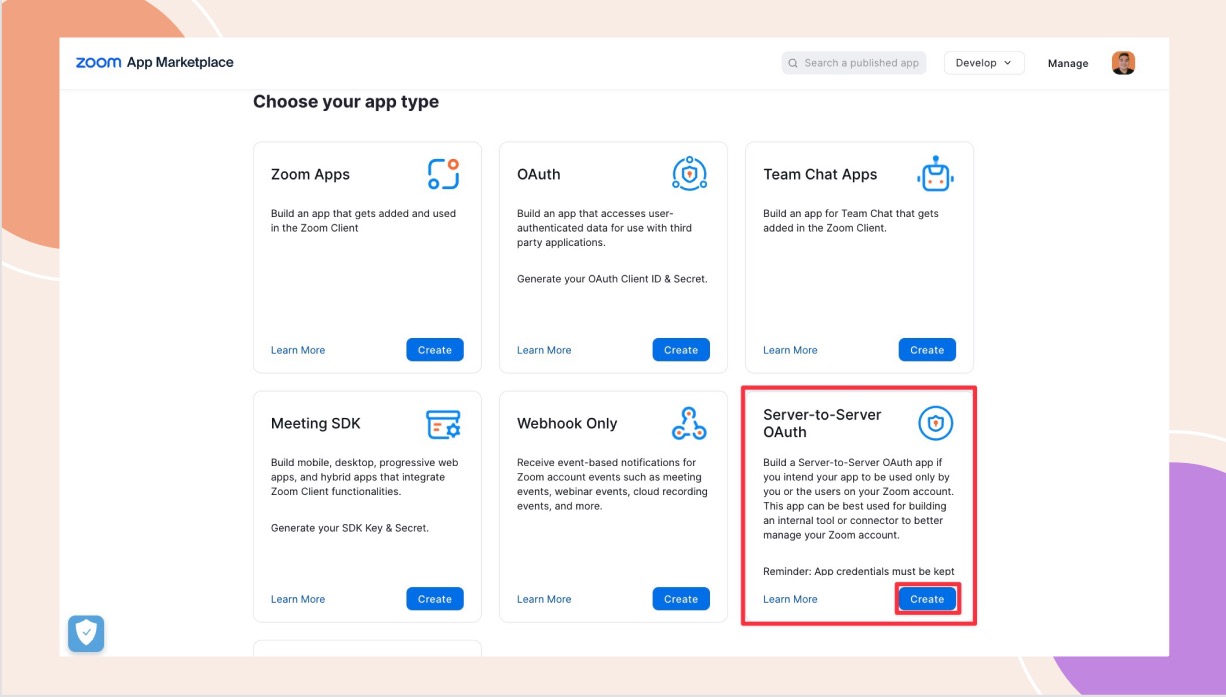
Here, go to Server-to-Server OAuth and click Create.
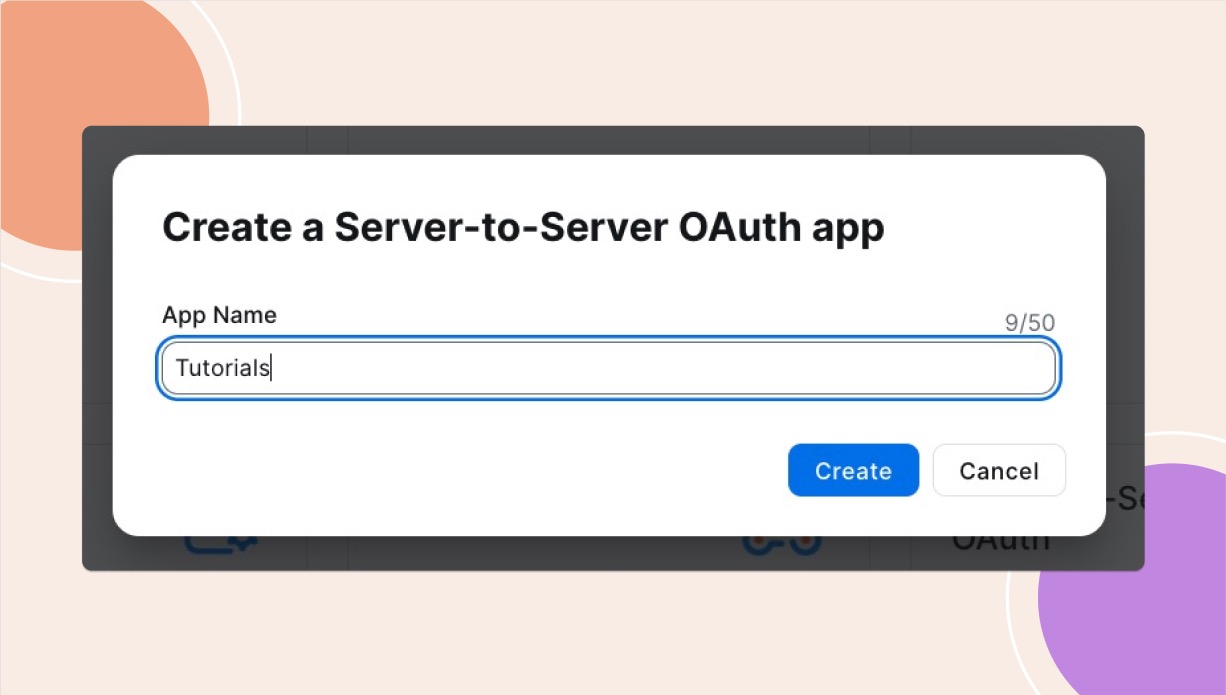
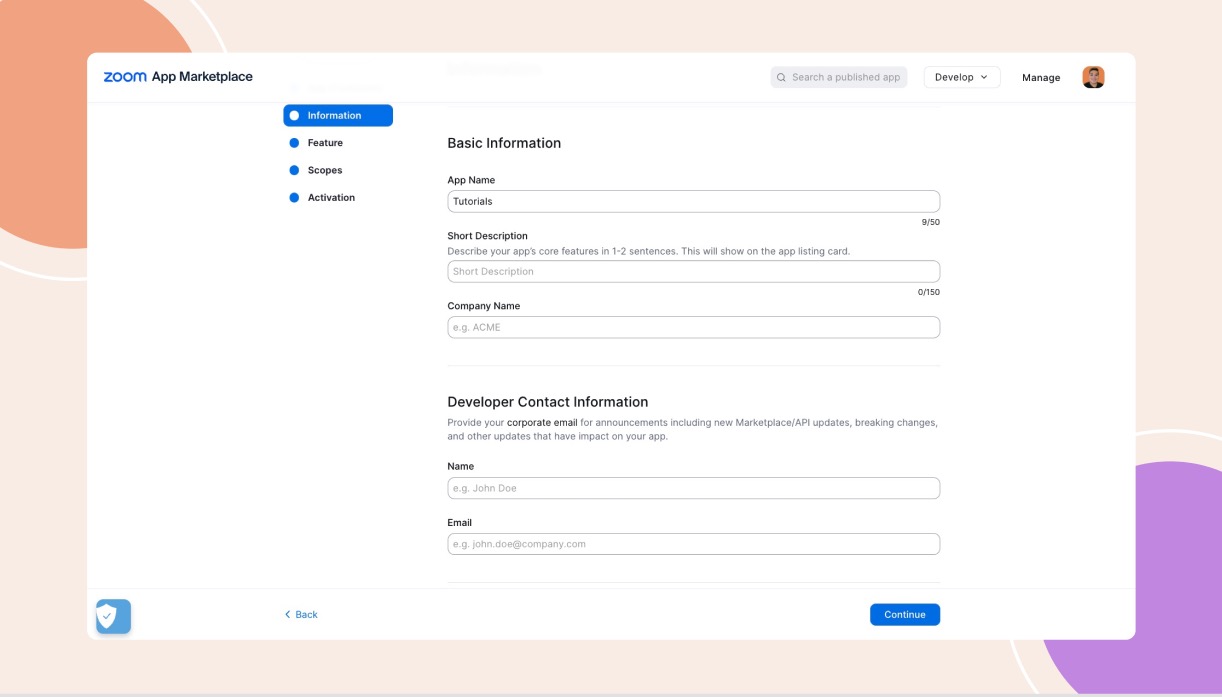
Give your App any name then click Create.
Once the App is created, go to the Information tab and fill out the form with your Company name and Developer Contact Information. This is required before you can activate your app.
Next, go to the Scopes Tab and add the following scopes:
Meeting
View all user meetings
- View a meeting
- View a past meeting’s instances
View and manage all user meetings
- Delete a meeting
- Update a meeting
- Create a meeting for a user
View and manage sub-accounts user meetings
- Delete a meeting
- View a past meeting’s instances
- View a meeting
- Update a meeting
- Create a meeting for a user
User
View all user information
- View users
- View a user
View and manage sub account’s user information
- View users
- View a user
Webinar
View all user Webinars
- View a past webinar’s instances
- View a webinar
View and manage all user Webinars
- Delete a webinar
- Update a webinar
- Create a webinar for a user
View and manage sub account’s user webinars
- Delete a webinar
- View a past webinar’s instances
- View a webinar
- Update a webinar
- Create a webinar for a user
Lastly, go to the Activation tab then click Activate your App.

Connect Zoom to BuddyBoss
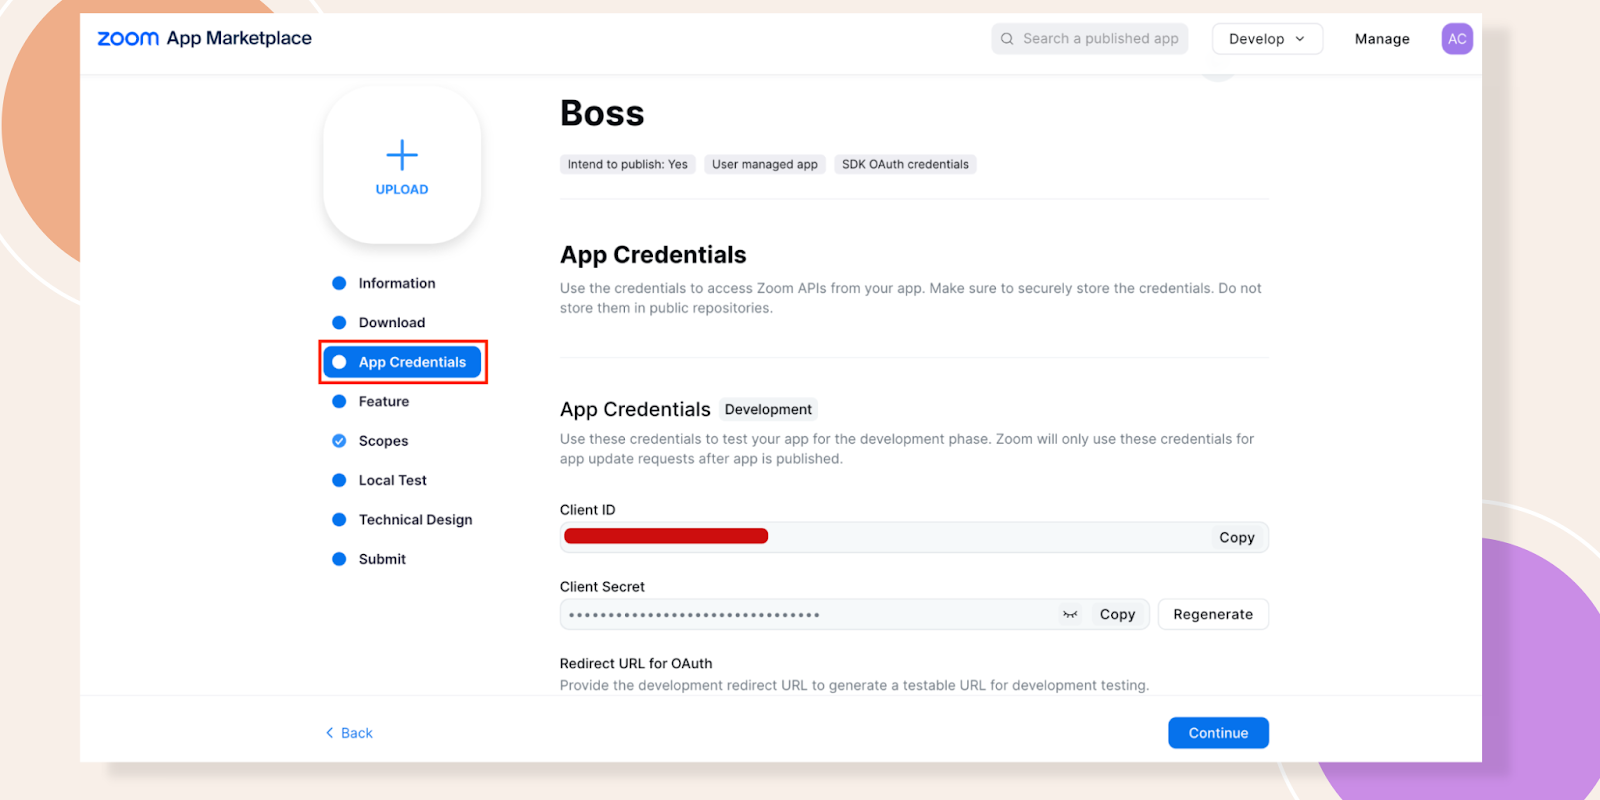
Navigate to the App Credentials tab and copy these credentials back to your BuddyBoss site under the Zoom Gutenberg Blocks section.
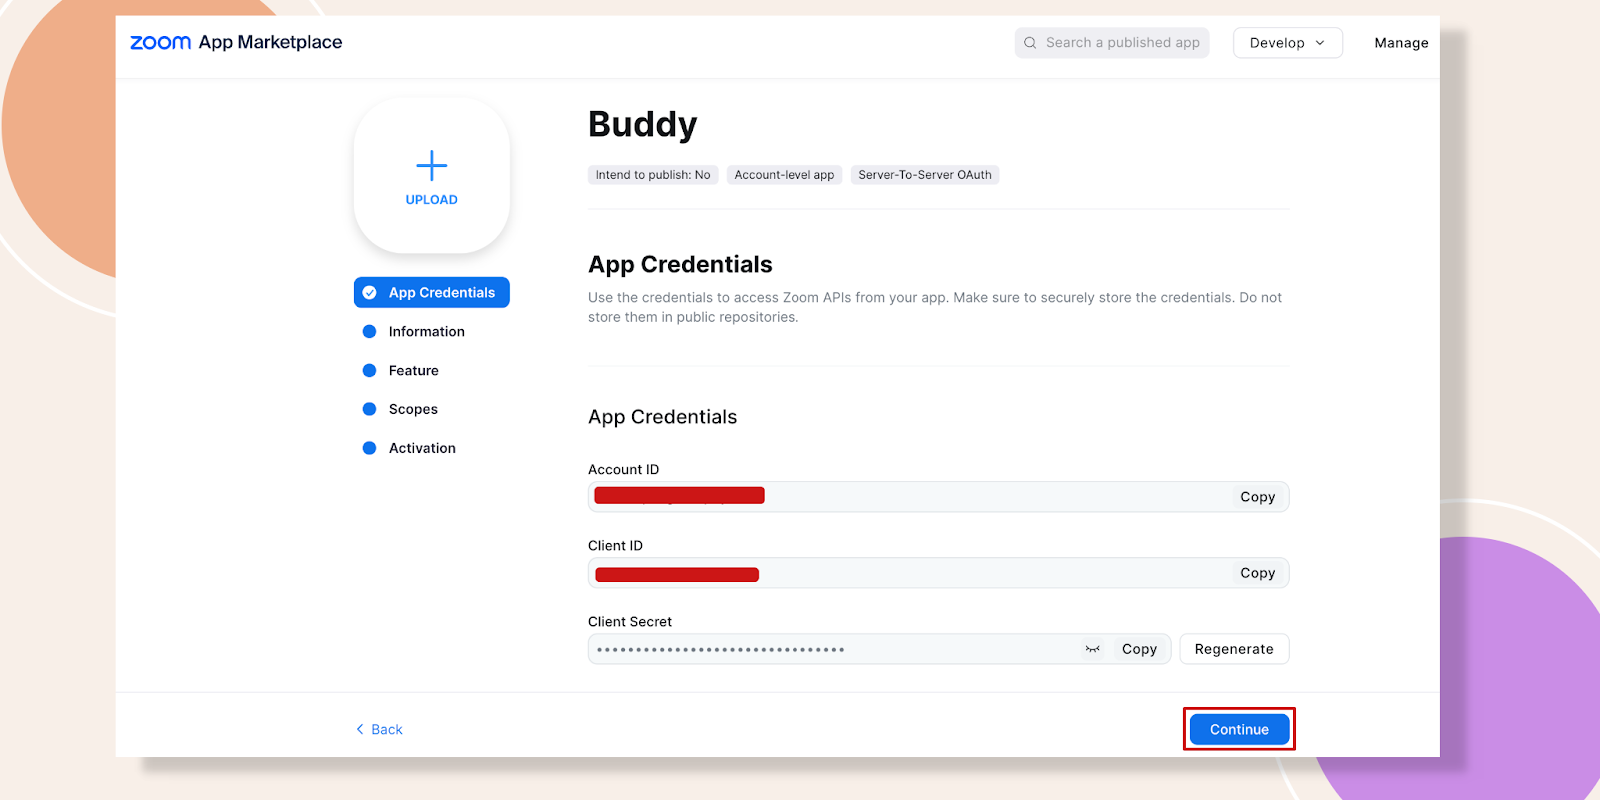
Once you get to the App Credentials page, copy the Account ID, Client ID and Client Secret and paste them into the fields in the form below.
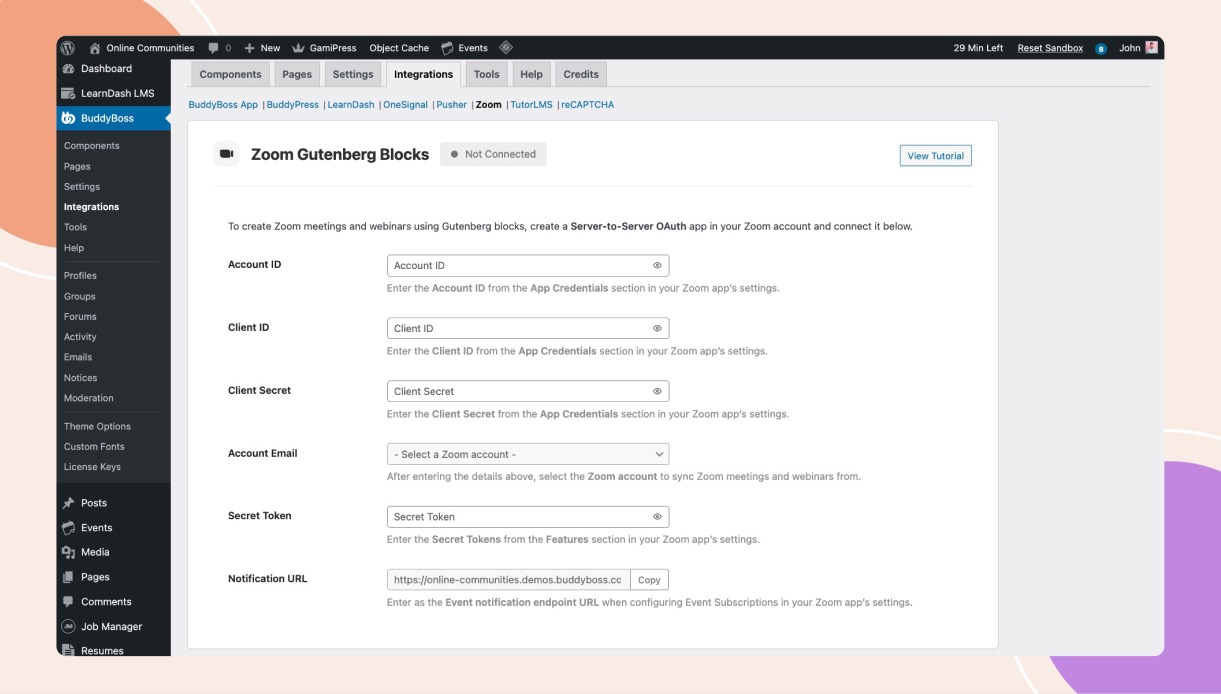
Once you’ve filled in the top three fields, select your Account Email address on the dropdown menu.
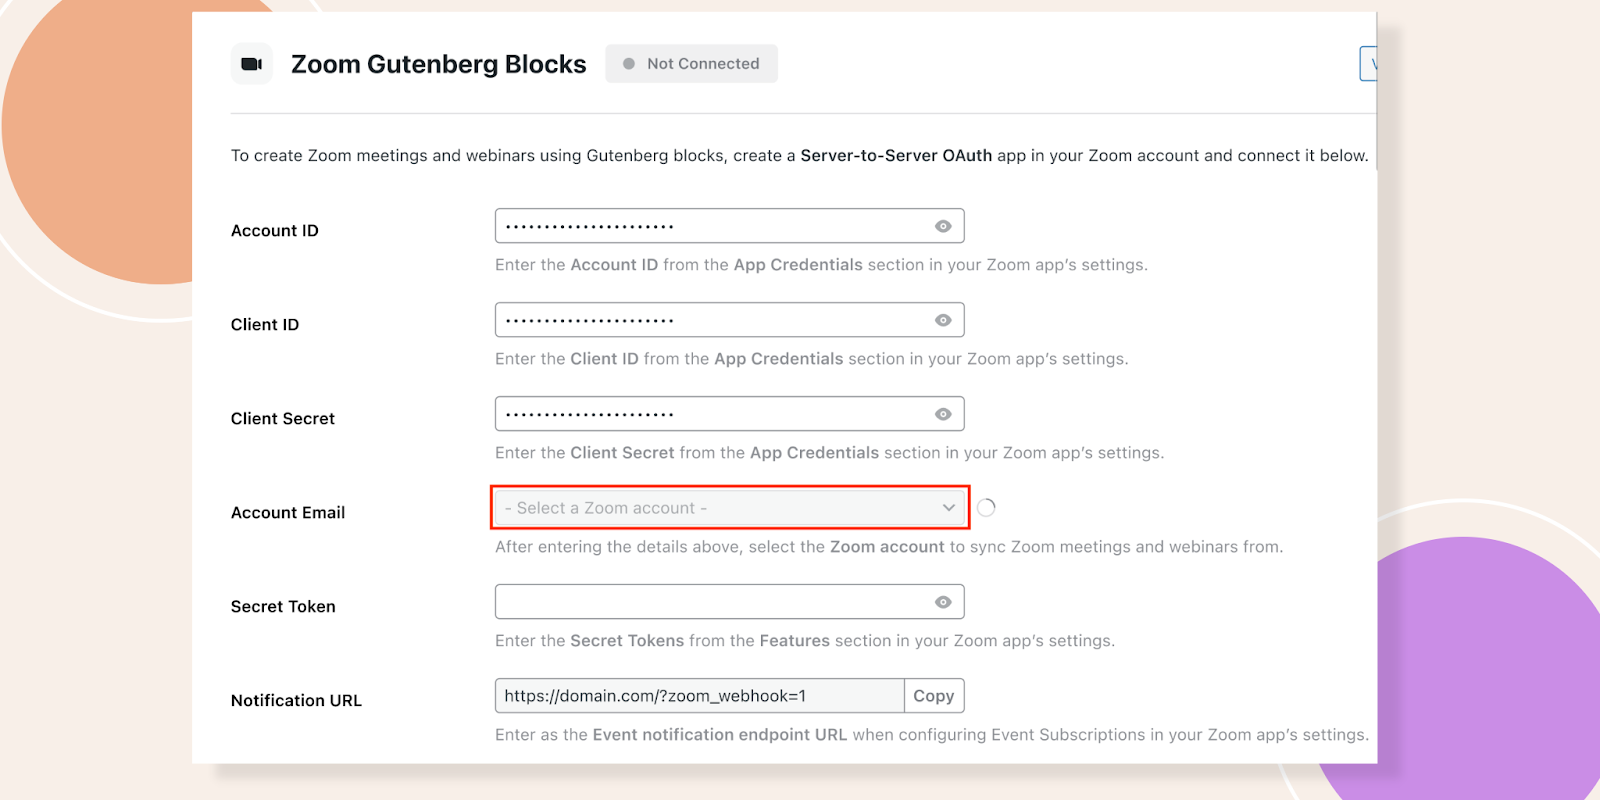
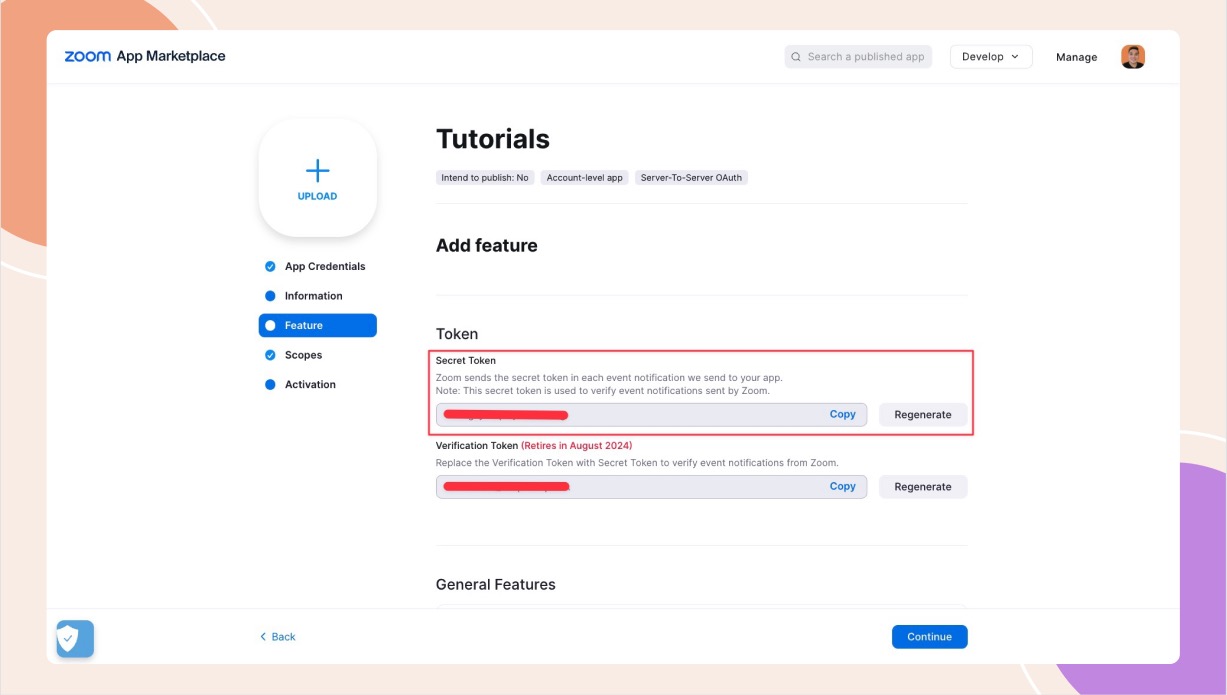
From the Features tab, you need to copy your Secret Token.
Then let’s click Save Settings at the bottom.
It should now say Connected under the Zoom Gutenberg Block section which means the connection is successful.
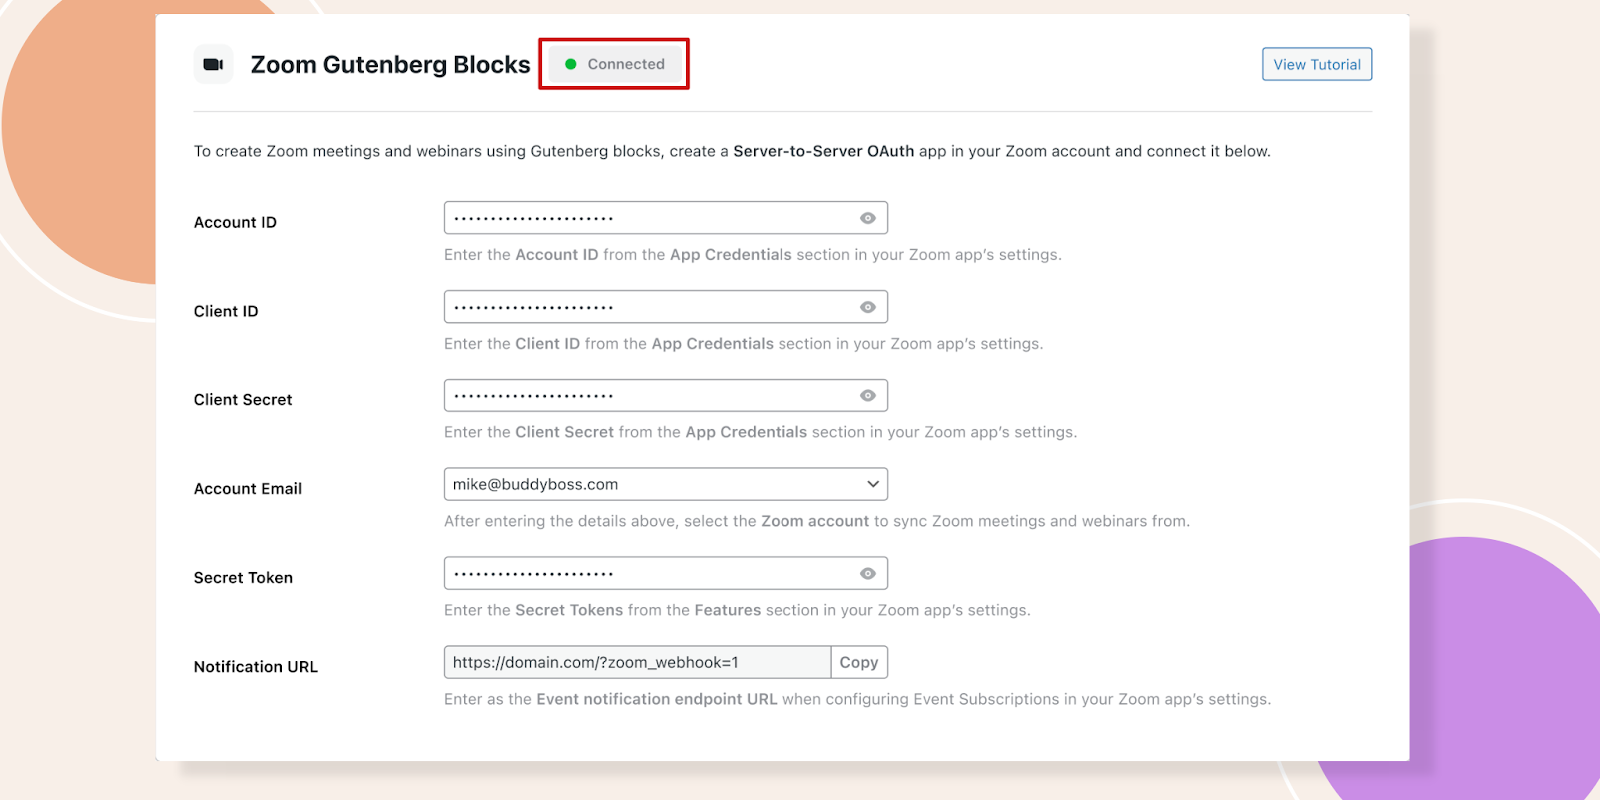
You should now be able to create zoom meetings and display them using Gutenberg block.
Setup Zoom Meeting SDK
The next thing that we need to set up is a Meeting SDK app so we can require members to attend your Zoom meetings and webinars directly on your site.
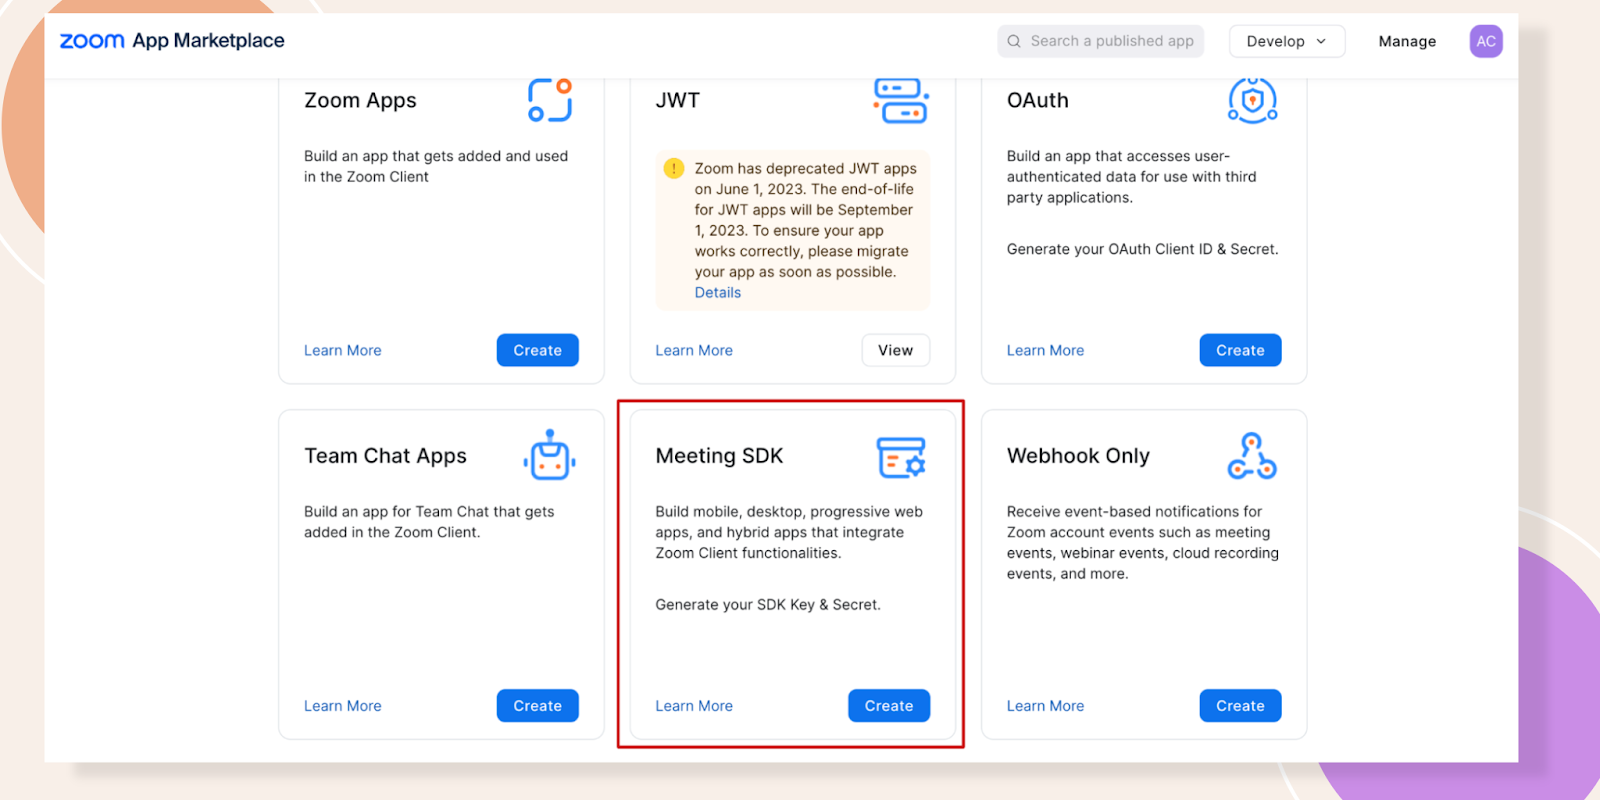
Go back to your Zoom App Marketplace account. On the Develop dropdown again, click Build Legacy App. On this page, click Create under Meeting SDK.
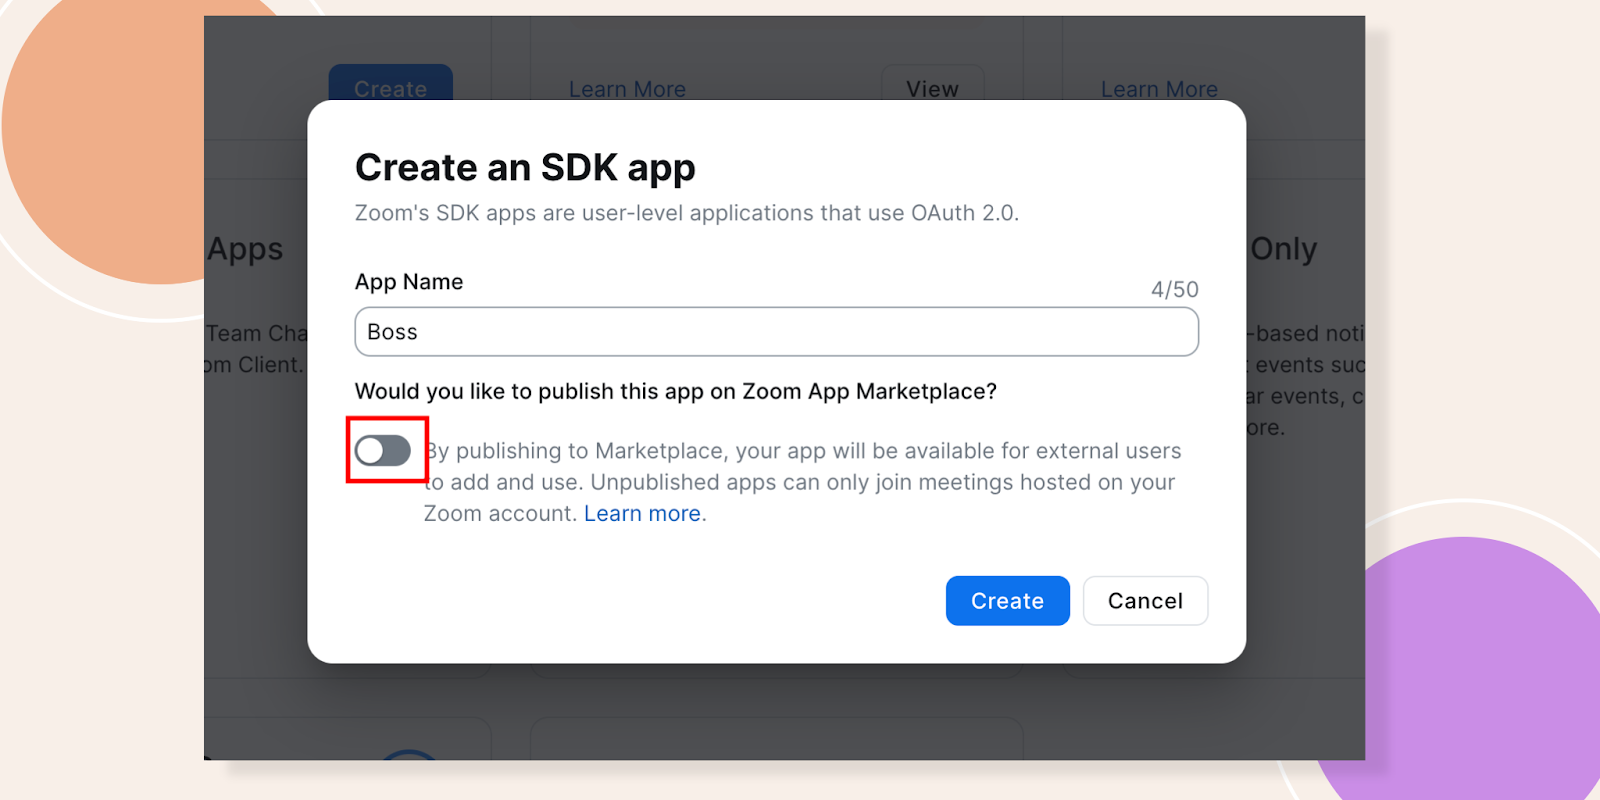
Enter a name and don’t forget to disable the checkbox then click Create again.
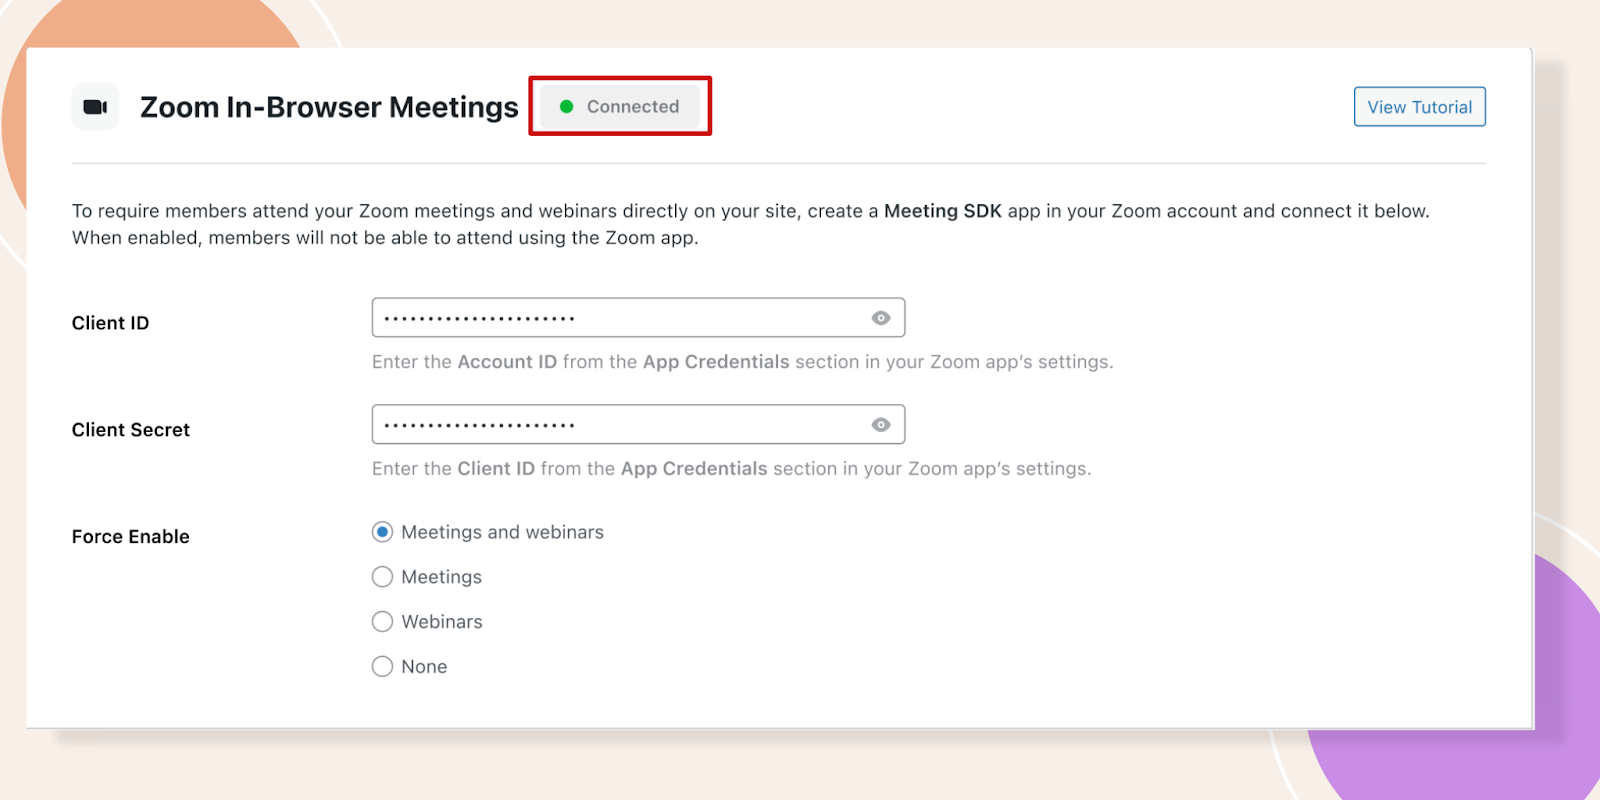
On the app page, click on the App Credentials tab to get your needed credentials to set up your Zoom-In Browser Meeting.
Let’s paste these credentials back to your BuddyBoss site under the Zoom In-Browser Meetings Section. Then click on Save Settings.
If the credentials are valid, it should say Connected with a green indicator on top.
With both of these sections completed, you should now be able to create and host Zoom calls from within your BuddyBoss site. If you are using the BuddyBoss Platform Pro then make sure you are updated.
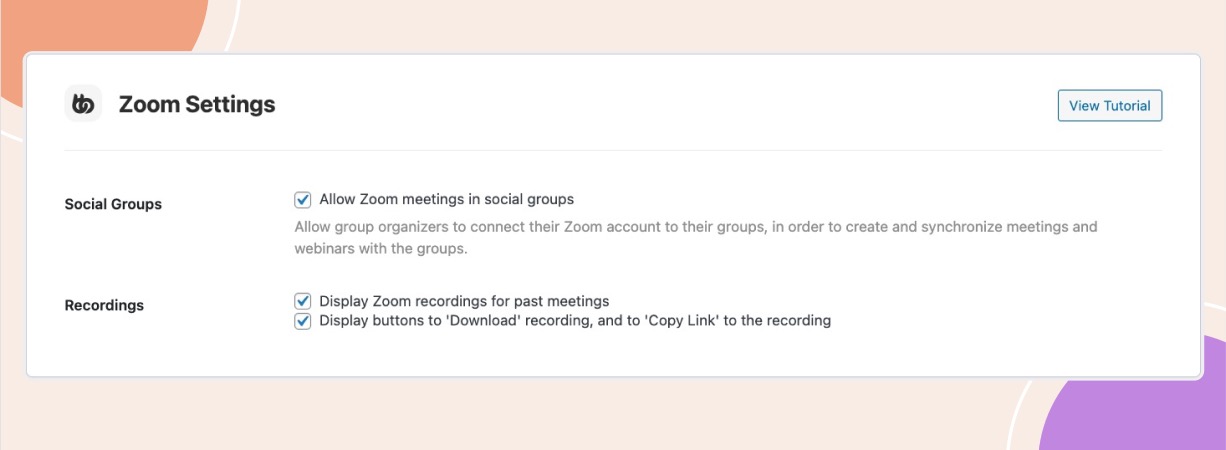
Zoom Settings
Once everything is Connected, you may now configure the Zoom Settings.
Here, you can enable Zoom meetings in Social Groups and enable Recordings.
Related Articles
- This plugin requires BuddyBoss Platform Pro, which is included with your BuddyBoss Theme purchase for all customers. Learn more about BuddyBoss Platform Pro.