Each Ninja Forms add-on serves a different purpose and you may choose to install them based on the requirement of your site.
File Uploads add-on lets you add a file upload field to your forms. You can control the file type and size that your users may upload on your site. Also, connect services such as Google Drive, Dropbox, or Amazon S3 to upload files directly to these cloud storage services.
Installing the plugin
To install and activate the plugin:
- Download the File Uploads plugin from your Ninja Forms account Downloads page.
- Extract the downloaded ninja-forms-uploads-version.zip file to the WordPress plugins folder yourhostname/wordpress/wp-content/plugins
OR
Go to your WordPress Dashboard > Plugins > Add New. Click the Upload Plugin button. Browse to the download file location, select the ninja-forms-uploads-version.zip & install the plugin. - Click the Activate Plugin button to activate the Ninja Forms – File Uploads plugin on your website. OR
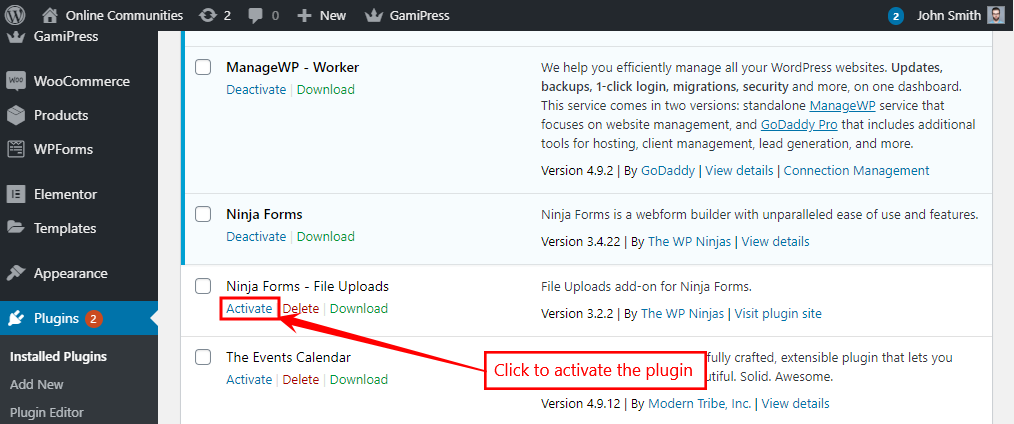
To activate the plugin on your website site go to WordPress Dashboard > Plugins and then click the Activate button for Ninja Forms – File Uploads.
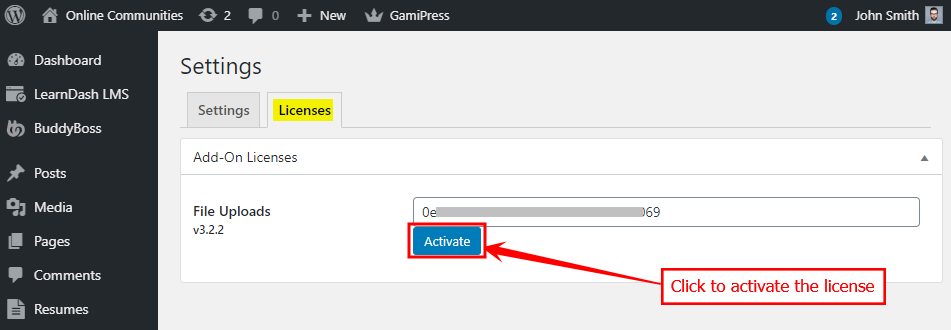
- Go to WordPress Dashboard > Ninja Forms > Settings > Licenses.
- In the File Uploads section, enter your license key for the add-on and click the Activate button.