
The BuddyPages plugin an easy-to-use solution to create custom pages and add them to groups and member profiles. Site administrators can choose to restrict access via the plugin and allow all members to create custom pages or reserve the right to admins only.
The integration works and requires the BuddyBoss Platform installed and activated on your website.
BuddyBoss Platform is a fork and forge of the BuddyPress plugin and bbPress plugin. Any plugin developed for the BuddyPress and bbPress plugin is supported by the BuddyBoss Platform.
You do NOT need to install the BuddyPress plugin or the bbPress plugin separately. BuddyBoss Platform acts as a replacement for both the plugins.
Installing the plugin
- Buy and download the BuddyPages plugin from the link below
https://pluginize.com/plugins/buddypages/ - Extract the downloaded buddypages.zip file to the WordPress plugins folder yourhostname/wordpress/wp-content/plugins OR
Go to your WordPress Dashboard > Plugins > Add New. Click the Upload Plugin button. Browse to the download file location, select the buddypages.zip & install the plugin. - Click the Activate Plugin button to activate the BuddyPages plugin on your website. OR
To activate the plugin on your website site go to WordPress Dashboard > Plugins and then click the Activate button for BuddyPages.
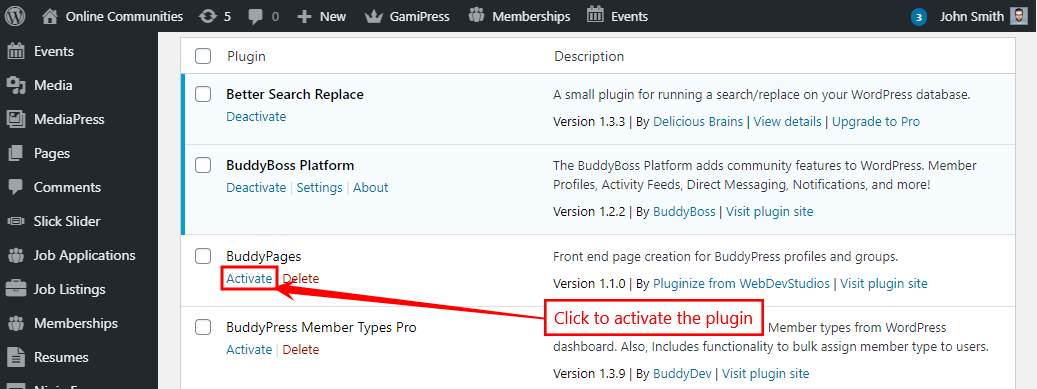
You must have the BuddyBoss Platform installed and activated on your site for the BuddyPages plugin to work.
Setting up the plugin
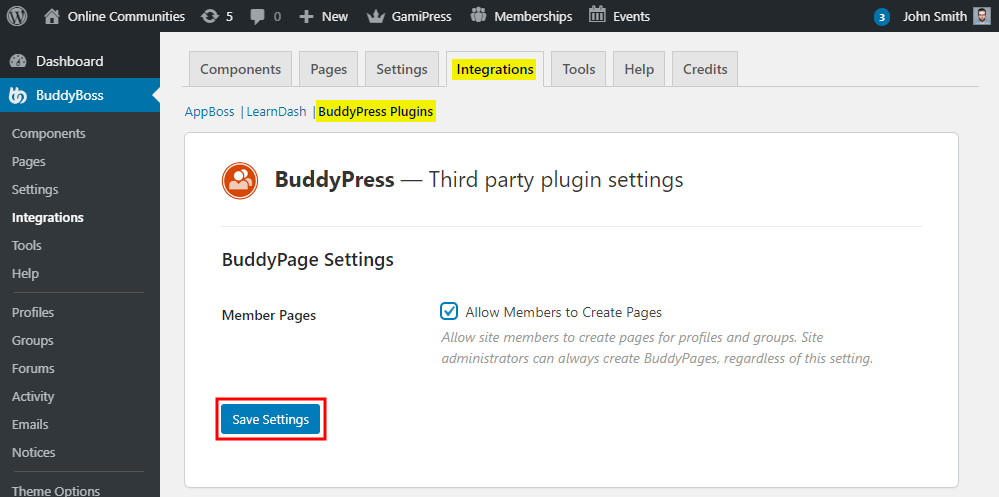
By default, only site admins can create BuddyPages. To allow BuddyPress members to create pages:
- Go to WordPress Dashboard > BuddyBoss > Integrations > BuddyPress Plugins.
- In the BuddyPage Settings section, mark the checkbox Allow Members to Create Pages to allow your BuddyPress members to create pages from their profile.
- Click the Save Settings button.
Creating group pages
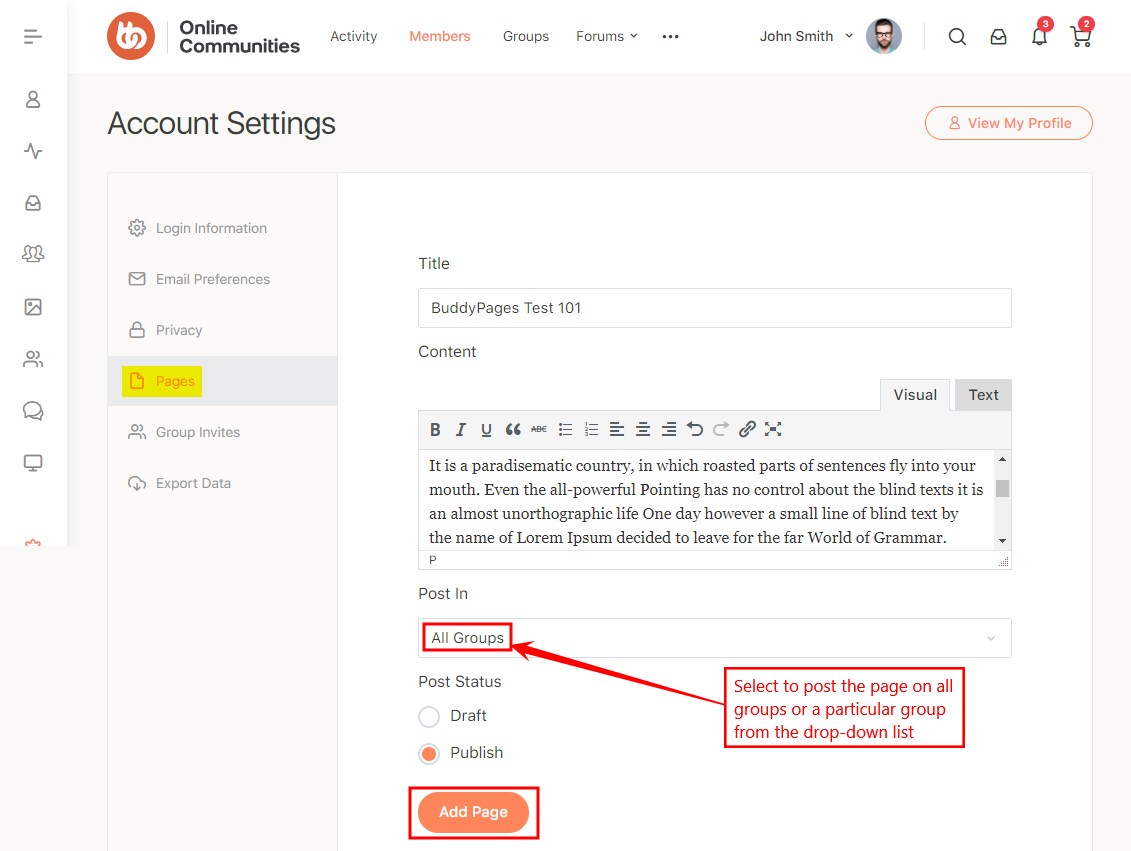
To create a page for all groups as a site admin:
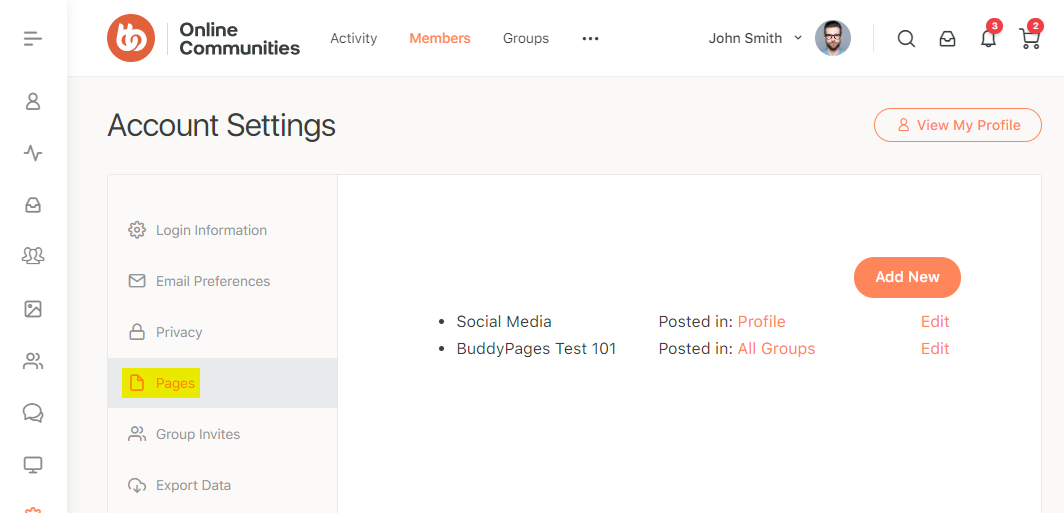
- Go to your Account Settings > Pages section and click the Add New button.
- Add a title and the content for the group page.
- Select the All Groups option to post the page on all groups from the Post In drop-down list. OR select a particular group from the drop-down list.
- Choose the status of the post as Publish.
- Click the Add Page button.

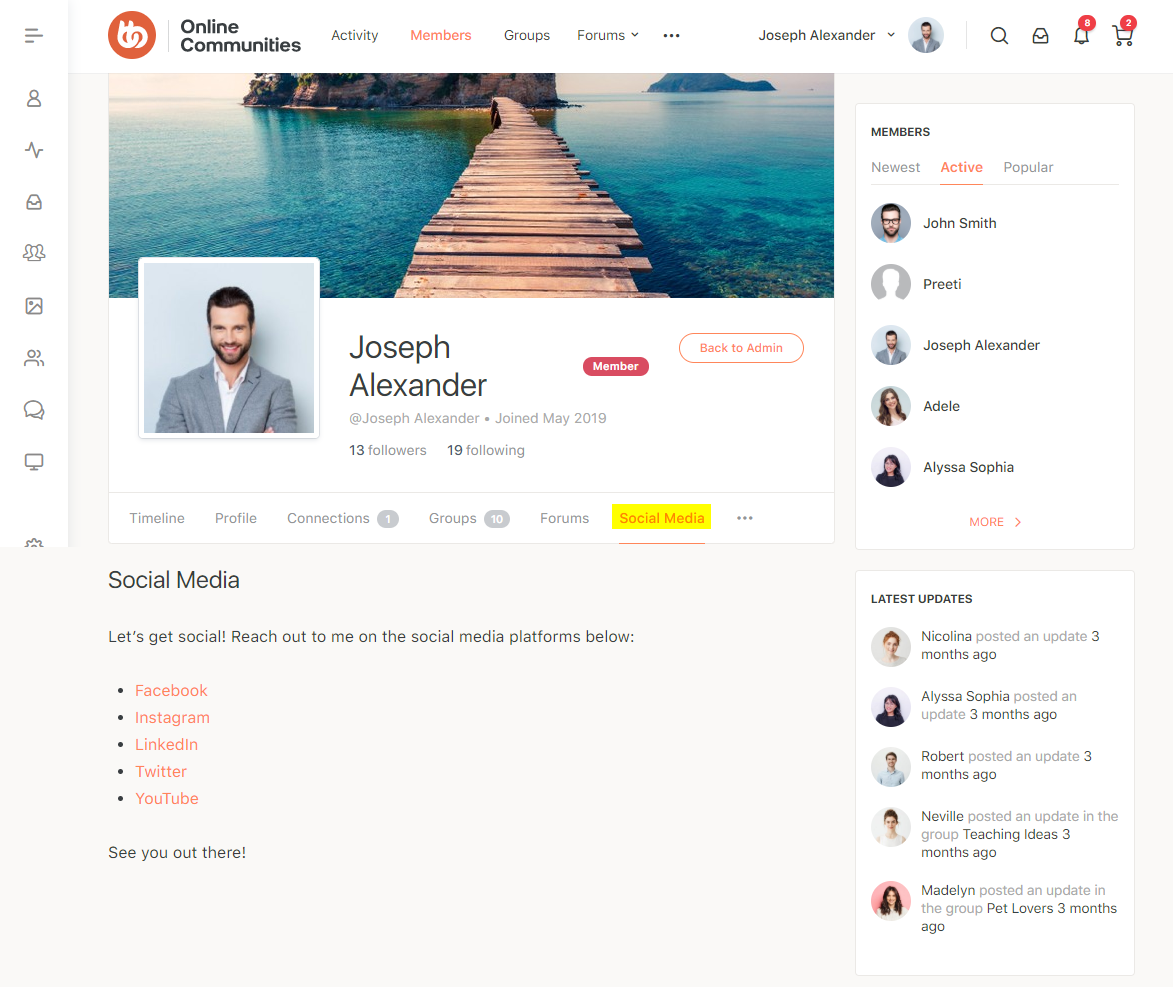
Creating member profile pages
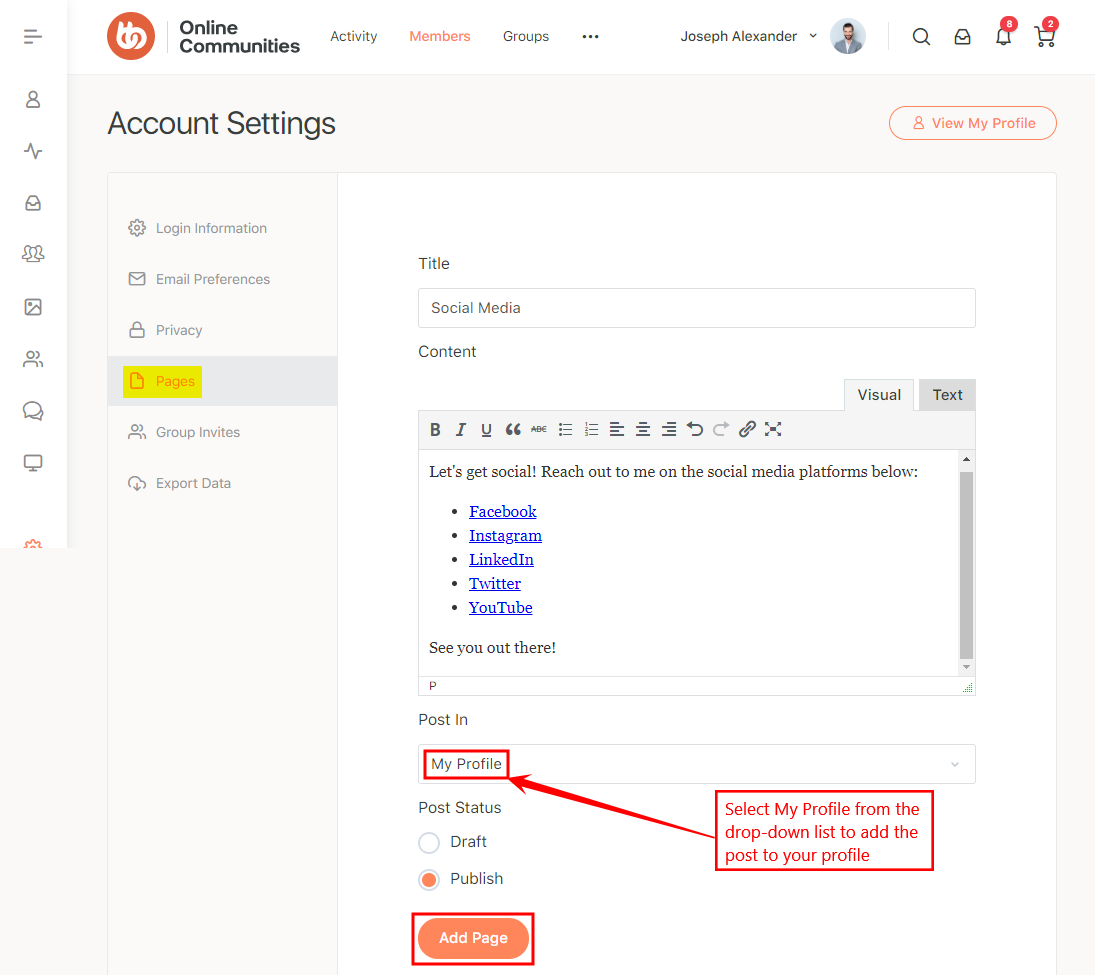
To create a page for your profile:
- Go to your Account Settings > Pages section and click the Add New button.
- Add a title and the content for the profile page.
- Select the My Profile option to post the page on your profile from the Post In drop-down list.
- Choose the status of the post as Publish.
- Click the Add Page button.
For further setup options and usage, refer to the official documentation of the BudyPages plugin.