
Configure Zoom Integration For Social Groups
Step 1: Enable Social Groups Zoom Meeting
Firstly set up your Zoom Integration for BuddyBoss Platform Pro. Then from the WordPress backend navigate to BuddyBoss – Integrations – Zoom. Scroll down to find the Zoom Settings.
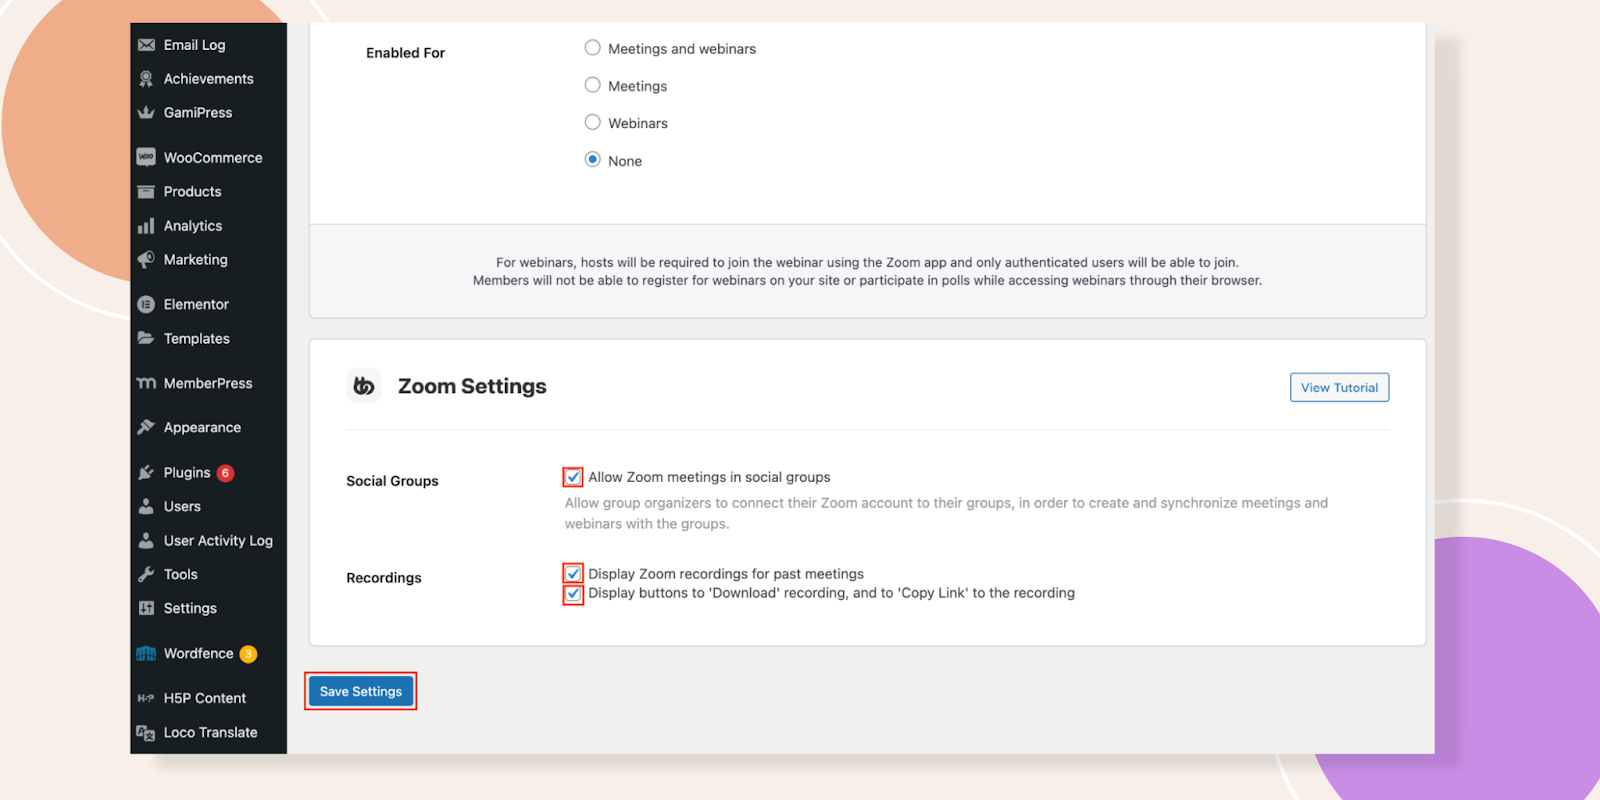
Here, you can enable Zoom Meetings on your Social Groups. Tick the Social Groups checkbox which will allow group organizers to connect their own Zoom accounts to a group. After configuring this section, don’t forget to click Save Changes.
Step 2: Set Up Social Groups for Seamless Zoom Meetings
Now, navigate to any of your Social Groups, you will see a Zoom notification like below.
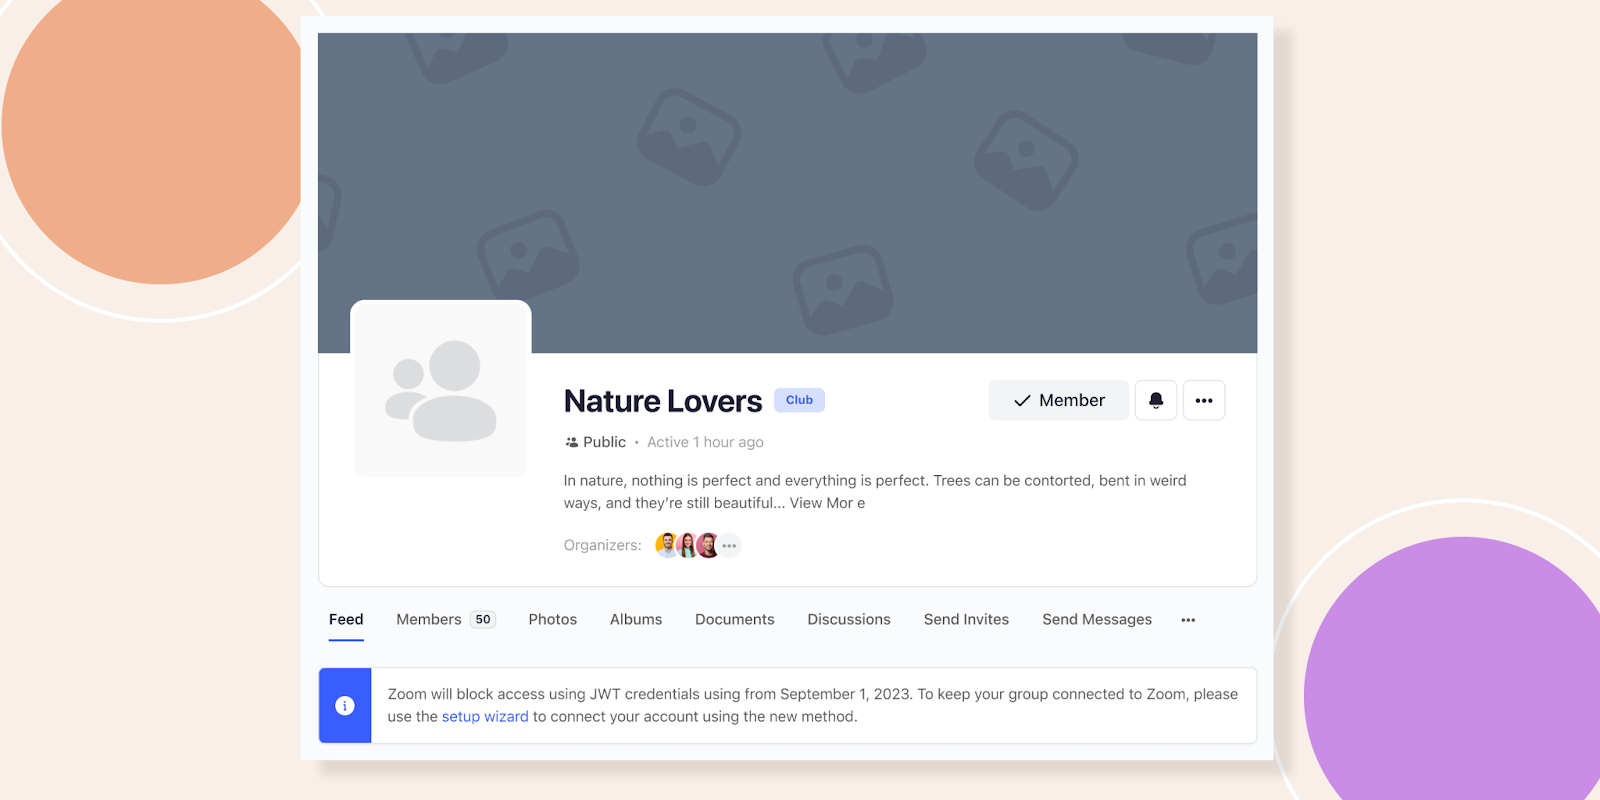
Navigate to Manage – Zoom.
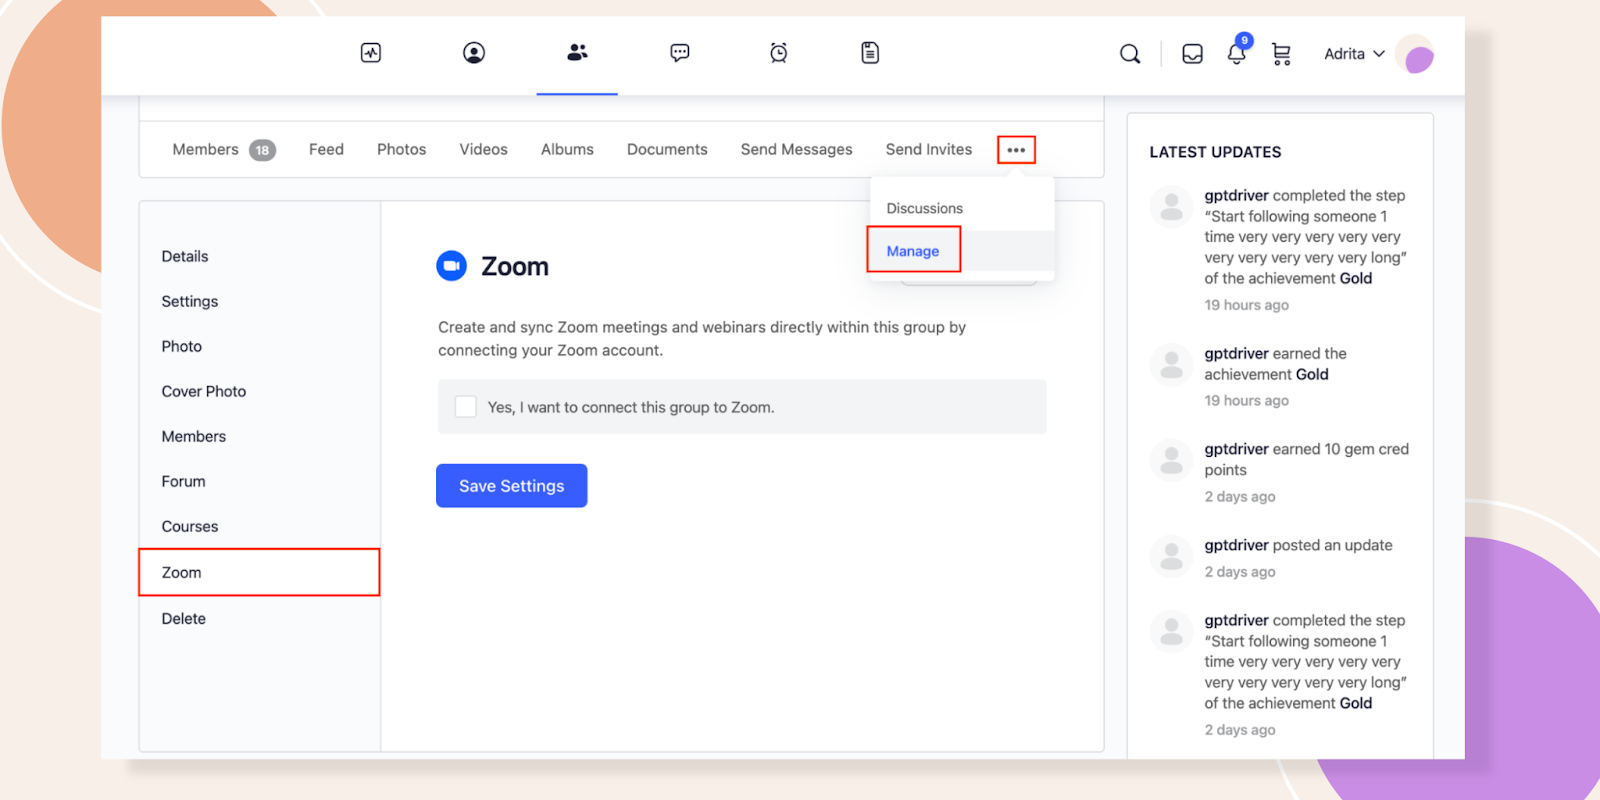
Step 3: Authenticate Zoom Account for Social Groups
First step is to complete the Authentication section.
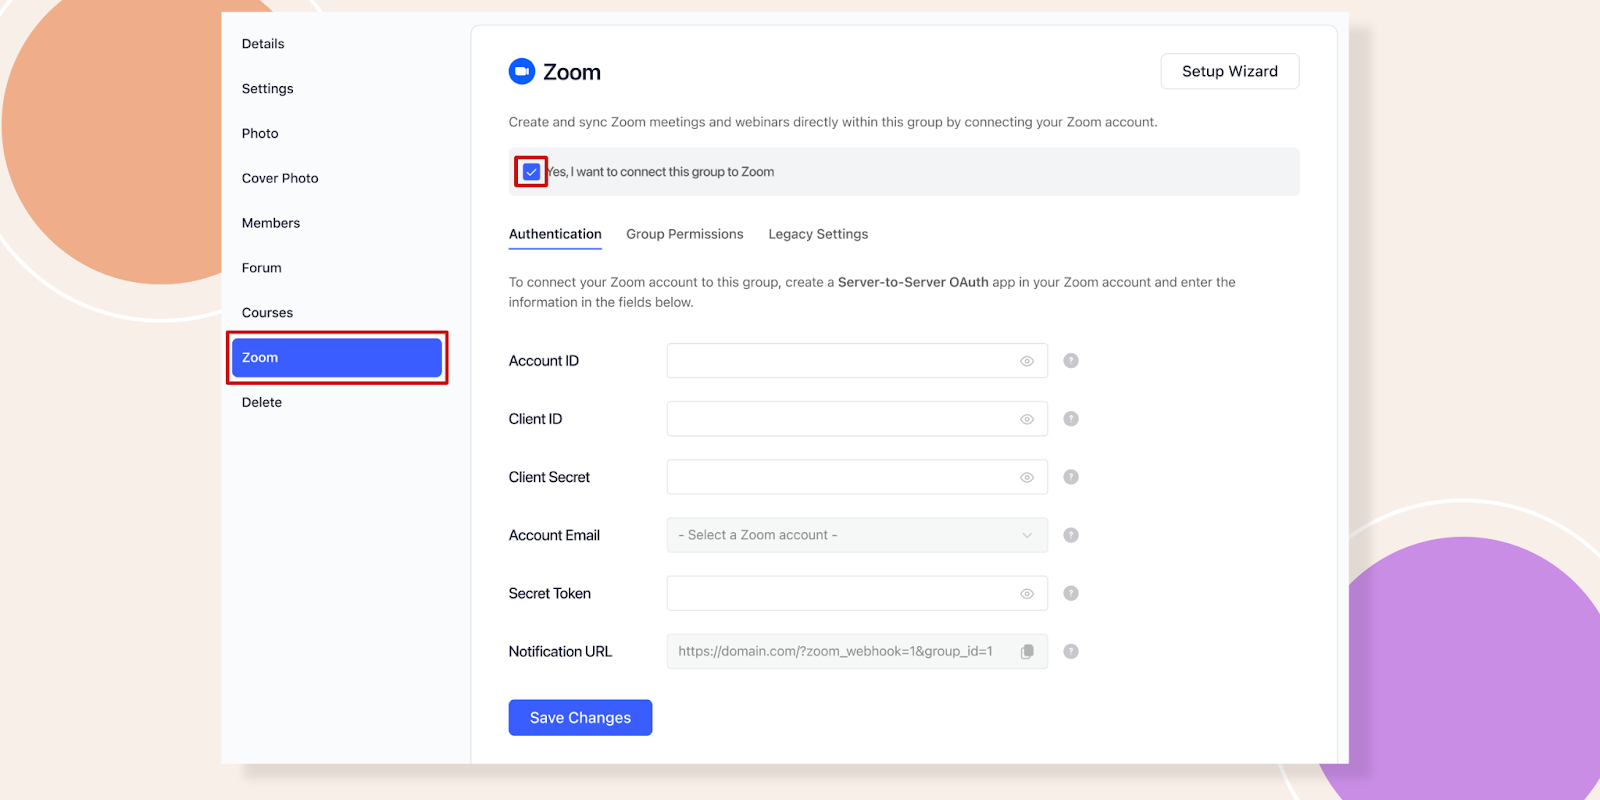
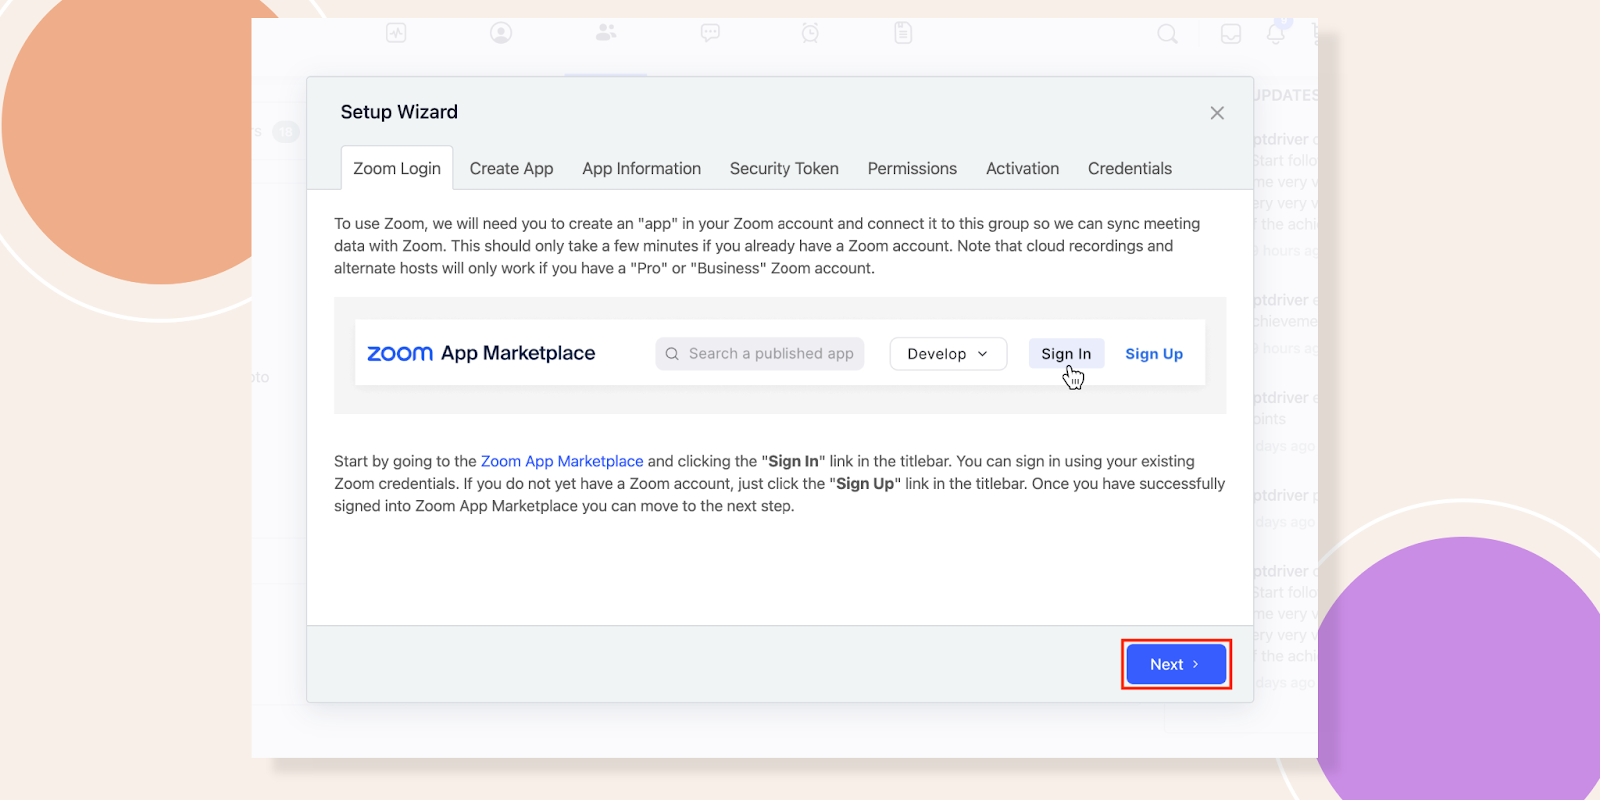
On the top right there is a Setup Wizard which will walk your Group Organizers step-by-step through the entire zoom app authentication process, but follow along with this tutorial as we explain all the steps involved.
The first thing you need to do is Sign In to your account on the Zoom Marketplace.
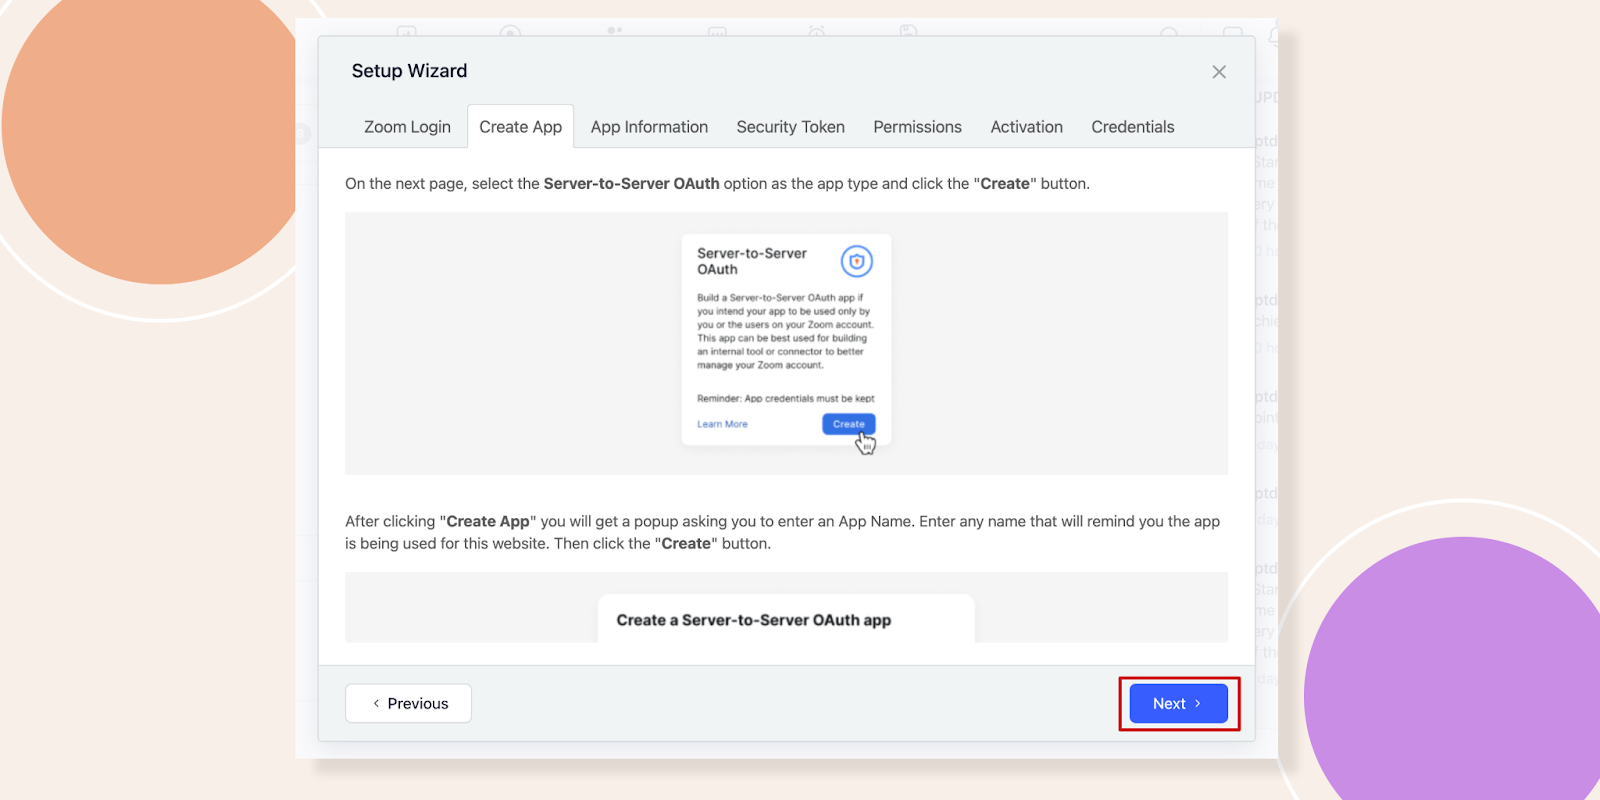
Under the Develop dropdown menu, select Build Legacy App.

Here, let’s click Create under Server-to-Server OAuth. Scroll down to see how to add any name for your App.
After creating the app fill up your Basic and Developer Contact Information. This is essential before you activate your app.

We now need to configure the event notifications by Zoom on the Feature tab. This step is used to allow meeting updates from Zoom to automatically sync back into your group.

Next, we add the appropriate account permissions from the Scopes tab. Click +Add Scopes and add the following permissions under each scope type.
Meeting
View all user meetings
- View a meeting
- View a past meeting’s instances
View and manage all user meetings
- Delete a meeting
- Update a meeting
- Create a meeting for a user
View and manage sub account’s user meetings
- Delete a meeting
- View a past meeting’s instances
- View a meeting
- Update a meeting
- Create a meeting for a user
User
View all user information
- View users
- View a user
View and manage sub account’s user information
- View users
- View a user
Webinar
View all user Webinars
- View a past webinar’s instances
- View a webinar
View and manage all user Webinars
- Delete a webinar
- Update a webinar
- Create a webinar for a user
View and manage sub account’s user webinars
- Delete a webinar
- View a past webinar’s instances
- View a webinar
- Update a webinar
- Create a webinar for a user
Once all these have been enabled, click Done and then Continue to the next step.
With all the previous steps completed, your app should now be ready for activation. Click Activate your app.

Once the app has been activated, you can go back to the App Credentials page, copy the Account ID, Client ID & Client Secret and paste them into the fields in the form below. If multiple zoom users are available, you will then need to select the email address of the associated account for this group.
Make sure to click the Save button on this tab to save the data you entered. You have now successfully connected Zoom to your group.

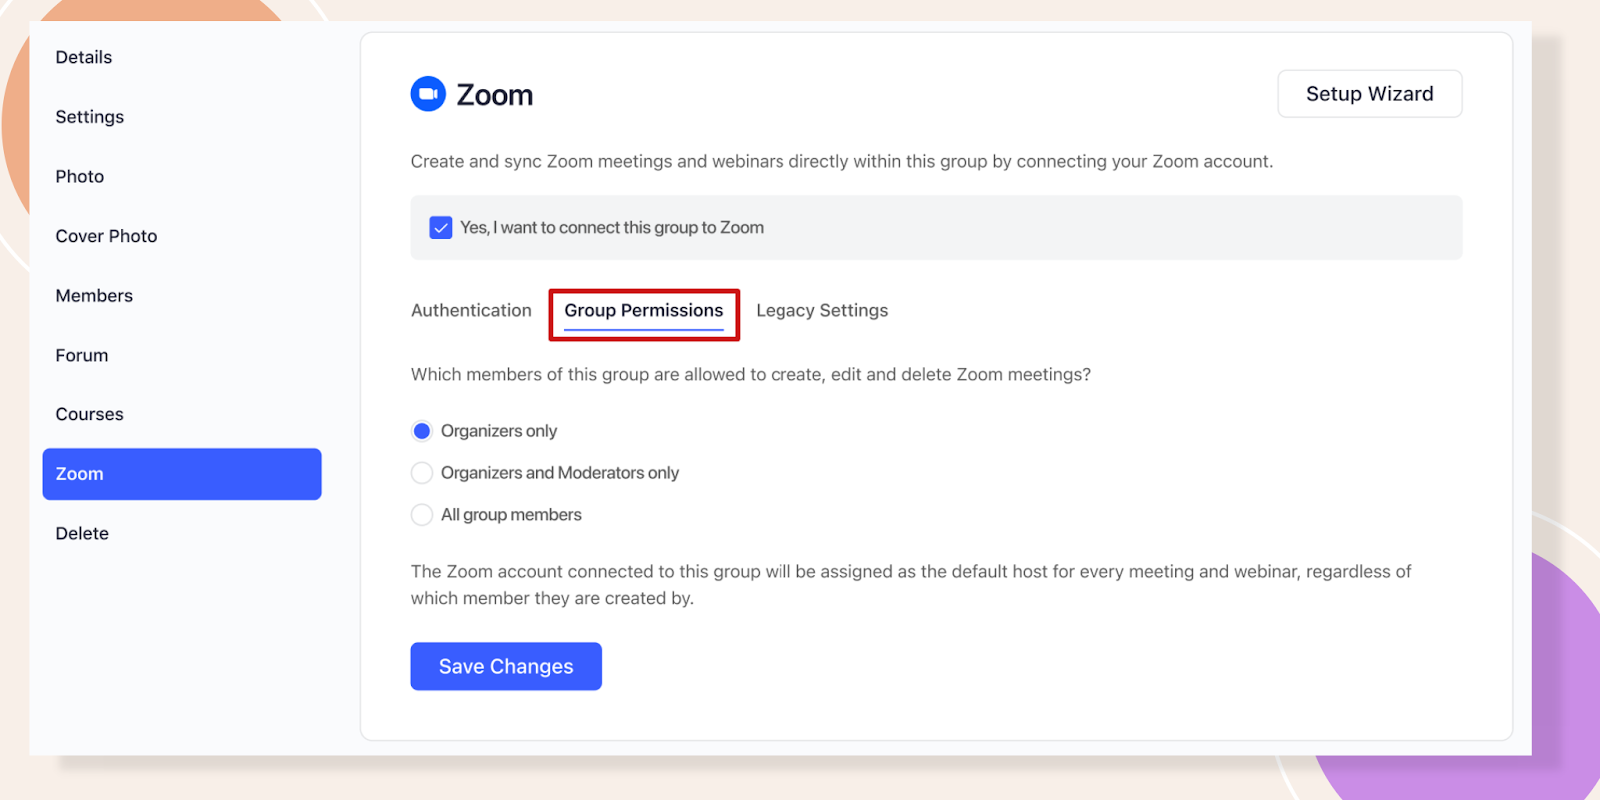
Step 4: Group Permissions
In the Group Permissions tab you can select which members of this group are allowed to create, edit and delete Zoom meetings.
And that’s how you connect your Zoom account to your BuddyBoss Social Groups.