
The Uncanny Automator plugin lets you set triggers and actions on your WordPress website. When one thing happens, Uncanny Automator can make other things happen. For example, when a user fails a LearnDash quiz, add them to a BuddyPress group. Or when a user buys a product, add them to a membership level and enroll them in a course.
The plugin features include:
- Built-in support for popular plugins such as bbPress, BuddyPress, Caldera Forms, Contact Form 7, Easy Digital Downloads, Formidable Forms, GamiPress, Gravity Forms, LearnDash, LearnPress, LifterLMS, MemberPress, Ninja Forms, Popup Maker, The Events Calendar, WooCommerce, WP Courseware, WP LMS, and WPForms
- Support for common WP triggers and actions –
- User views a page
- User submits a comment
- User views a post (including custom post types)
- User logs in
- Send an email
- Add a role
- Change a role
The Pro version of the plugin includes the ability to create new users and posts, connect two separate WordPress sites together and connect your site to non-WordPress applications via webhooks. More triggers and actions for recipes and support for H5P, WP Fusion, and Zapier.
Installing the plugin
To install the plugin:
- Download the FREE Uncanny Automator plugin from the link below
https://wordpress.org/plugins/uncanny-automator/ OR
Buy and download Uncanny Automator Pro plugin from the link below
https://automatorplugin.com/pricing/ - Extract the downloaded uncanny-automator.zip file to the WordPress plugins folder yourhostname/wordpress/wp-content/plugins OR
Go to your WordPress Dashboard > Plugins > Add New. Click the Upload Plugin button. Browse to the download file location, select the uncanny-automator.zip & install the plugin. - Click the Activate Plugin button to activate the Uncanny Automator plugin on your website. OR
To activate the plugin on your website site go to WordPress Dashboard > Plugins and then click the Activate button for Uncanny Automator.
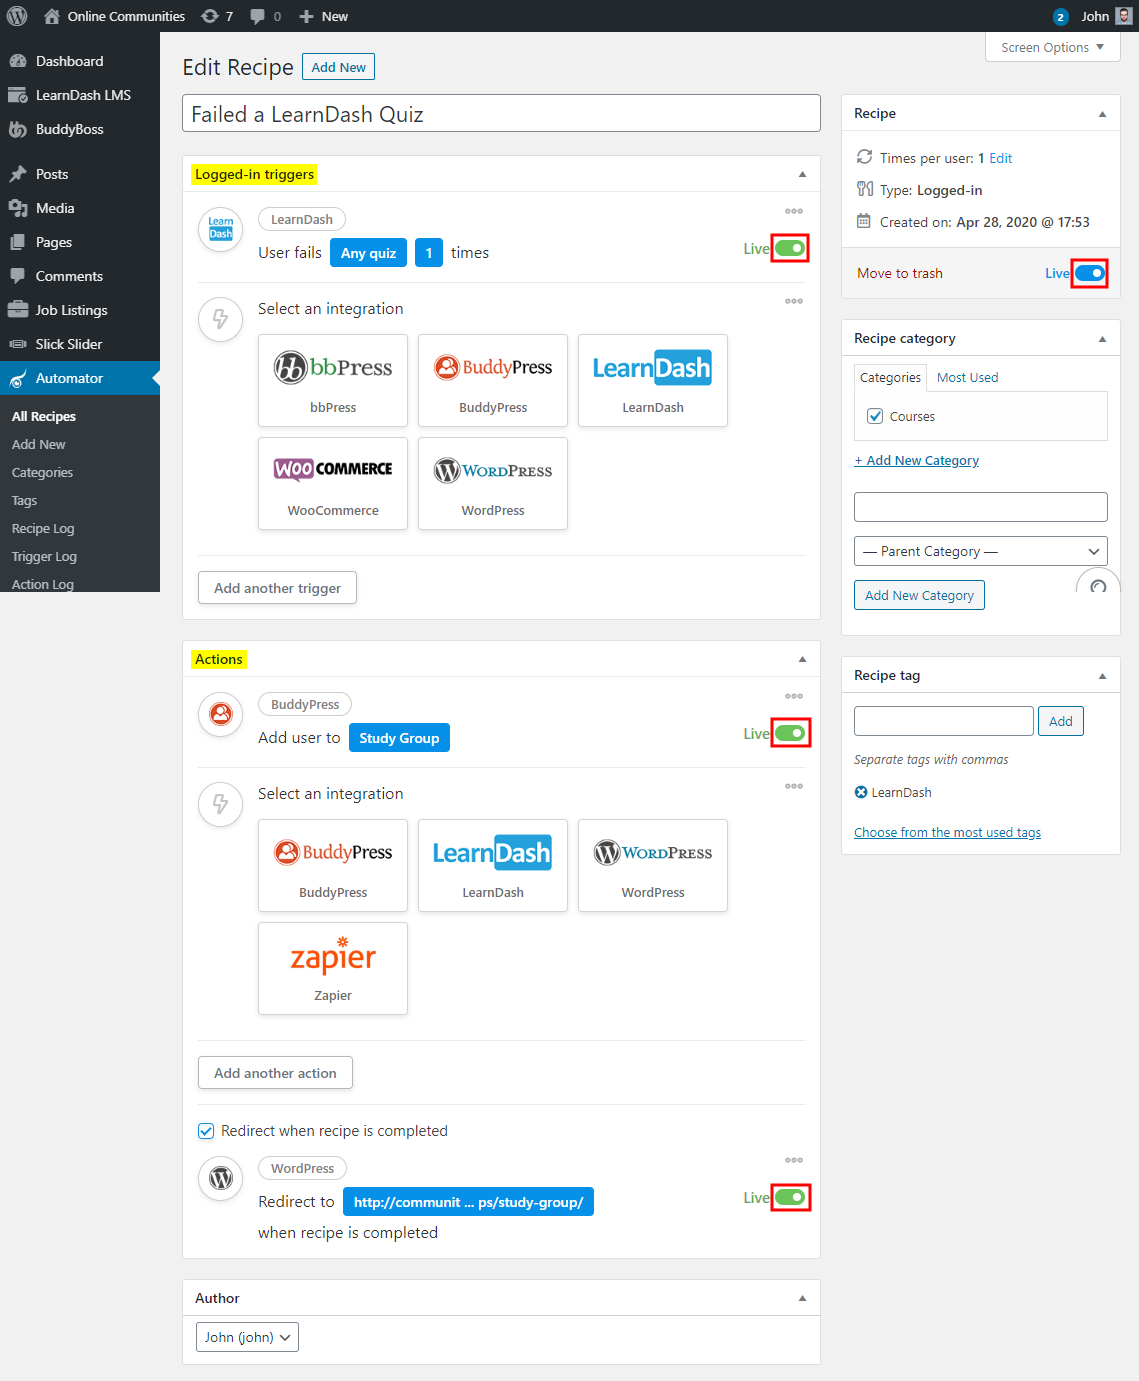
Creating a new recipe
A recipe is the basic building block of the Uncanny Automator WordPress plugin. Every recipe has triggers and actions. A trigger is what happens first to tell the site to run an action. A recipe effectively tells your WordPress site, “if this happens then do that“. Triggers are the “this” in that example; actions are “that”. To create a new recipe:
- Go to WordPress Dashboard > Automator > All Recipes and click the Add New button.
- Enter a title for the recipe.
- In the Logged-in Triggers meta box, select the integration and the trigger for the recipe. And then click the toggle bar to activate the trigger.
- In the Actions meta box, select the integration and the action for the recipe. And then click the toggle bar to activate the action.
- Optionally, add a URL for redirection when a recipe is completed.
All changes are saved automatically to the recipe. - Click the toggle bar to publish the recipe.
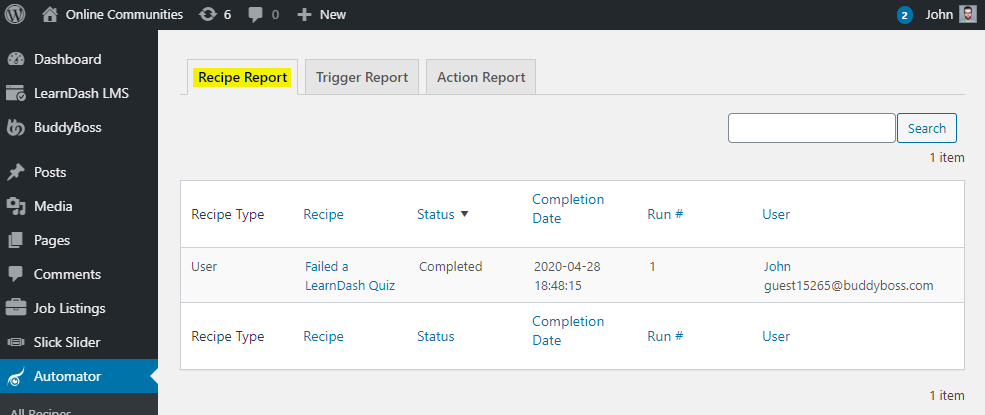
Site administrators can view the recipe, trigger and action logs in the WordPress Dashboard via
- WordPress Dashboard > Automator > Recipe Report
- WordPress Dashboard > Automator > Trigger Report
- WordPress Dashboard > Automator > Action Report
For further setup and usage tutorials, refer to the official documentation of Uncanny Automator.