
The BuddyPress User Profile Tabs Creator Pro plugin lets you create, remove and modify the BuddyPress user profile tabs with a simple and intuitive interface.
The plugin features include:
- Add new BuddyPress component or profile tabs
- Modify existing profile tabs and sub tabs for a component
- Create unlimited tabs/sub tabs
- Control visibility and availability of the profile tab based on user roles
- Modify label and position
- Set a tab as the default component.
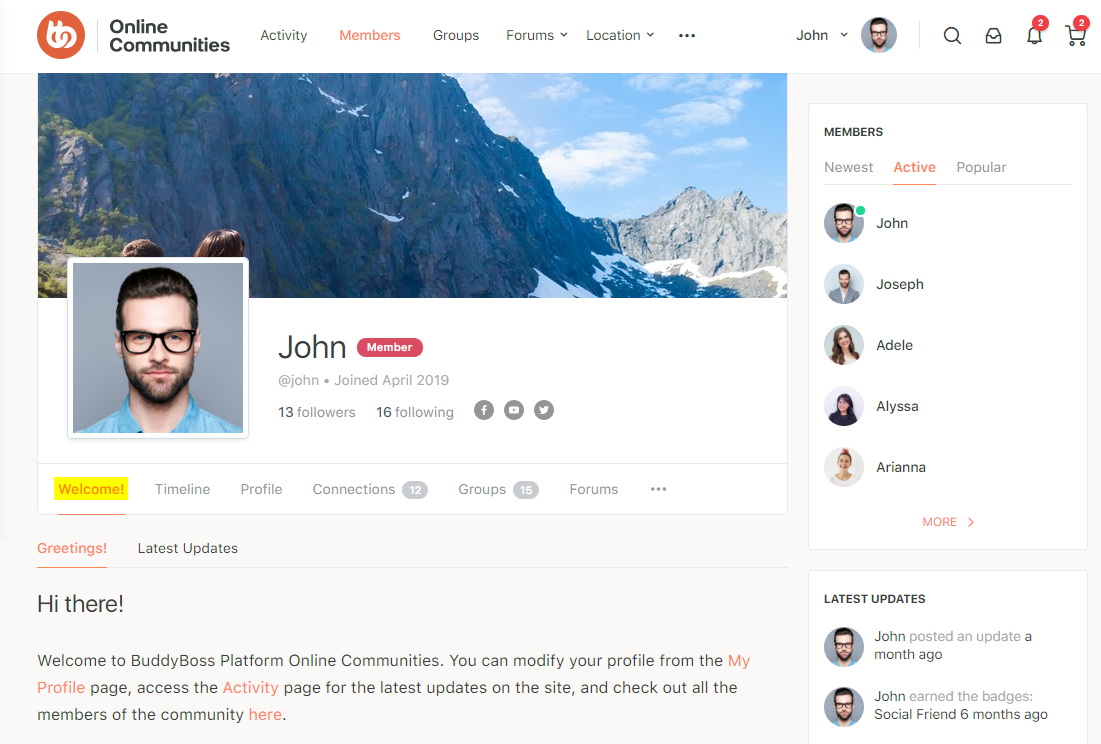
- Add any type of content (text, videos, images, document, or anything that you want) using a visual text editor or use shortcodes to generate dynamic content.
- Translation ready
The integration works and requires the BuddyBoss Platform installed and activated on your website.
BuddyBoss Platform is a fork and forge of the BuddyPress plugin and bbPress plugin. Any plugin developed for the BuddyPress and bbPress plugin is supported by the BuddyBoss Platform.
You do NOT need to install the BuddyPress plugin or the bbPress plugin separately. BuddyBoss Platform acts as a replacement for both the plugins.
Installing the plugin
To install the plugin:
- Download the BuddyPress User Profile Tabs Creator Pro plugin from your BuddyDev account page. OR the link below
https://buddydev.com/plugins/buddypress-user-profile-tabs-creator-pro/ - Extract the downloaded buddypress-user-profile-tabs-creator-pro.zip file to the WordPress plugins folder yourhostname/wordpress/wp-content/plugins OR
Go to your WordPress Dashboard > Plugins > Add New. Click the Upload Plugin button. Browse to the download file location, select the buddypress-user-profile-tabs-creator-pro.zip & install the plugin. - Click the Activate Plugin button to activate the BuddyPress User Profile Tabs Creator Pro plugin on your website. OR
To activate the plugin on your website site go to WordPress Dashboard > Plugins and then click the Activate button for BuddyPress User Profile Tabs Creator Pro.
You must have the BuddyBoss Platform installed and activated on your site for the BuddyPress User Profile Tabs Creator Pro plugin to work.
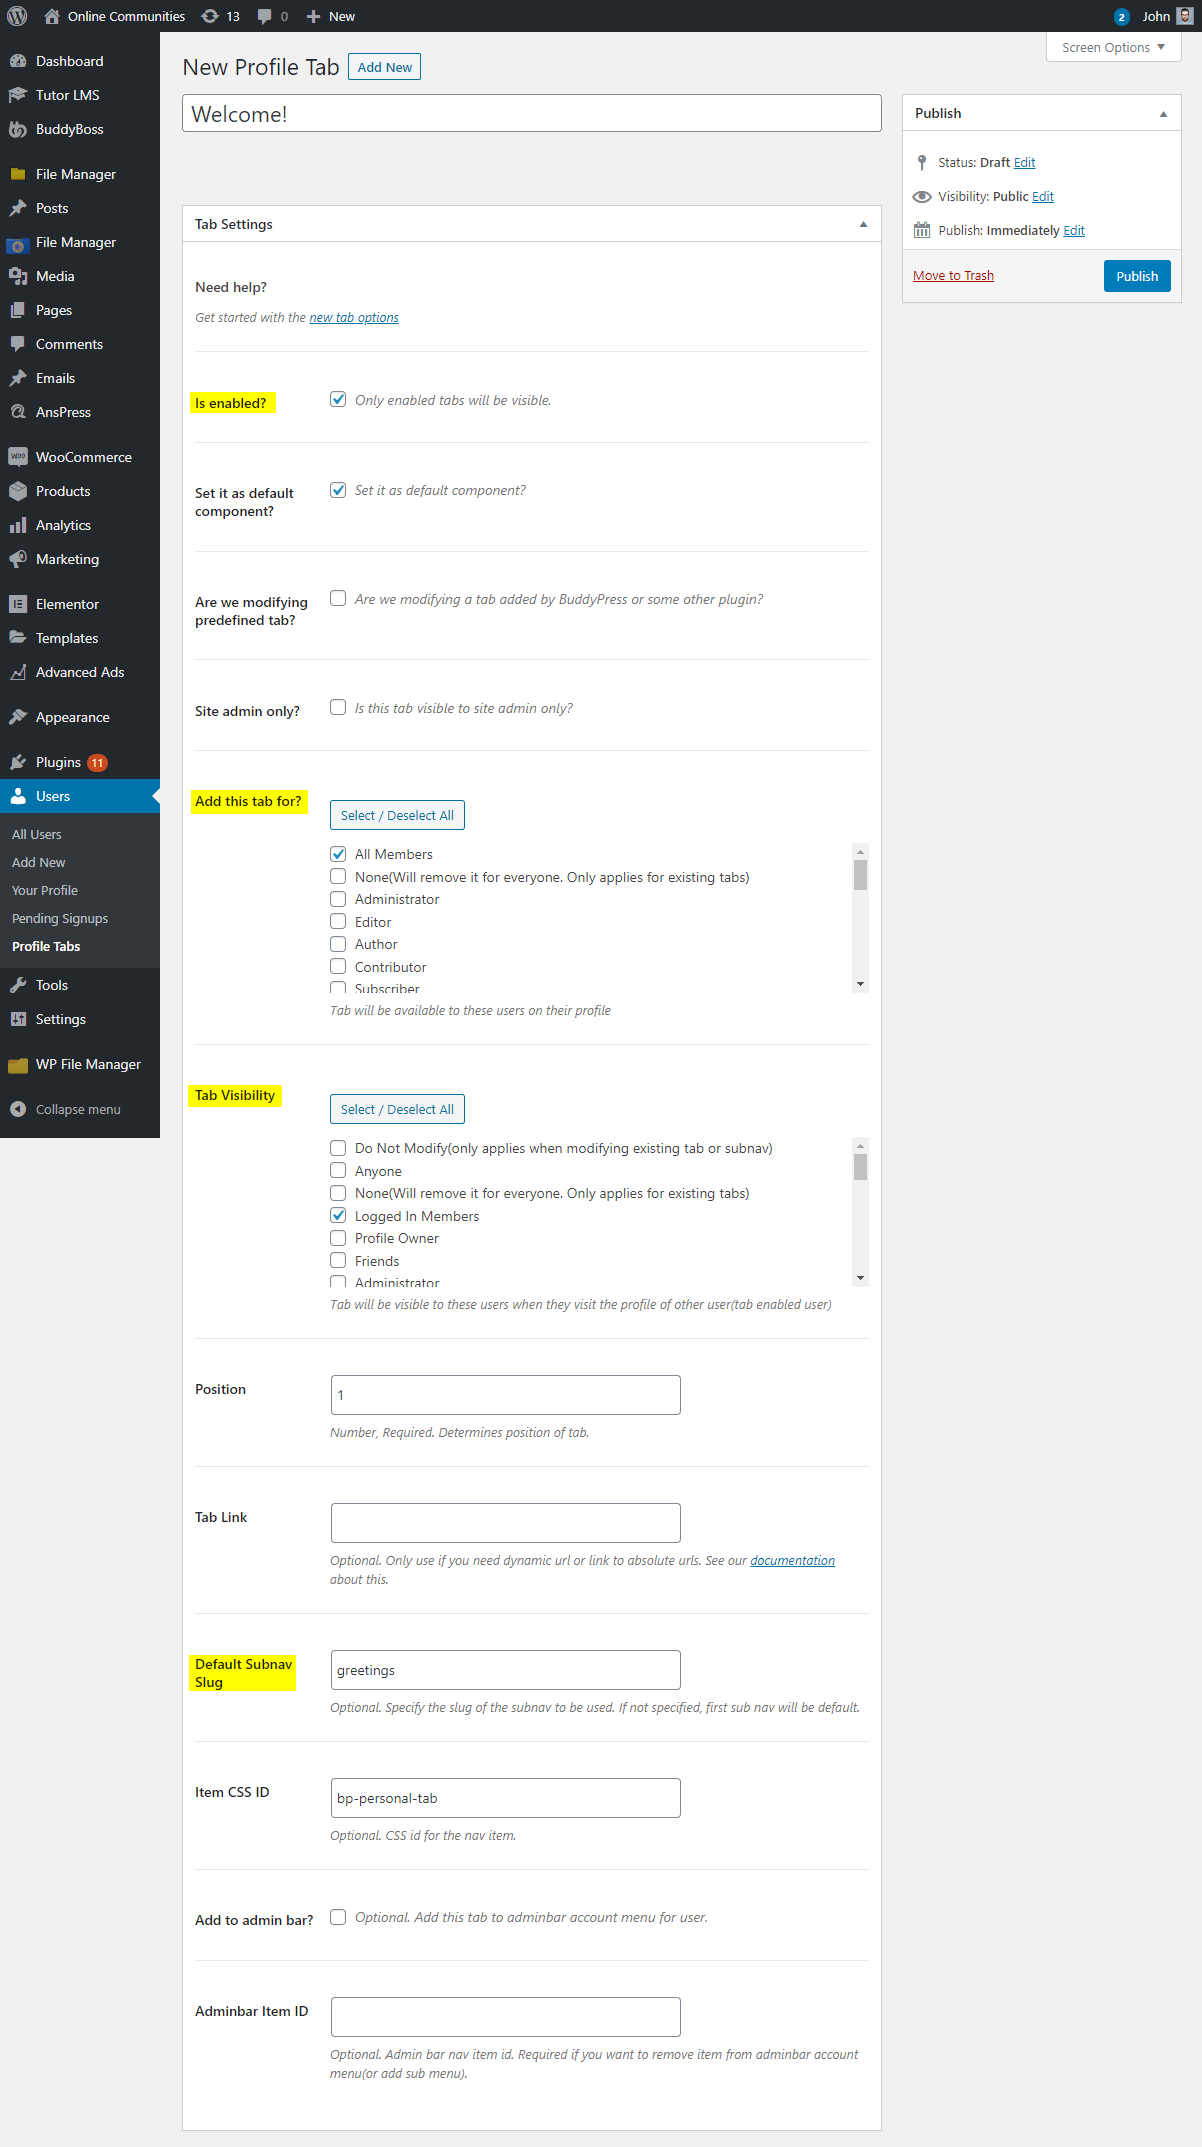
Creating a new tab
To create a new tab for profiles:
- Go to WordPress Dashboard > Users > Profile Tabs and then click the Add New button.
- Add a title for the tab, mark the checkbox for Is enabled? to display the tab and add the position of the tab on the profile page in the Position textbox.
- Select the user roles to display the new tab for and select the visibility of the tab.
- Enter the slug of the default sub-navigation tab to display in the Default Subnav Slug textbox. You must have at least 1 sub-navigation tab enabled to display the content.
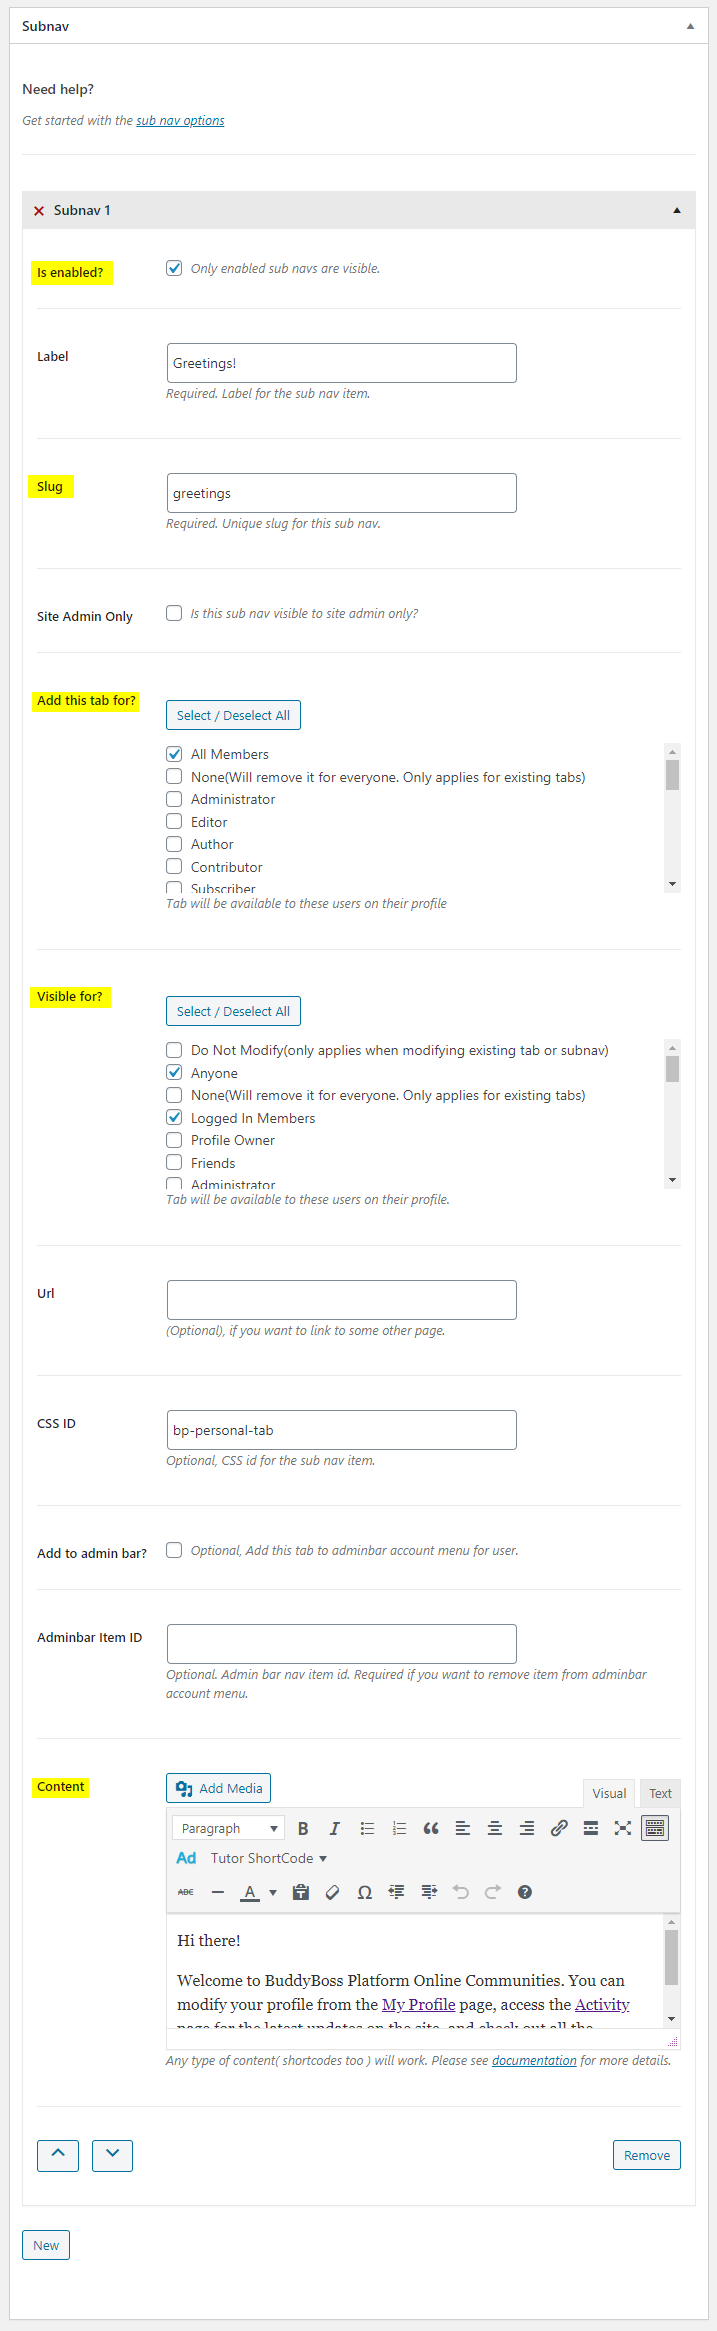
- Add a title for the sub tab, mark the checkbox for Is enabled? to display the sub tab on the profile page.
- Enter the slug for the sub-navigation tab in the Slug textbox.
- Select the user roles to display the new sub tab for and select the visibility.
- Add content to the sub-navigation tab and then click the Publish button.
For further setup options, refer to the official documentation of BuddyPress User Profile Tabs Creator Pro.