
Configure OneSignal For Web Push Notifications
In order to use our Web Push Notifications system you will need to connect your Buddyboss account to OneSignal. Please follow the steps below to walk through setting up an account and creating your Application (App) for your site.
Create OneSignal Account
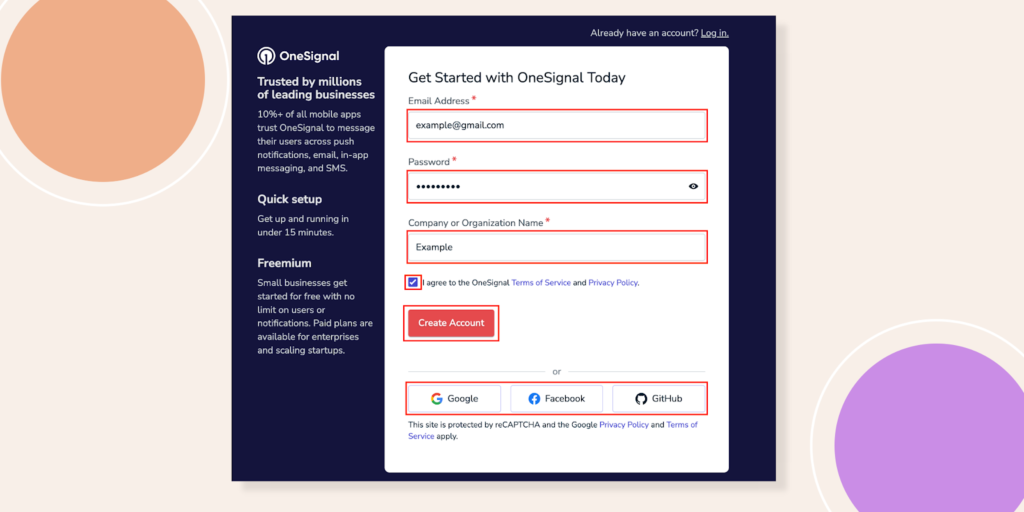
We integrate with OneSignal to provide your web push notification system. Let’s Sign Up to OneSignal account. Enter your Email Address, Password and Company or Website Name. Tick the box and agree with their terms and conditions. Lastly, click on the Create Account button.
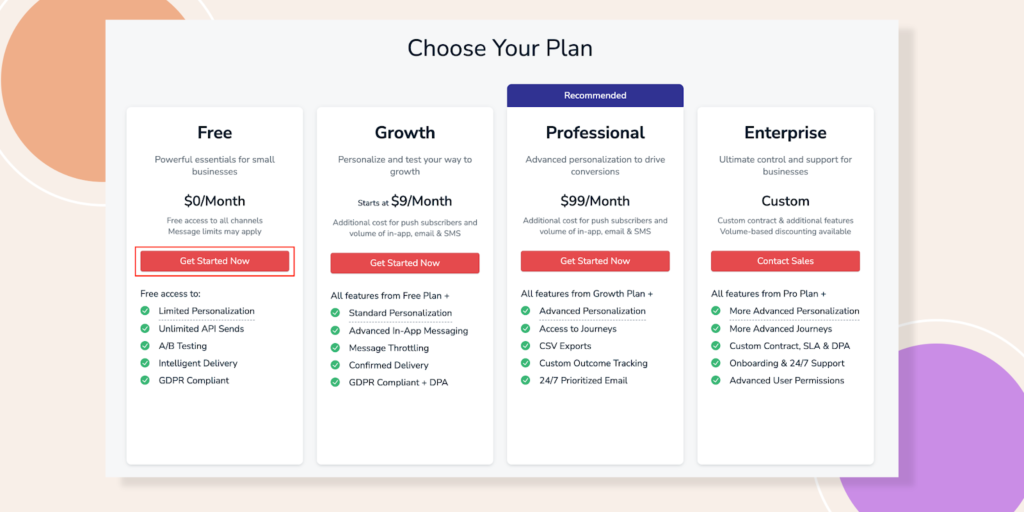
4 plans for using Onesignal will appear next. For instance, we are selecting the Free one.
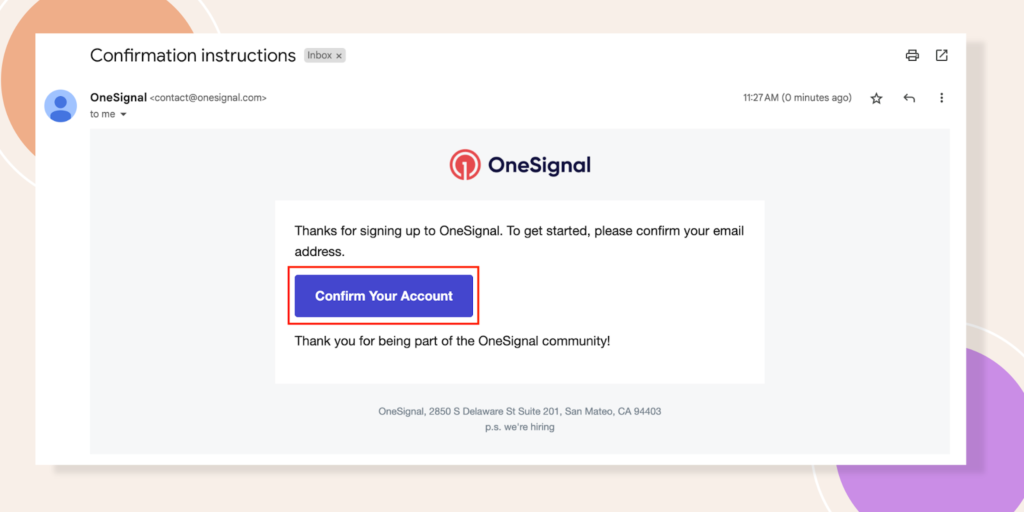
After clicking Get Started Now, OneSignal will send you a confirmation mail to your email.

Open that email and click on Confirm Your Account button.
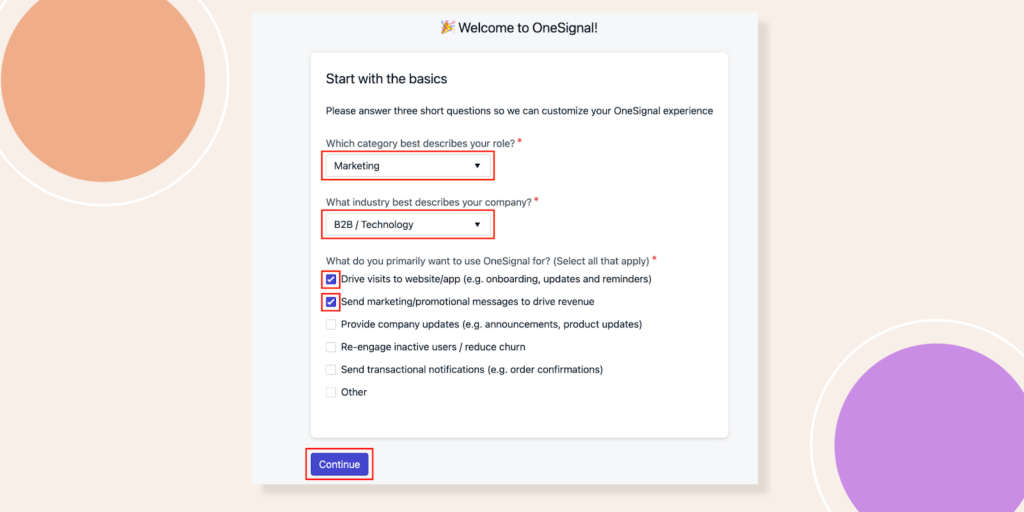
Now select your role category and the type of the company you want to add with OneSignal. Also, you will need to add the primary reason for using OneSignal and click Continue.
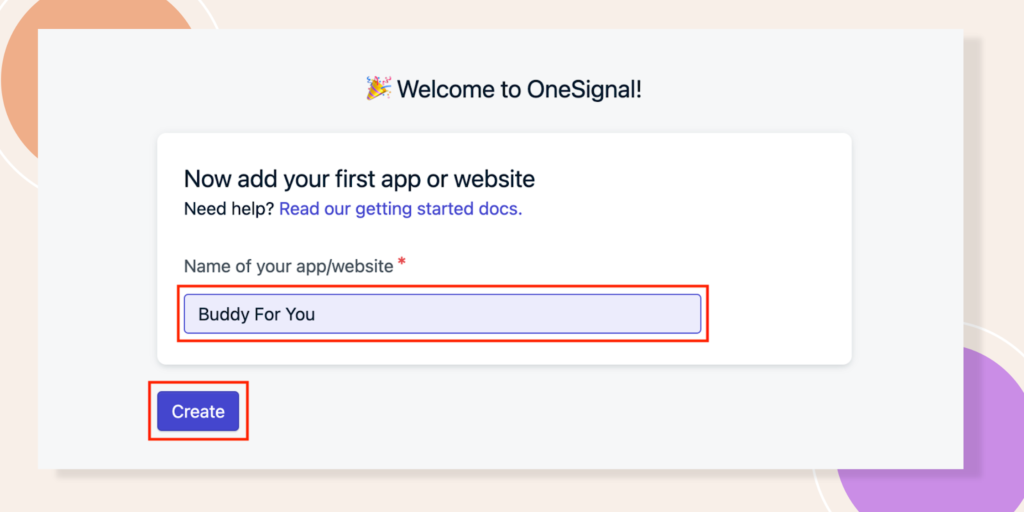
Add your Website name and hit the Create button.
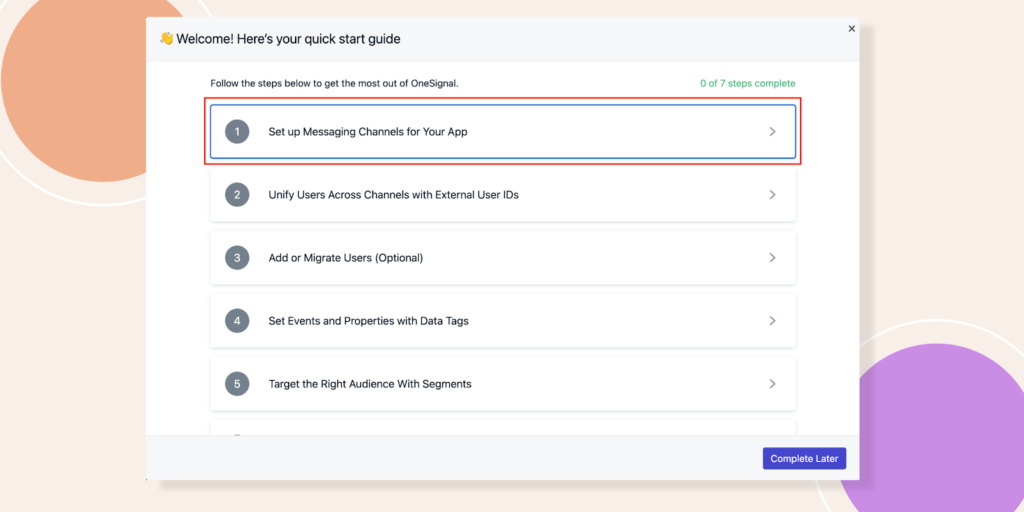
Now, you will have to fill out the steps to get the most out of OneSignal. Let’s Set up your Messaging Channel.
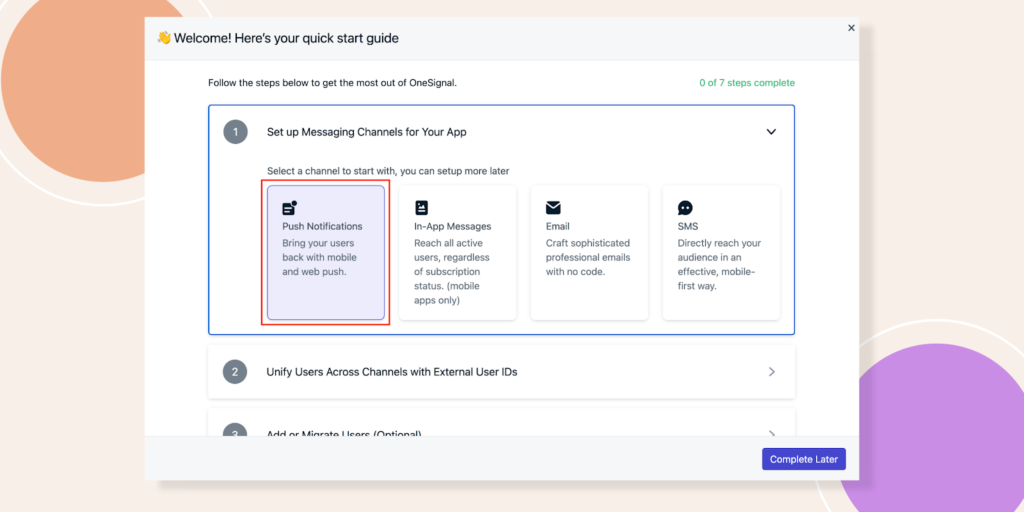
Press the first option here.
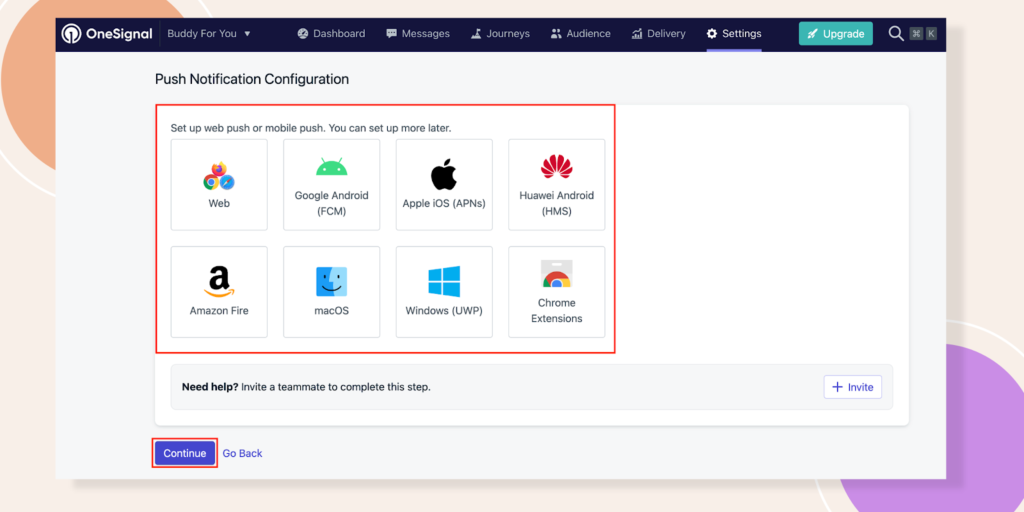
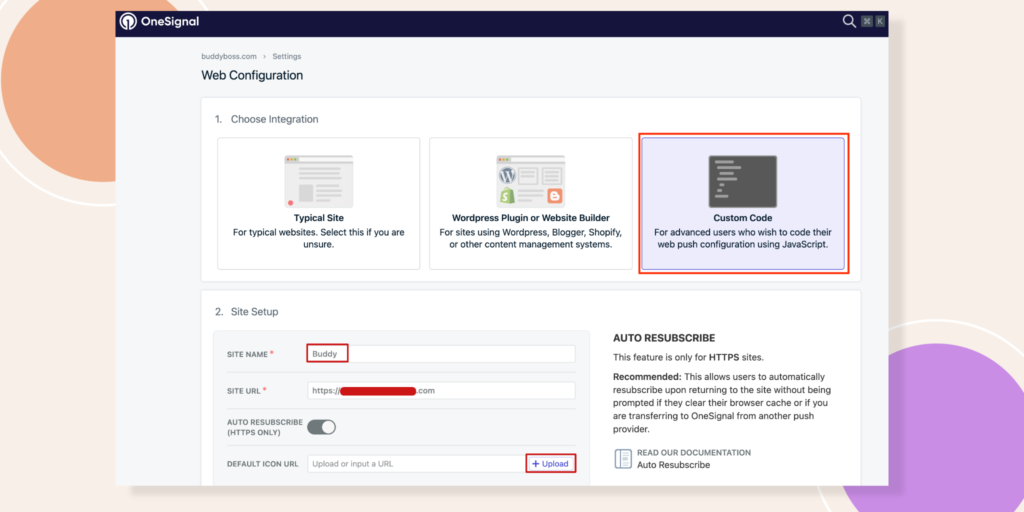
For its Push Notification Configuration, we will select Web Configuration and click Continue.
Select Custom Code option. And fill up the Site Name and URL. Also, you have to upload the Icon.
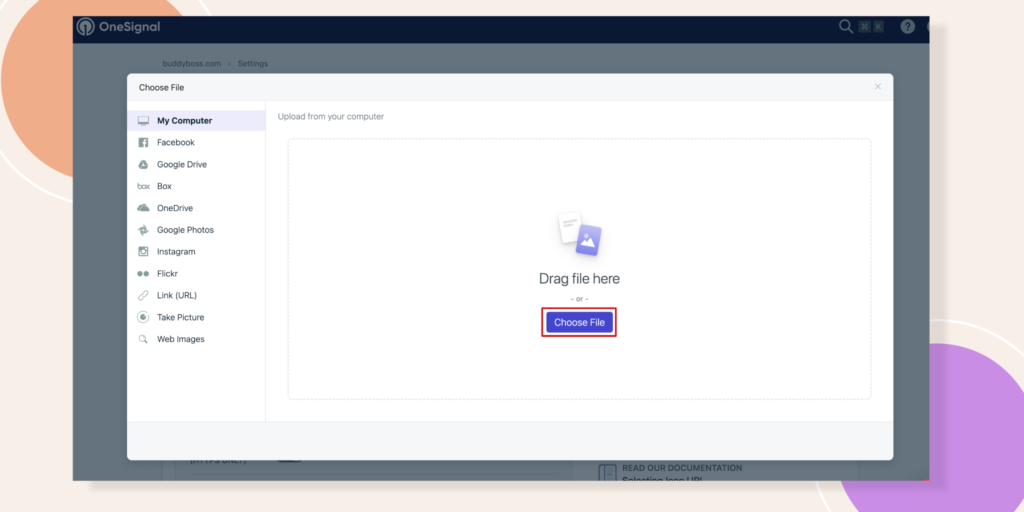
A popup will appear in front of you, hit the Choose File and select an icon from your computer or drives.
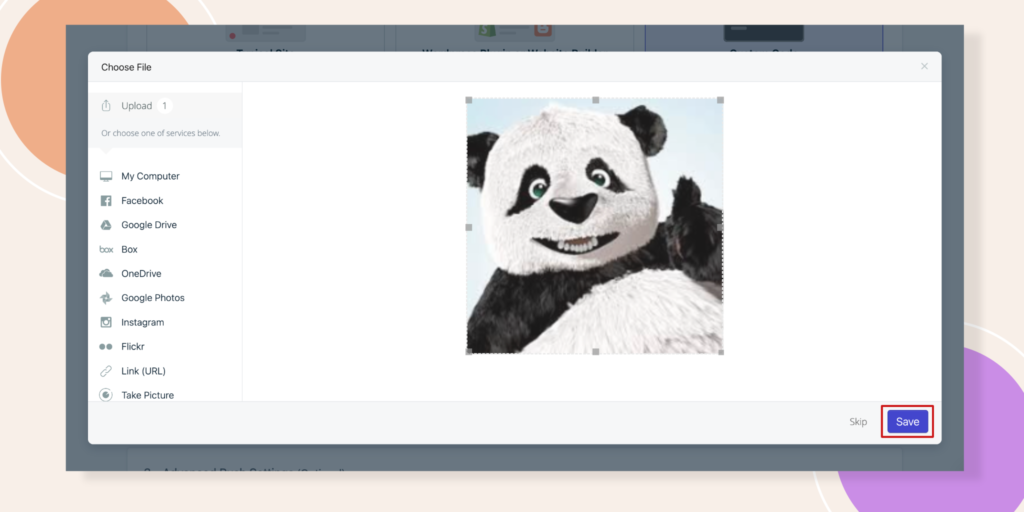
Now crop the icon as you like and click the Save button.
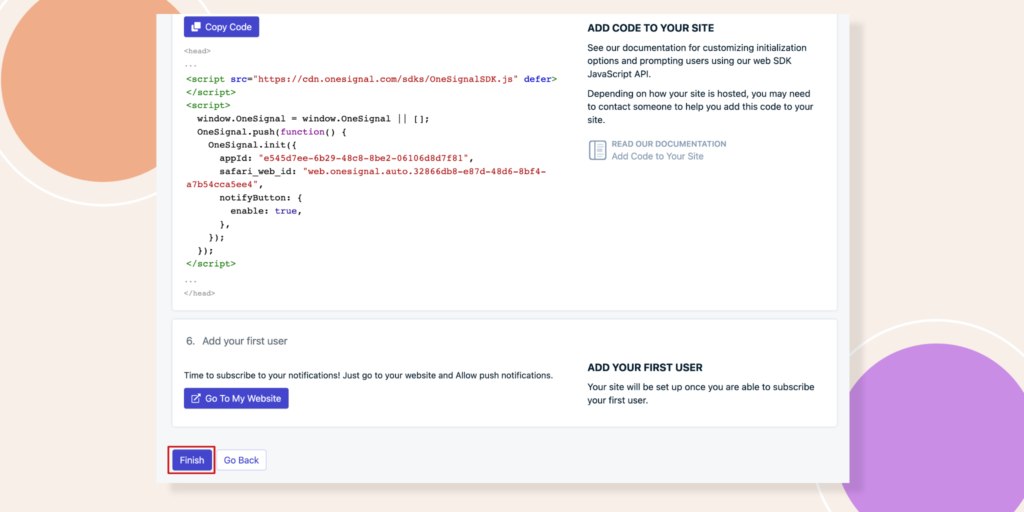
After that there will be a Save button below, click on it. You will navigate to another page, where you have to hit on Finish to complete the process.
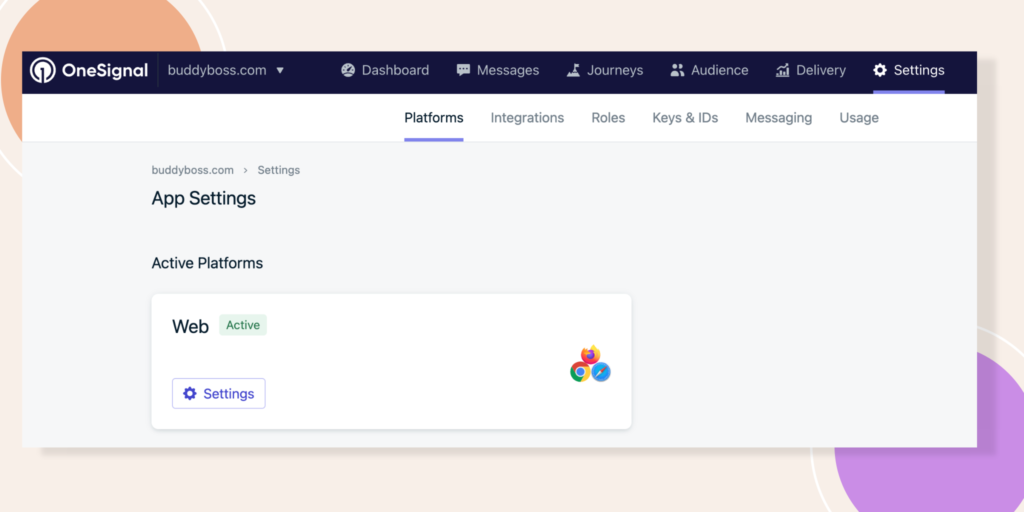
And your Web Configuration is Active now. You will get the confirmation like in the image below.
If we move on the other options like Adding or Migrating users you can either click Next Step or Upload CSV file from your website.
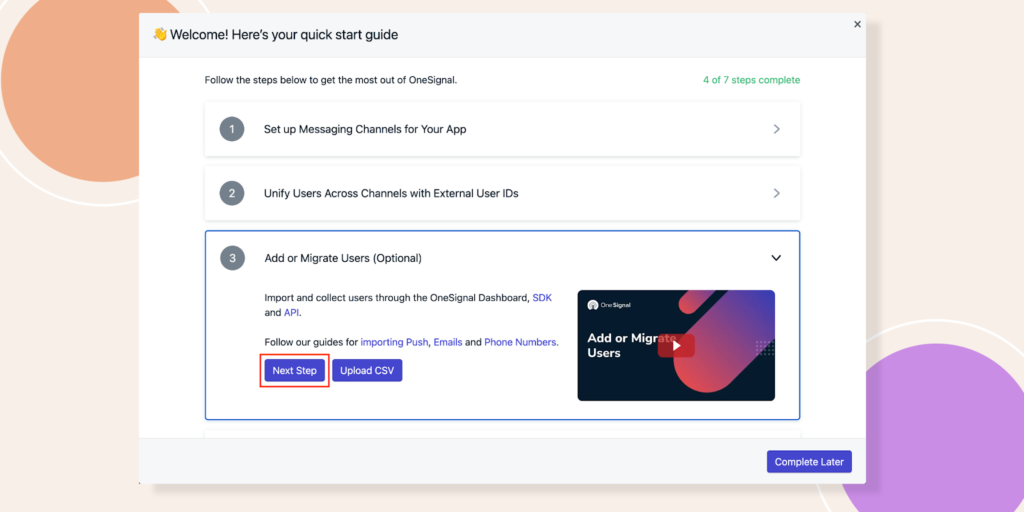
We have clicked Next Step and a green tick will appear next to it.

Connect OneSignal with BuddyBoss Website
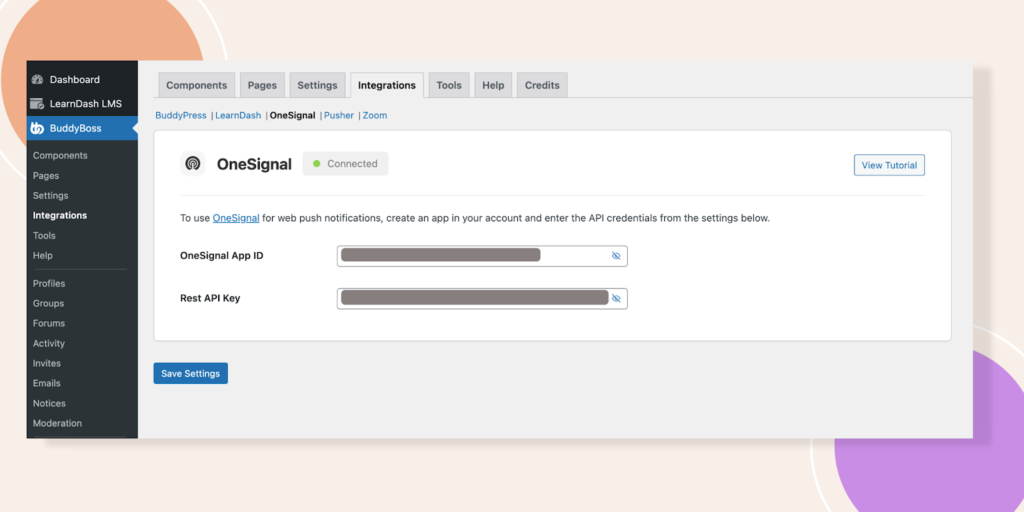
You have completed the OneSignal account initially. Now, navigate to BuddyBoss > Integrations > OneSignal.
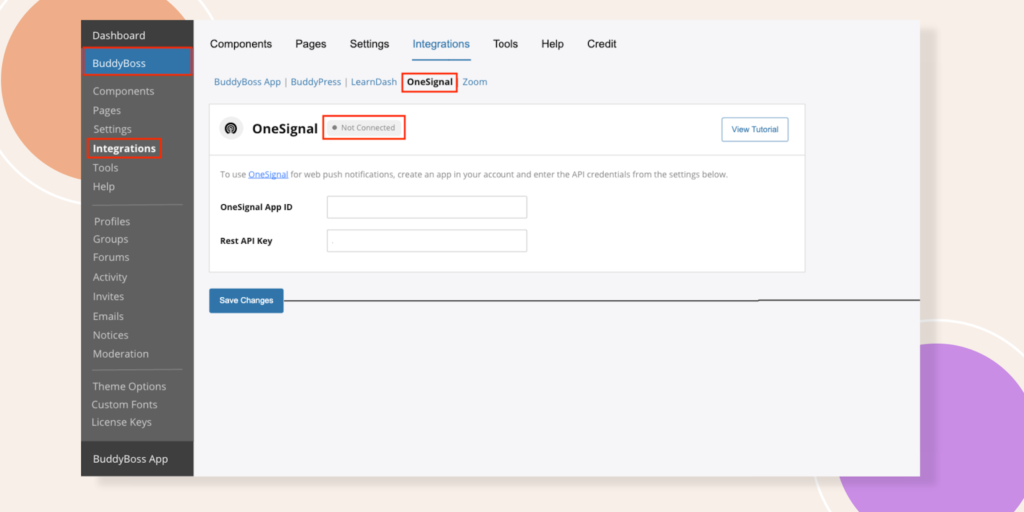
First, you will see this notice at the top asking you to enter a new API key in order to resume sending web push notifications. If you click on the link here, you will be redirected to this exact page to set up your OneSignal.
As you can see on this page, you need to enter your OneSignal App ID and Rest API key. To get this information, let’s go to our OneSignal Account. Click on the App you previously created then hit the Settings > Keys & IDs tab.
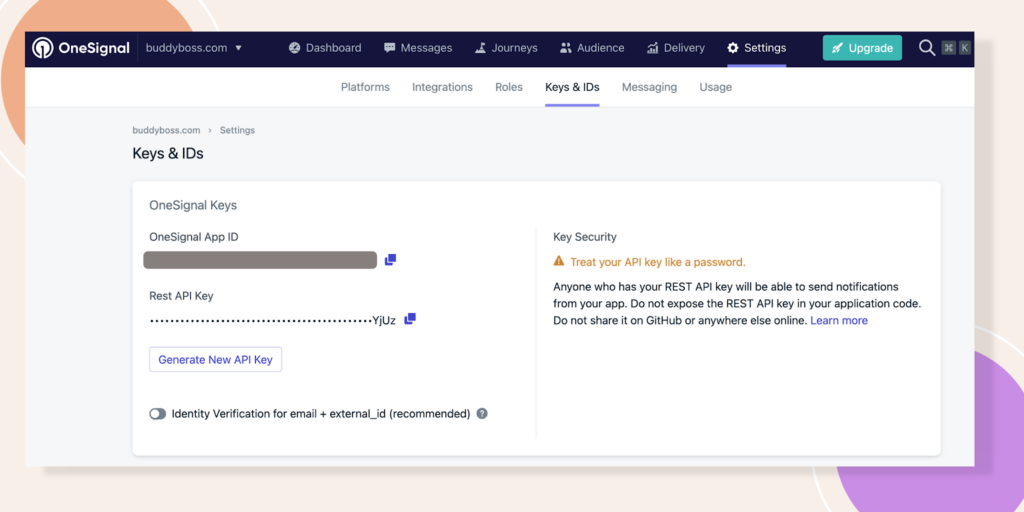
Right away, you will see your OneSignal App ID and Rest API keys. I will copy these and paste them back to my WordPress site. Then click Save Settings.
If there is any issue with connecting your OneSignal account, you will get this type of warning.
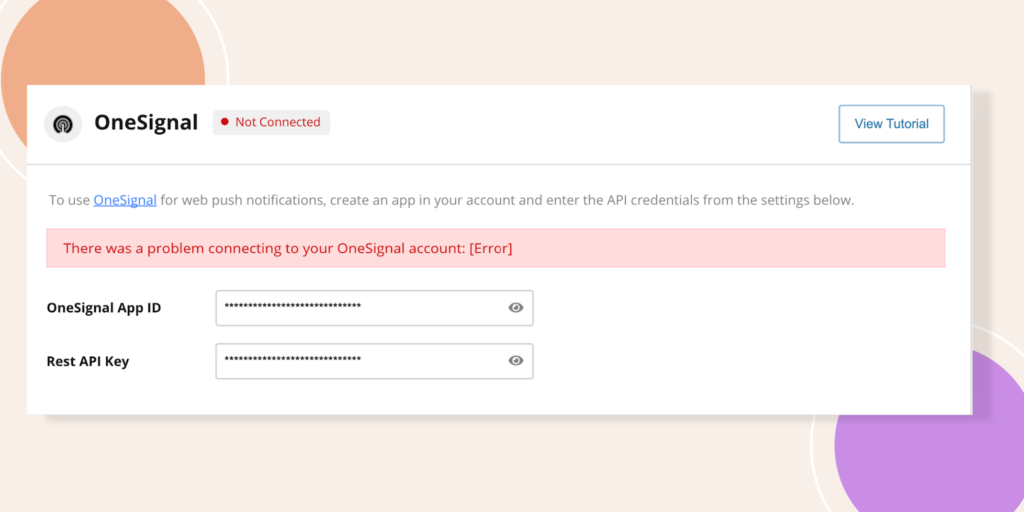
If the Site URL for the BuddyBoss app doesn’t match this site’s URL then you will get this type of error message.

Set Up the Web Push Notifications
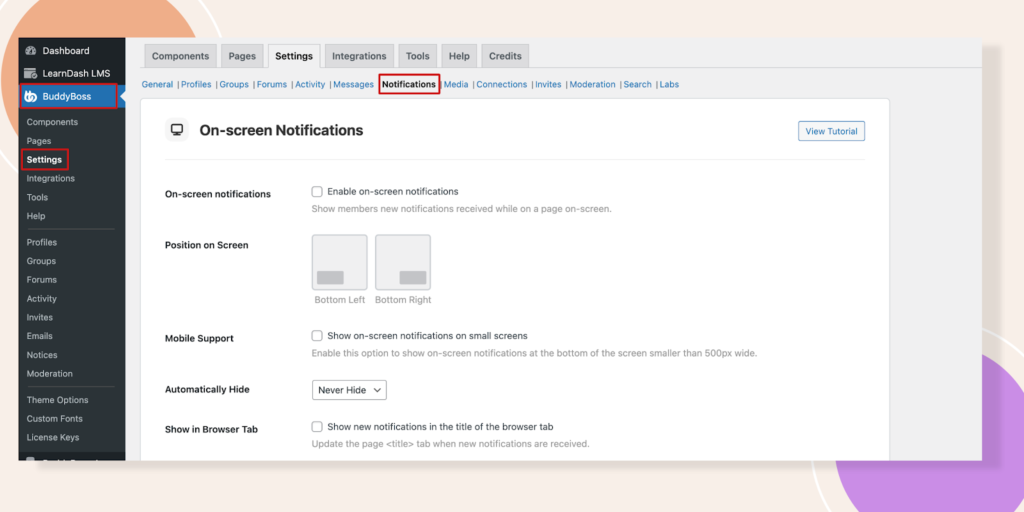
Next you will need to activate the Web Push Notifications. Go to BuddyBoss – Settings – Notifications.
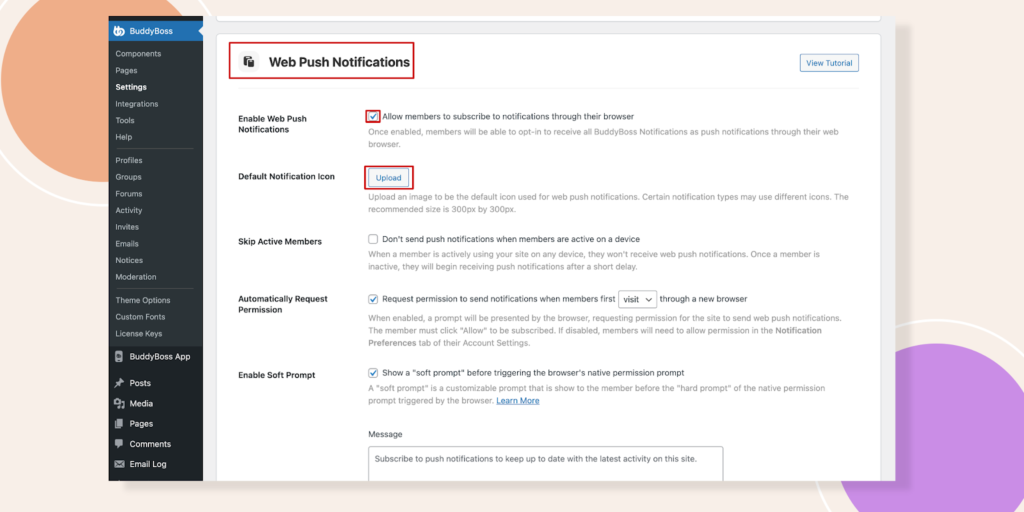
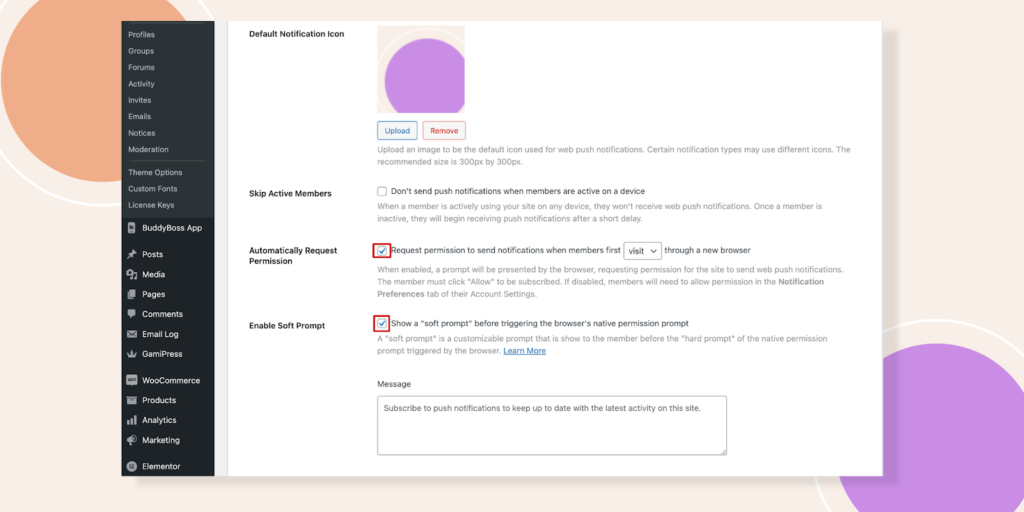
Now scroll down to find out the Web Push Notifications. Firstly, tick the box of Enable Web Push Notifications. Then you can Upload the Default Notification Icon.
After clicking on the Upload button, a popup will appear. Hit on the Select your file button.
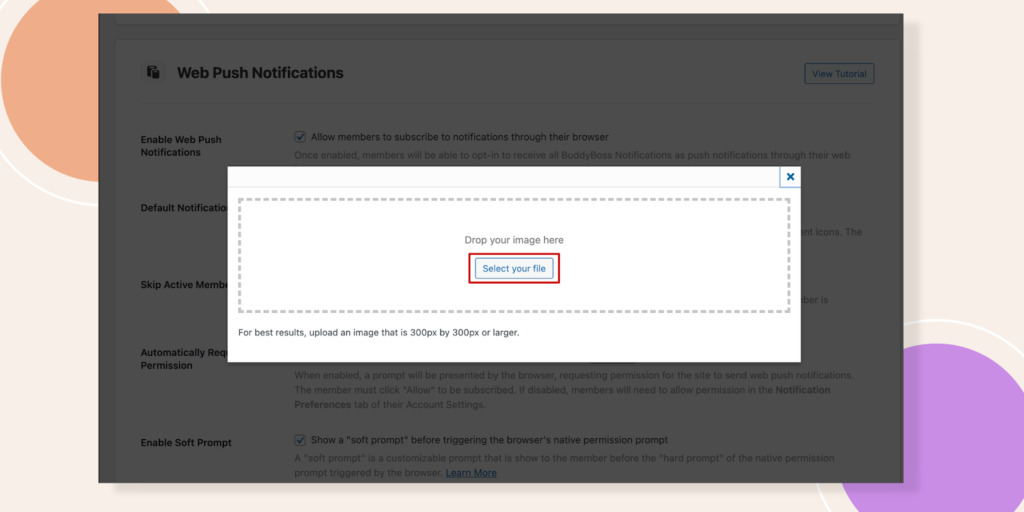
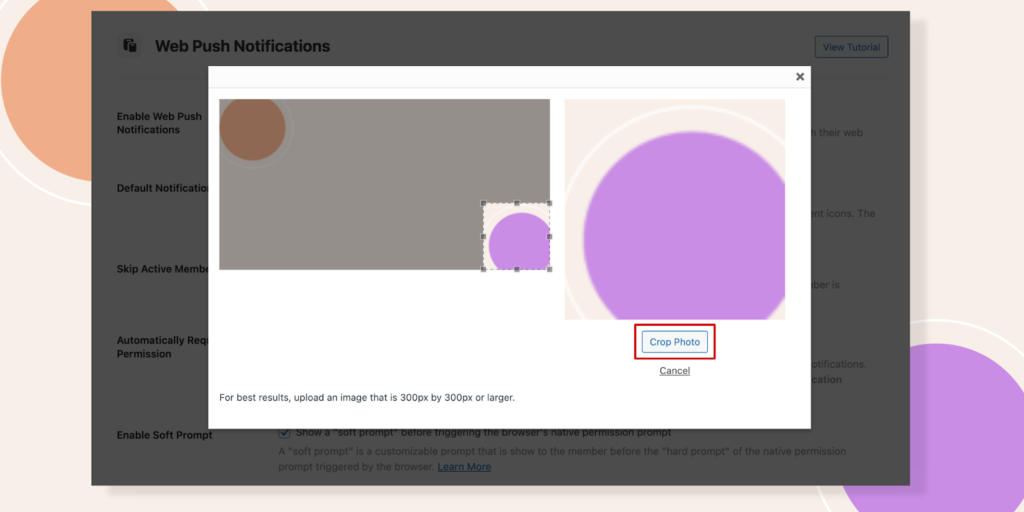
Select an image and click on Crop Photo.
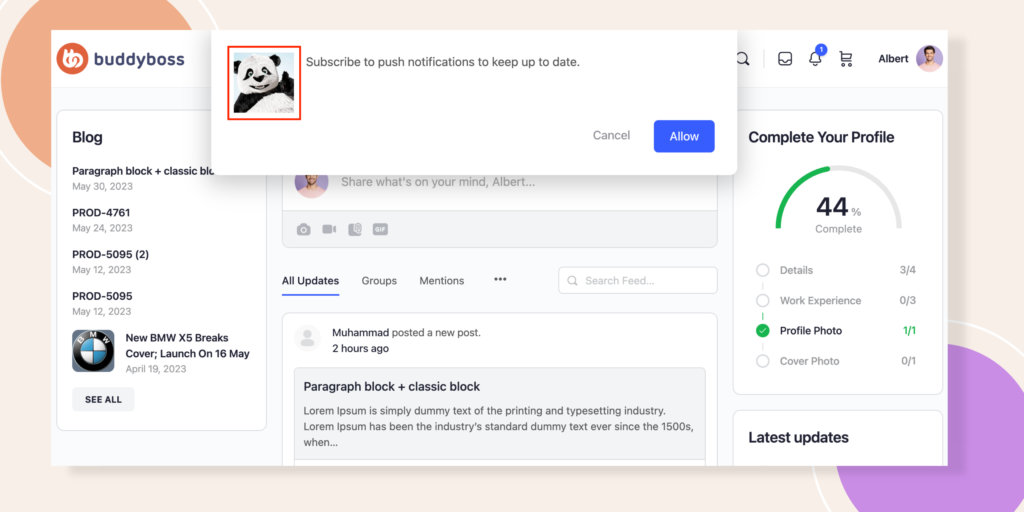
Tick the box of Automatically Request Permission and Enable Soft Prompt. You can add whatever message you want to show.
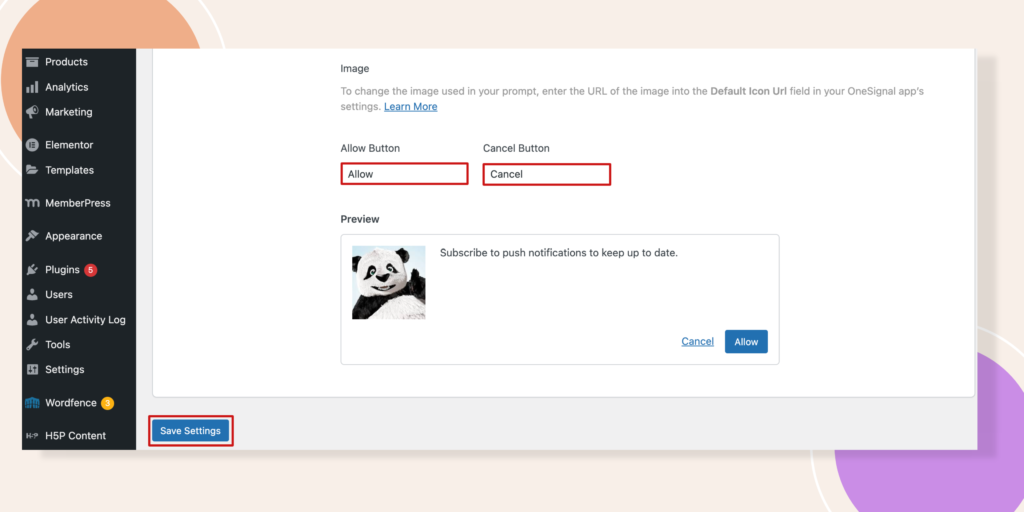
You can change the text of Allow Button and Cancel Button. Lastly, hit the Save Settings button.
Let’s move to the frontend to see how the notification works after a member just logged in.
Just like that, you have now connected your OneSignal account to your BuddyBoss site and the web push notifications should continue to work.