
The Groundhogg – BuddyBoss Integration lets you segment your members and target their interests for advanced marketing campaigns based on the BuddyBoss Profile Types and the BuddyBoss social groups.
You can add and remove tags when a user joins a specific social group to track their interests. You can further use this information to target them with relevant marketing material based on their interests.
You can also add and remove tags to members based on their profile types and easily target them when sending marketing or transactional messages.
The integration works and requires the BuddyBoss Platform installed and activated on your website.
BuddyBoss Platform is a fork and forge of the BuddyPress plugin and bbPress plugin. Any plugin developed for the BuddyPress and bbPress plugin is supported by the BuddyBoss Platform.
You do NOT need to install the BuddyPress plugin or the bbPress plugin separately. BuddyBoss Platform acts as a replacement for both the plugins.
Installing the plugin
To install the Groundhogg plugin:
- Buy and download the BuddyBoss Integration add-on for Groundhogg from the link below
https://www.groundhogg.io/downloads/buddyboss-integration/ - Extract the downloaded groundhogg-buddyboss.zip file to the WordPress plugins folder yourhostname/wordpress/wp-content/plugins OR
Go to your WordPress Dashboard > Plugins > Add New. Click the Upload Plugin button. Browse to the download file location, select the groundhogg-buddyboss.zip & install the plugin. - Click the Activate Plugin button to activate the Groundhogg – BuddyBoss Integration plugin on your website. OR
To activate the plugin on your website site go to WordPress Dashboard > Plugins and then click the Activate button for Groundhogg – BuddyBoss Integration. - Go to WordPress Dashboard > Groundhogg > Settings > Licenses, enter the license for the BuddyBoss integration plugin in the Groundhogg – BuddyBoss textbox and then click the Activate button.
The integration works and requires the BuddyBoss Platform installed and activated on your website.
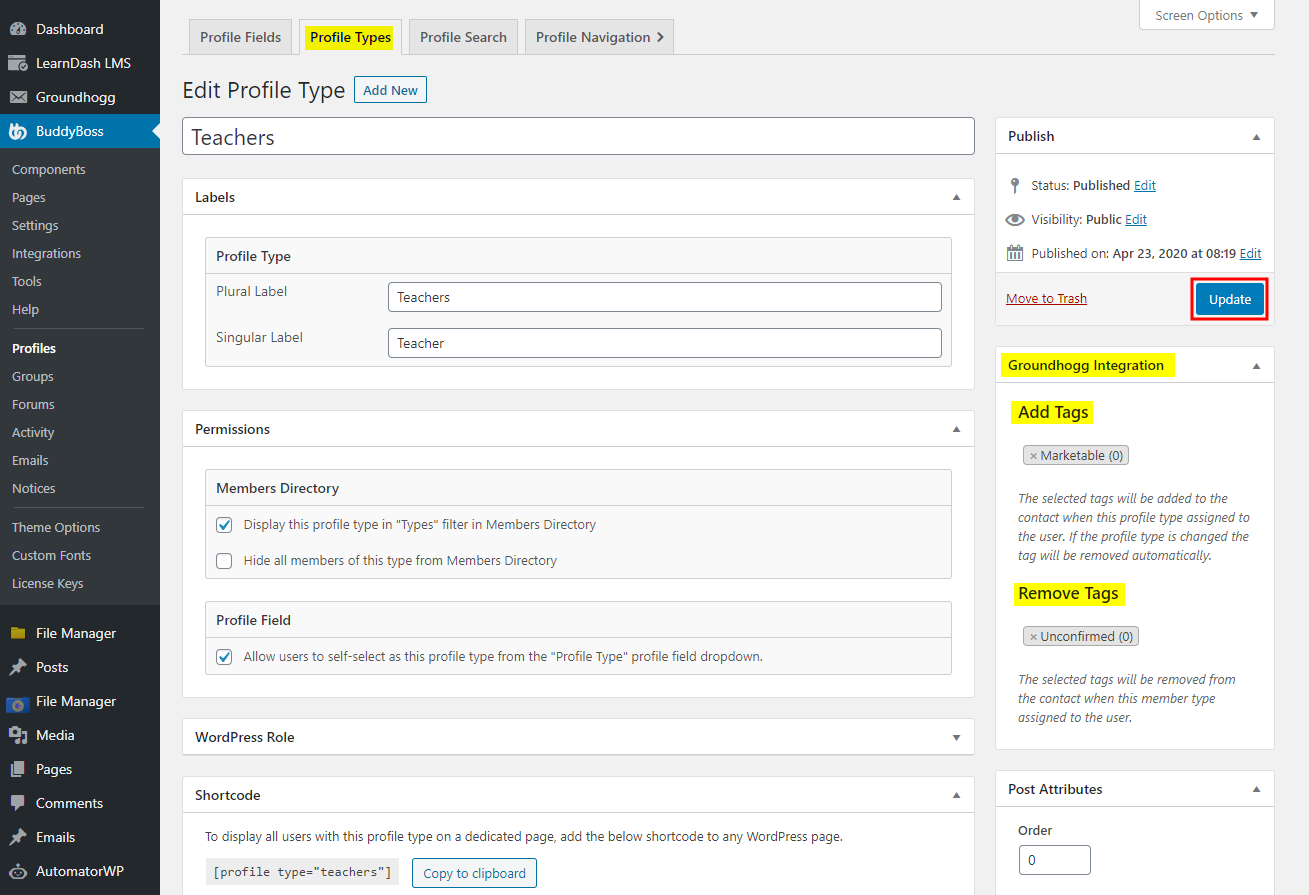
Adding tags to BuddyBoss Profile Types
You can also add and remove tags to members based on their profile types and easily target them when sending marketing or transactional messages.To set the tags for profile types:
- Go to WordPress Dashboard > BuddyBoss > Profiles > Profile Types and click the Edit button for the preferred profile type.
- In the Groundhogg Integration meta box, select the tags to add or remove when a user is assigned the profile type.
- Click the Update button to save the changes.
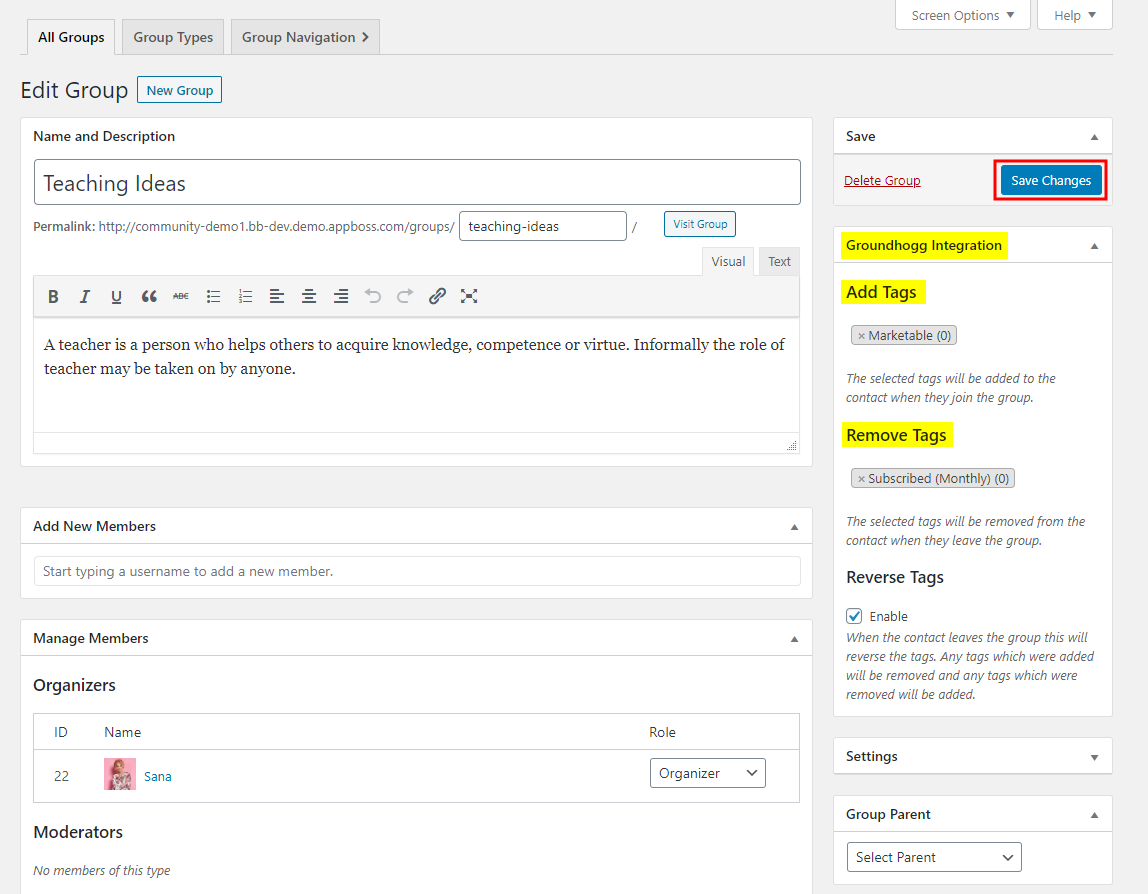
Adding tags to social groups
You can add and remove tags when a user joins a specific social group to track their interests. You can further use this information to target them with relevant marketing material based on their interests.To set the tags for social groups:
- Go to WordPress Dashboard > BuddyBoss > Groups and click the Edit button for the preferred social group.
- In the Groundhogg Integration meta box, select the tags to add or remove when a user joins the social group.
- Click the Save Changes button.
For further setup and usage tutorials, refer to the official documentation of Groundhogg – BuddyBoss Integration.