
In this tutorial, you will learn how to configure BuddyBoss Registration settings for allowing new users to become members of your community. You can use the built-in registration form, or you can redirect the Signup/Register buttons to any custom URL of your choosing (useful for membership plugins).
Configure Register Settings
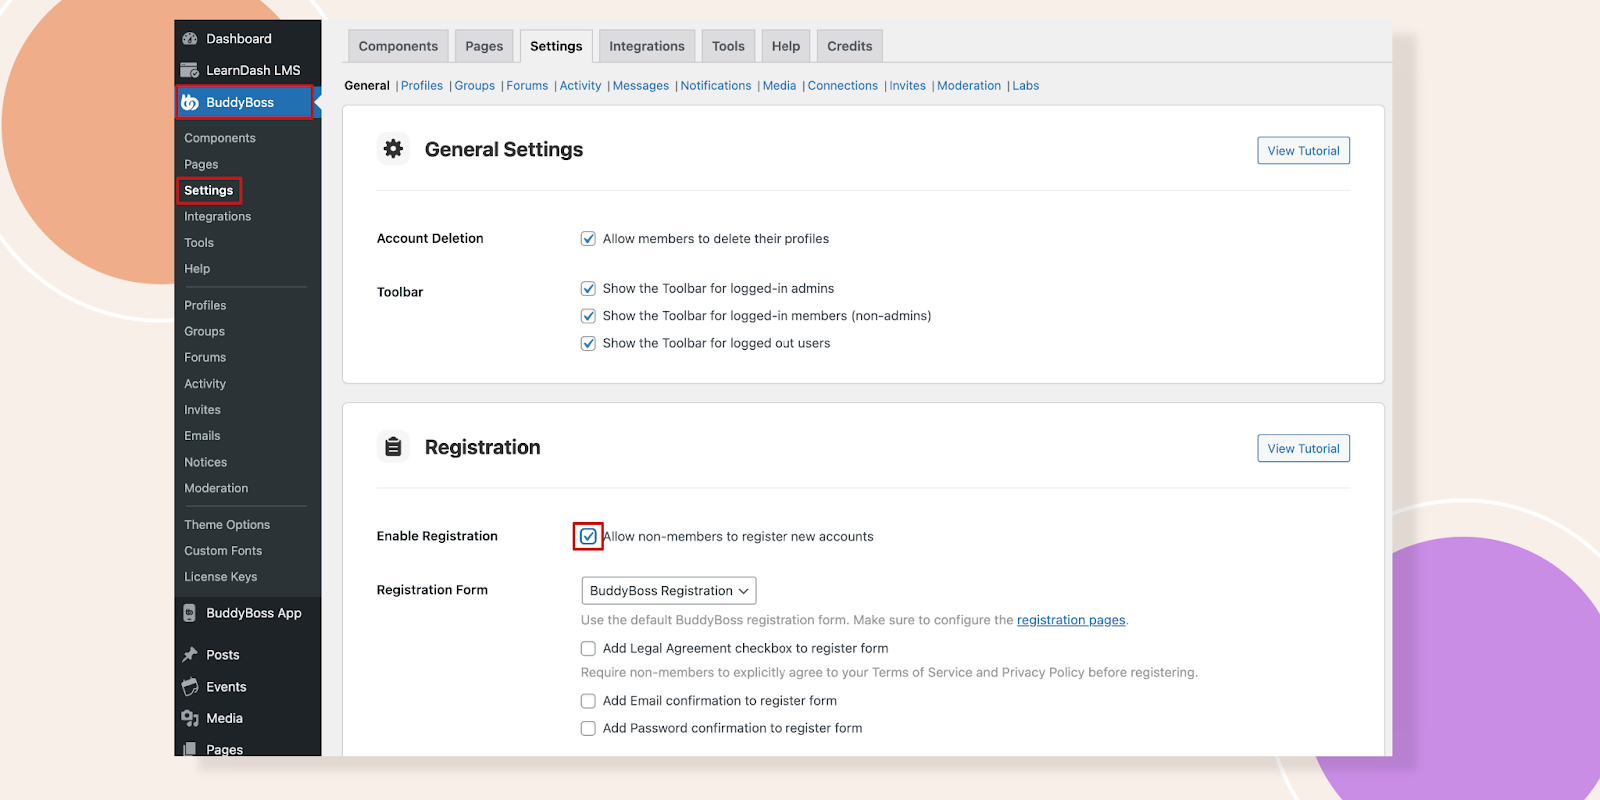
Enable Registration
Navigate to BuddyBoss – Settings. You will find the Registration area when Enable Registration by checking the box and don’t forget to hit the Save Settings button.
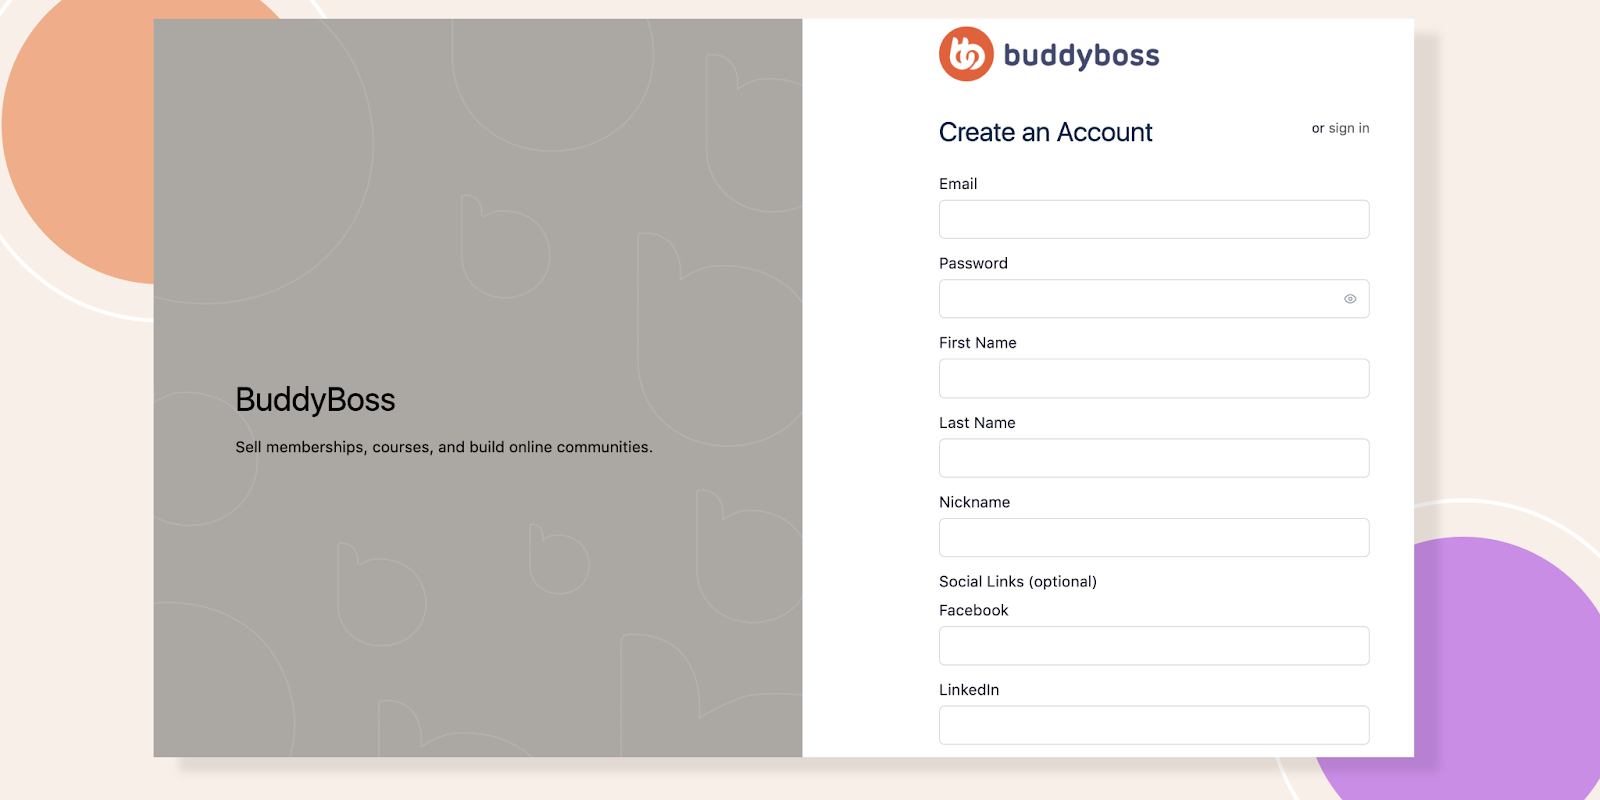
If you now click on Sign Up to register as a member of this website-

You will have a registration form like the image below.
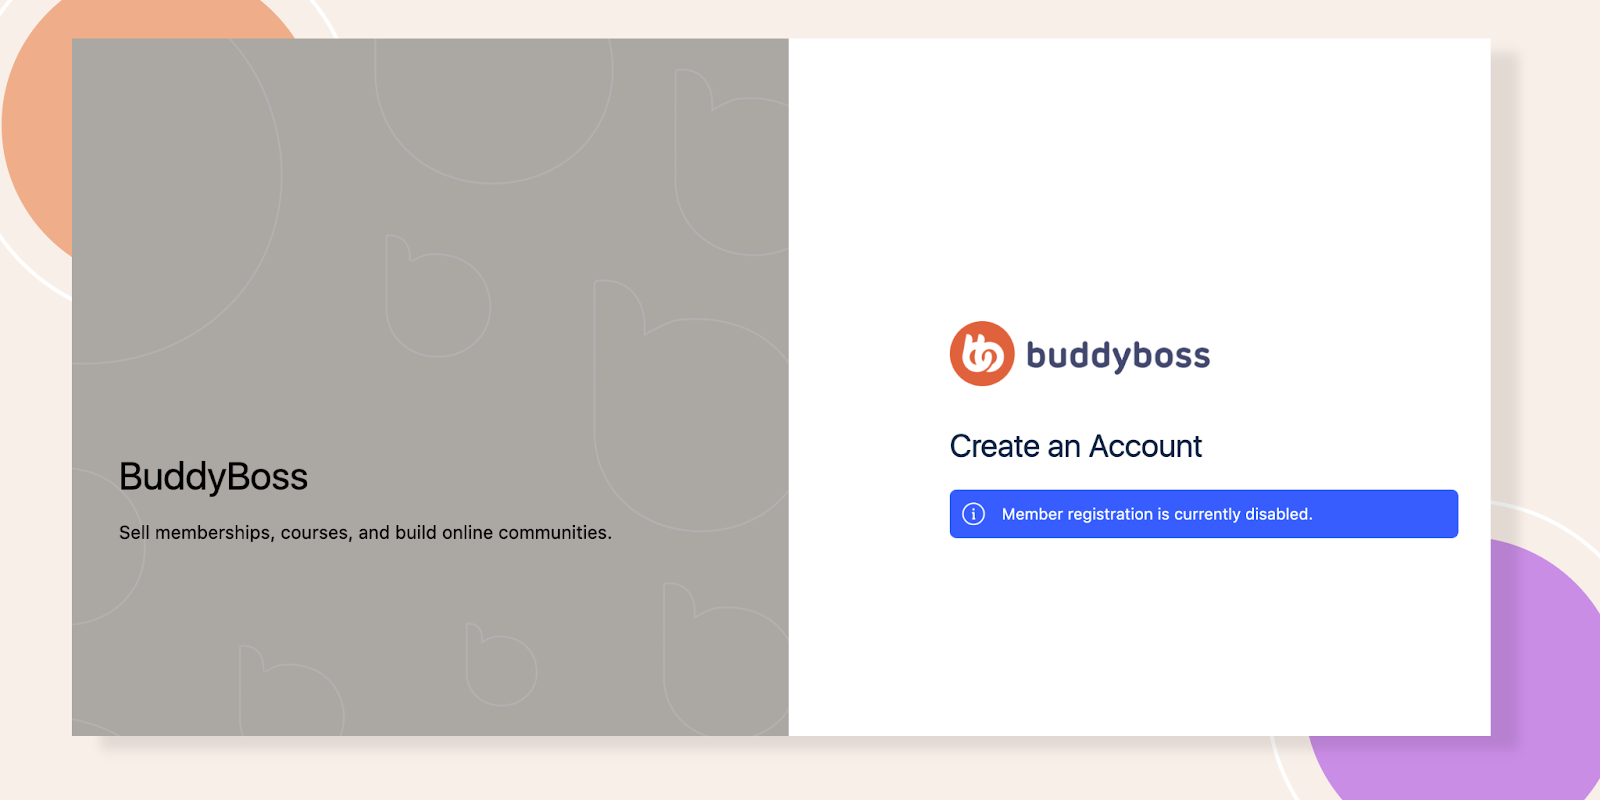
Now if you uncheck the Enable Registration option then after hitting Sign Up a person will get an interface like this.
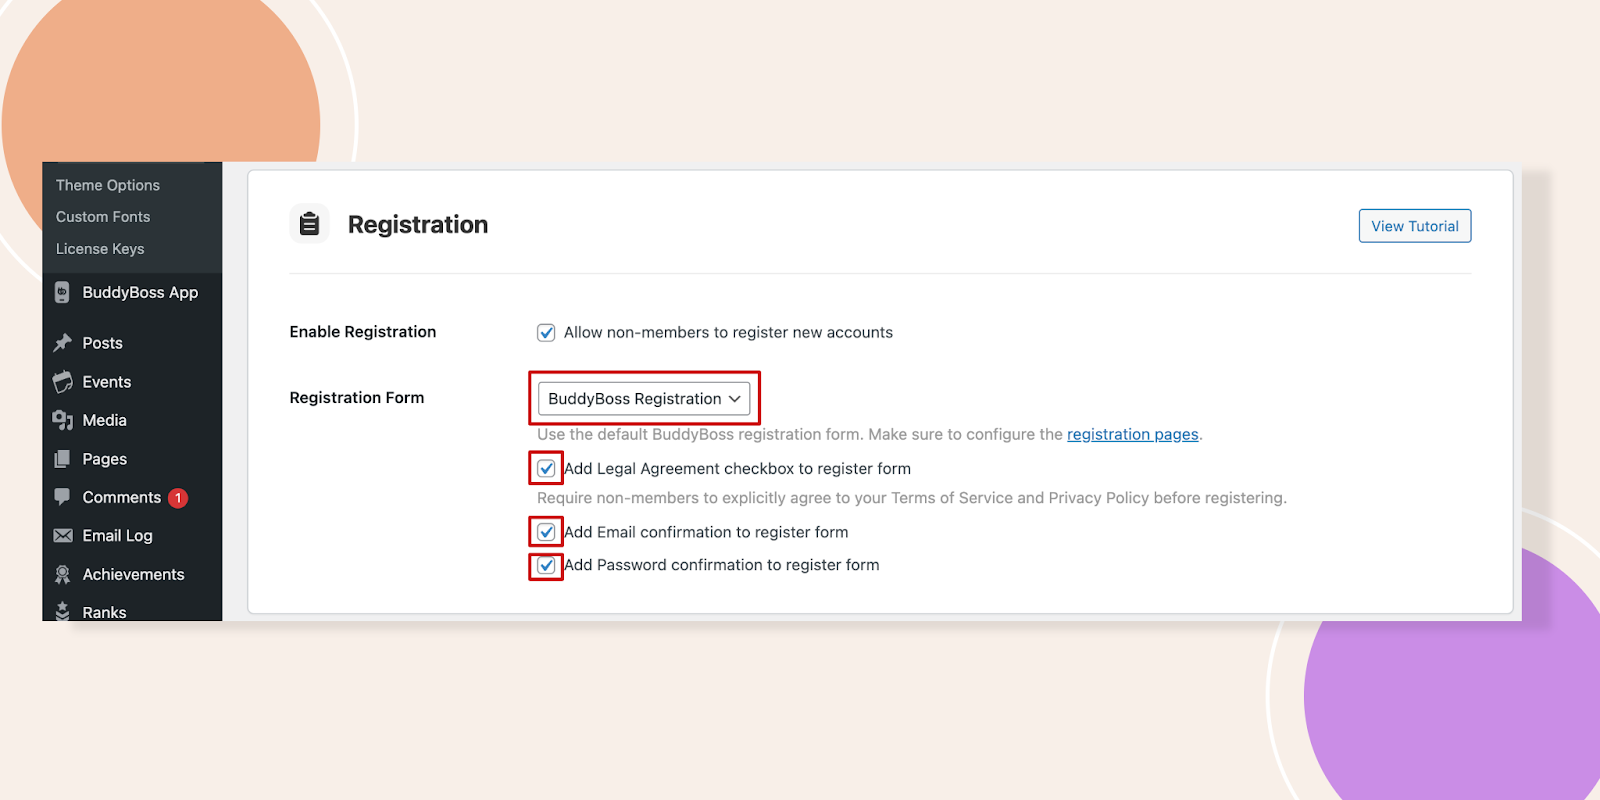
Registration Form
Under Registration Form select the BuddyBoss Registration. Next enable the Legal Agreement, Email Confirmation, and Password Confirmation by checking the boxes. Never forget to click the Save Settings button.
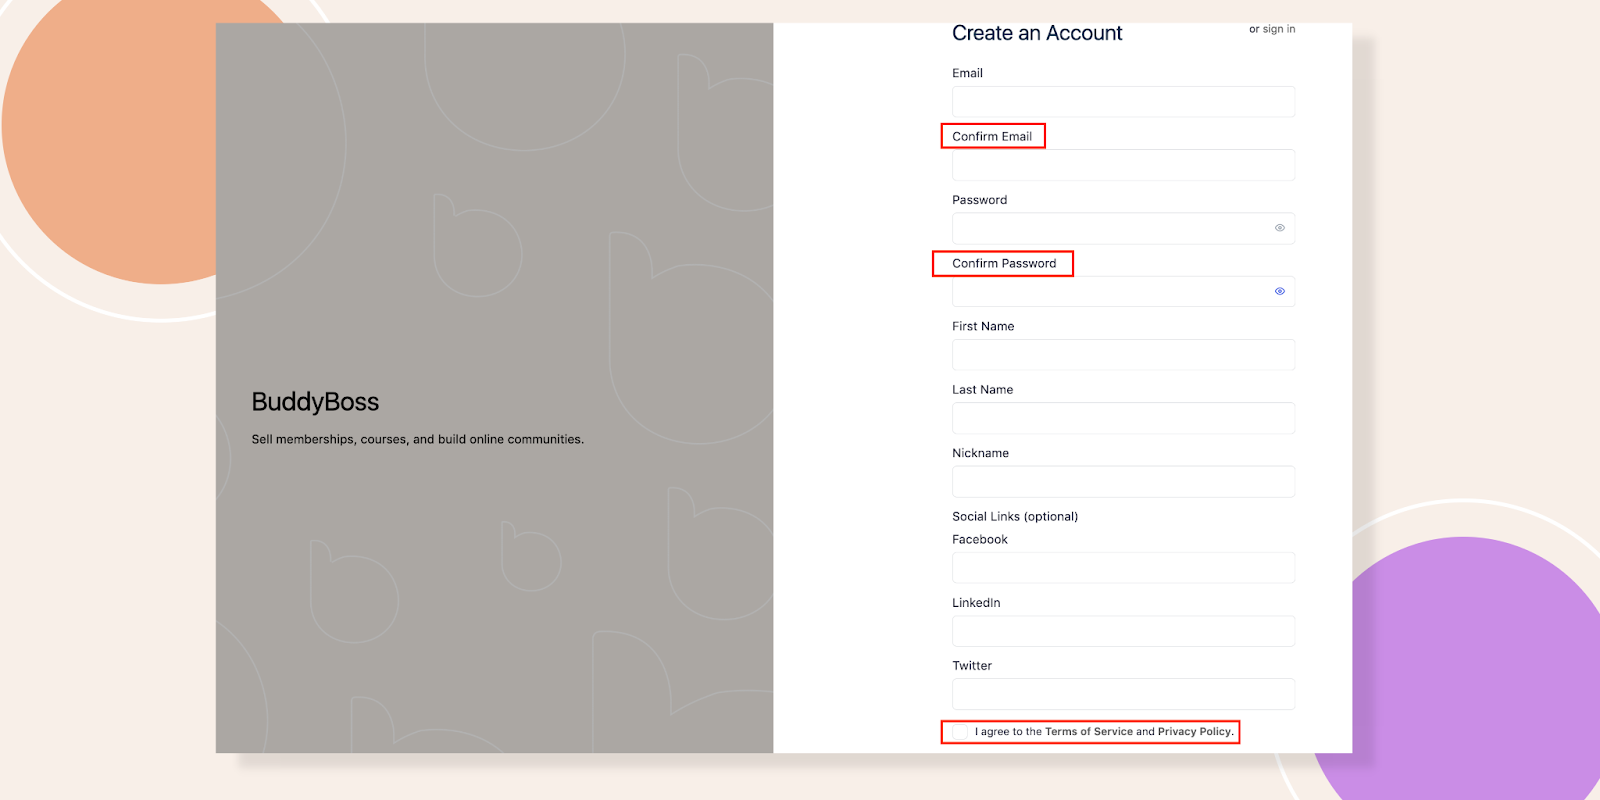
Let’s go to the registration form and reload it, you will see the Email, Password and Legal Agreement fields.
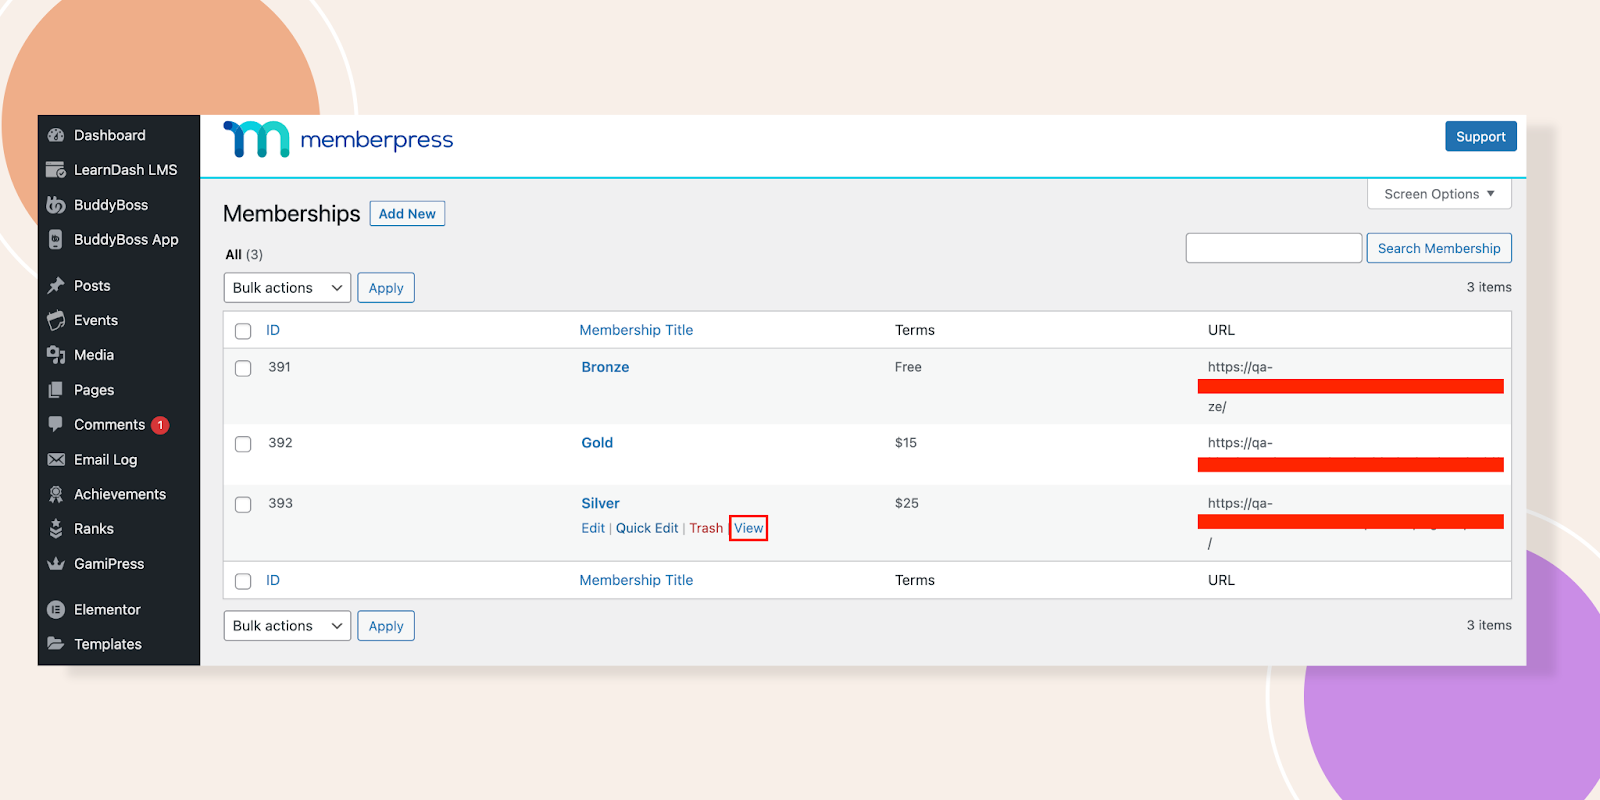
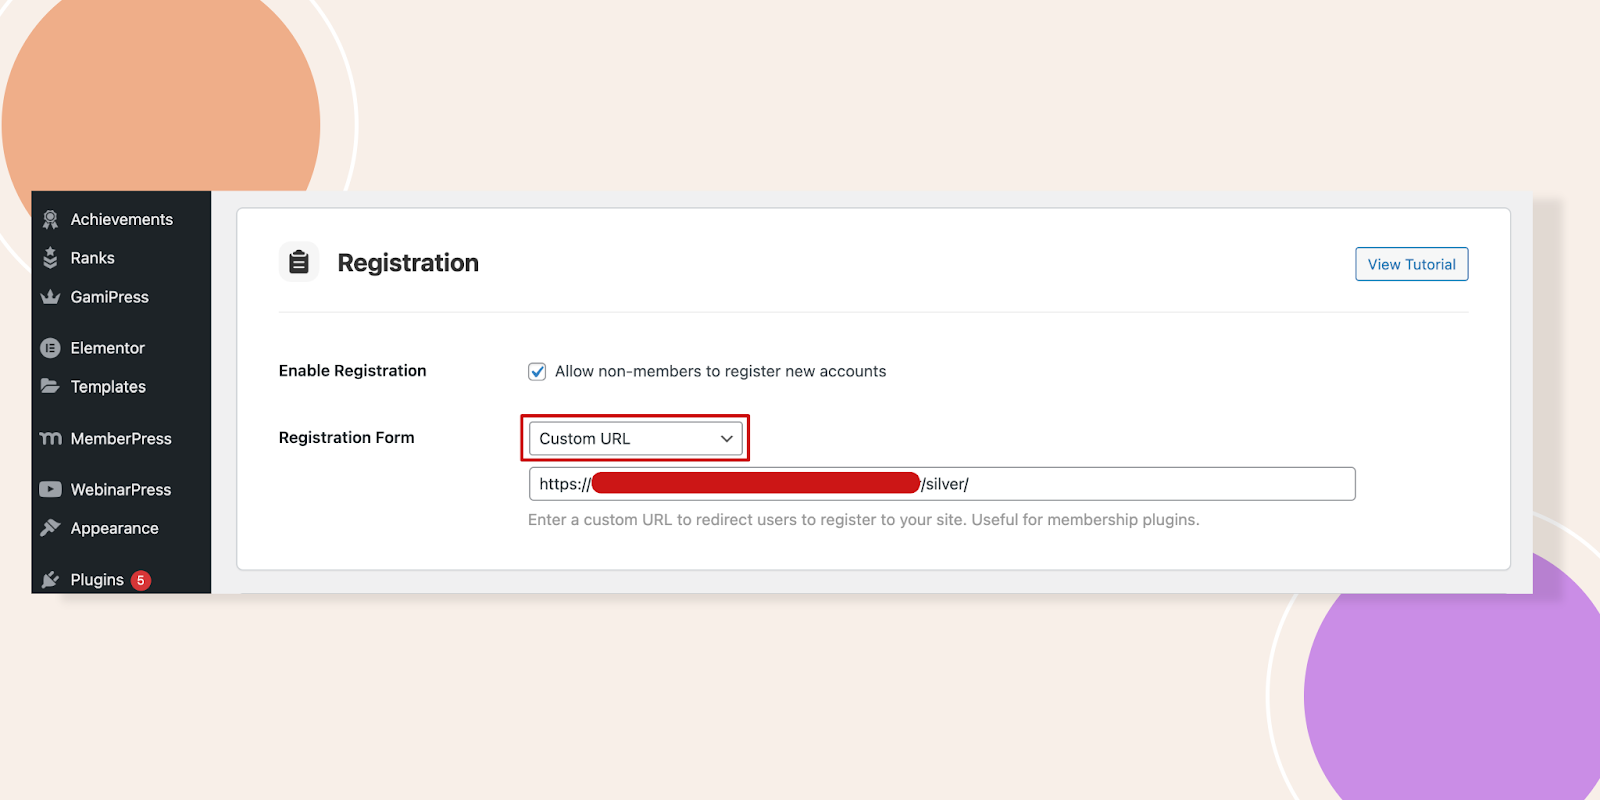
Now we will select the Custom URL. Enter a custom URL to redirect users to register to your site. Useful for membership plugins. For the Custom URL, we will navigate to MemberPress if you have other membership plugins you can navigate there.

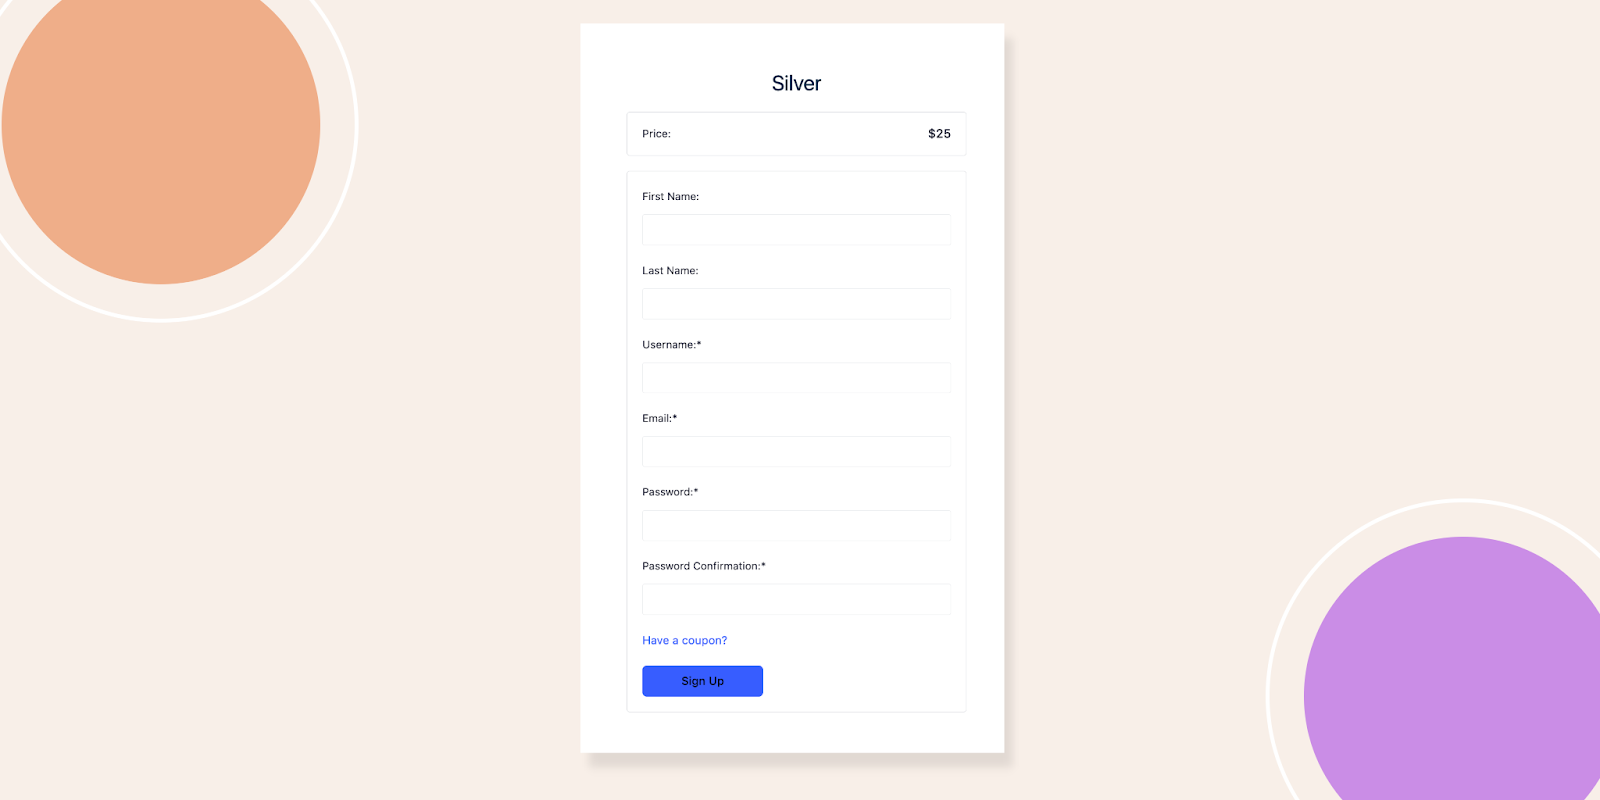
There are 3 types of membership and we have selected the Silver one. Click on the View button to check out the look of that form.
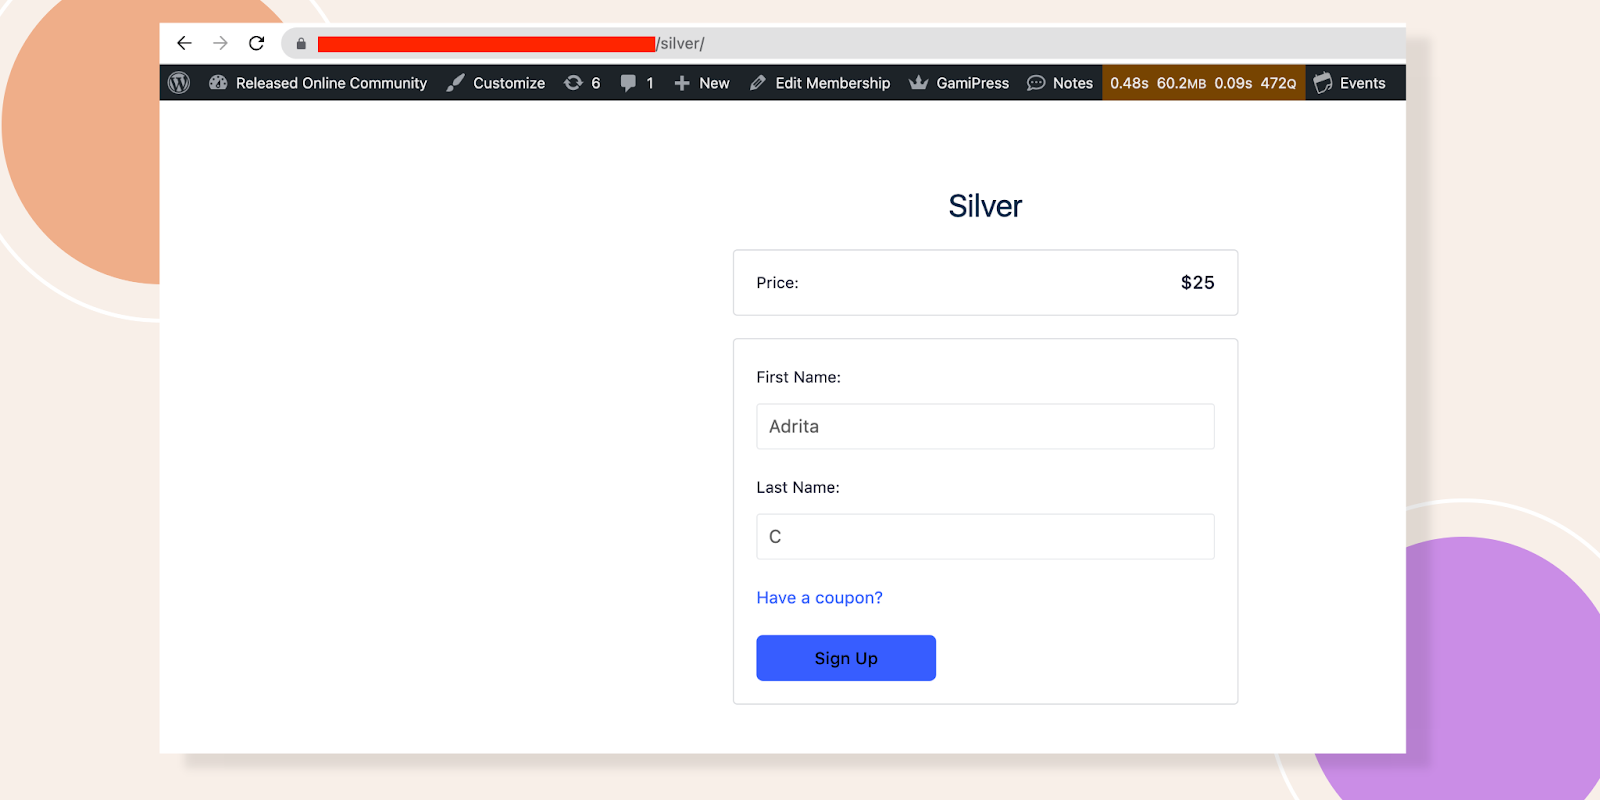
Well, the preview is like below and we will copy the URL from there.
Paste it here and click the Save Settings button.
After that, if you navigate to the Sign Up then this form will appear.
This feature is beneficial for any kind of Membership Website or community.