
In this tutorial, we show you how to configure Group Settings in the BuddyBoss Platform, including the ability for members to create groups, and enabling and disabling group photos and cover images.
Configure Group Settings
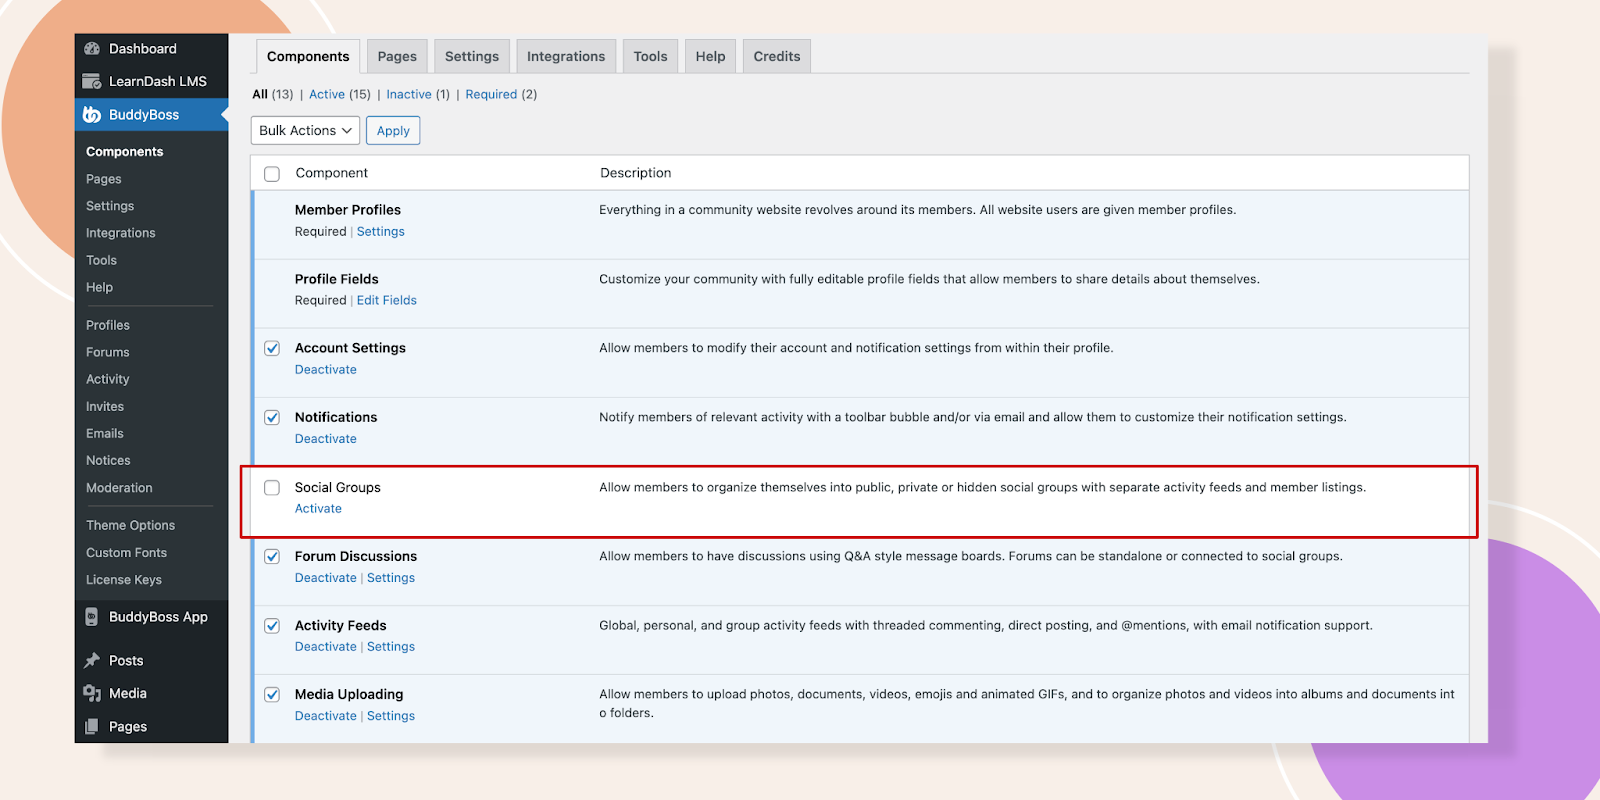
Navigate to BuddyBoss – Components and press the Activate button of Social Groups.
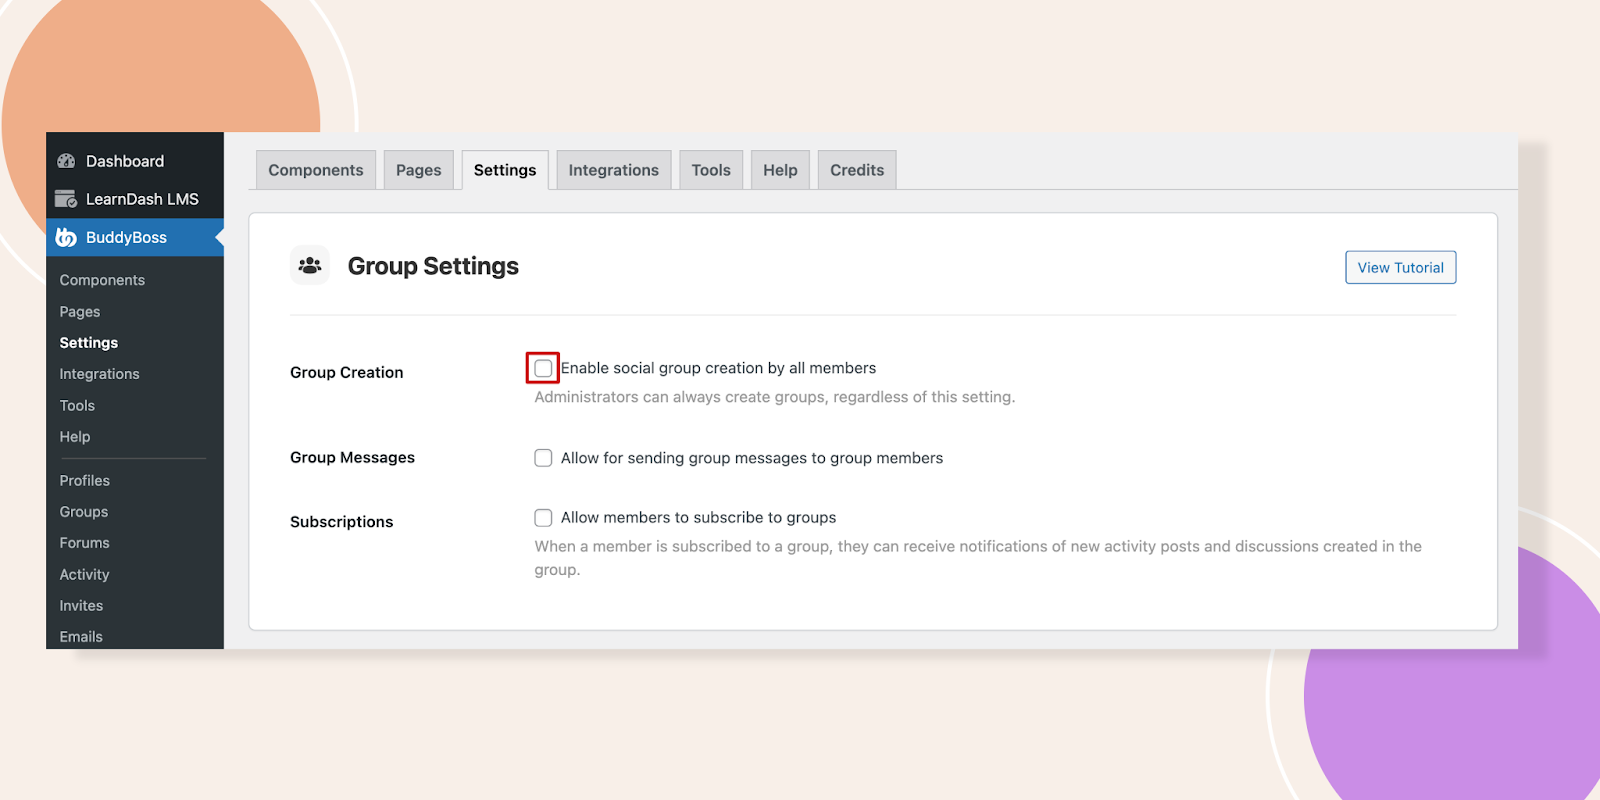
You will see the Settings button under Social Groups, click on it and you will be in the Group Settings section. Let’s enable Group Creation by ticking the box, it will allow social group creation by all members.
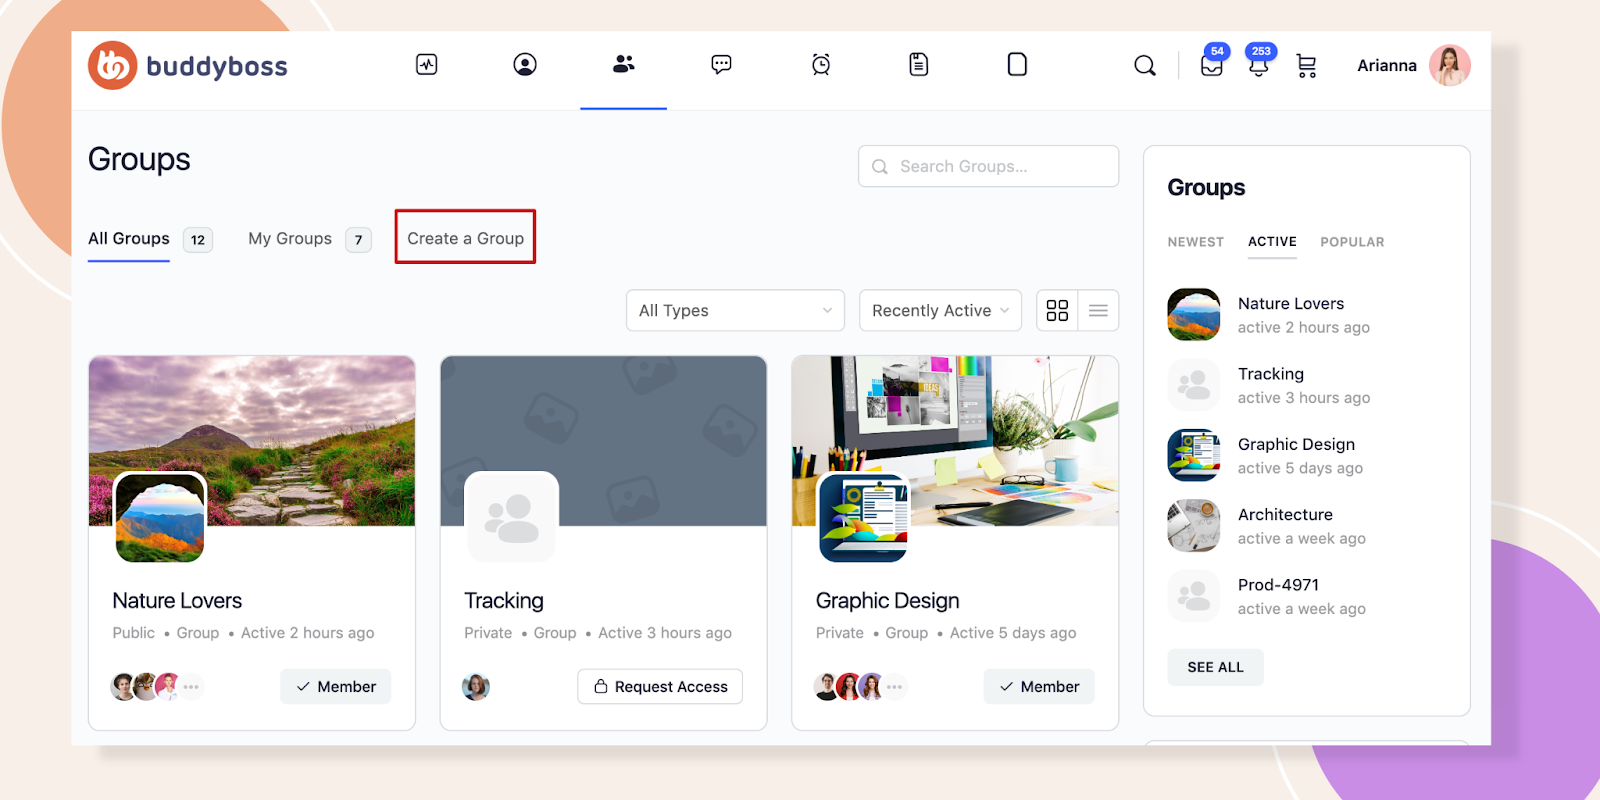
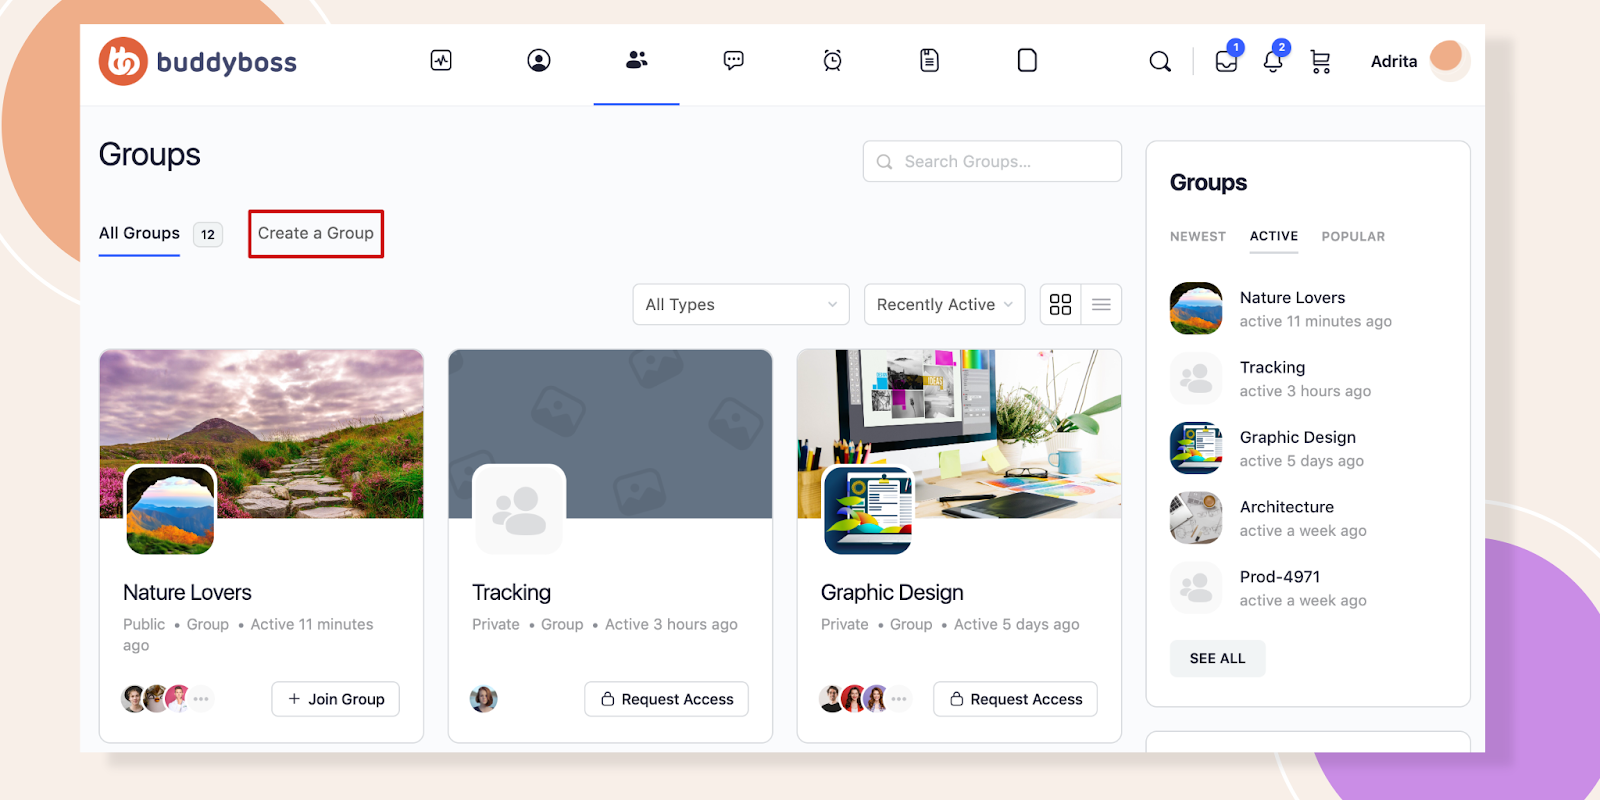
Now, we will log in as Arianna, she is a regular member. If she navigates to Group, she will find a Create a Group option like the image here.
But if you disable the Group Creation feature, there won’t be any Create a Group option visible.
Nevertheless, if you are an Admin, like here Adrita is an Admin and though the Group Creation feature is disabled she can create a new group.
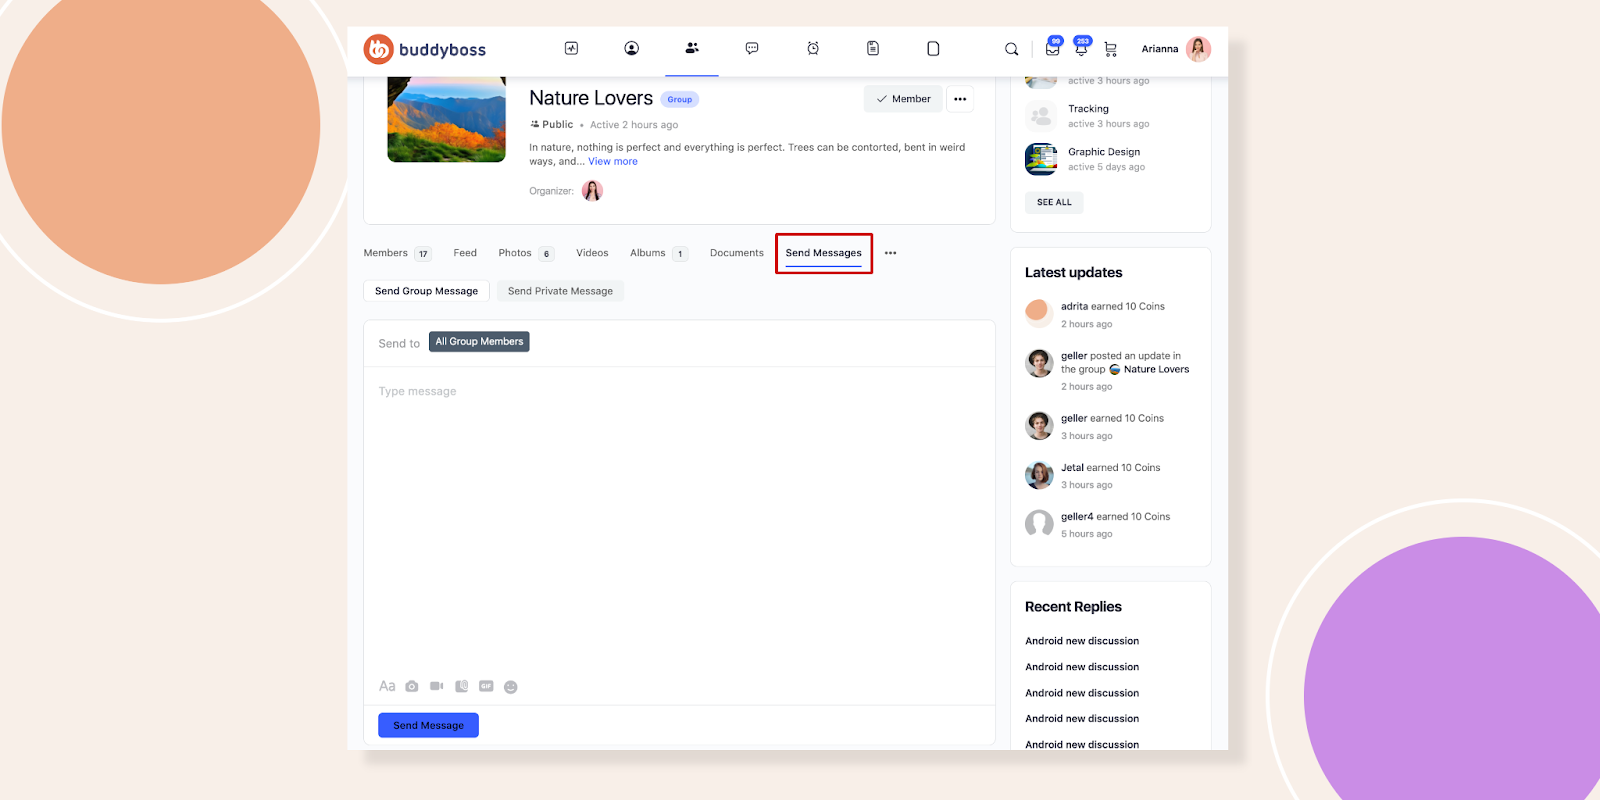
After that enable the Group Messages option.
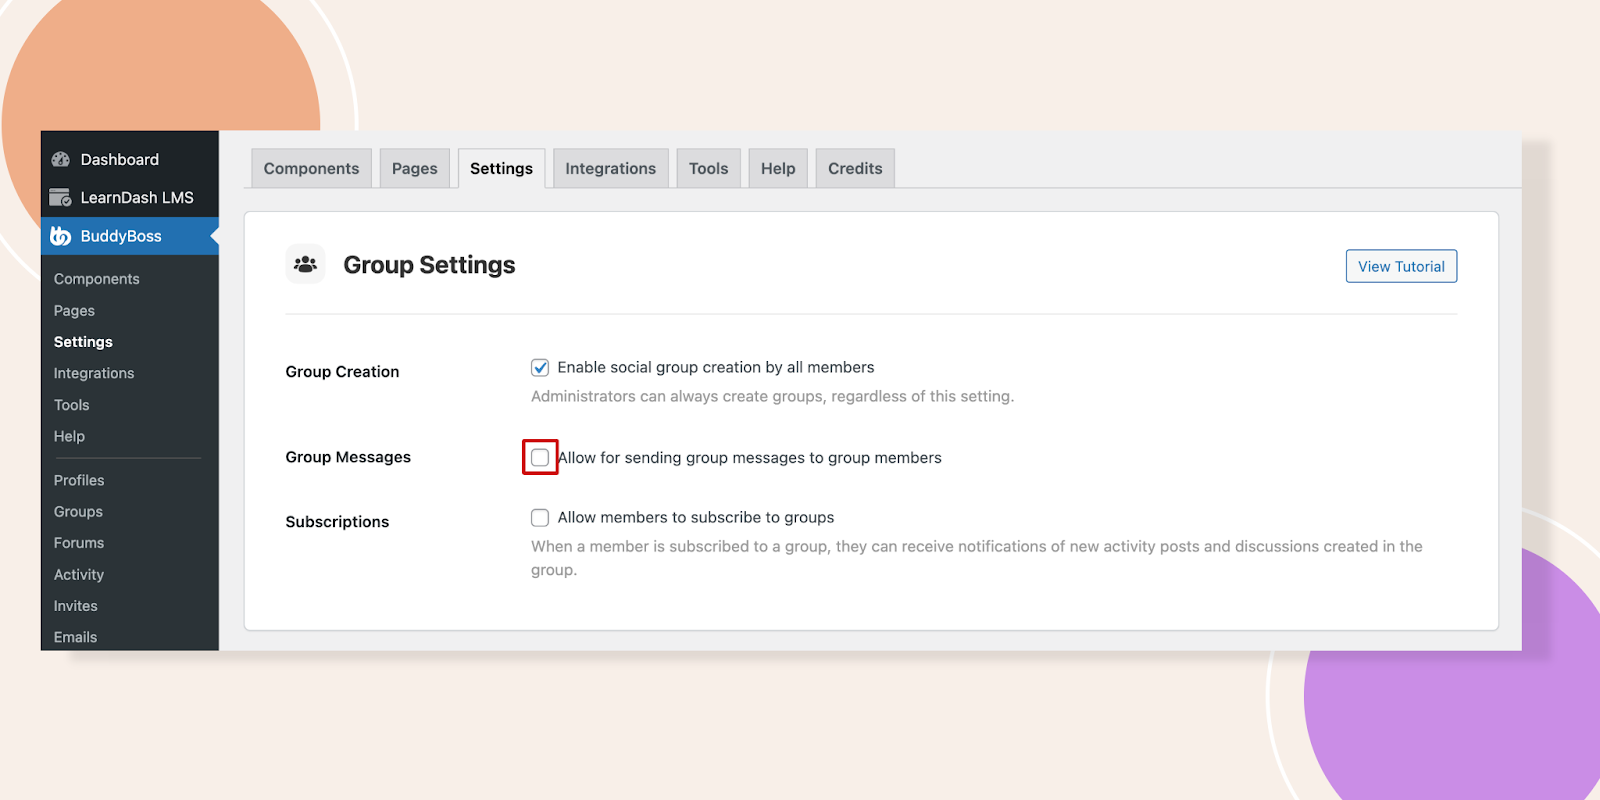
You can see in the frontend that Arianna can send group messages to group members. This won’t be available if you just disable this option.
Now, allow the members to subscribe to groups by ticking the Subscriptions box.
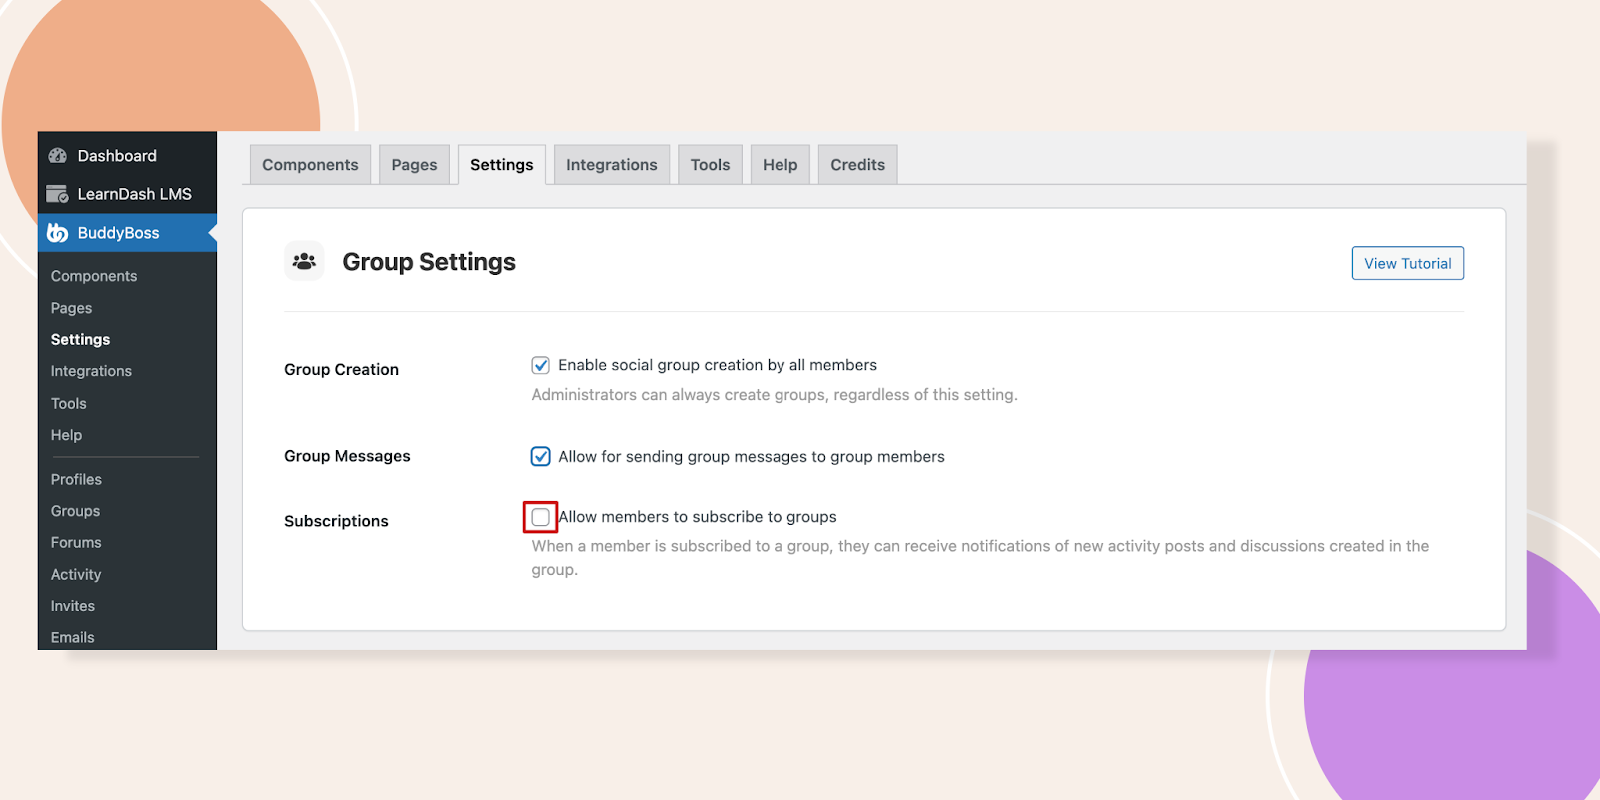
Go to any particular group, you will find the bell icon which is the subscription option for the members.
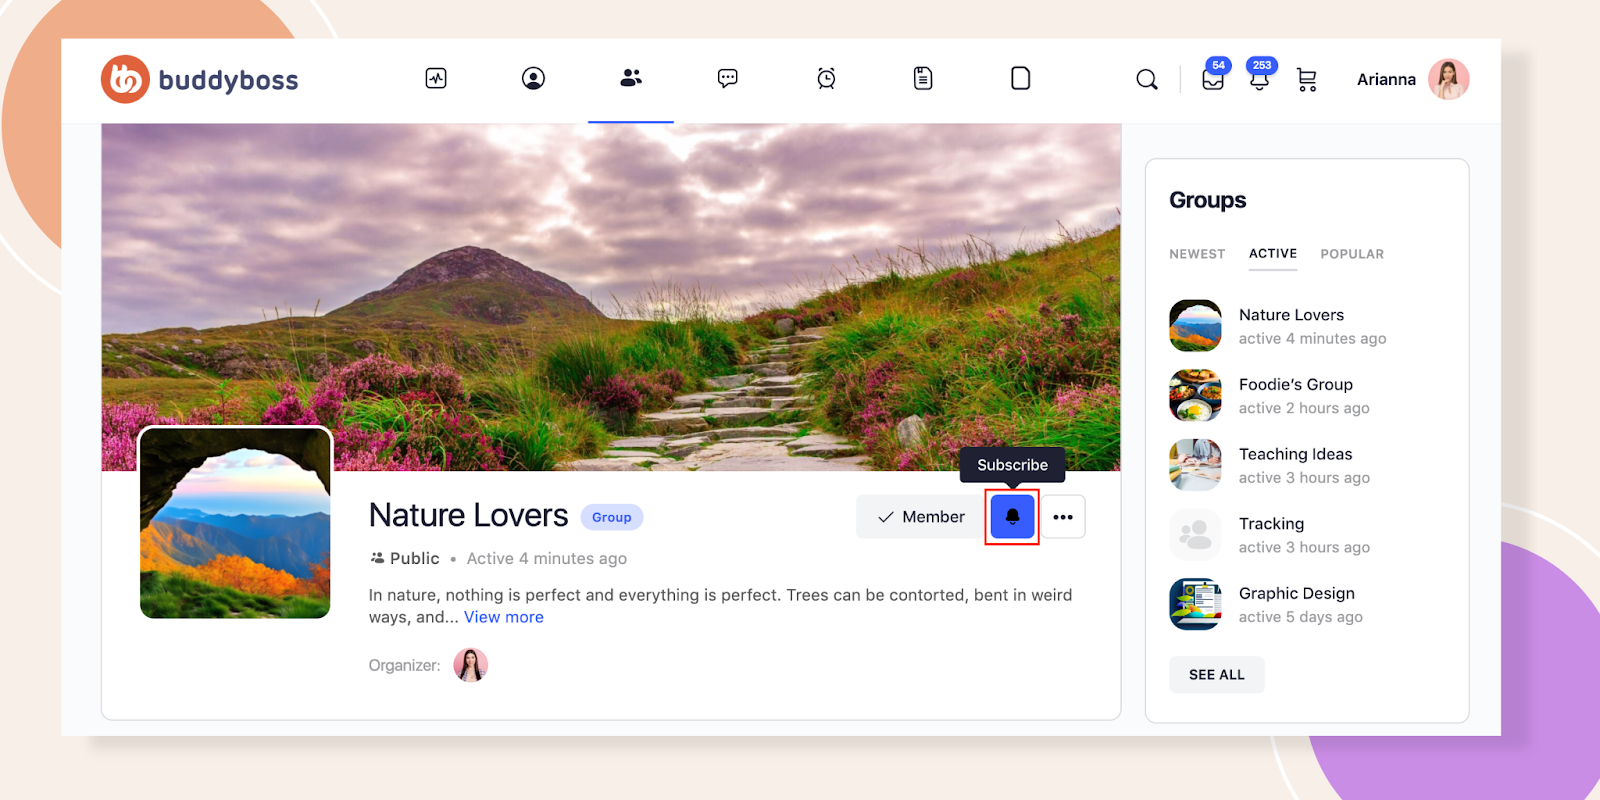
But after disabling the Subscriptions option the bell icon will disappear.
Setting your group is just a matter of a few clicks, hope you are successful in setting your groups.