
Group Types organize your groups better. If you want to segregate your groups into types such as schools, courses and other types depending on your community, you can easily set up group types in BuddyBoss Platform. Learn more of what you can configure with group types by watching this video.
Configure Group Types
Enable Group Types
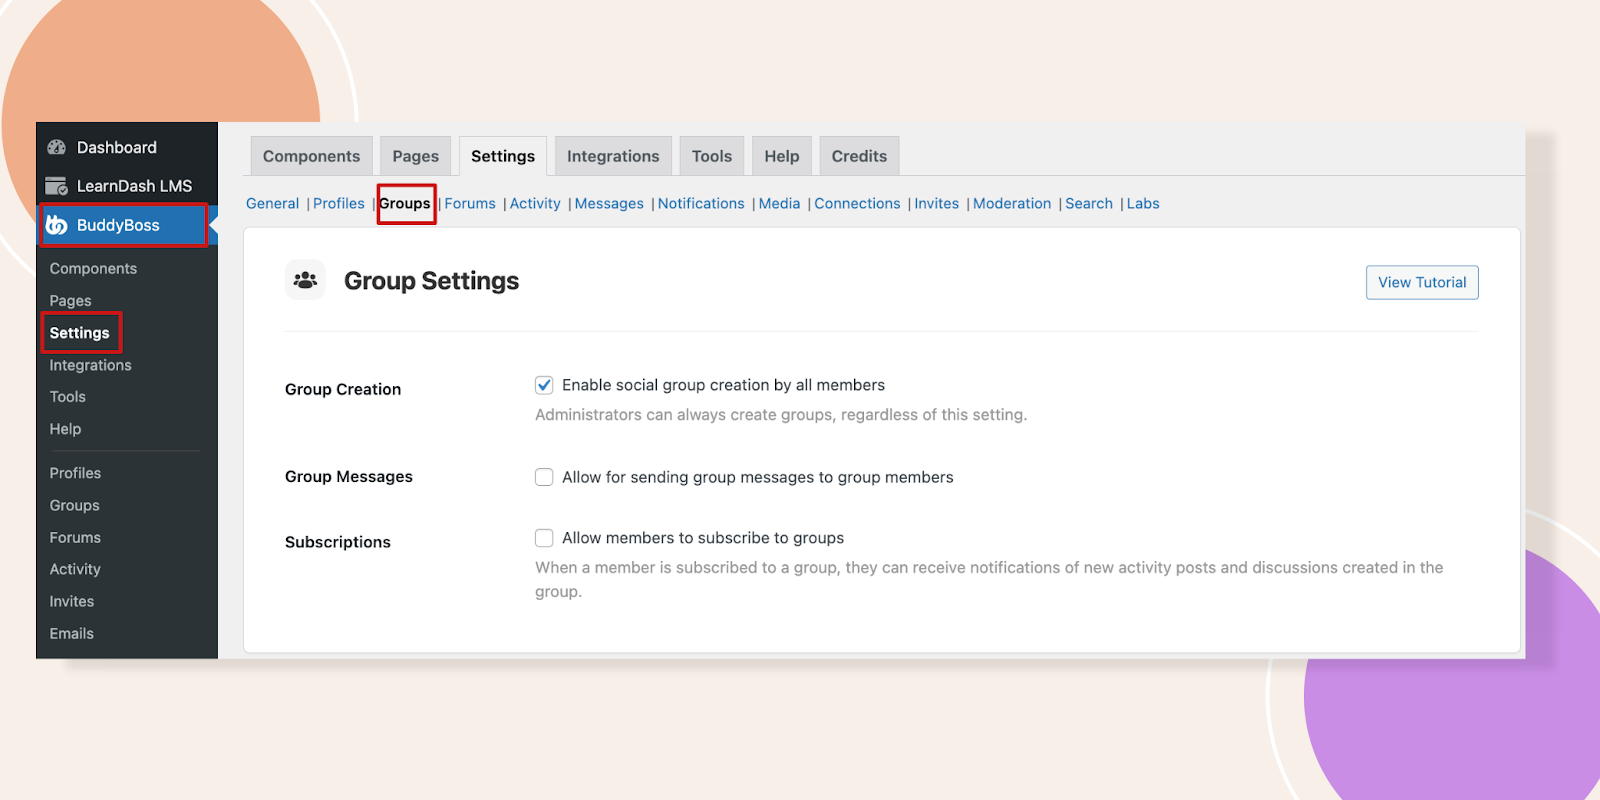
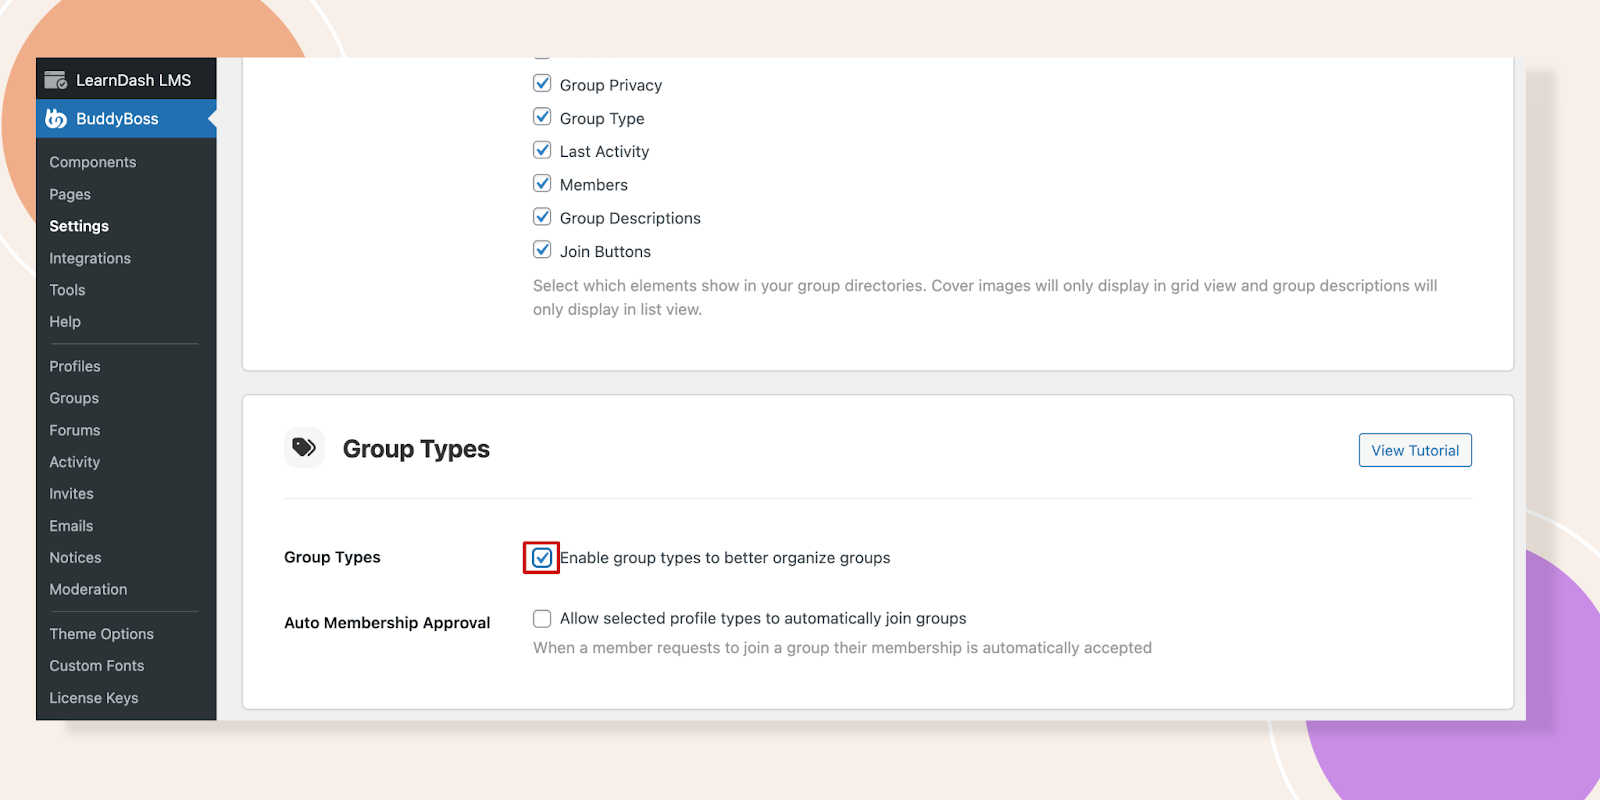
Navigate to BuddyBoss – Settings – Groups. Scroll down to find the Group Types section.
Enable Group Types to better organize groups by ticking the box. Don’t forget to click the Save Settings button.
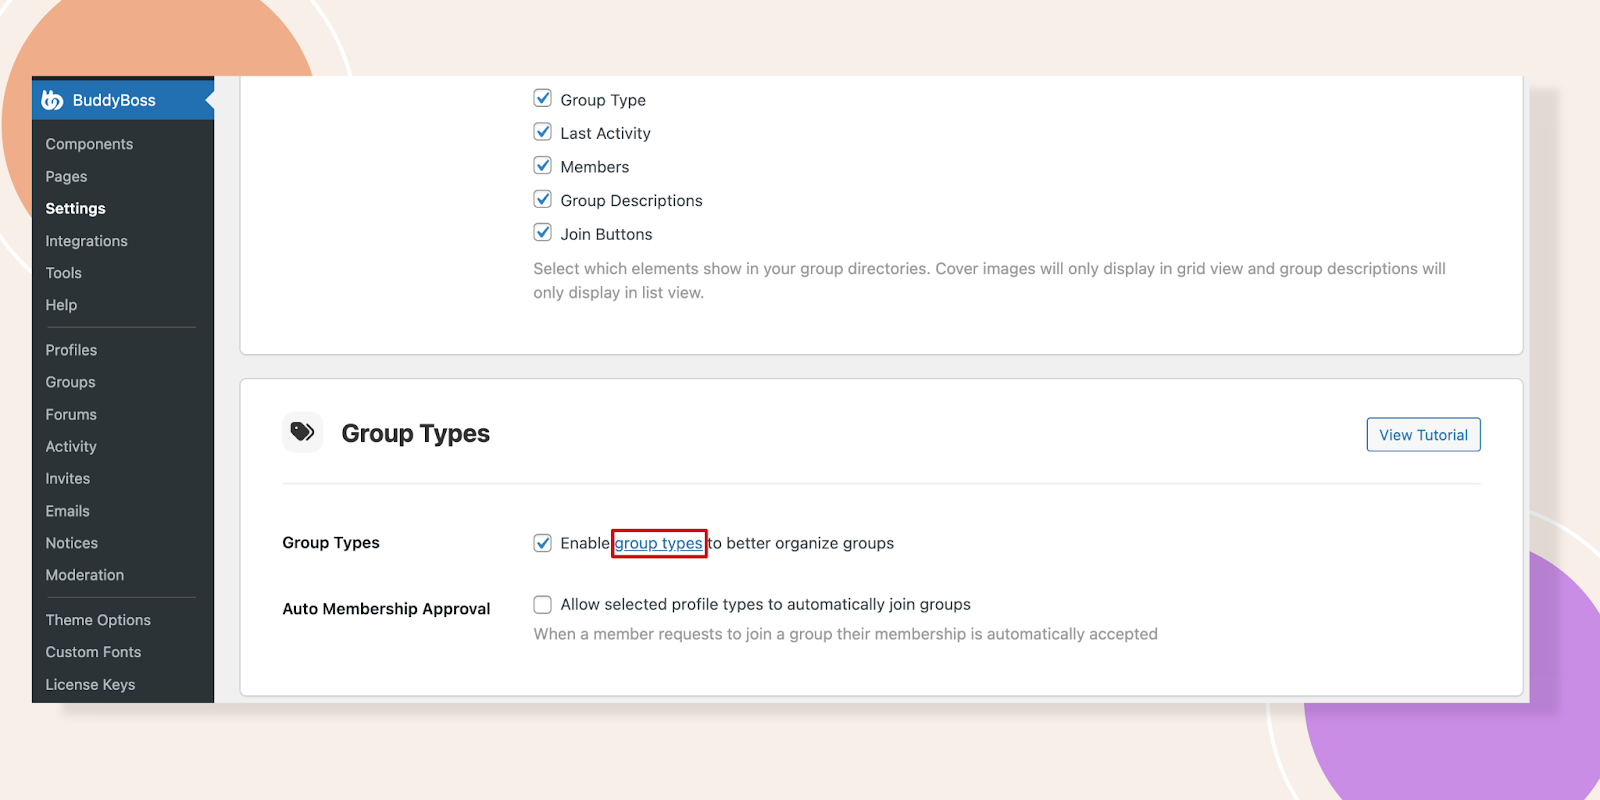
Click on the hyperlinked Group Types, like the image below.
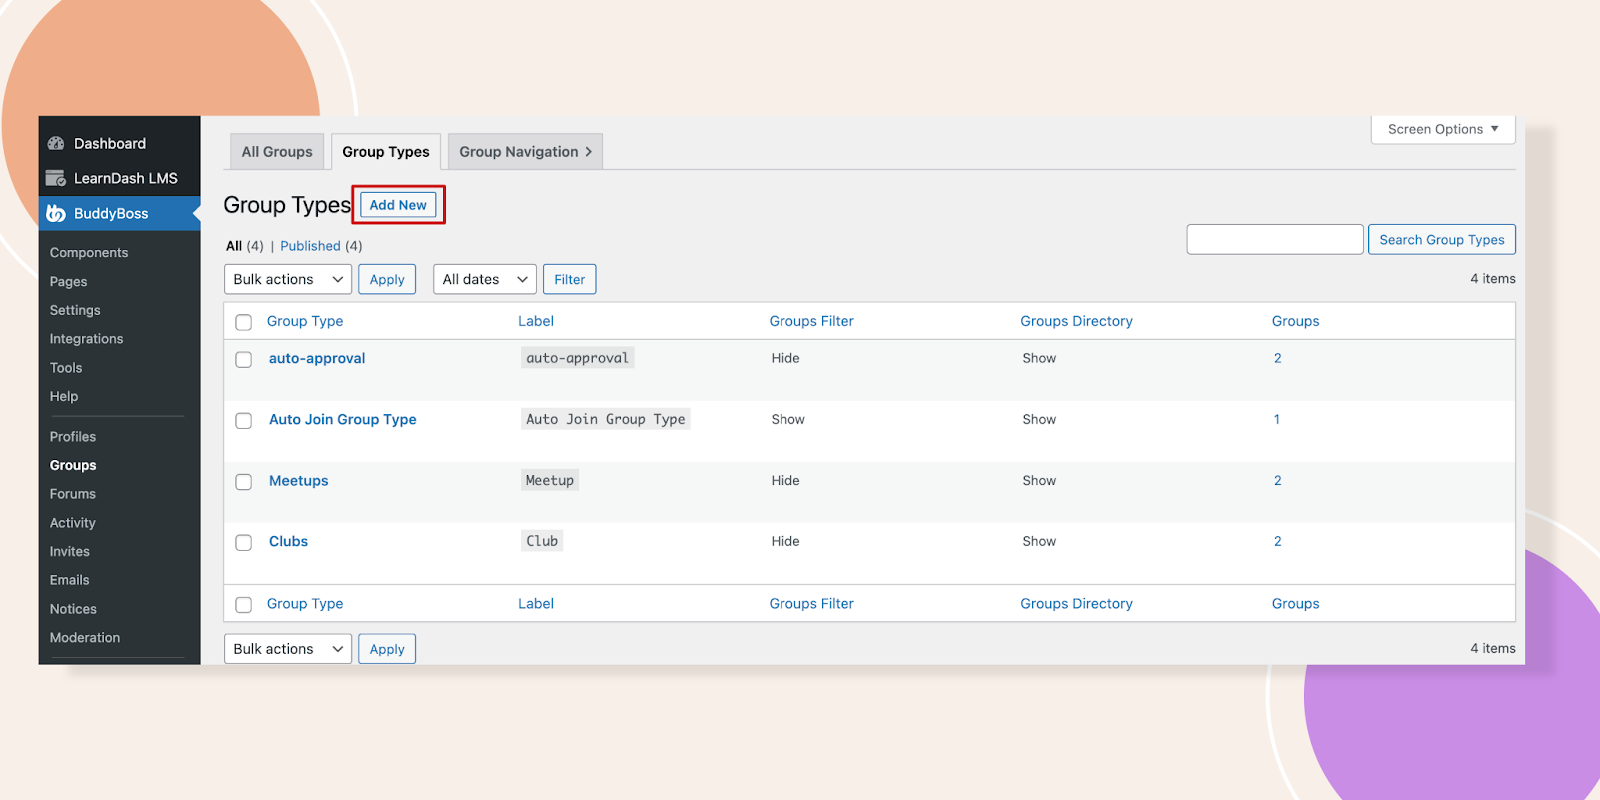
It will lead you to the Group Types page. Click on the Add New button.
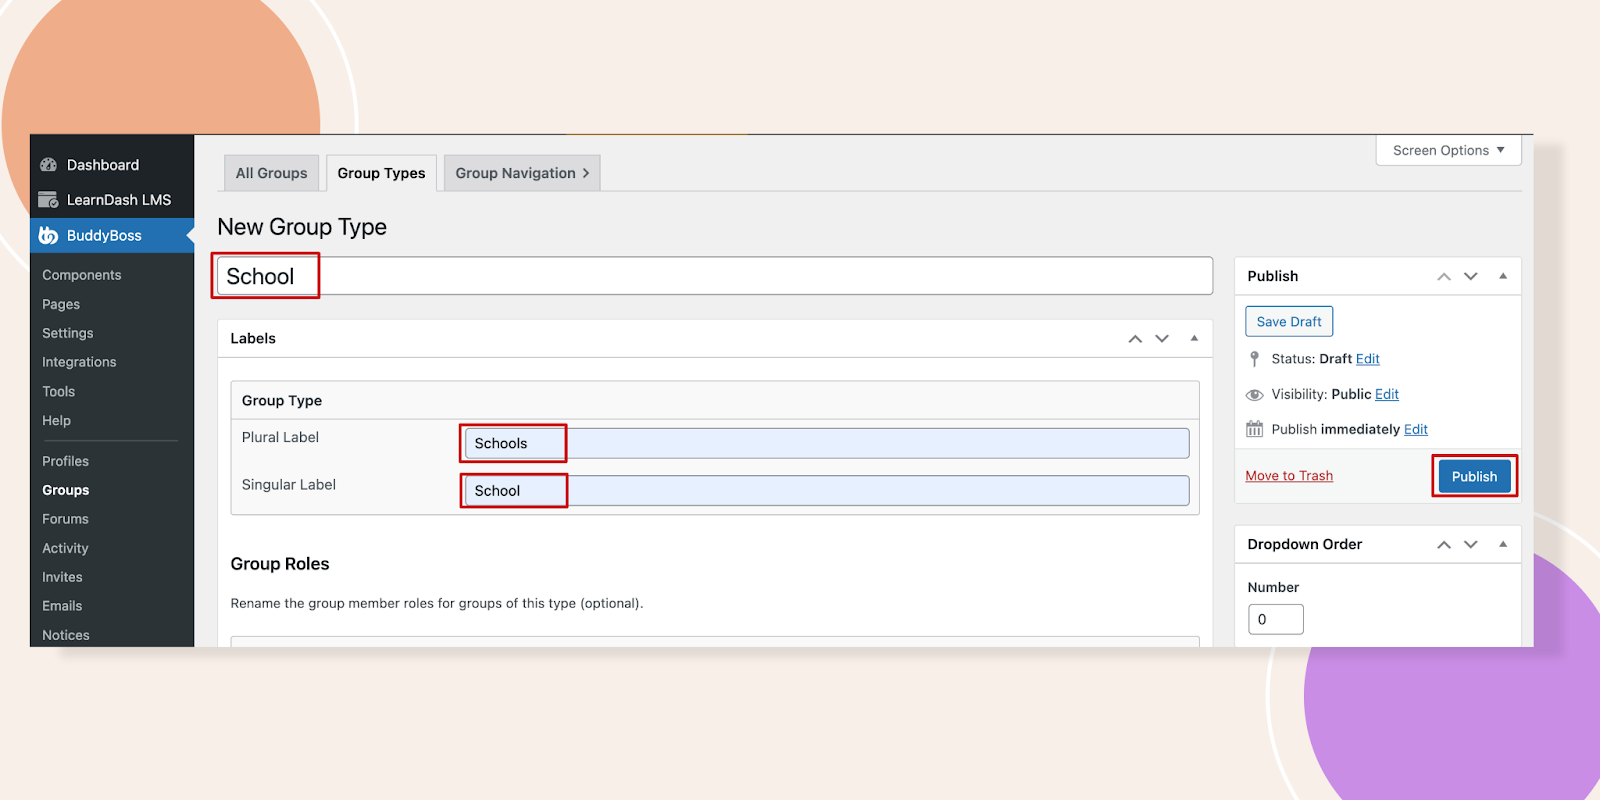
Create the new group type- School. In plural, it will be Schools and in singular it will be School. Fill those areas and hit the Publish button.
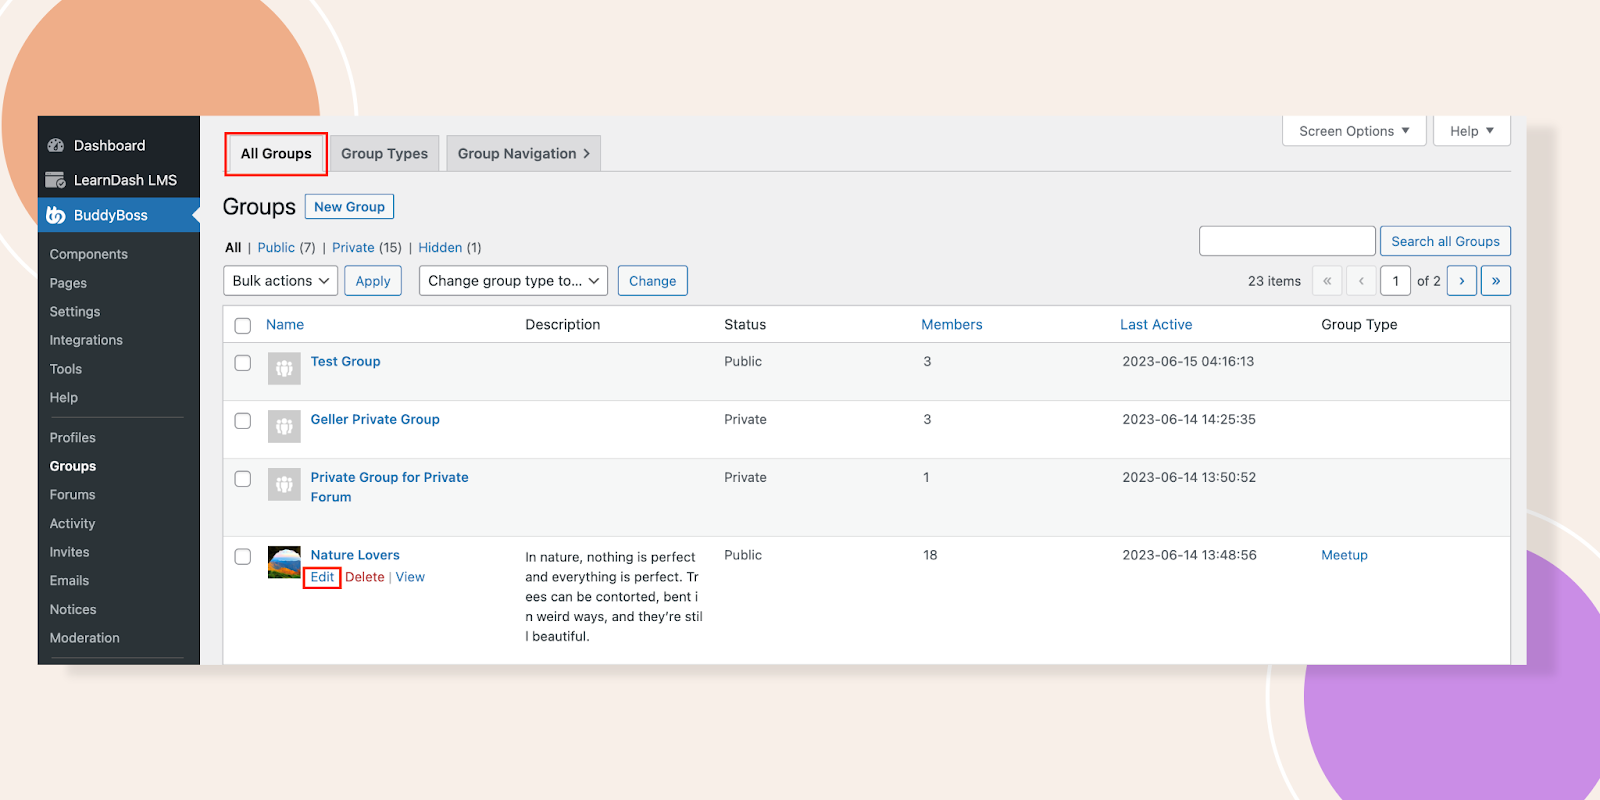
Click on All Groups and let’s Edit a group.
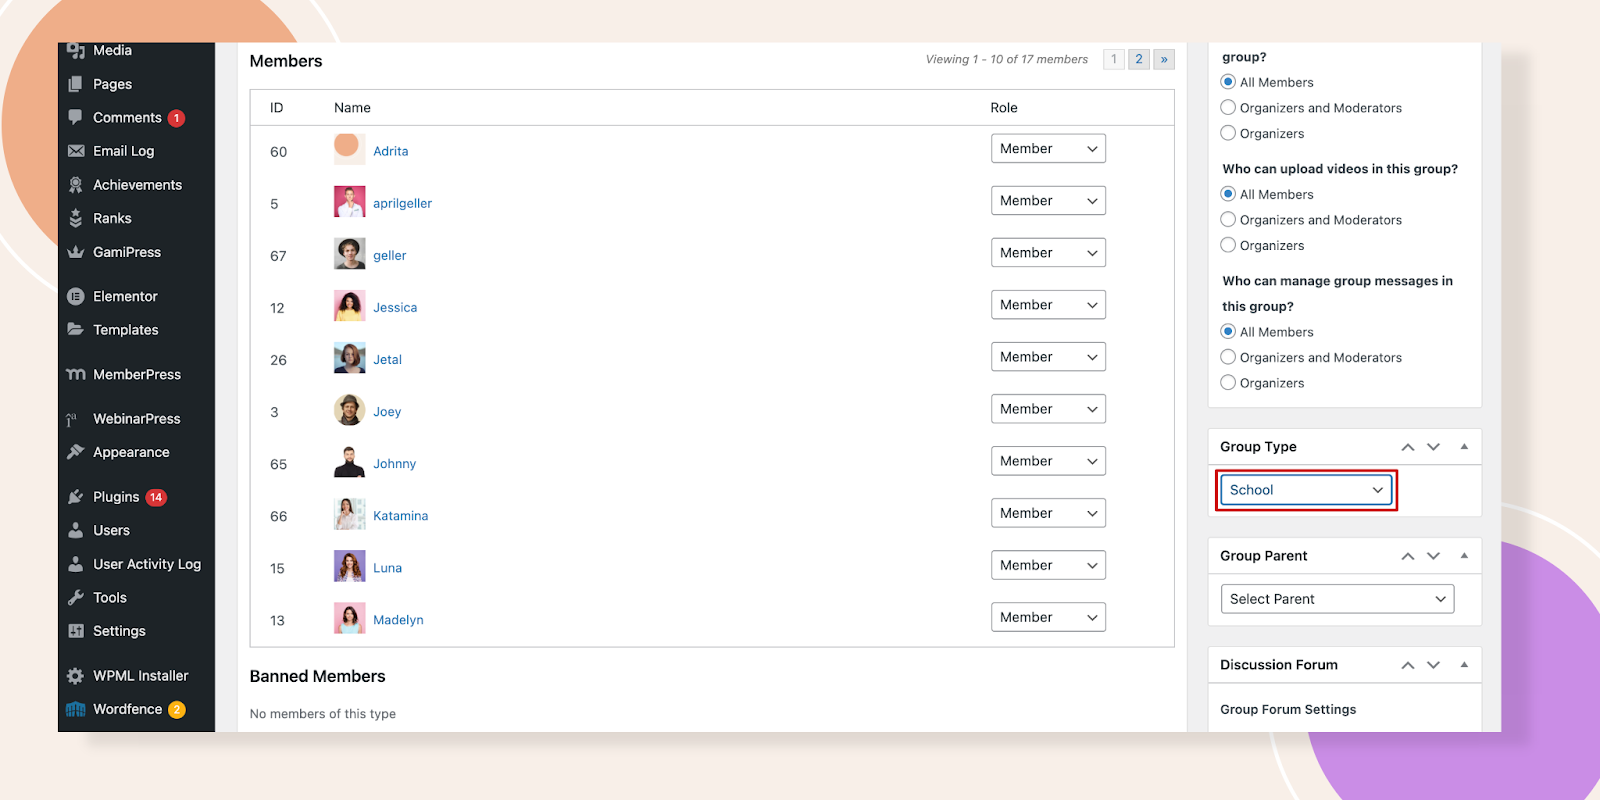
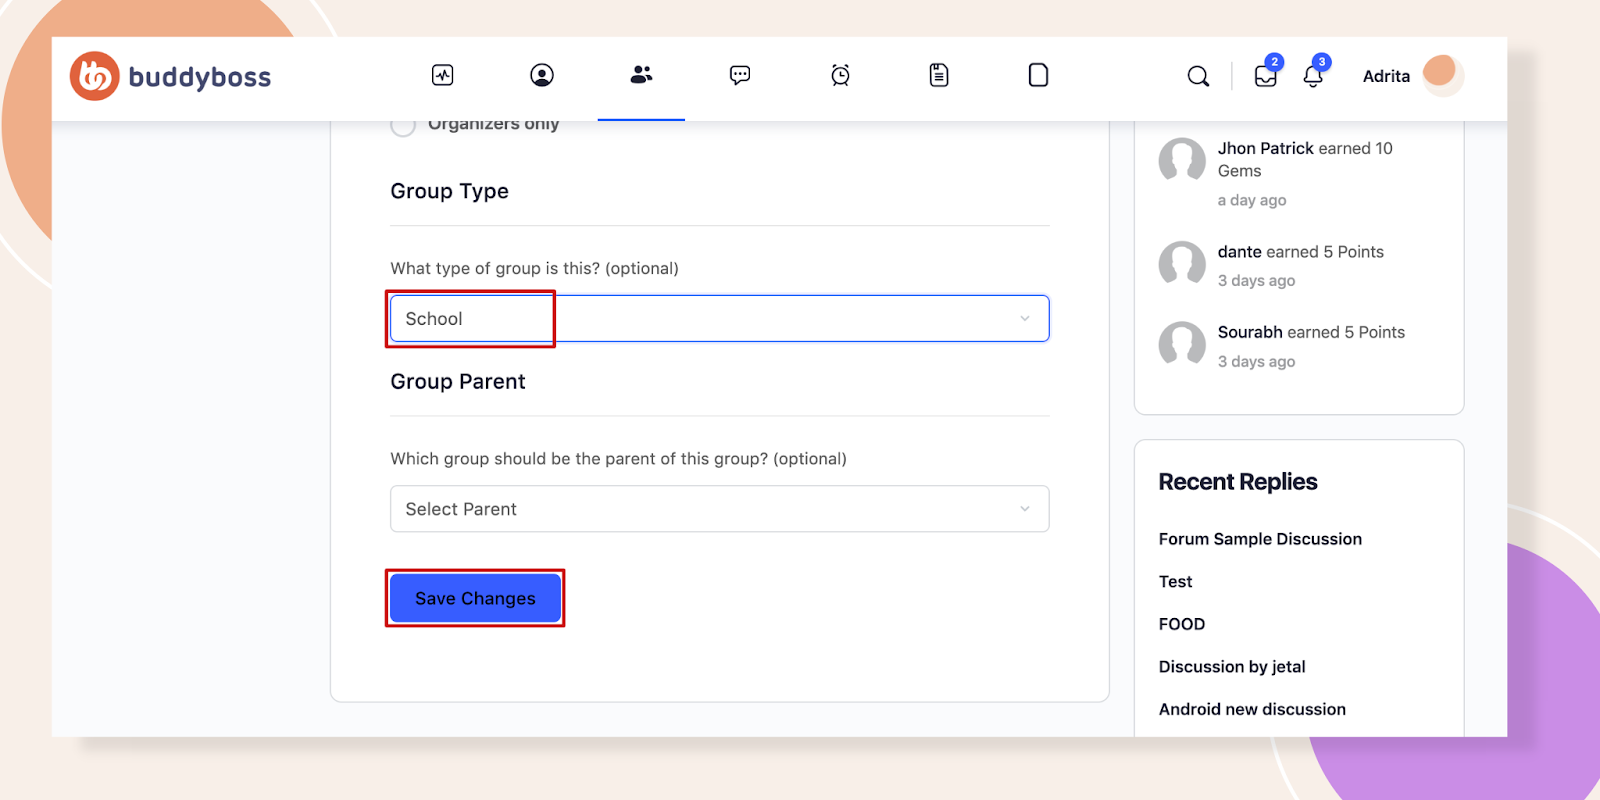
Scroll down and at the right-hand side, you will see the Group Type area, where you can select the School group don’t forget to hit the Update button to see the changes.
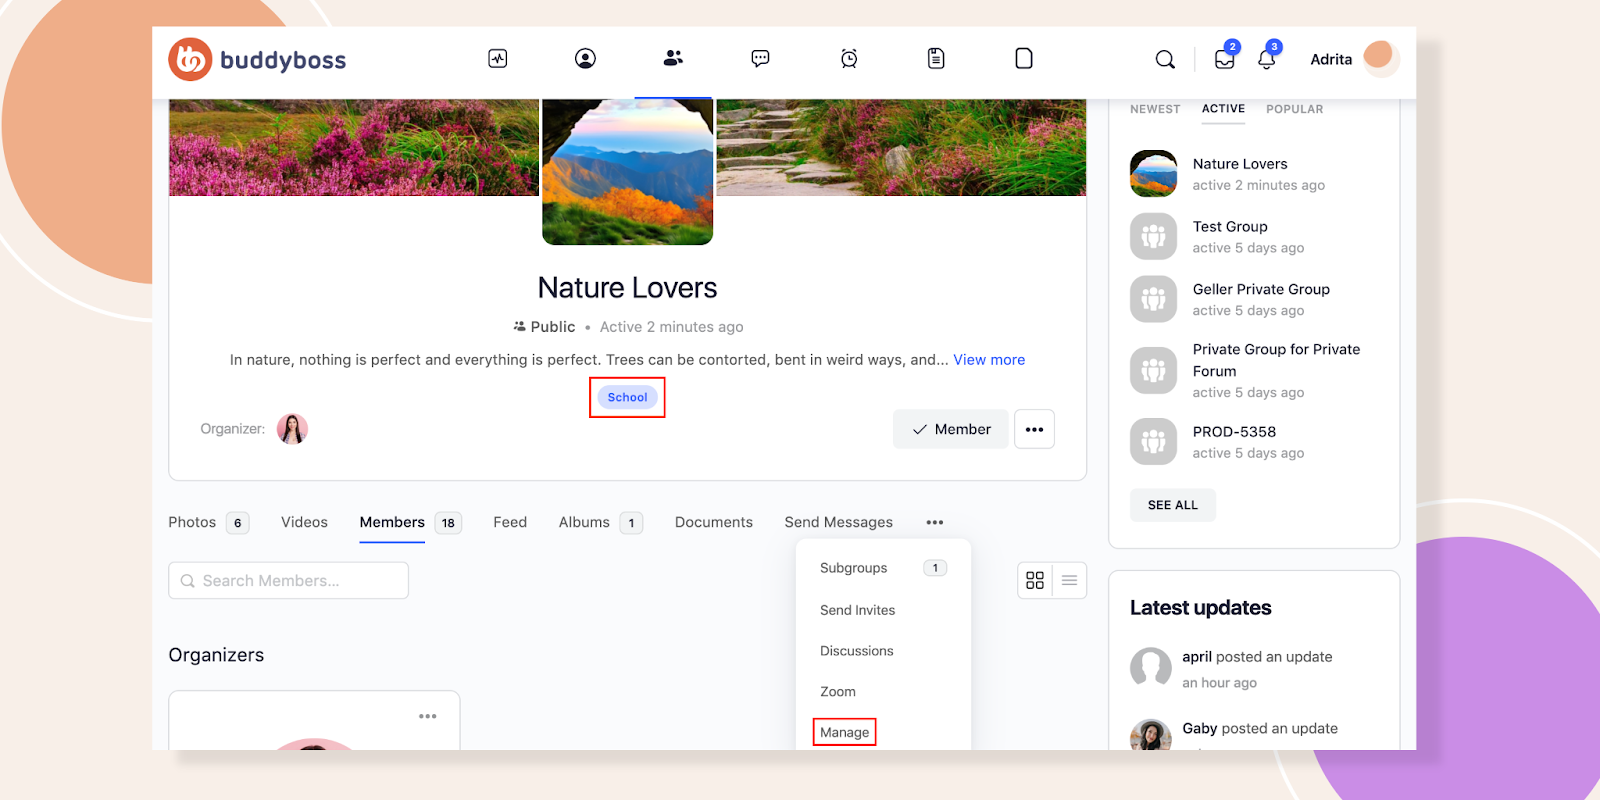
Now navigate to any group, you will see it’s labeled as School. With the help of the three dots, you can see the Manage option, hit on it.
Press on Settings.
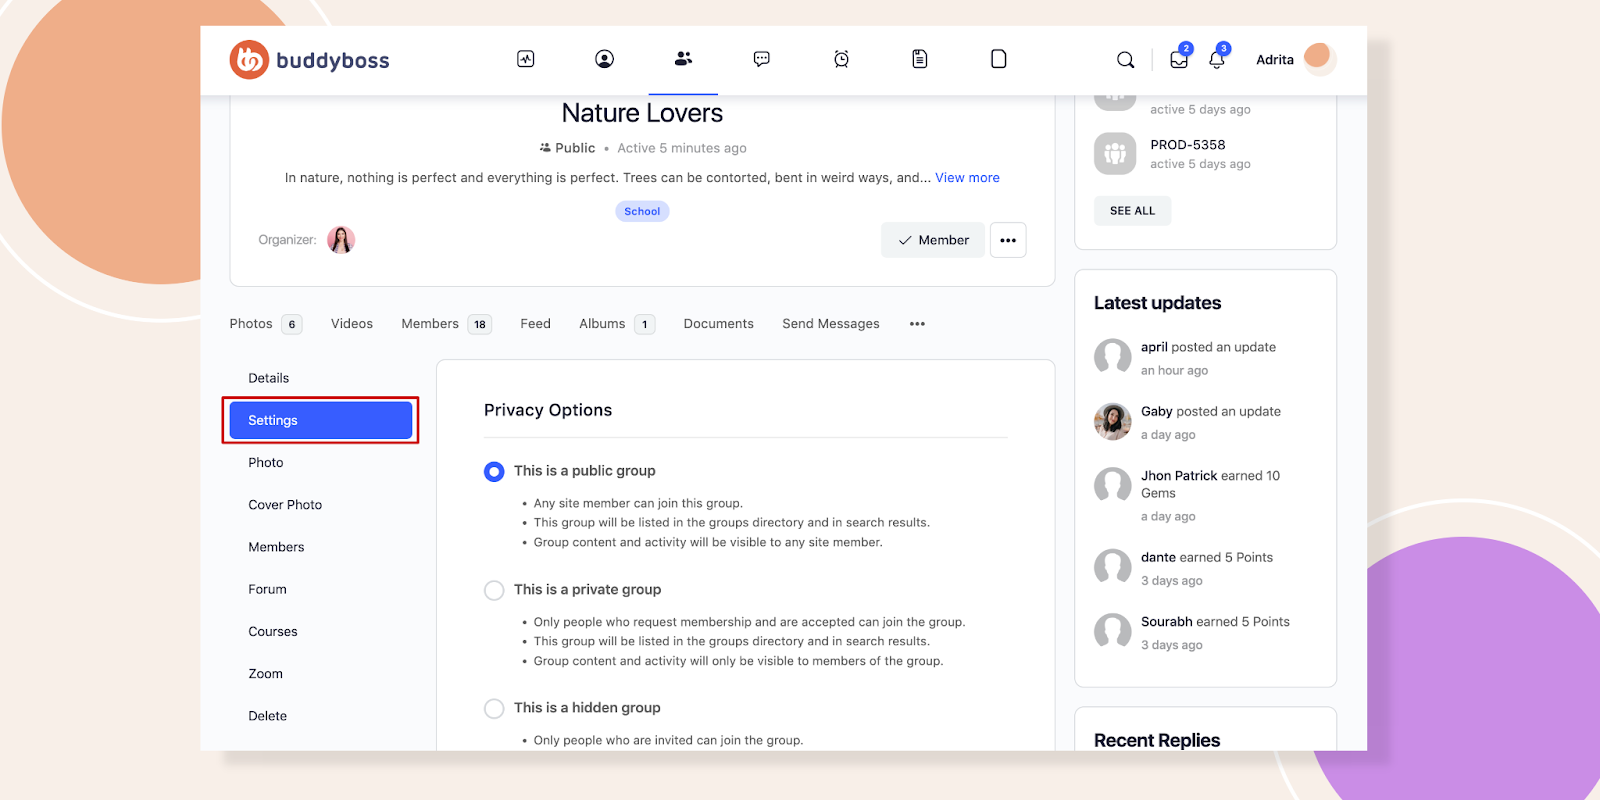
Scroll down below, from here you can also change the particular group type.
Change the Group Member’s Label
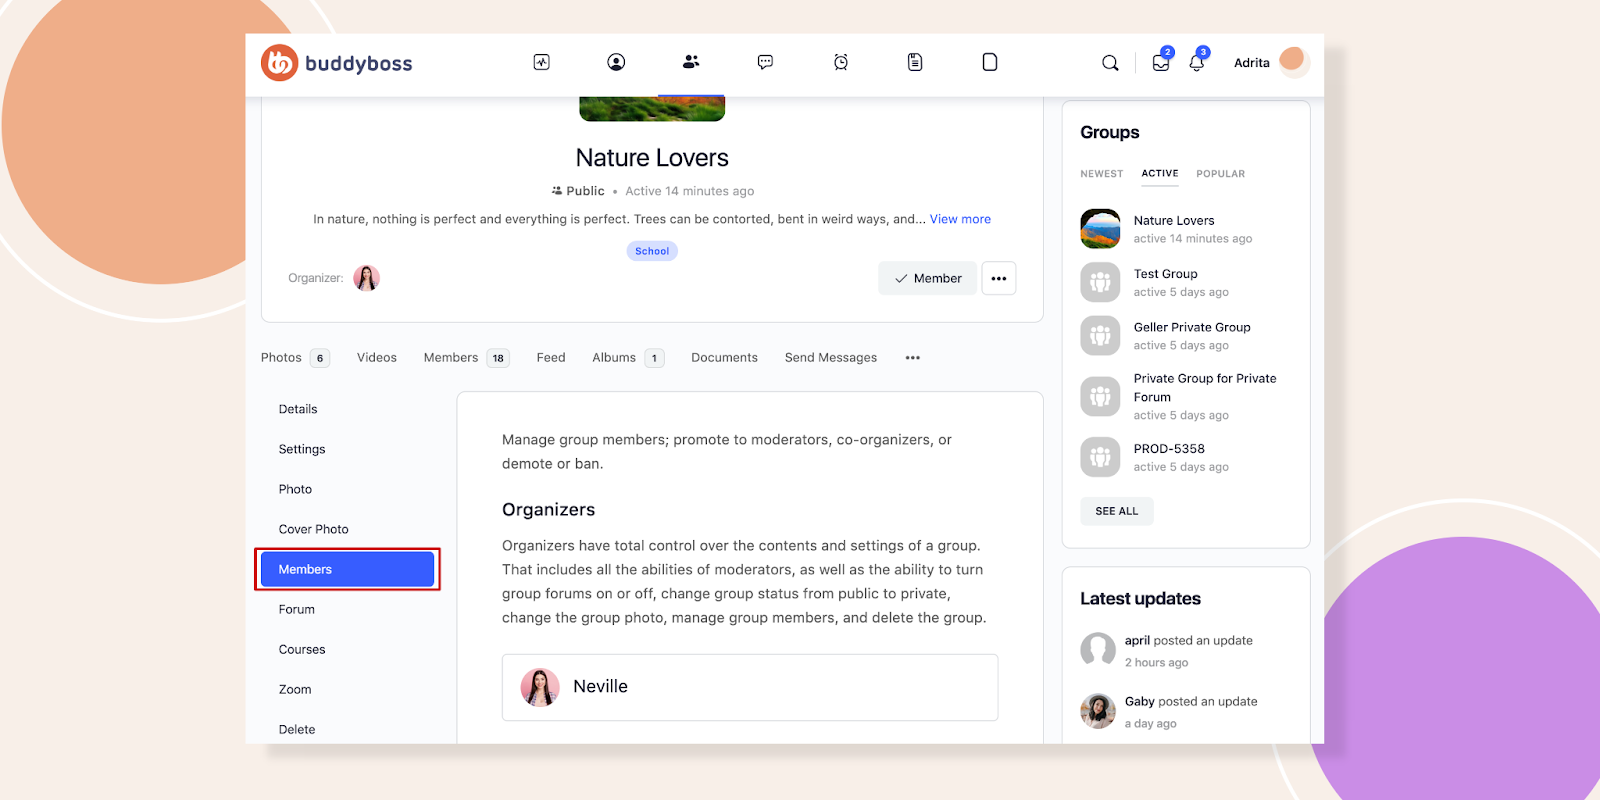
Navigate to the Members option.
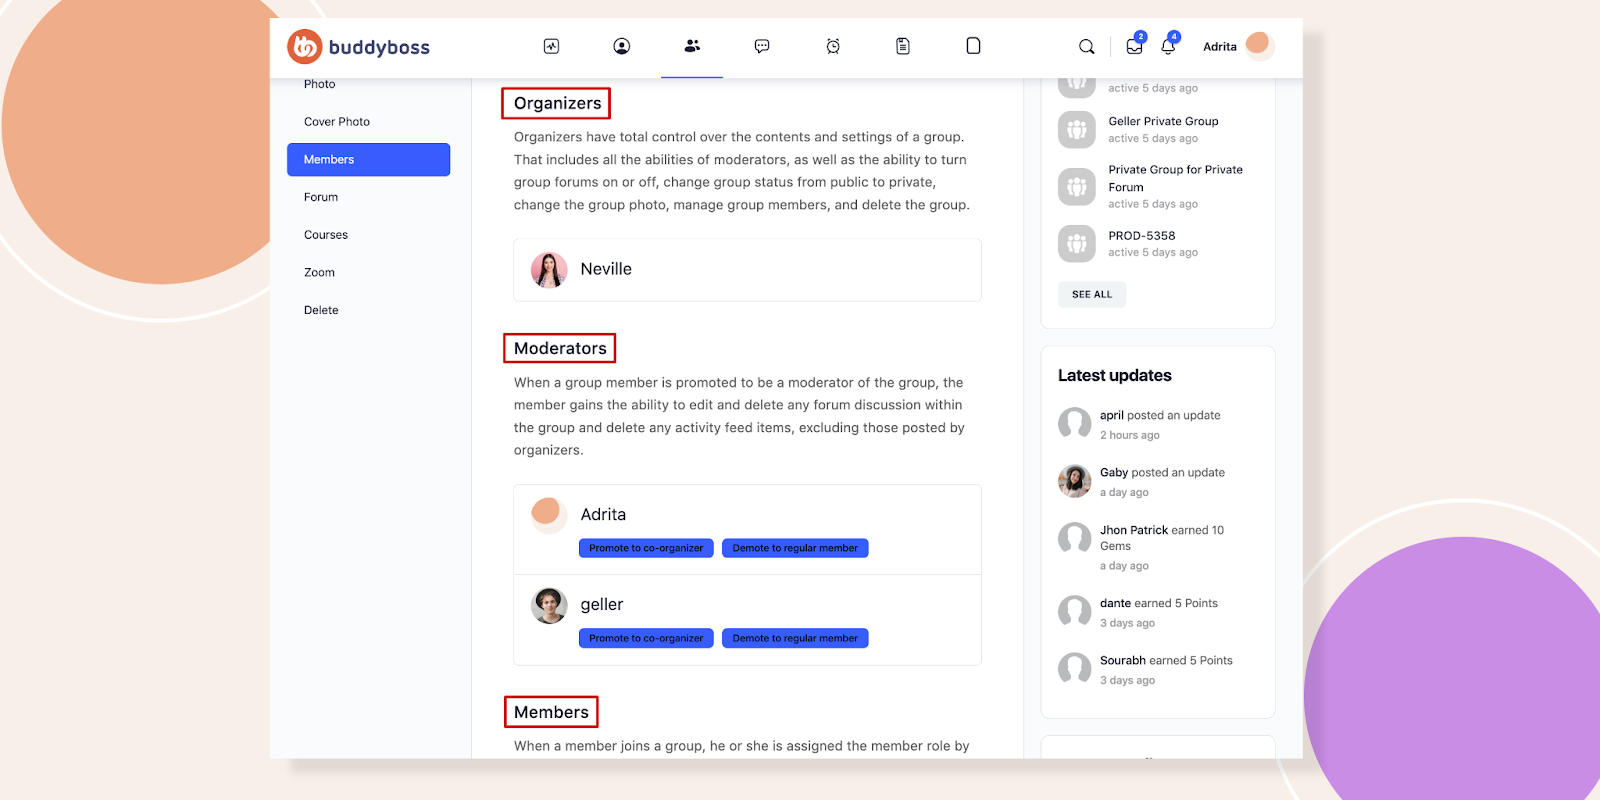
We will now promote Adrita and Geller as Moderators.
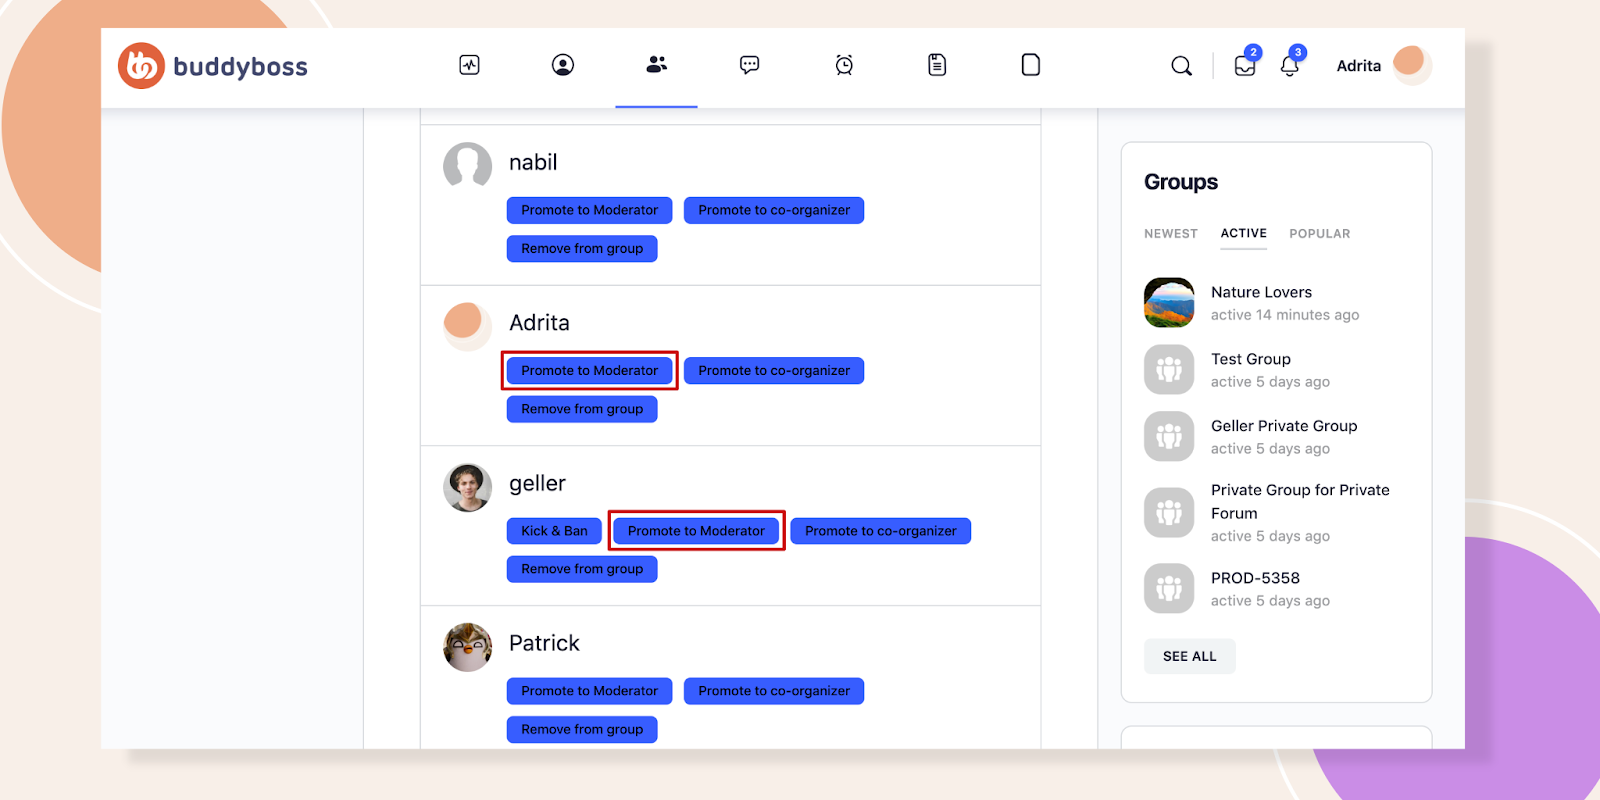
Check we have now three different types of people in this group.
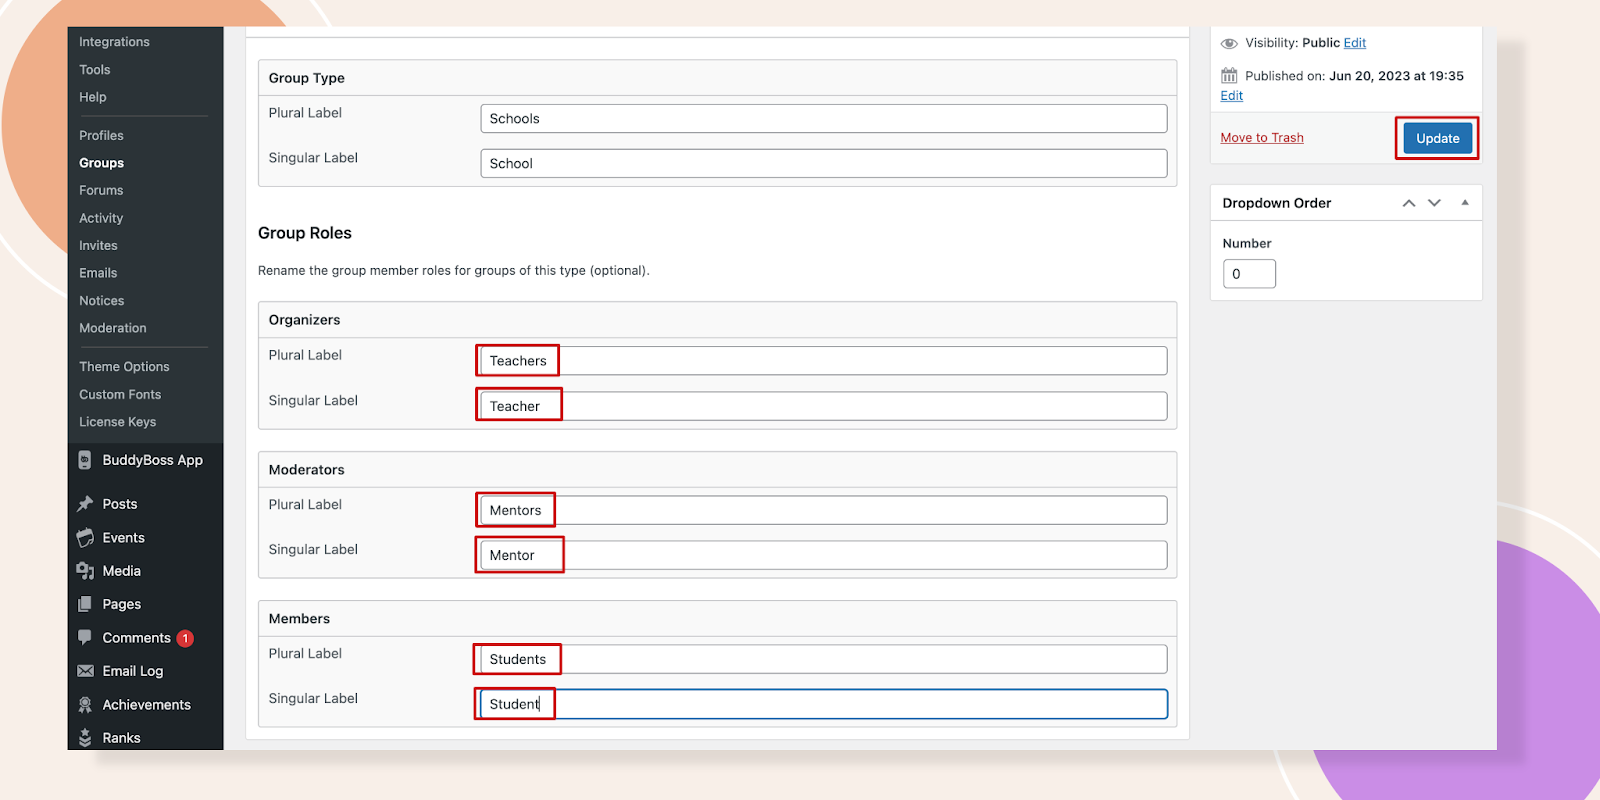
Get back to the School Group Type. Here, we will change the Organizers to Teachers, Moderators to Mentors, and Members to Students.
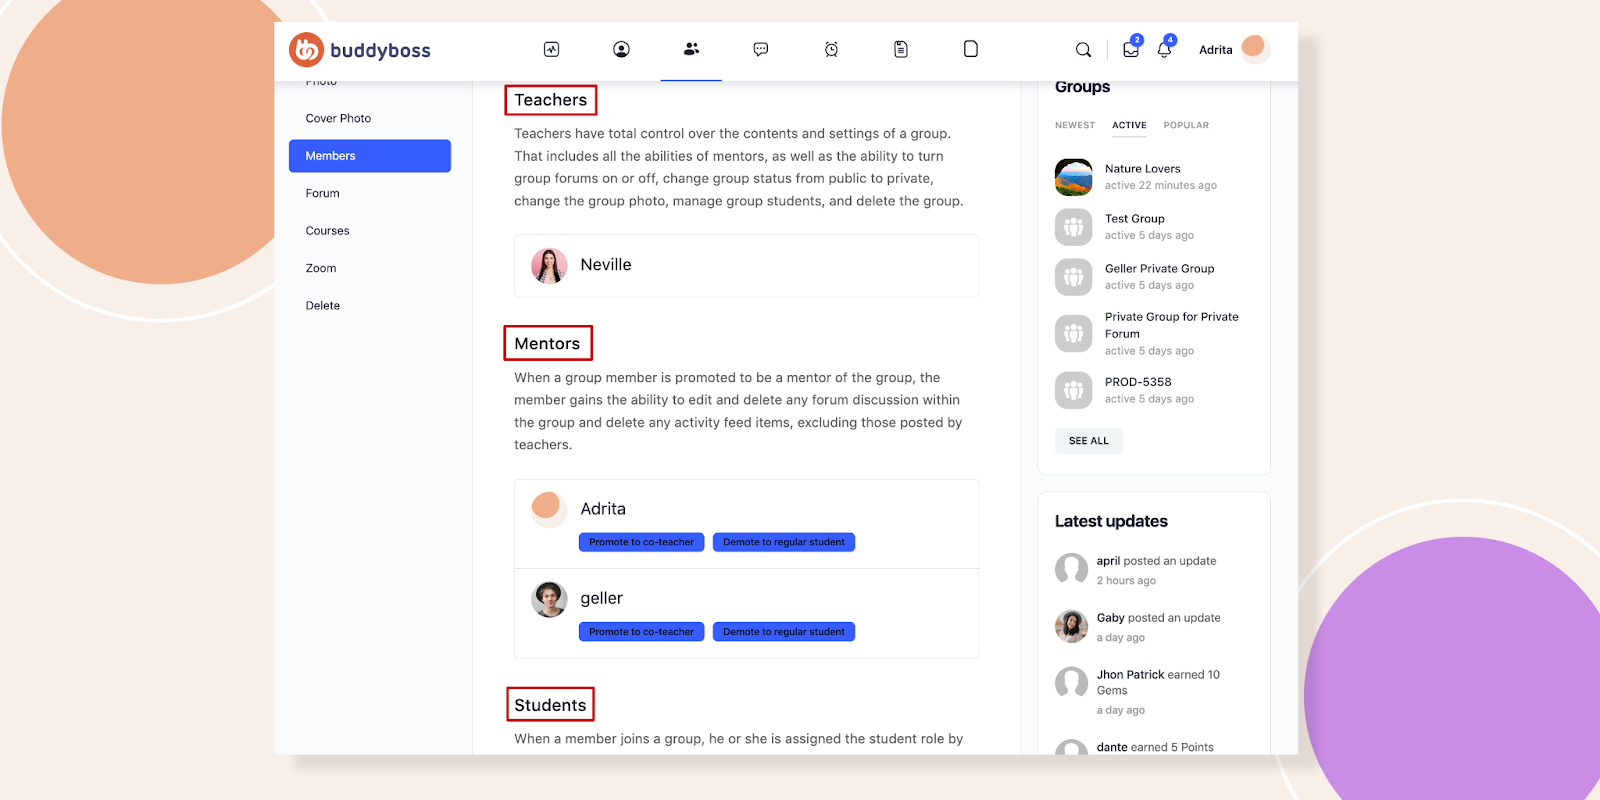
Now if you go to any group that is under School type the members profile will display like below.
Enter Group Types in the Types Filter
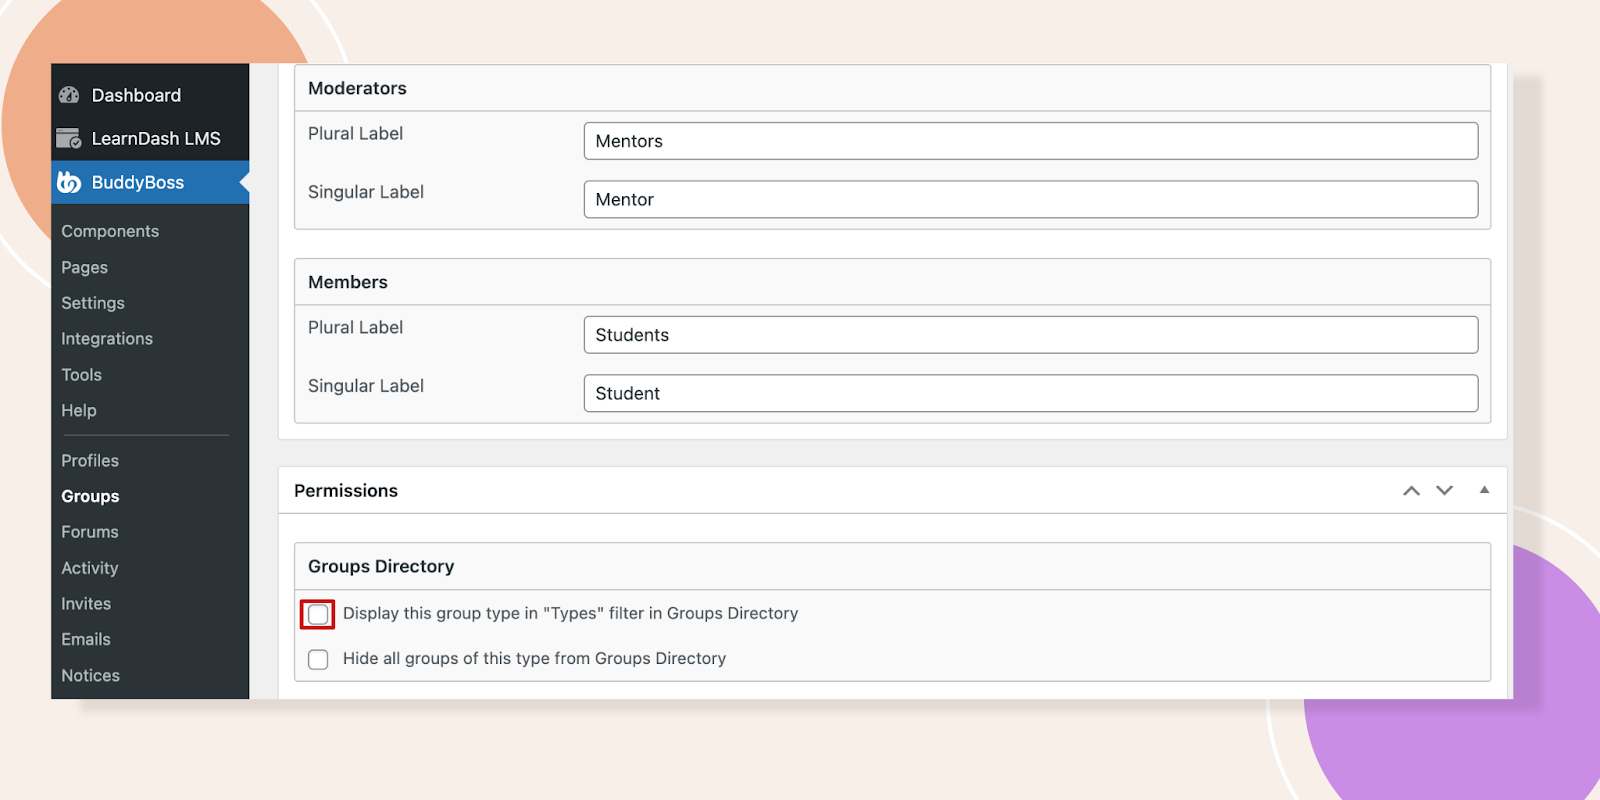
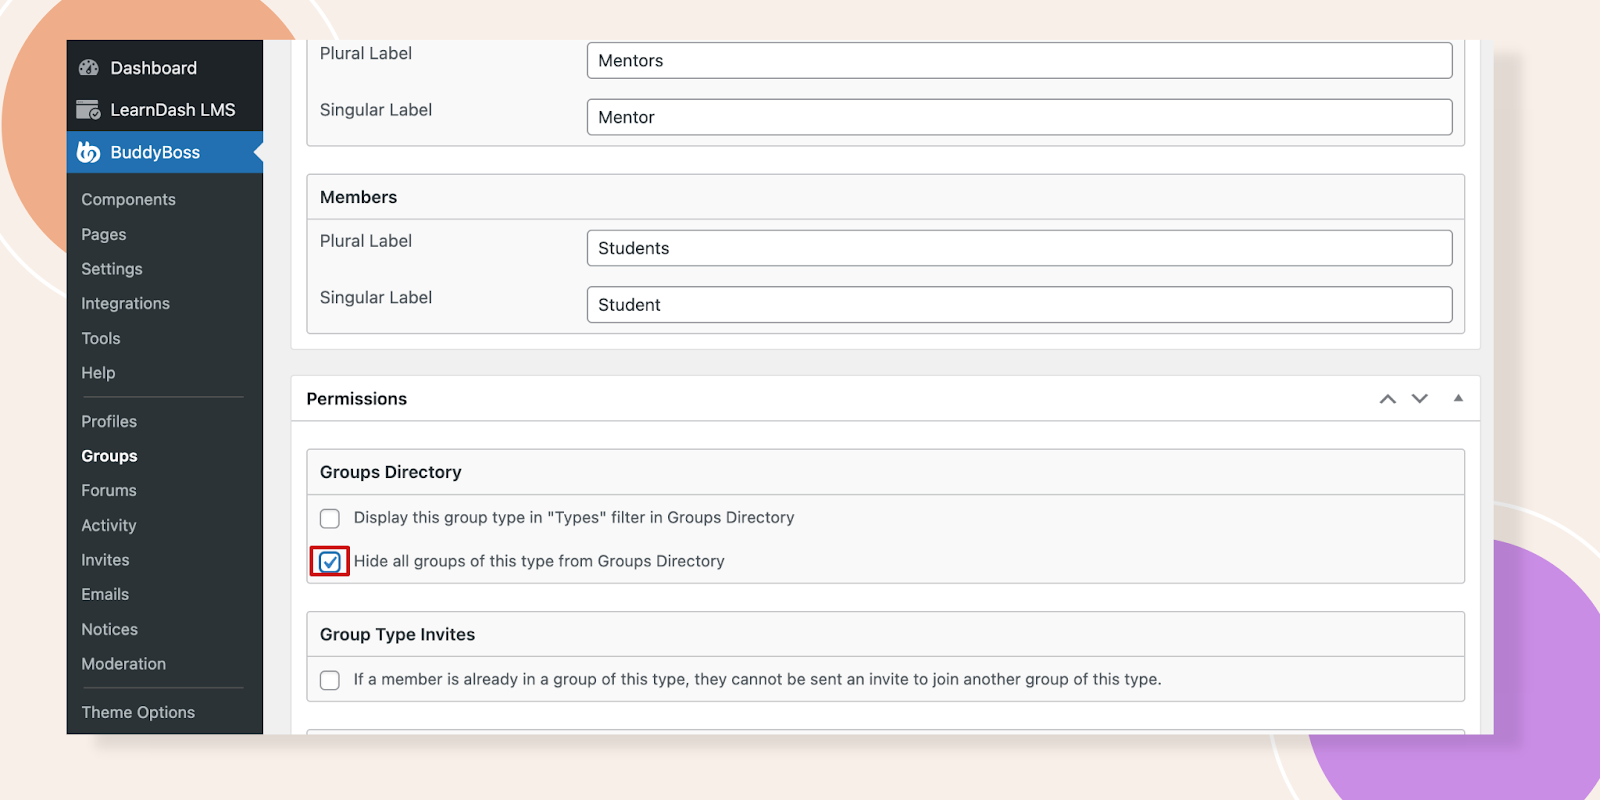
Go to the Permissions section and tick the box to display this group in the Types filter in the Groups Directory.
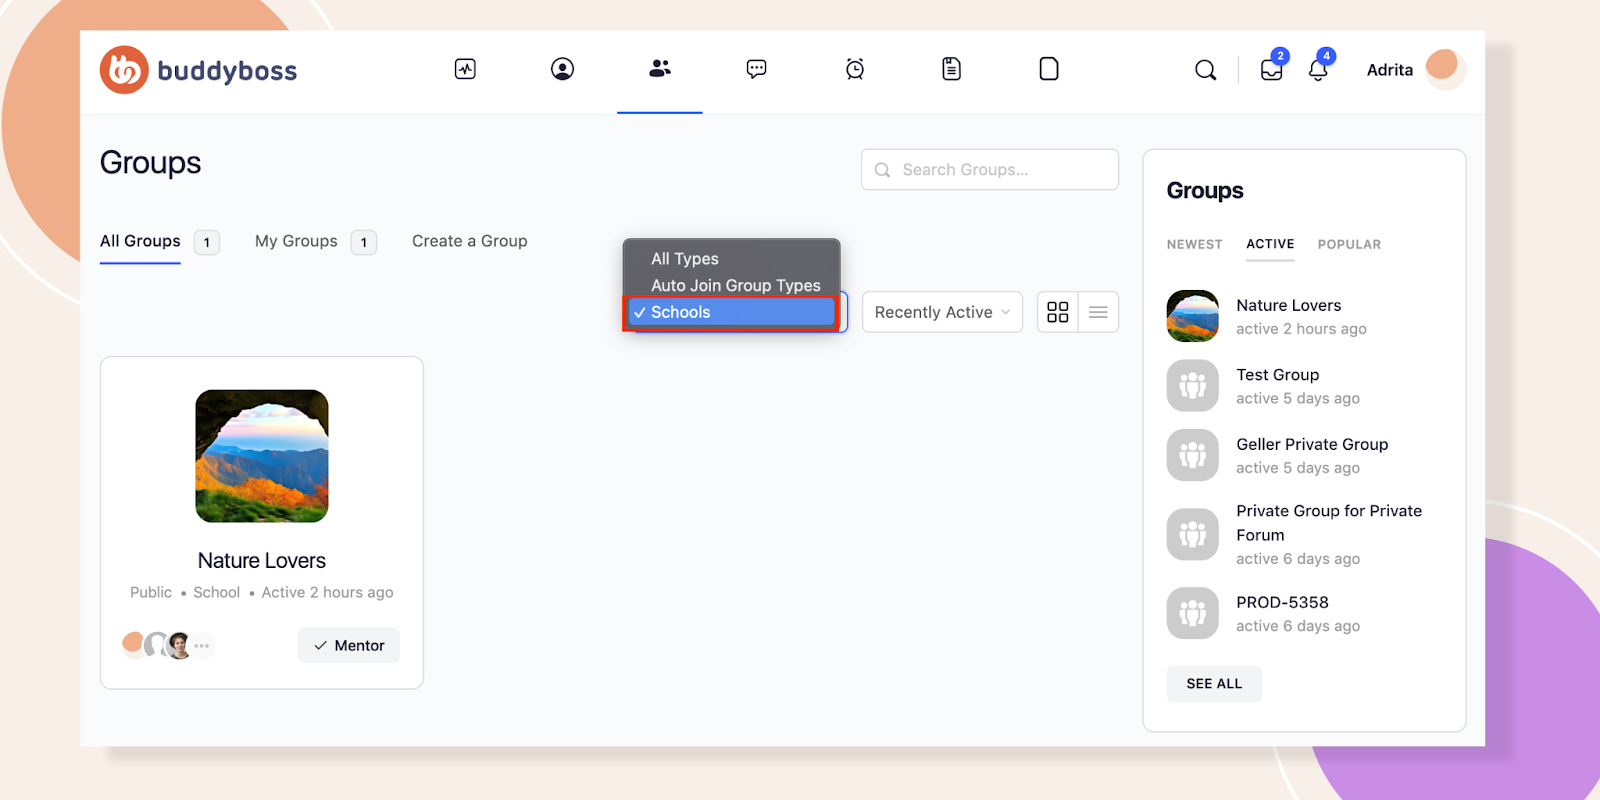
Move to the Group Directory and select Schools type. It will just filter the groups that are under School type.
If you check the box to hide all groups of this type from Groups Directory then you won’t see that group.
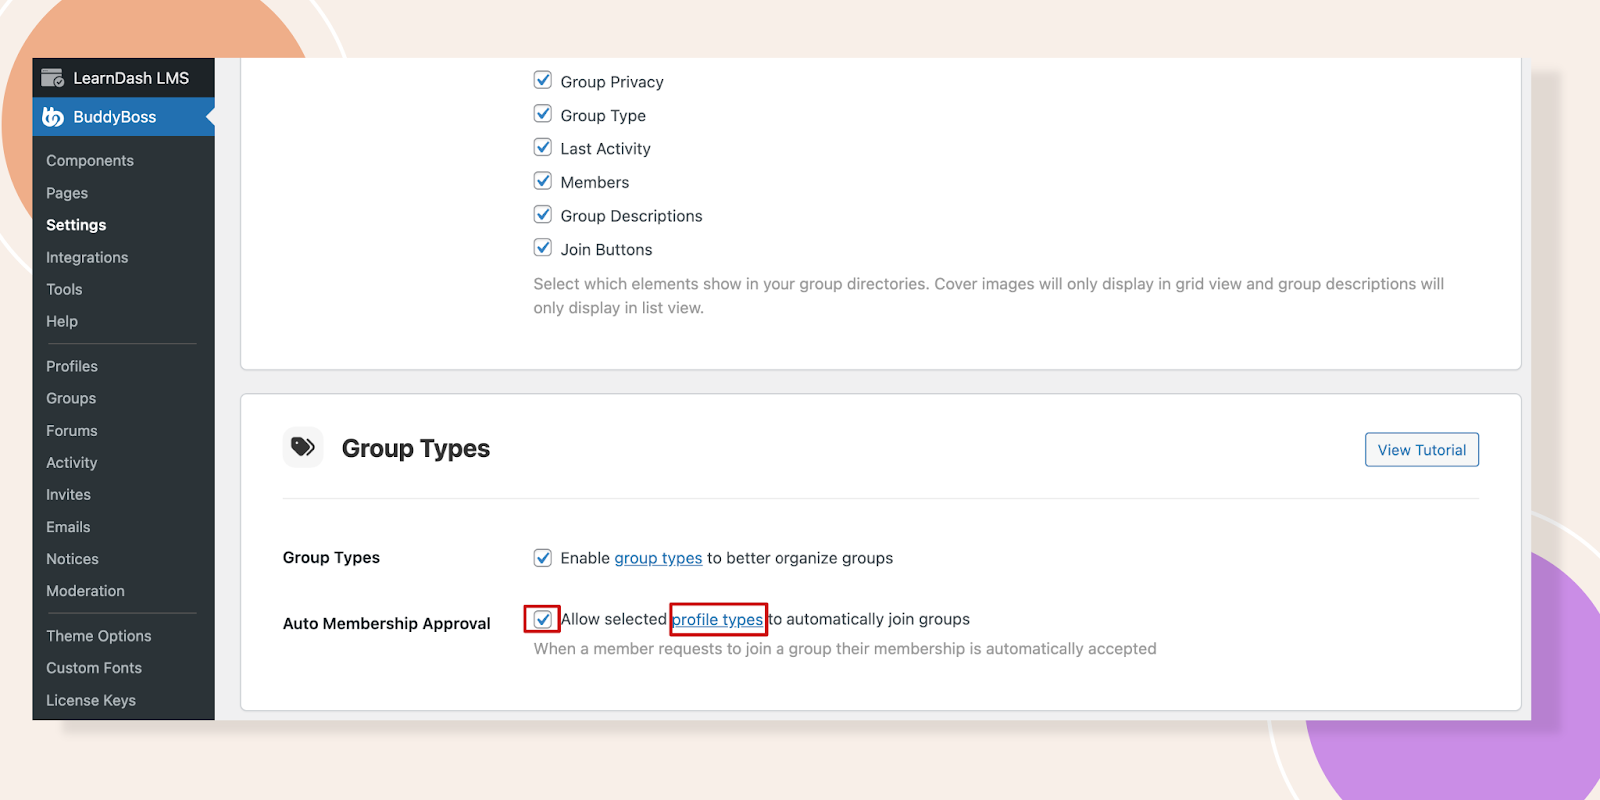
Enable Auto Membership Approval
Get back to our Group Types section and enable the Auto Membership Approval option. Before clicking the hyperlinked Profile Types don’t forget to click the Save Settings button.
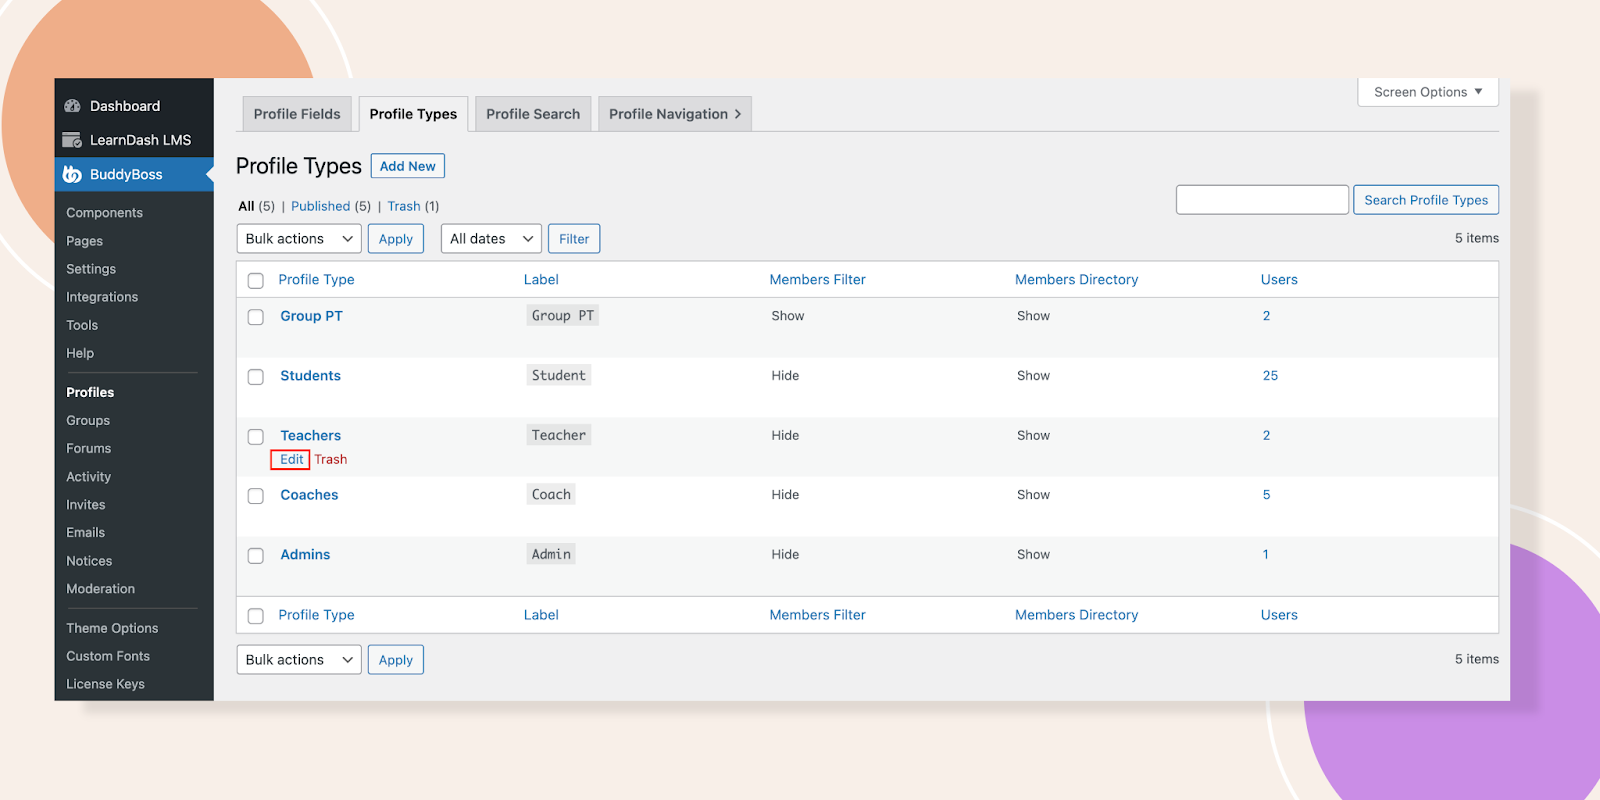
Here, we will Edit the Teacher profile type.
We are in the Teachers Profile Type, now scroll down.
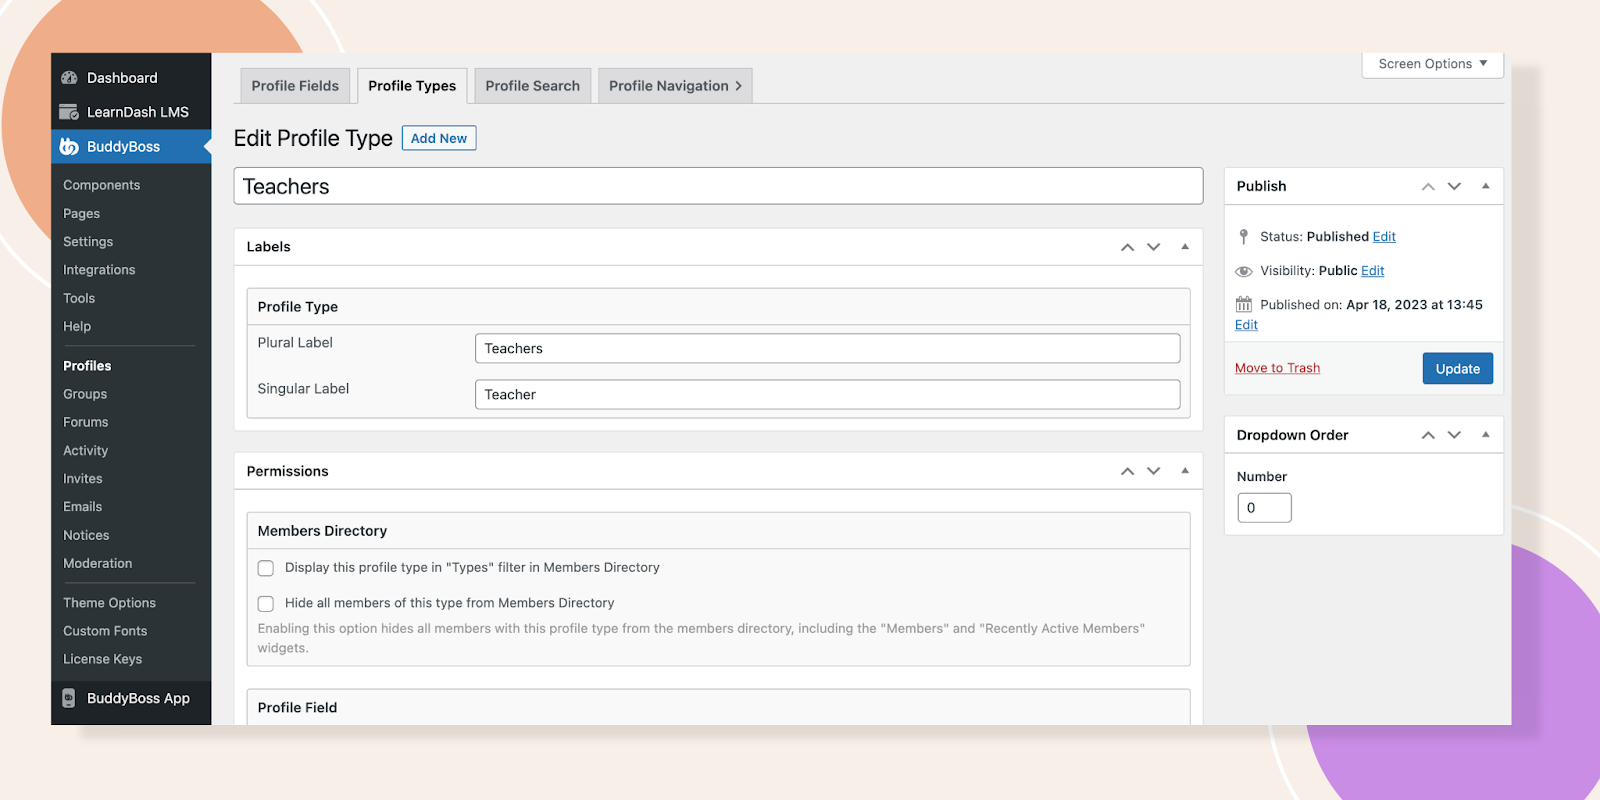
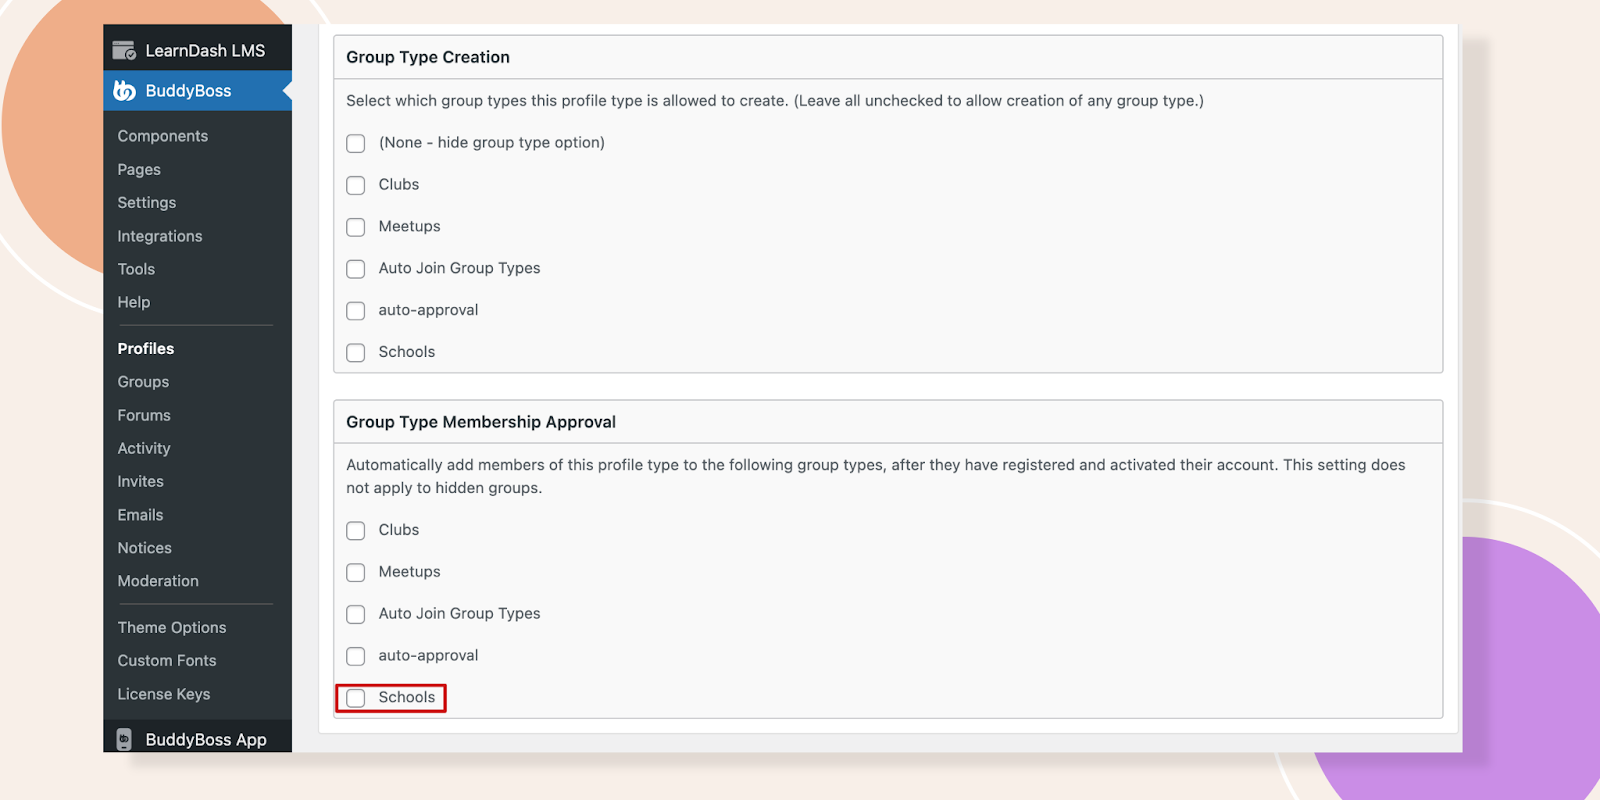
Stop at the Group Type Membership Approval. Select the Schools type and hit the Update button of this page.
Create a Particular Group Page
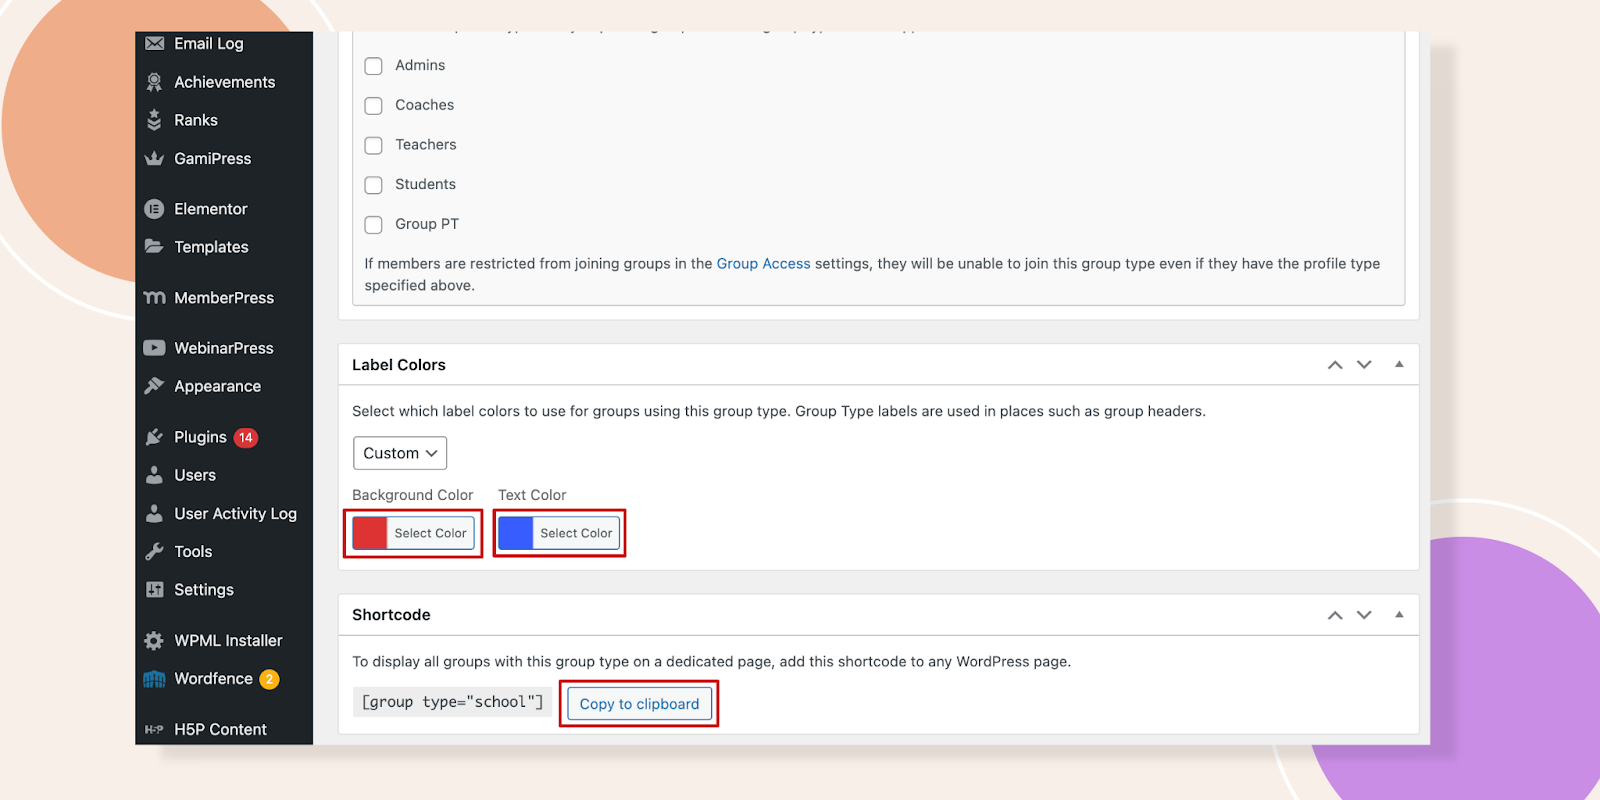
Get back to the School Group Type and scroll down below. There is an option available for changing the Label Colors as well. At the bottom, you will find the Shortcode to display this particular profile on a dedicated page. Let’s press the Copy of Clipboard.
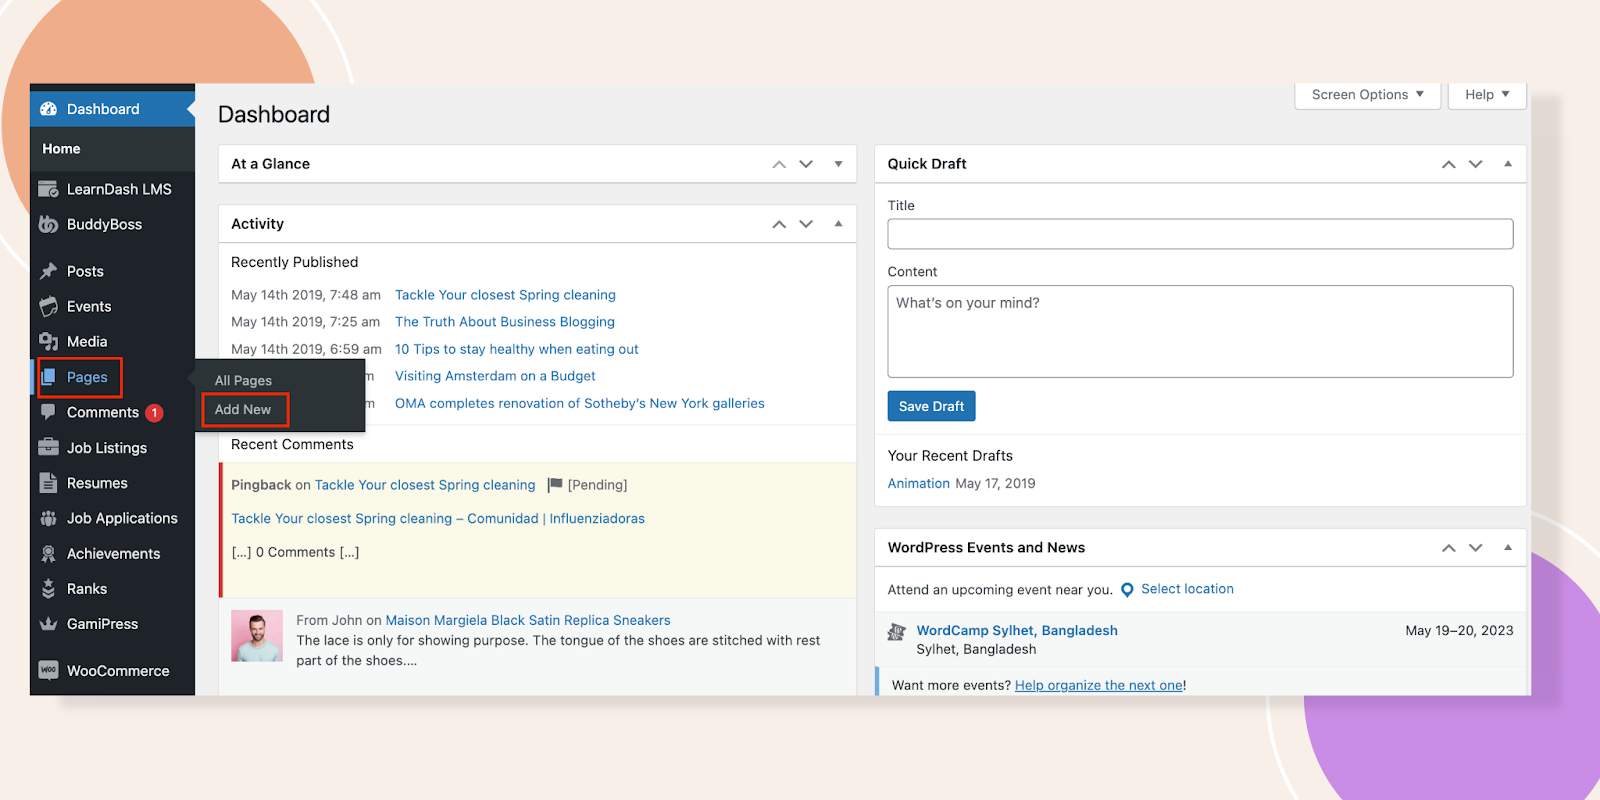
From the left sidebar, Pages – Add New.
A new page will open, and from the blocks find the Shortcode block.
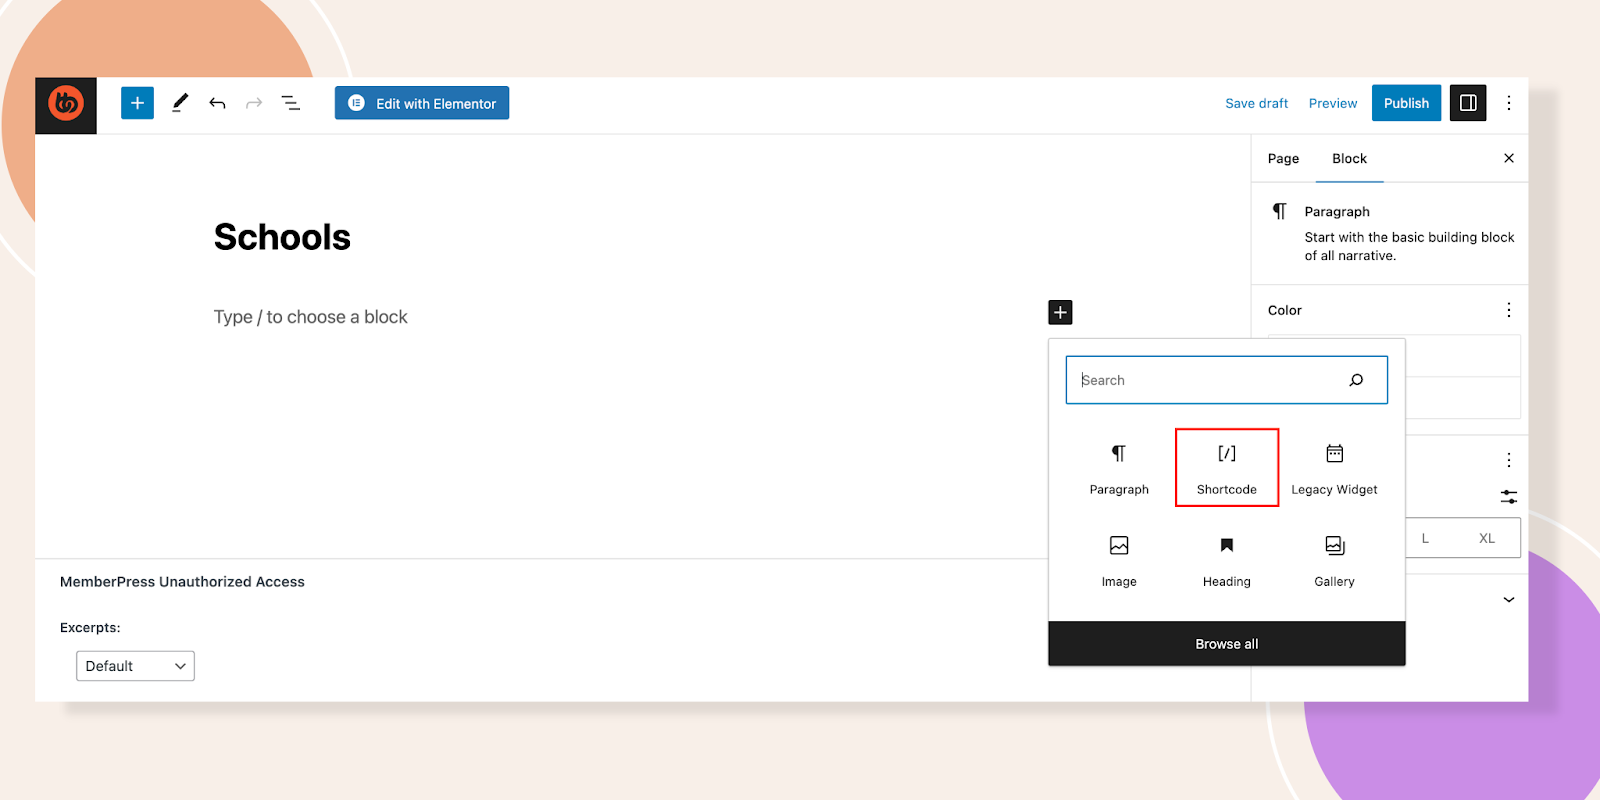
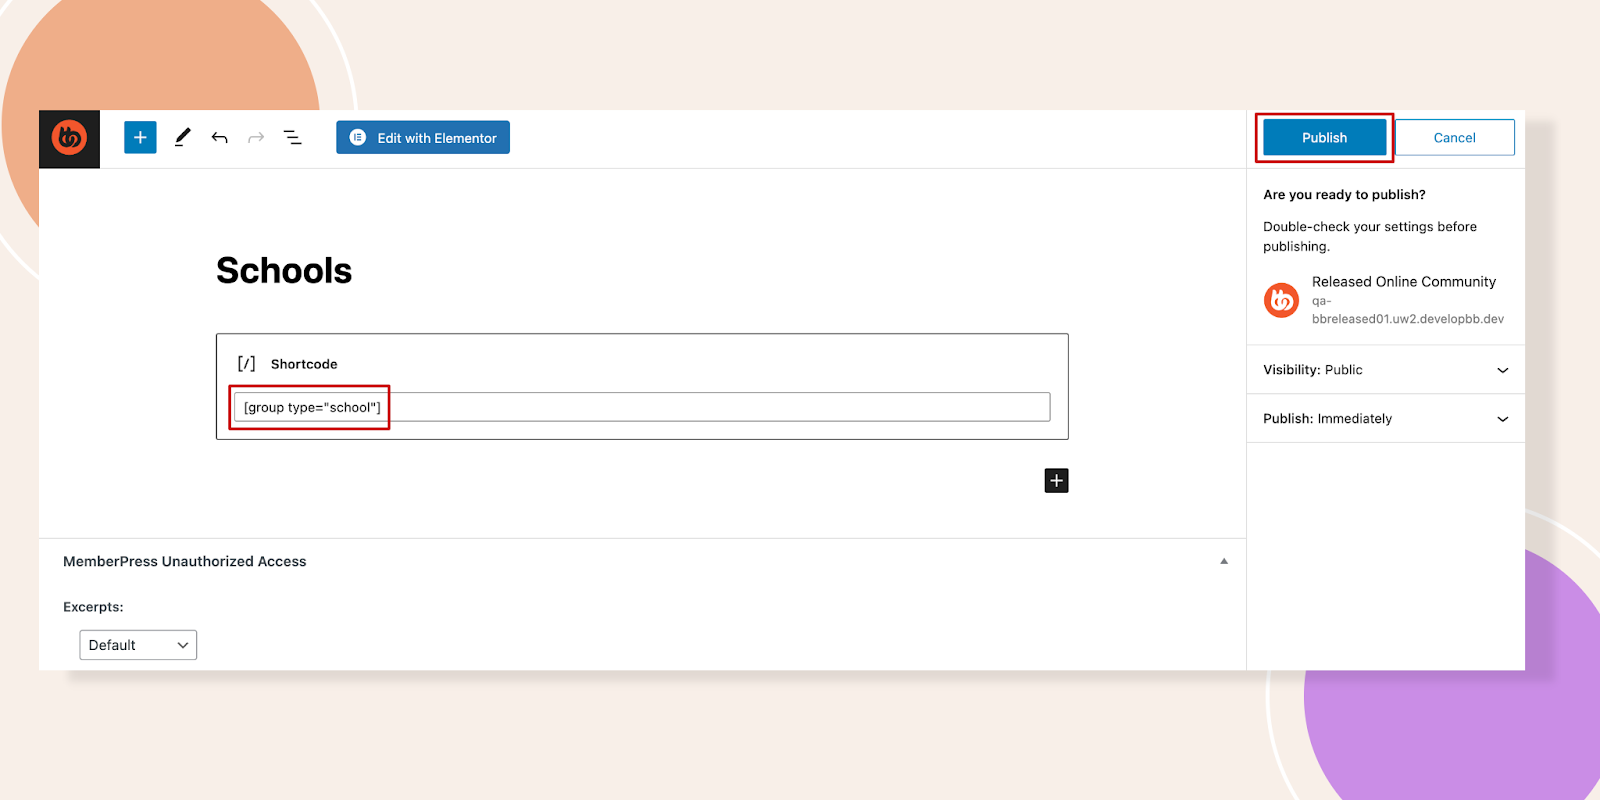
Now, paste the code you copied earlier in the School’s Group. Finally, hit the Publish button.
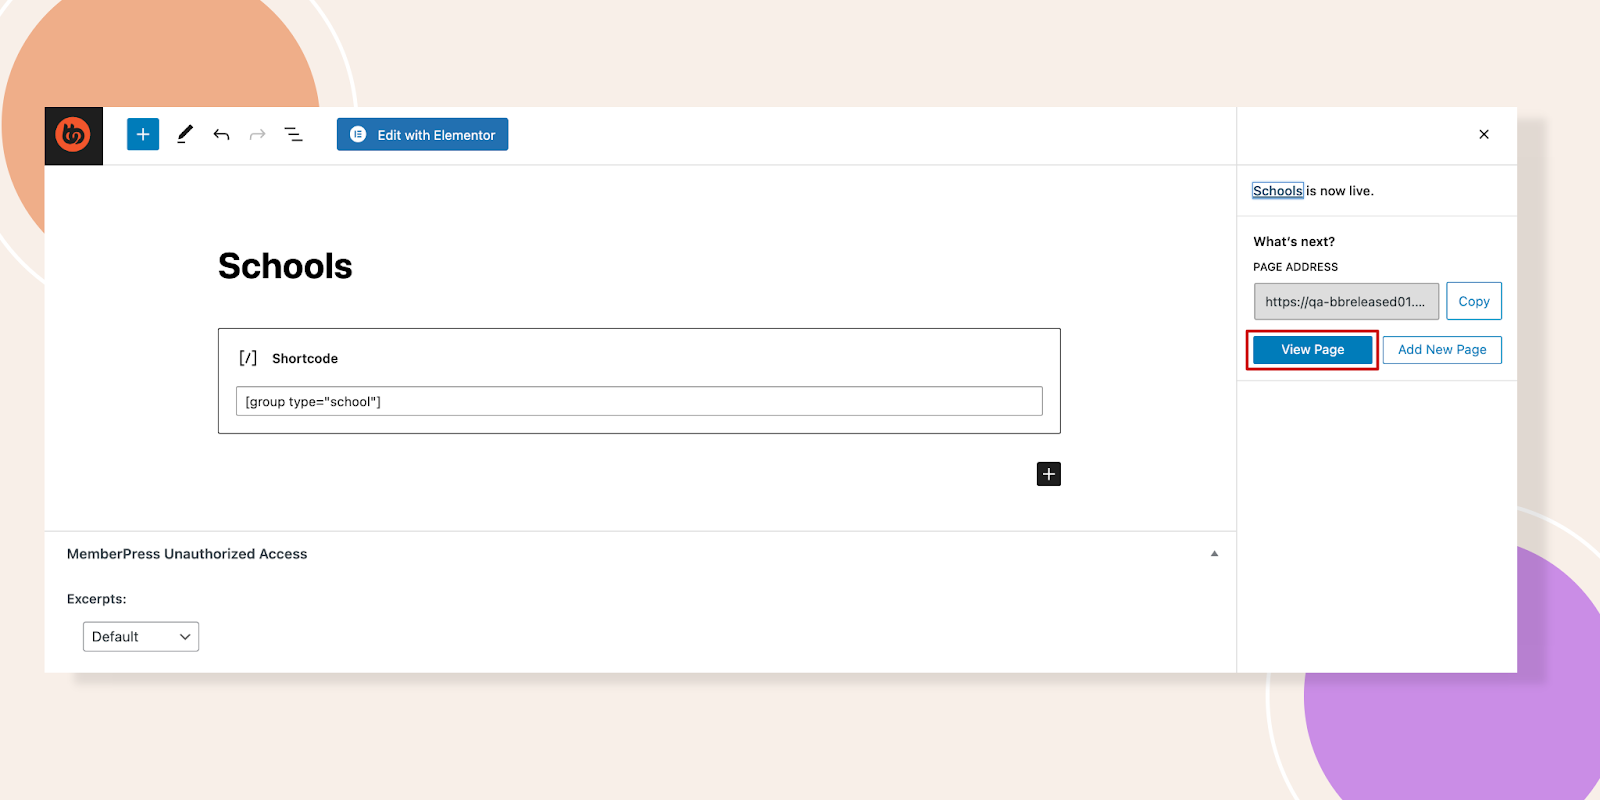
If you click on the View Page button you will see what the page will look like.
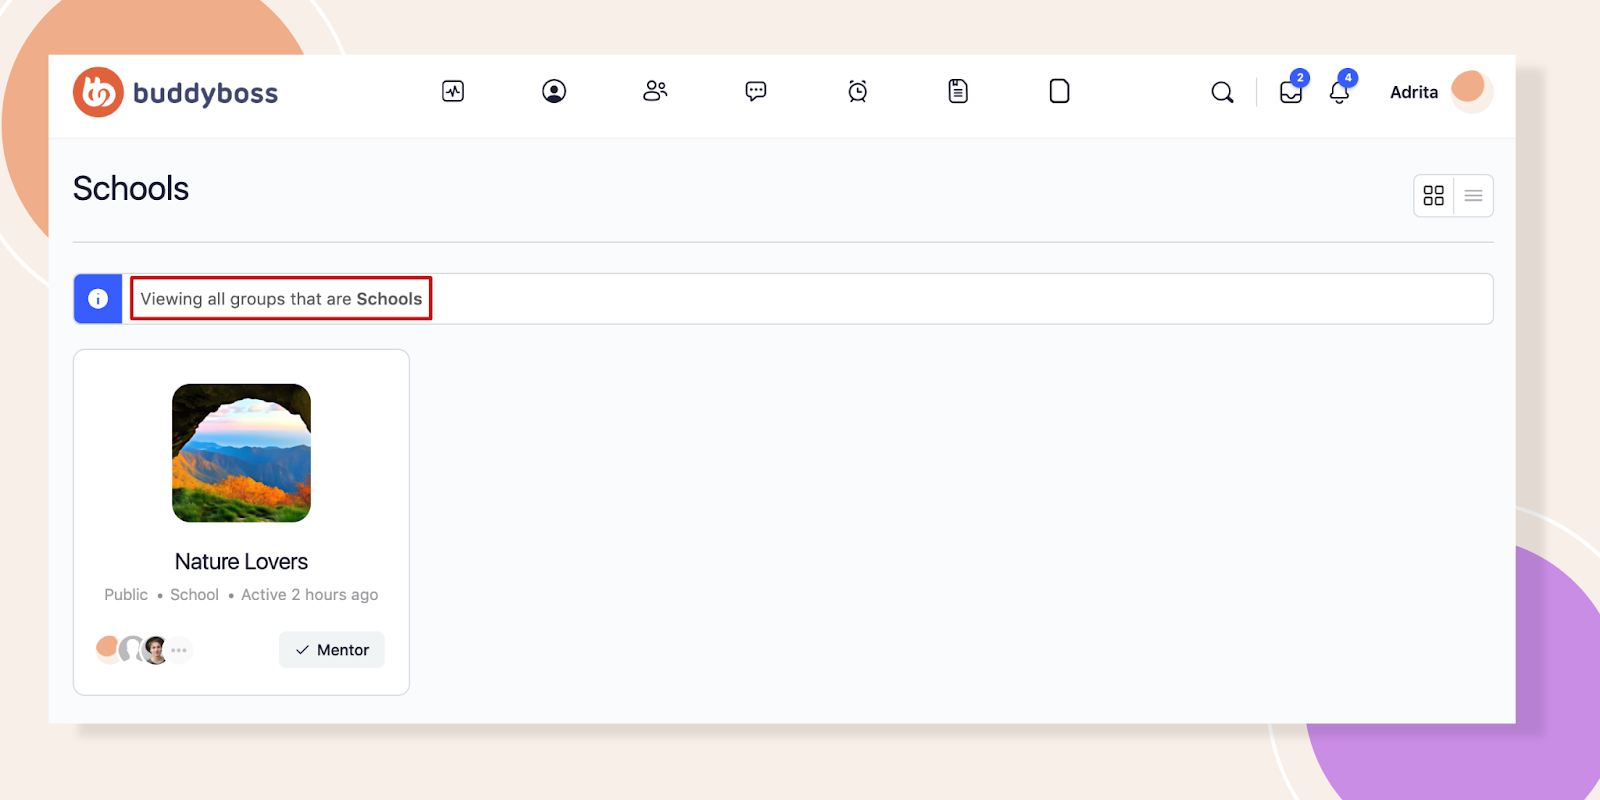
Here is the page dedicatedly created for Schools only.
Hope this feature will assist you in creating Group Types.