This guide explains how to schedule posts in your BuddyBoss community, allowing you to plan your content calendar and maximize reach and engagement.
Please note that scheduling posts is currently limited to site administrators, group owners, and group moderators.
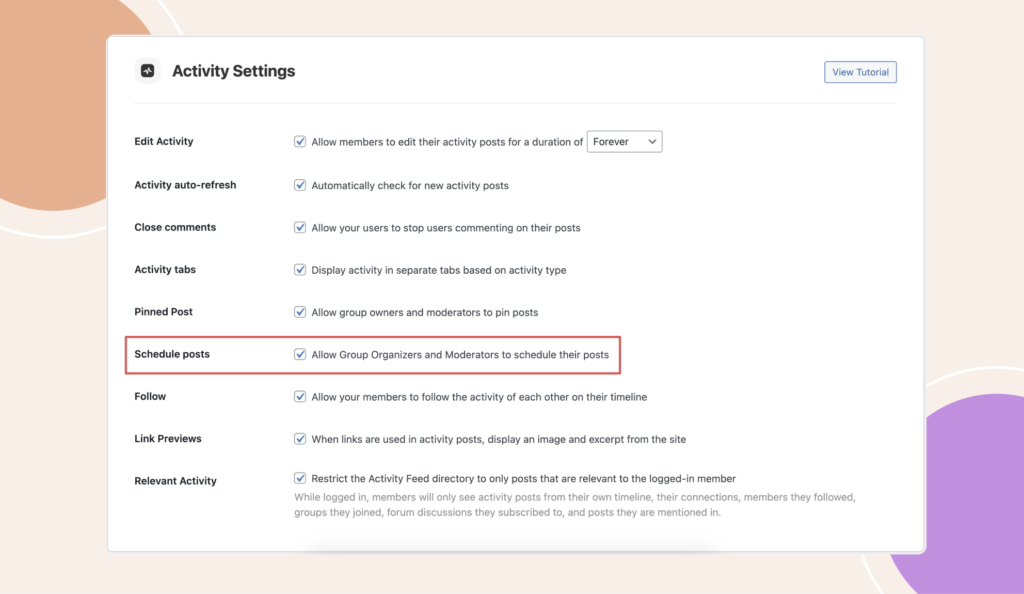
Enabling Schedule Posts:
- Navigate to your WordPress backend.
- Go to BuddyBoss > Settings > Activity.
- Under Activity Settings, locate the new option for Schedule Posts.
- Enable the checkbox next to Schedule Posts.
- Click Save Settings to confirm the changes.

Creating a Scheduled Post:
- Create a new post.
- Locate the clock icon next to the Post button.
- Click the clock icon to open the scheduling dropdown menu.
- Choose Schedule Post from the menu.
- In the pop-up window, select the desired date and time for your scheduled post.
- Click Next to confirm the date and time.
- Notice that the Post button has changed to Schedule.
- Click Schedule to publish your post at the designated time.
Viewing and Managing Scheduled Posts:
- From the scheduling dropdown menu (clock icon), select View Scheduled Posts. This page will display a list of all your currently scheduled posts.
- Each post displays its scheduled publication date and time.
- To edit a scheduled post, click the pencil icon next to the post.
- You can modify the content and/or reschedule the post using the same steps as outlined above.
- Click Clear Schedule to remove the scheduled date and time. This will publish your post immediately.
- To delete a scheduled post, click the delete icon next to the post.
Benefits of Scheduling Posts:
- Plan a content calendar for the entire week, month, or even longer.
- Save time by scheduling posts beforehand.
- Improve efficiency by managing your content calendar more effectively.
- Maximize the reach and impact of your content by publishing at optimal times.
