
Why Use Web Push Notifications?
When your community members receive push notifications for events they are already aware of it can become annoying if you are the popular person. Thinking of this situation we came up with a new setting in Web Push Notifications that allows you to skip notifications if the user is already active on your site. This change is applicable to BuddyBoss Platform, Platform Pro, and App Plugin together.
Skip Notifications Setting
Go to BuddyBoss – Settings – Notifications.
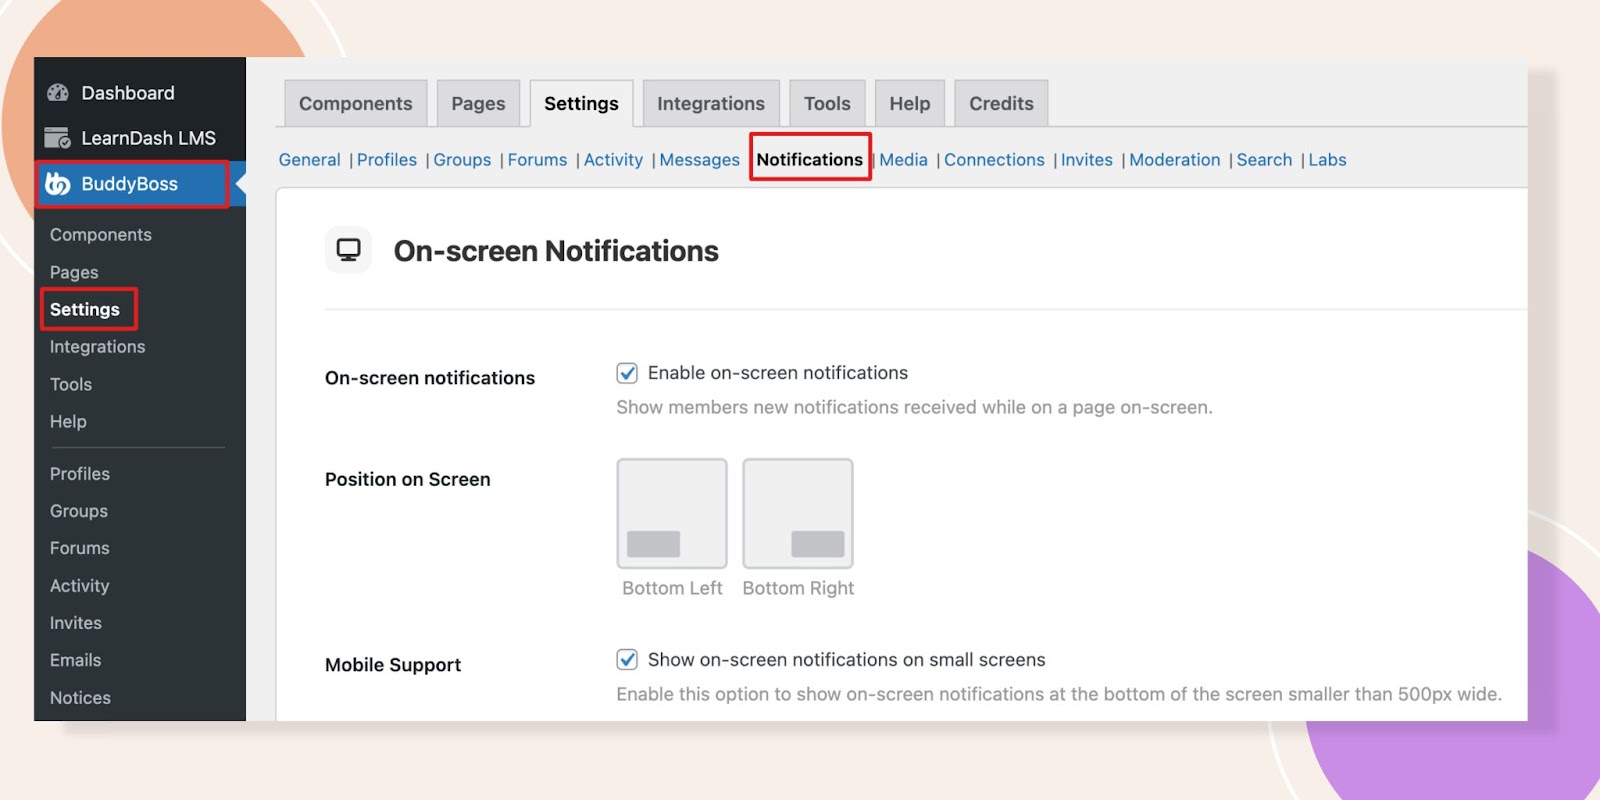
Now scroll down to find the Web Push Notification section. There will be a new setting- Skip Active Members. If this option is checked a member won’t receive web push notifications when actively using your site on any device. Once the member is inactive, they will begin receiving push notifications after a short delay.
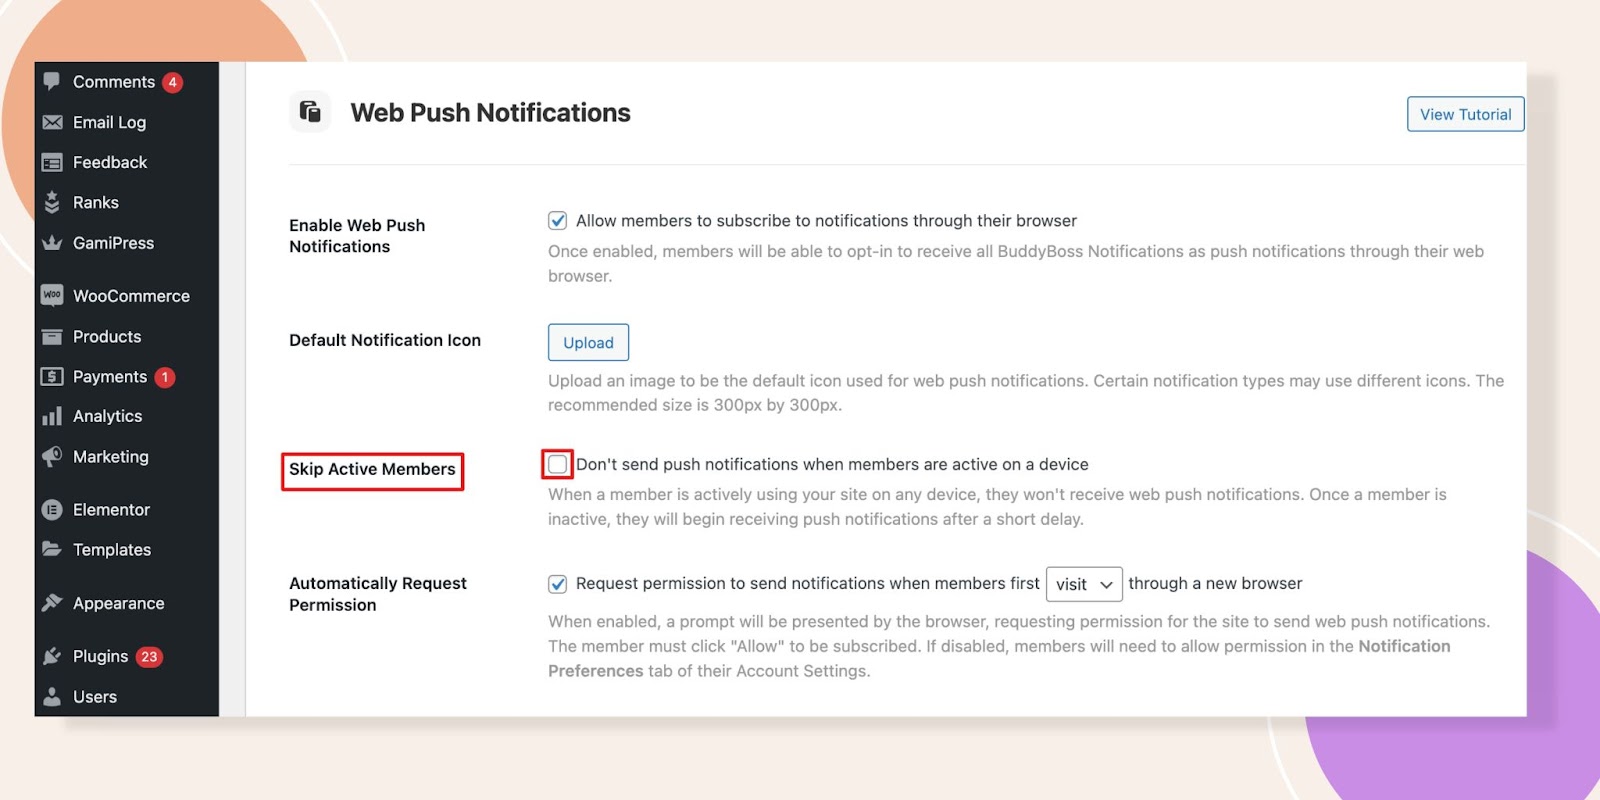
With this new setting, you will have another surprise about the time of push notifications. Previously inactive members get notifications for up to 8 minutes. But now the maximum time limit is 80 seconds.
Remember, if a user is viewing the site in an open browser tab or app will be marked as Inactive after 180 seconds of no activity (mouse movement, click, action, etc)
Configure App Settings
Navigate to BuddyBoss App – Settings – Push Notifications. You will find the new notification setting, Skip Active Members.
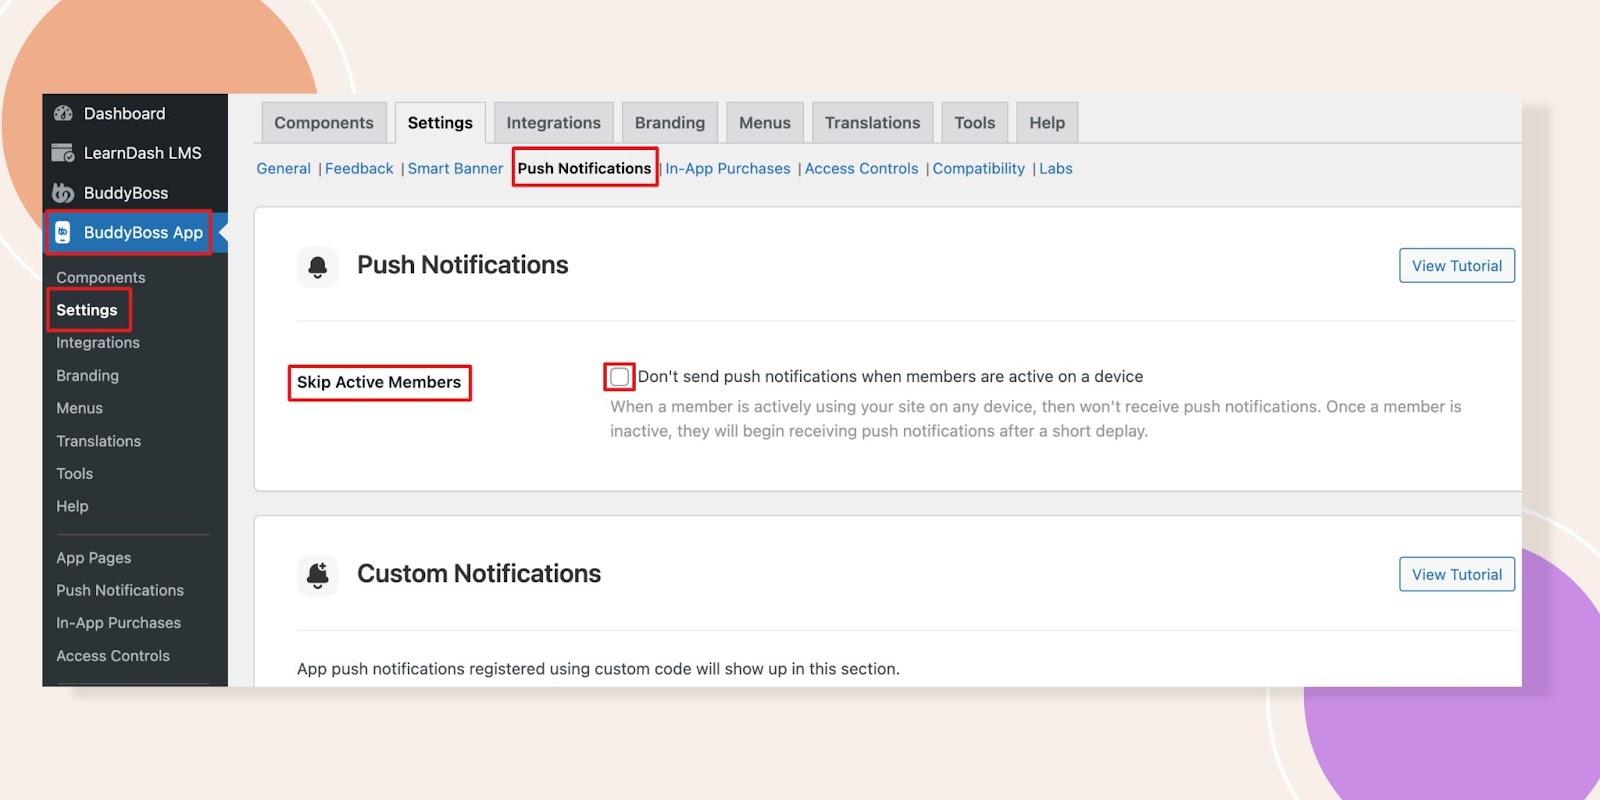
This option will help you to control the push notifications especially on BuddyBoss App.