
In this tutorial, you will learn how to manage the Notification Preferences in the BuddyBoss Platform. Your members can easily manage their notifications for Email, Web, and App all from a single page. Site admins can choose which notification types should be available to their members, set the default options for each notification, and manage the email template for each notification.
Configure Notification Types
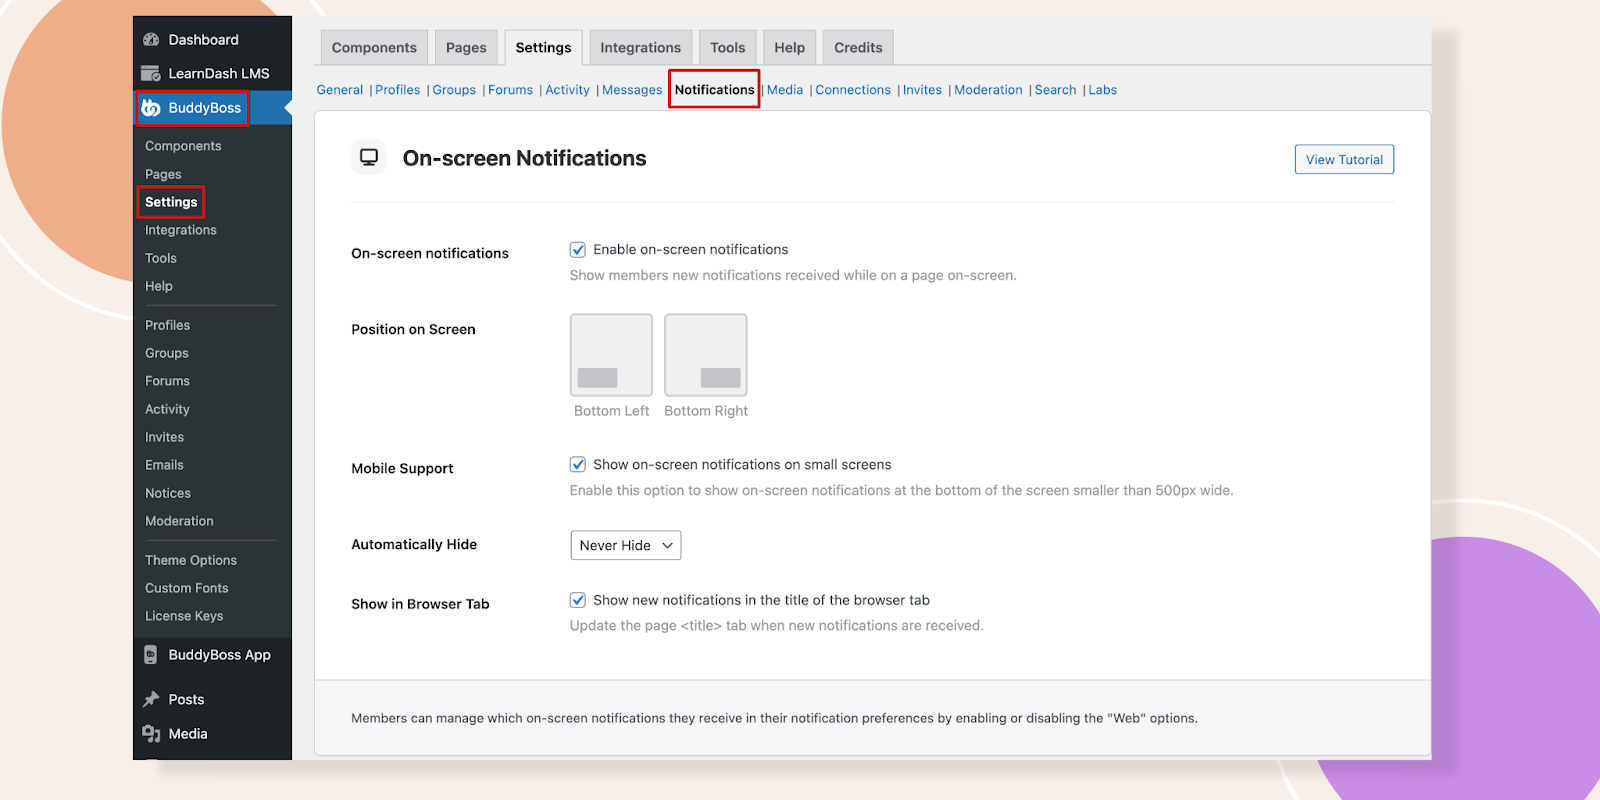
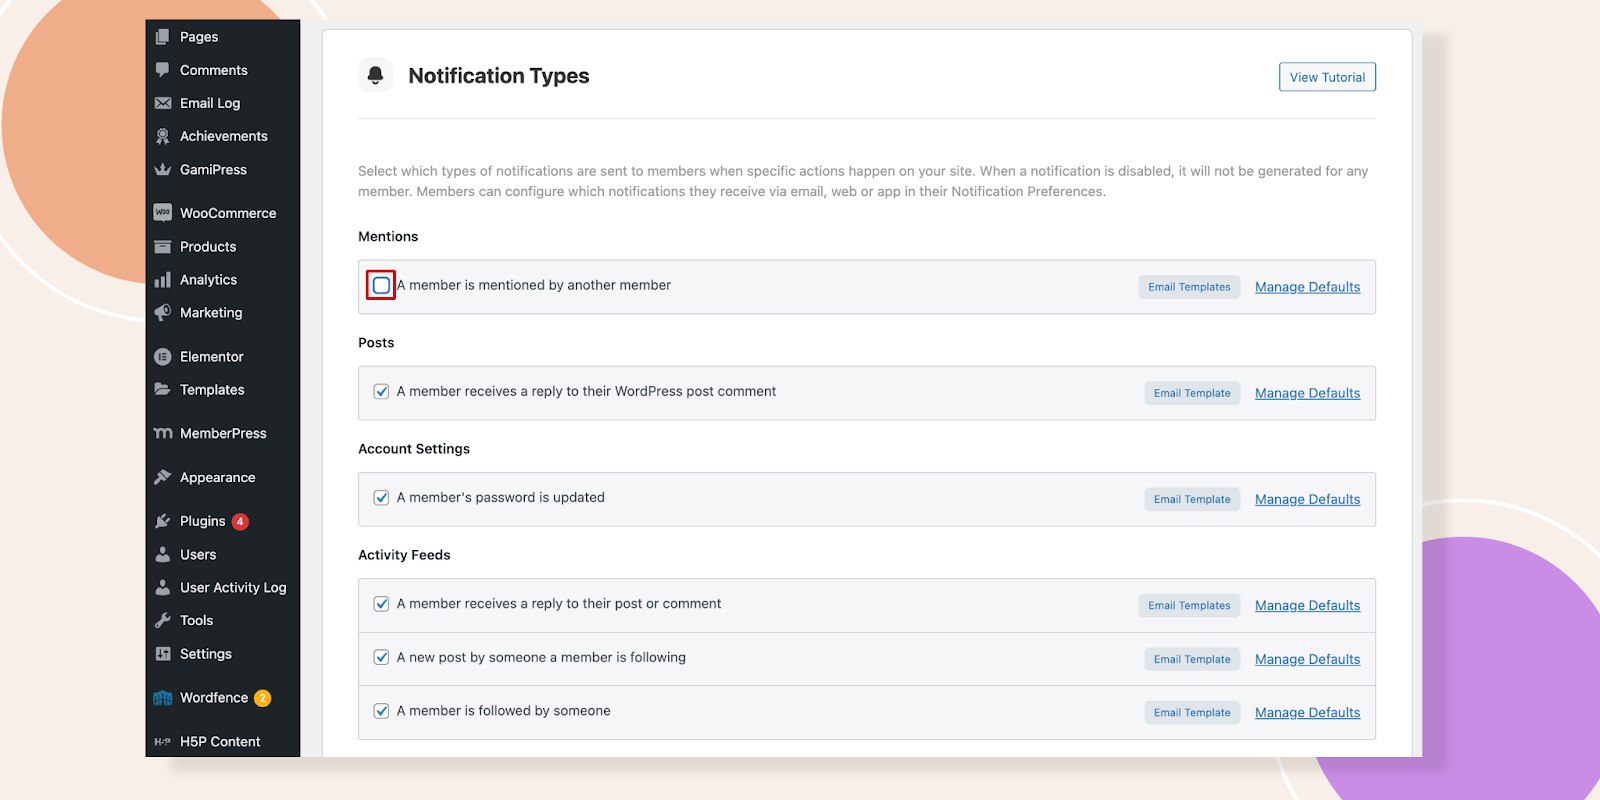
Navigate to BuddyBoss – Settings – Notifications.
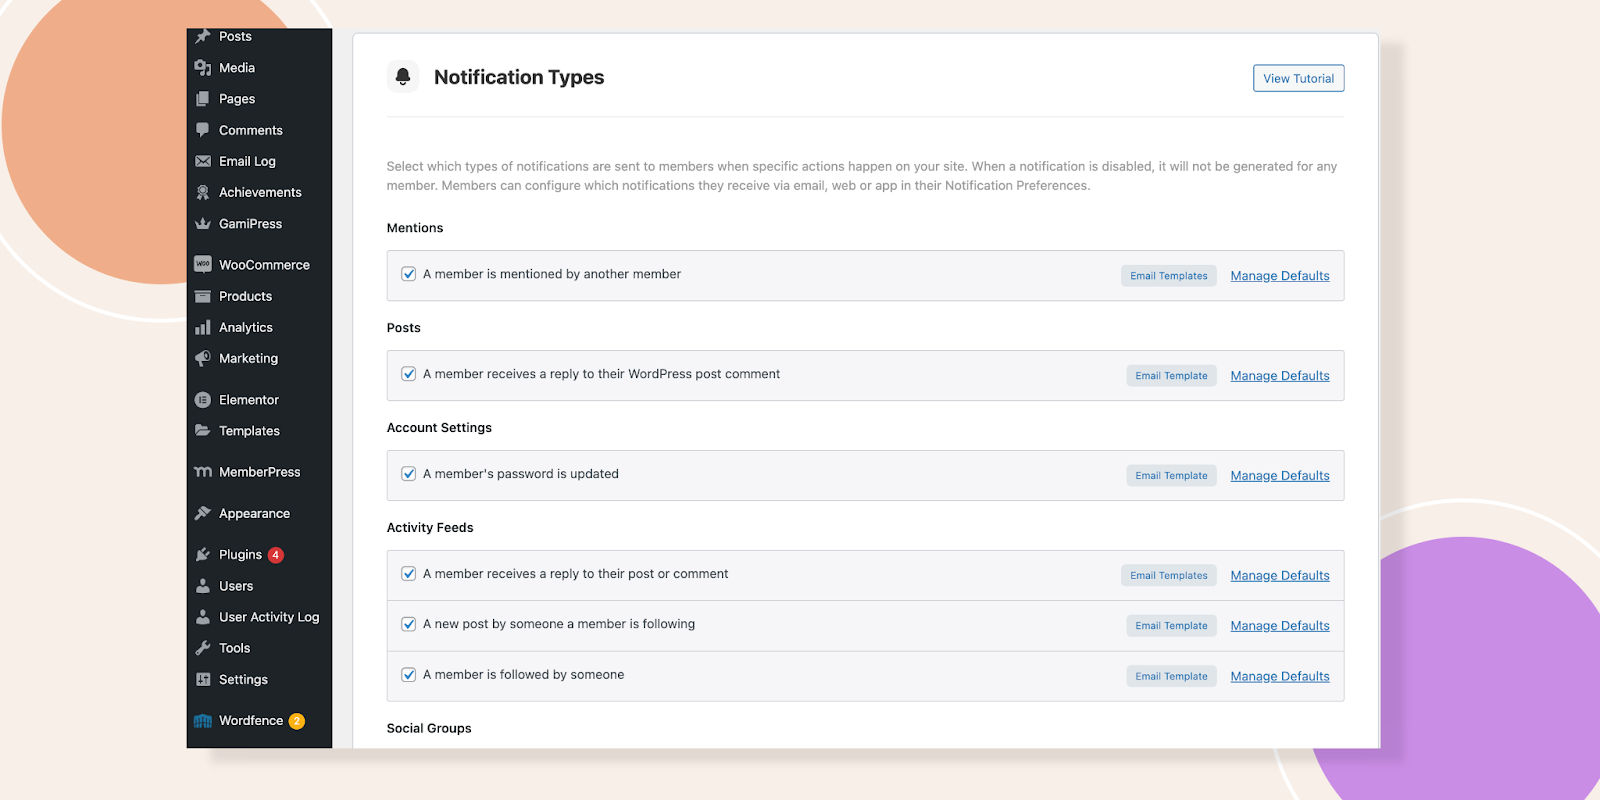
Scroll down and you will see the Notification Types section.
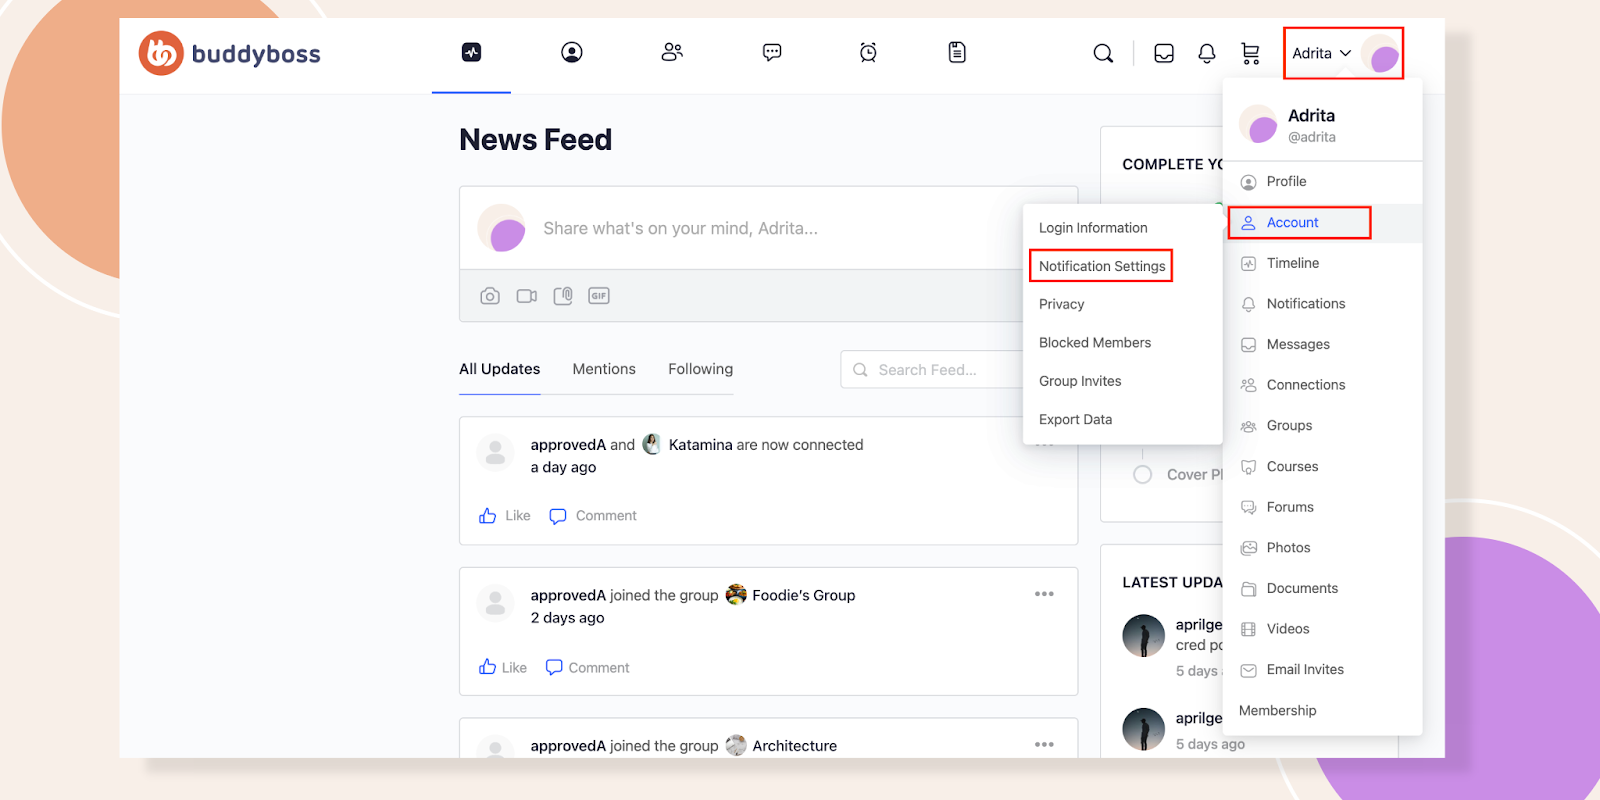
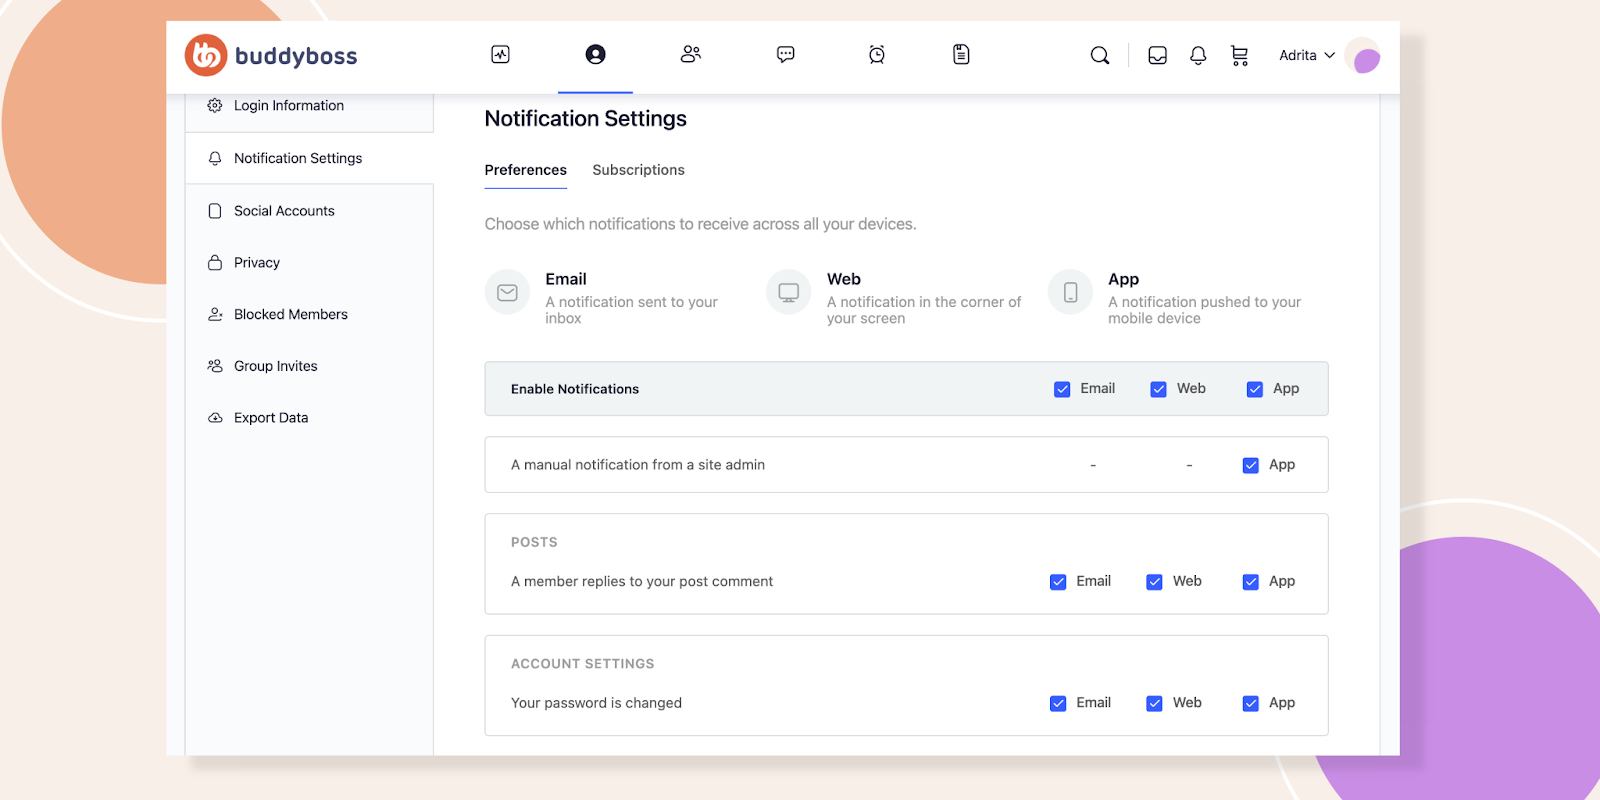
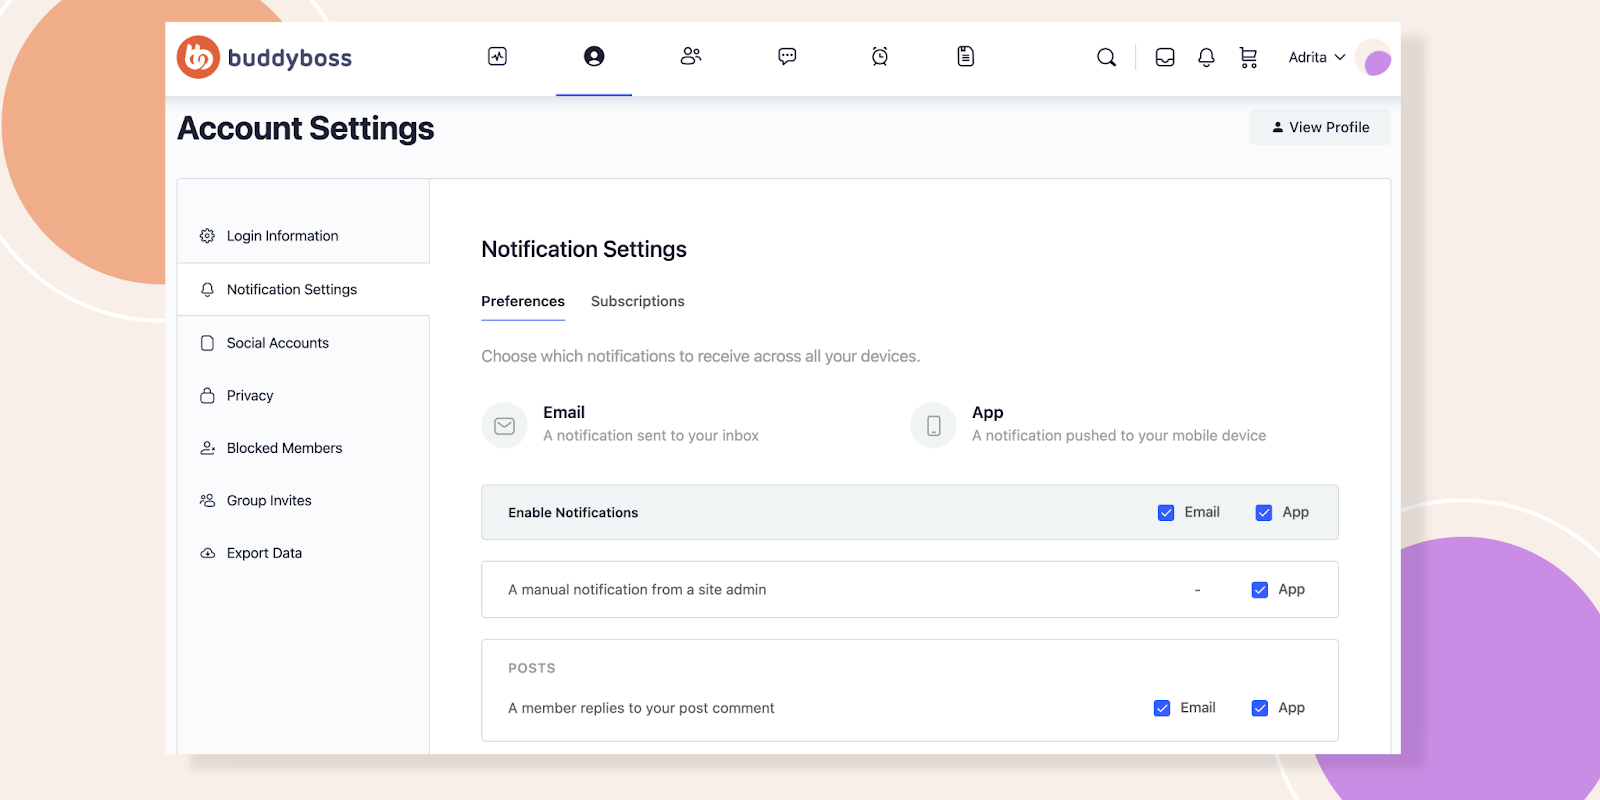
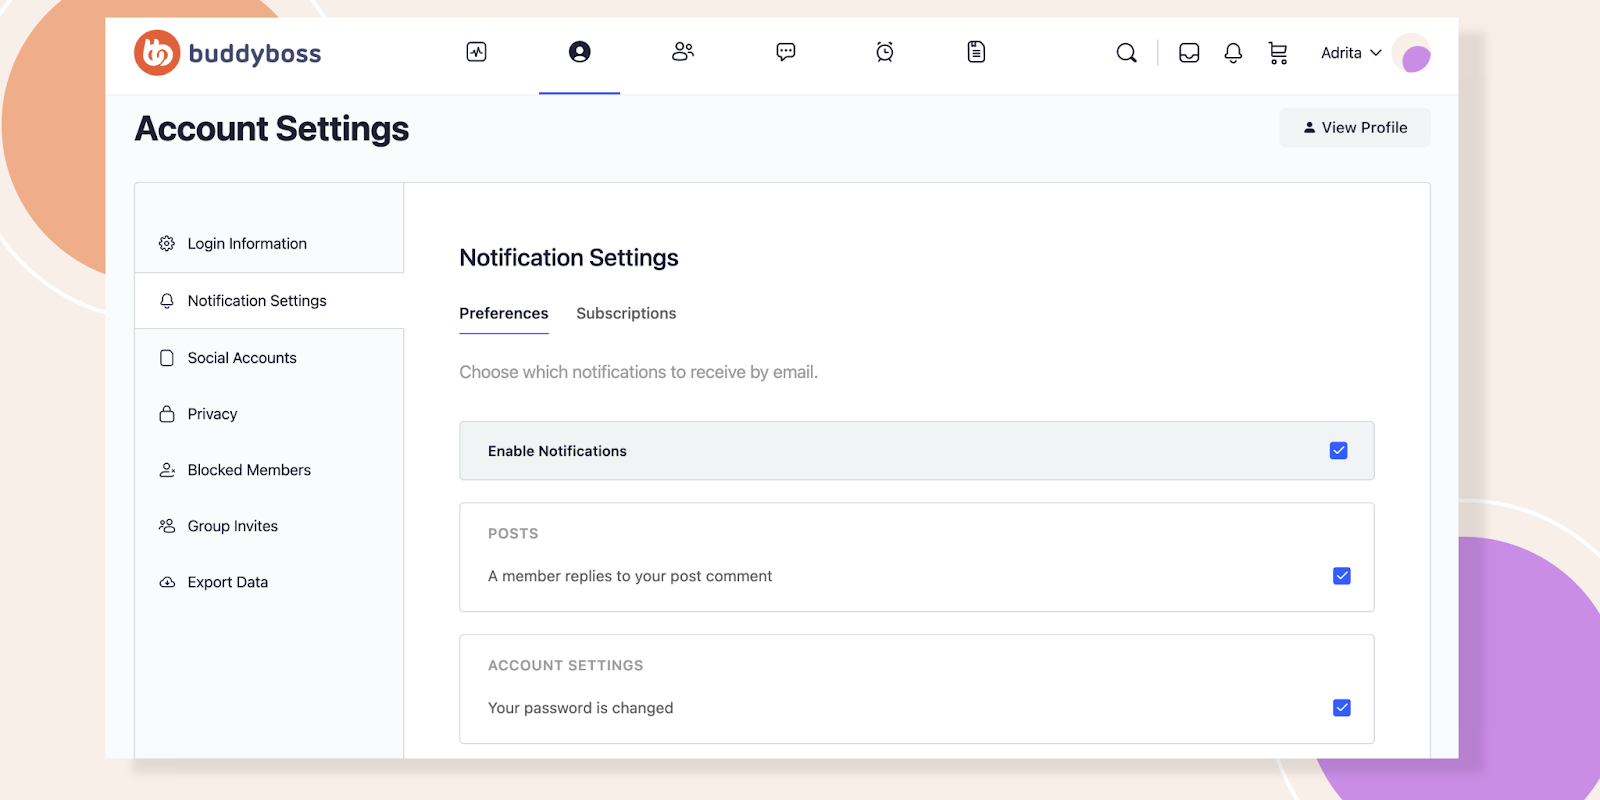
To watch out and control your Notifications click on your name and go to Account – Notification Settings.
In Notification Settings, there are three types of Notifications you can control- Email, Web, and App.
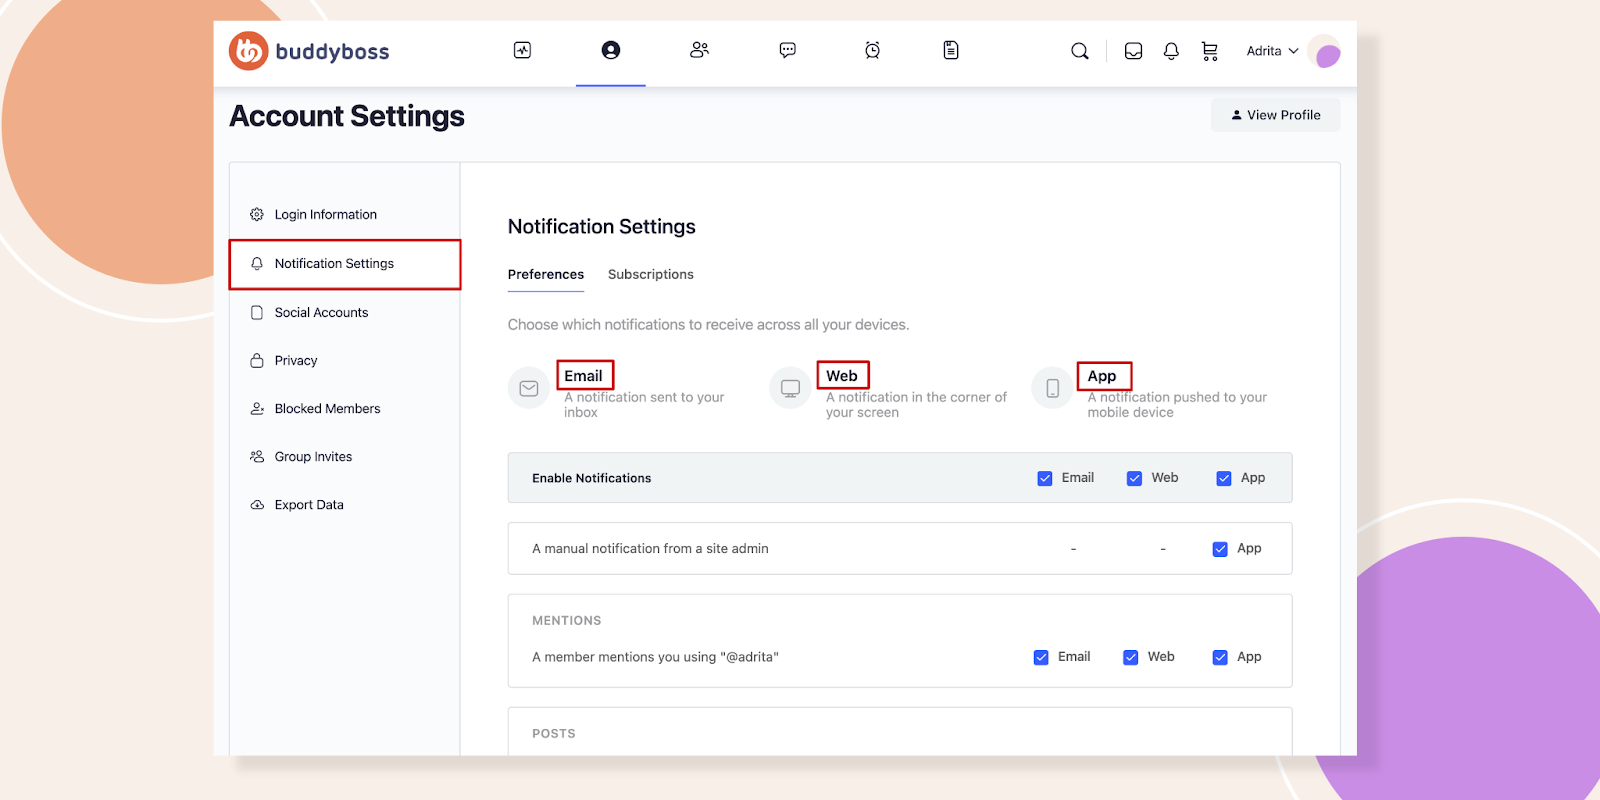
There is a notification where a member will be notified after getting any mention.

In the backend uncheck that notification and click the Save Settings button below.
Now, if you refresh your frontend that notification setting will disappear.
At the right side of every notification, you can see the Email Template button.
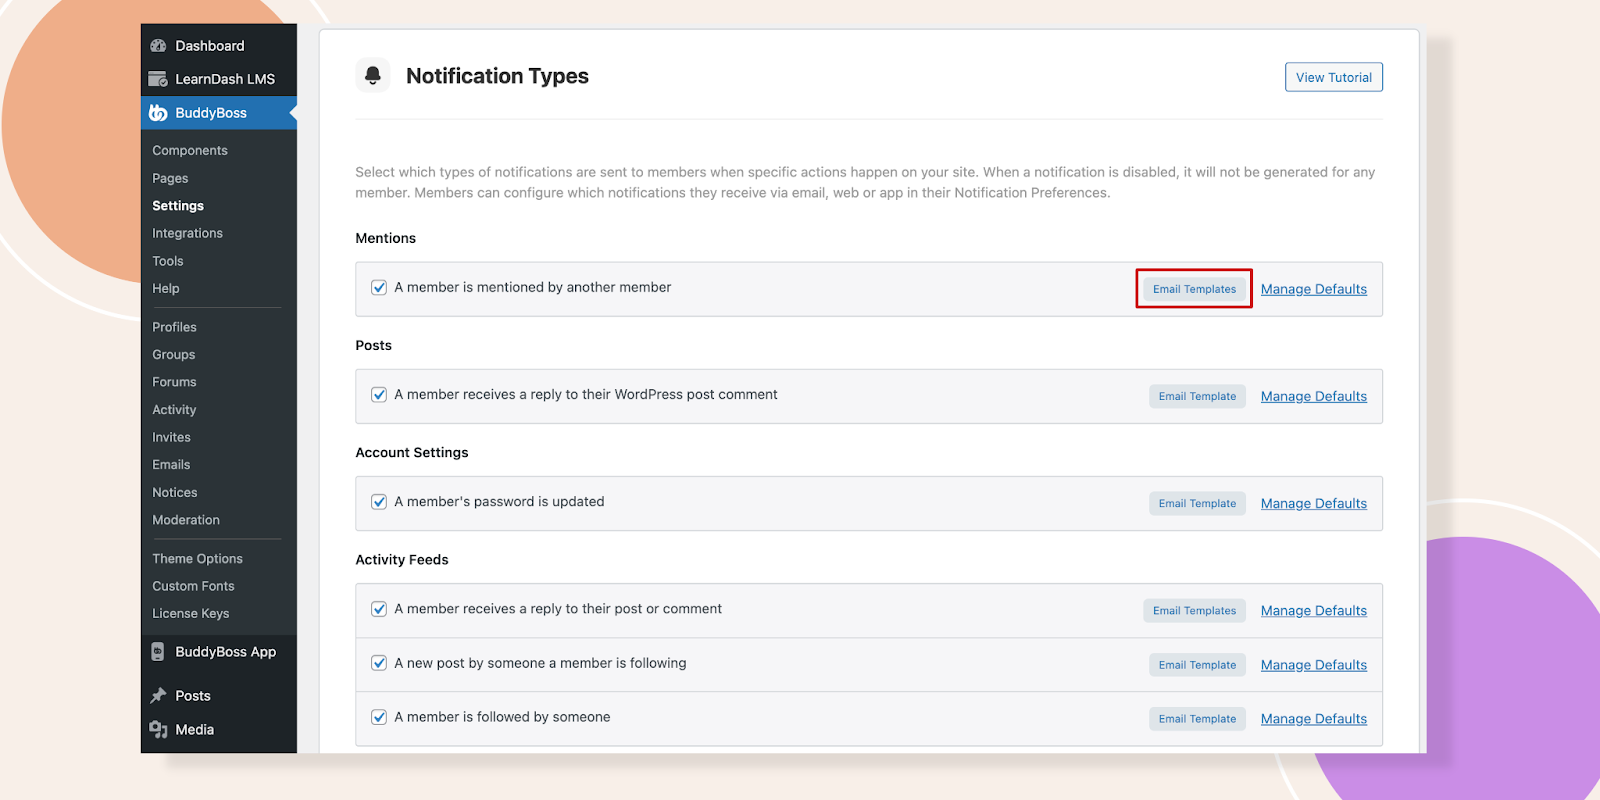
If you click on it, this will redirect you to the Email Templates page where you can edit the email.
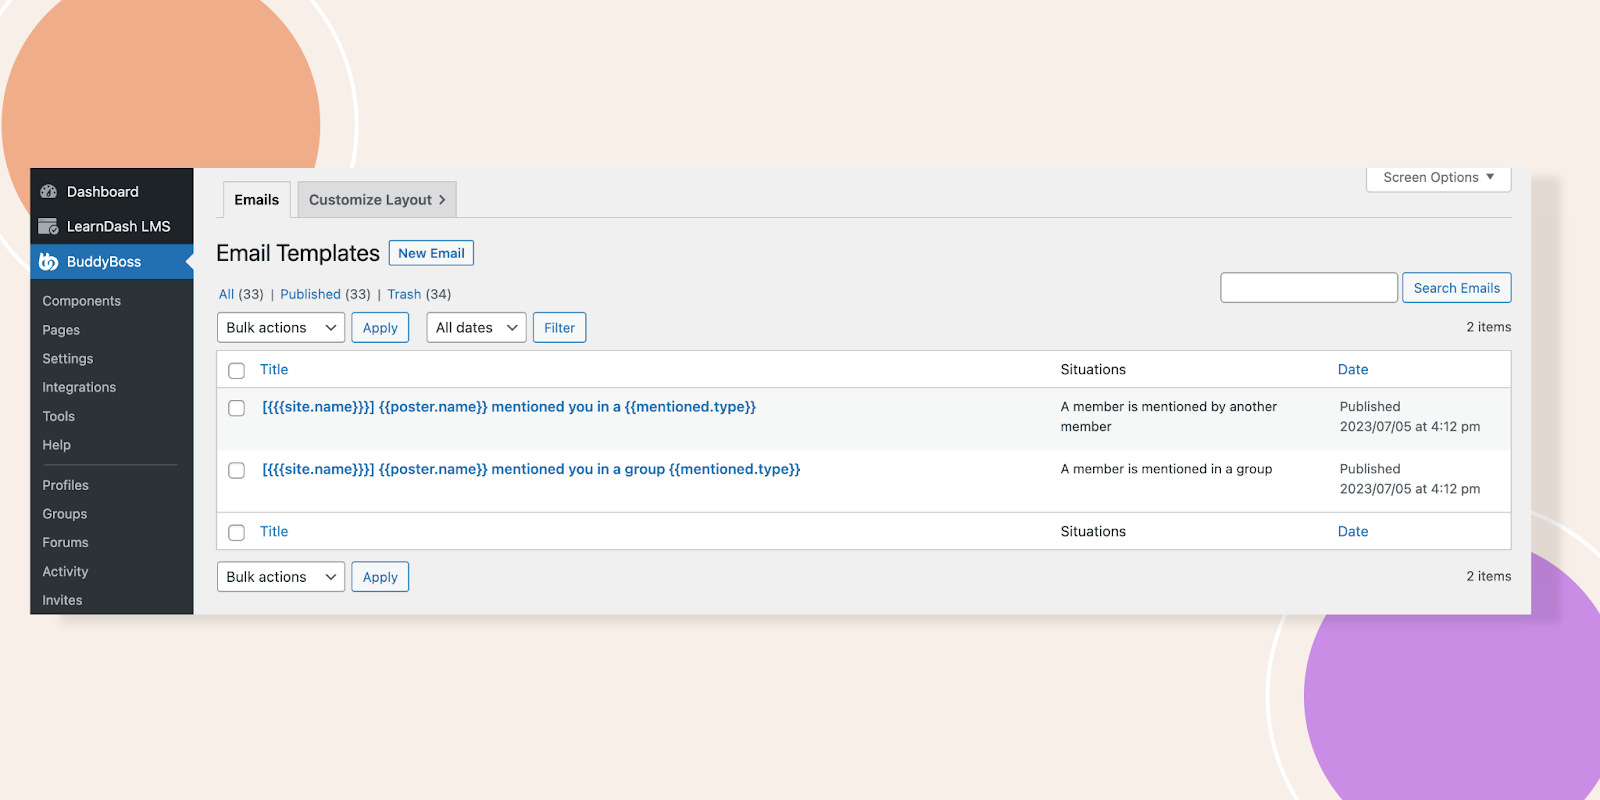
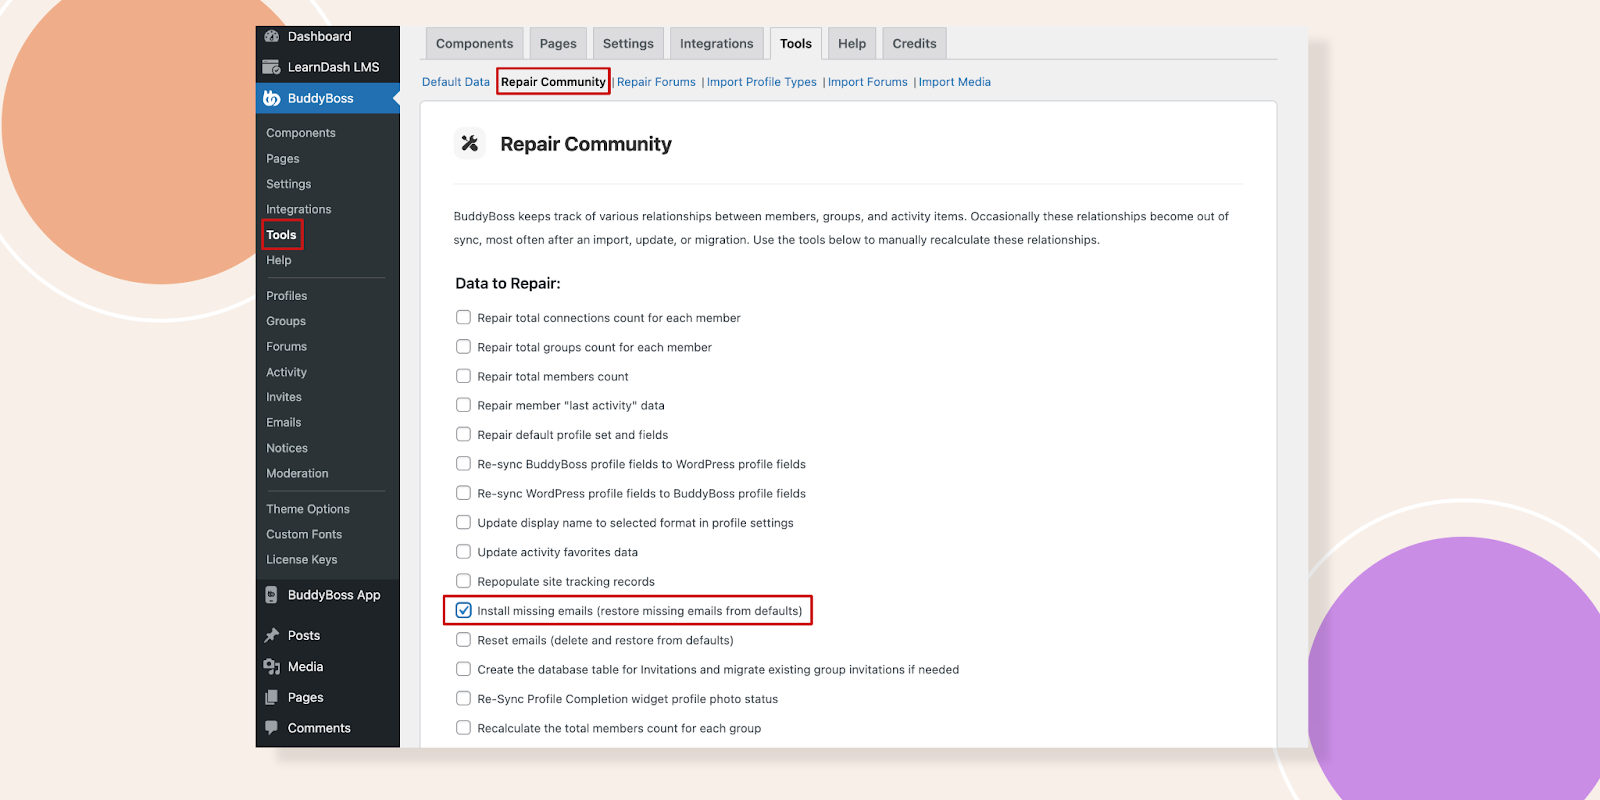
If you find that any email template is missing then go to Tools – Repair Community. Tick the Install Missing Emails (restore missing emails from default) option and hit the Repair Items button.
Now let’s see how the Web notification option will disappear. Under On-screen Notifications uncheck the On-screen notifications option and hit the Save Settings button.
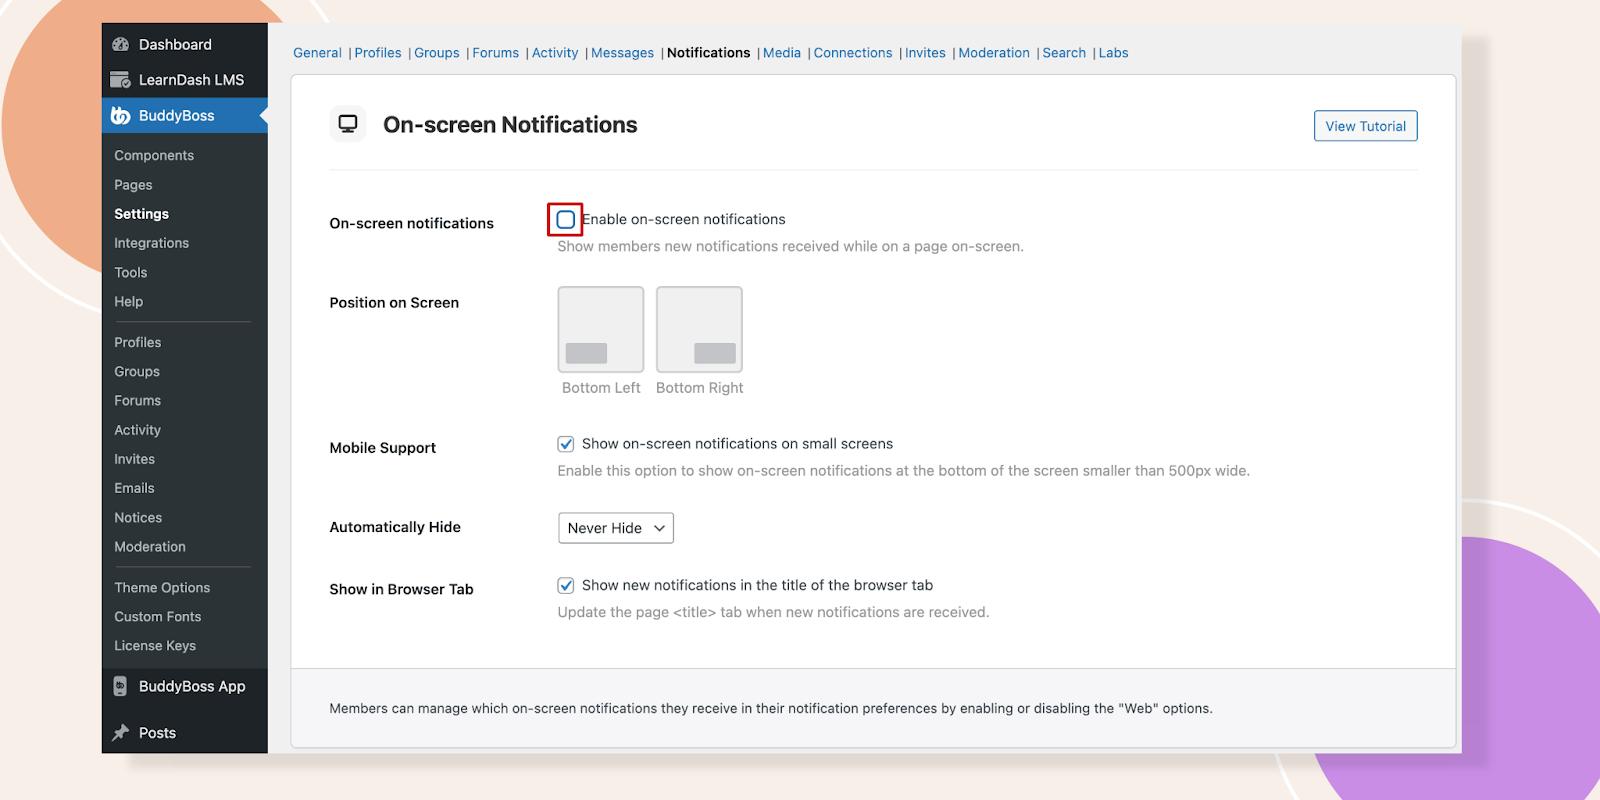
Refresh your frontend and see the Web option has disappeared.
To disappear the App Notification, navigate to BuddyBoss App – Components and then Deactivate the Push Notifications.
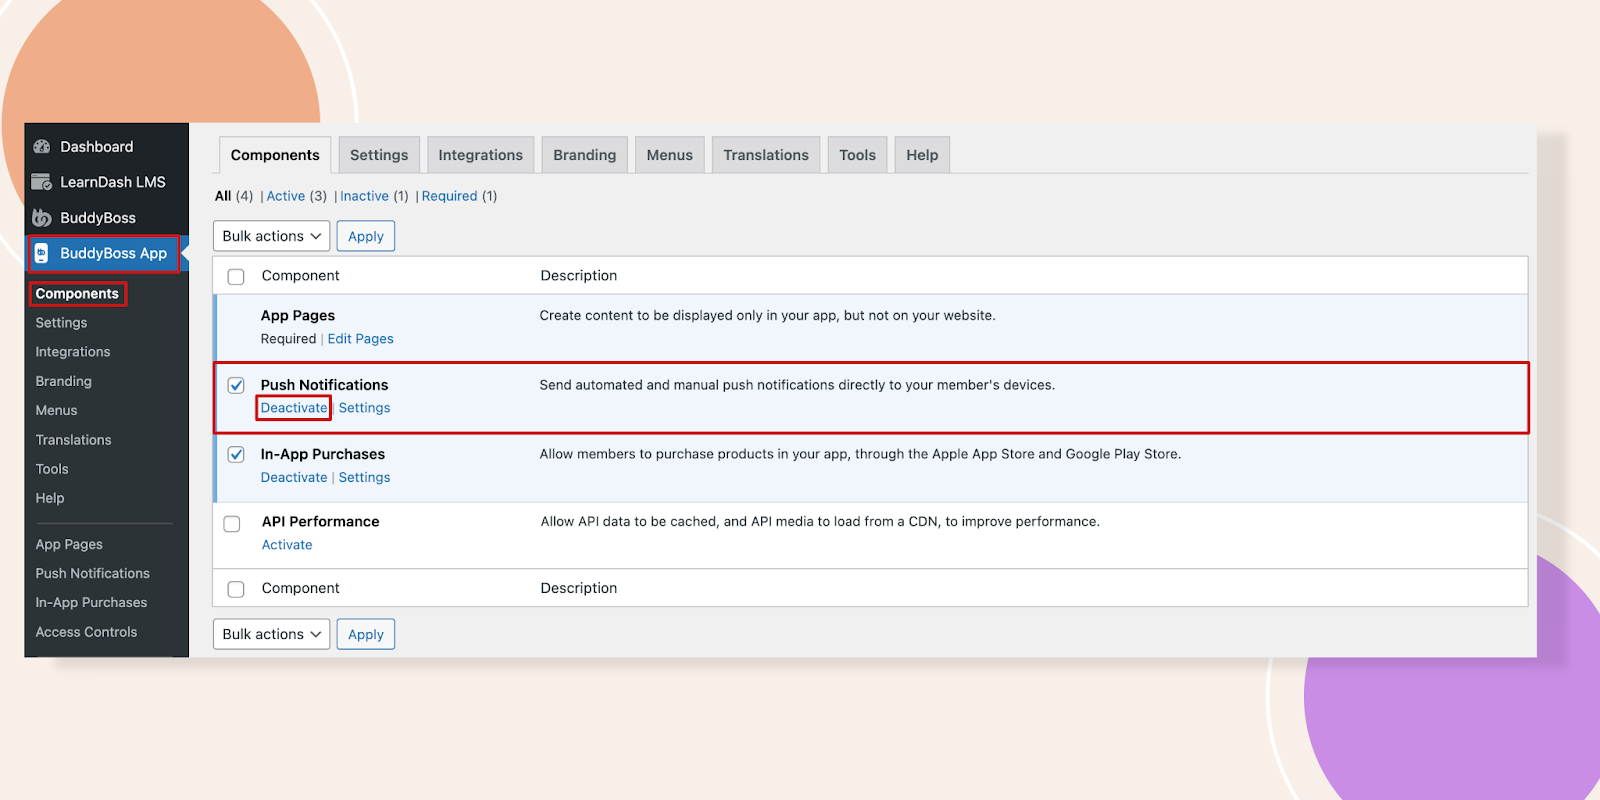
Well, after refreshing your Notification Settings page you will see the App section is also gone.
This is how you can control the Notification Settings.