
In this tutorial, you will learn how to organize your groups into hierarchies, with parent and subgroup relationships. For example you could have a parent School group, that has sub-groups representing Departments within that school.
Group Hierarchies
Enable Group Hierarchies
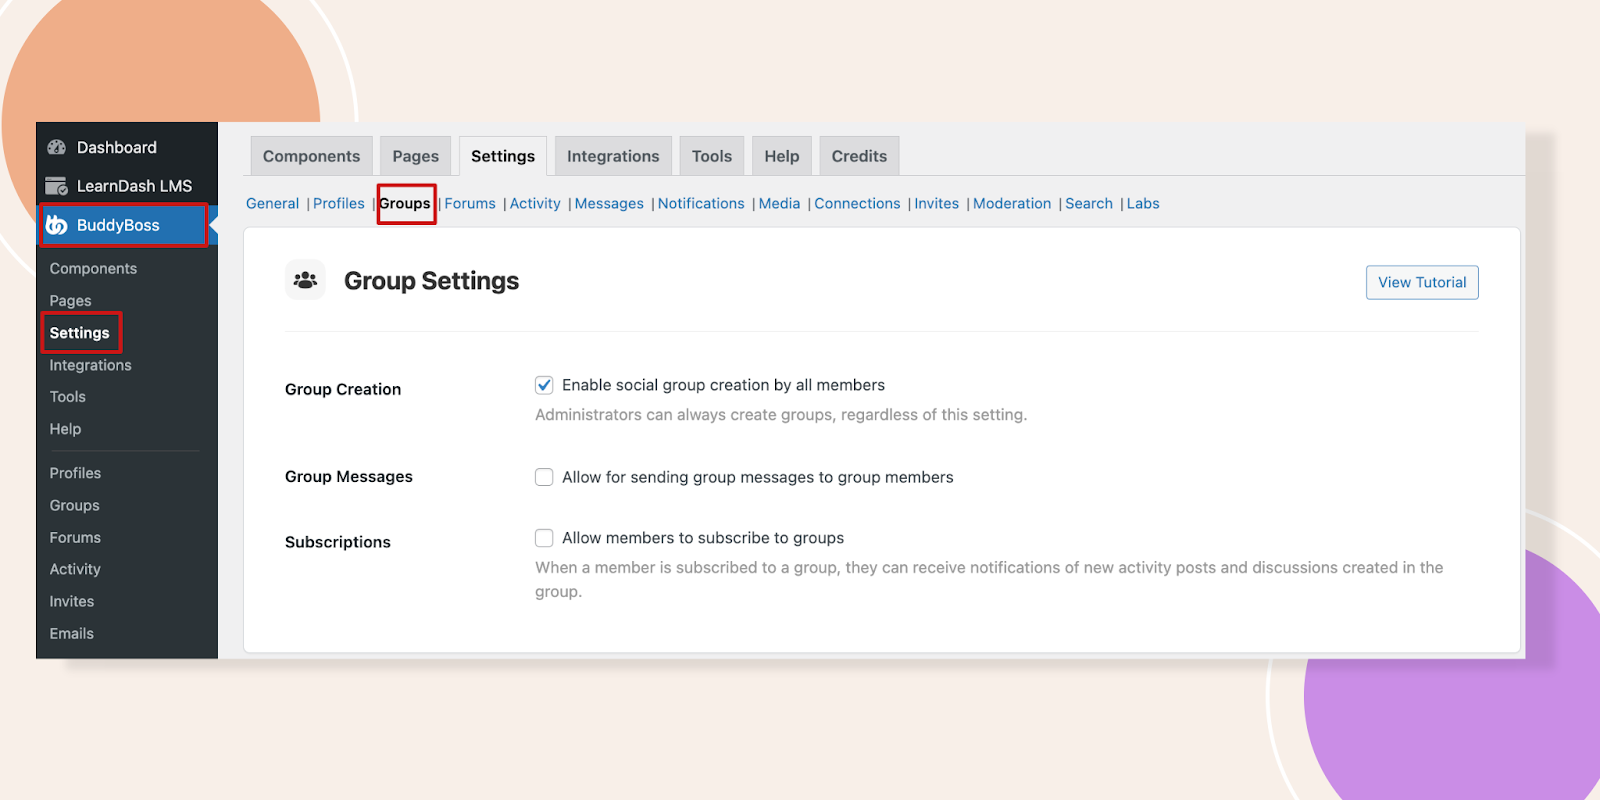
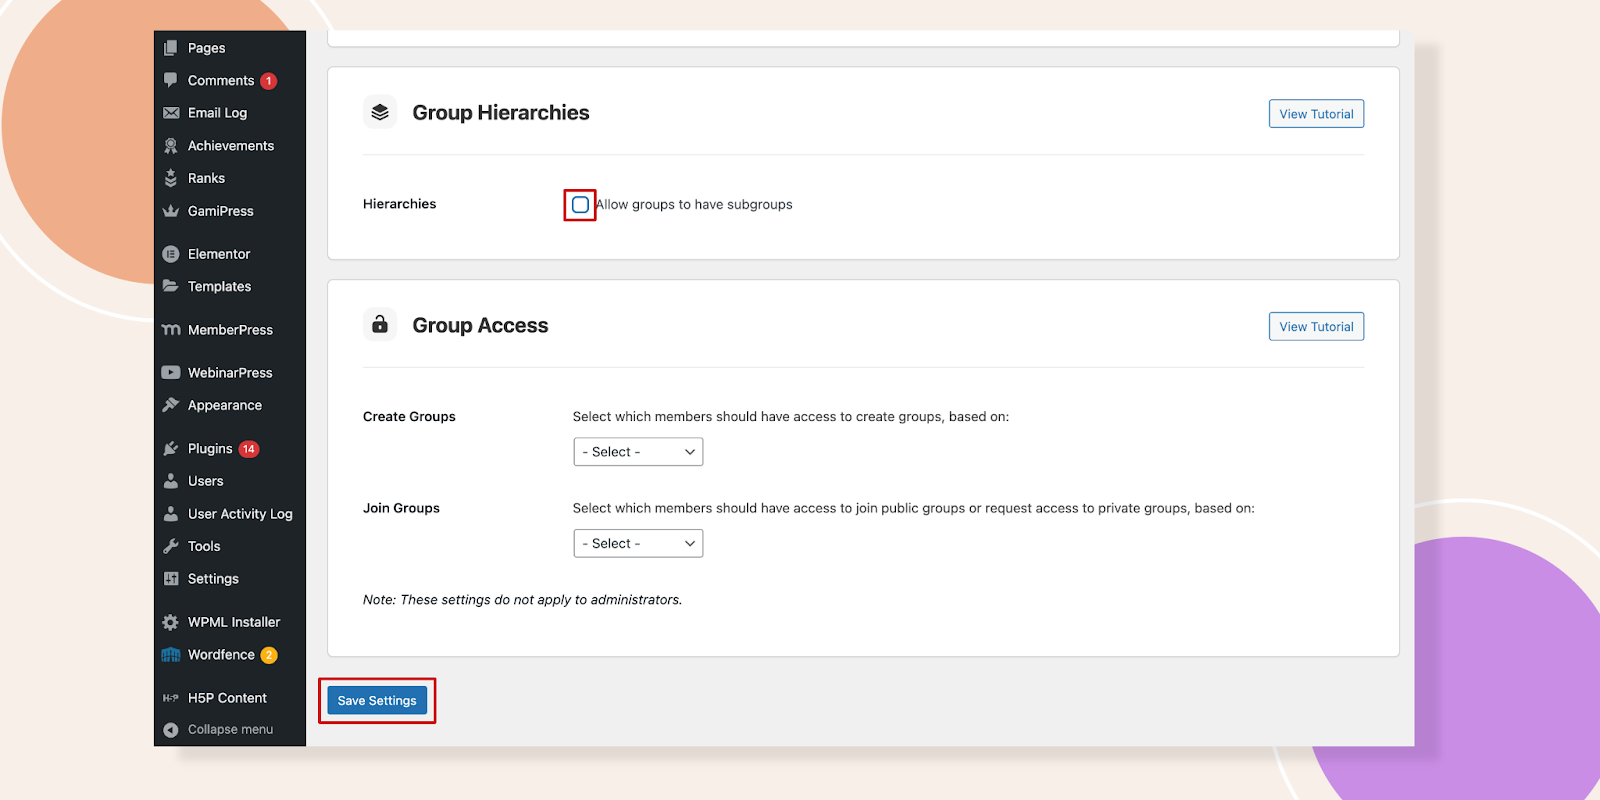
Navigate to BuddyBoss – Settings – Groups. Scroll down to find the Group Hierarchies section.
Enable Group Hierarchies to allow groups to have subgroups by ticking the box. Don’t forget to click the Save Settings button.
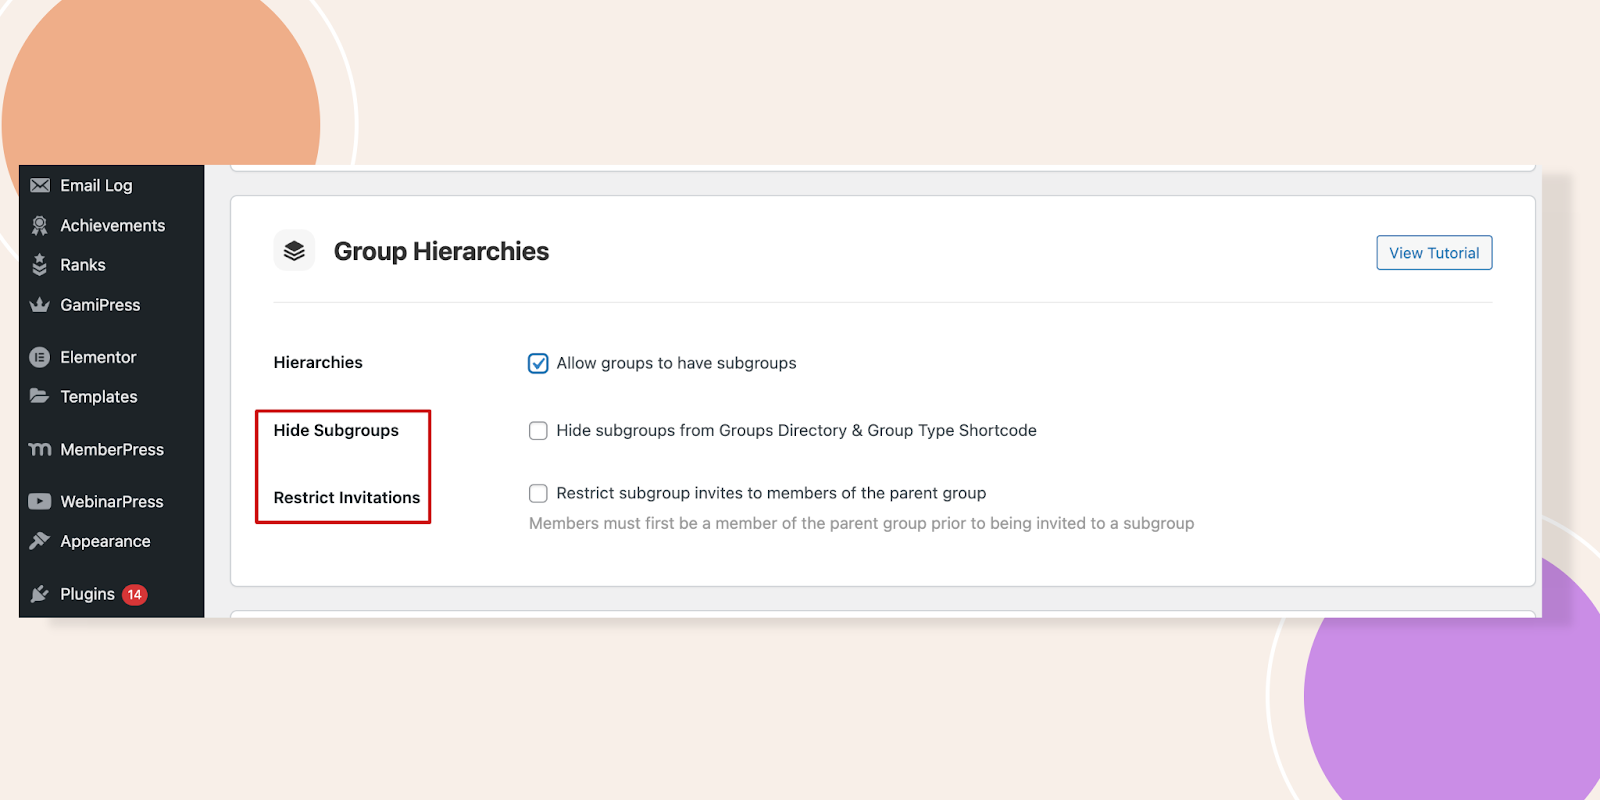
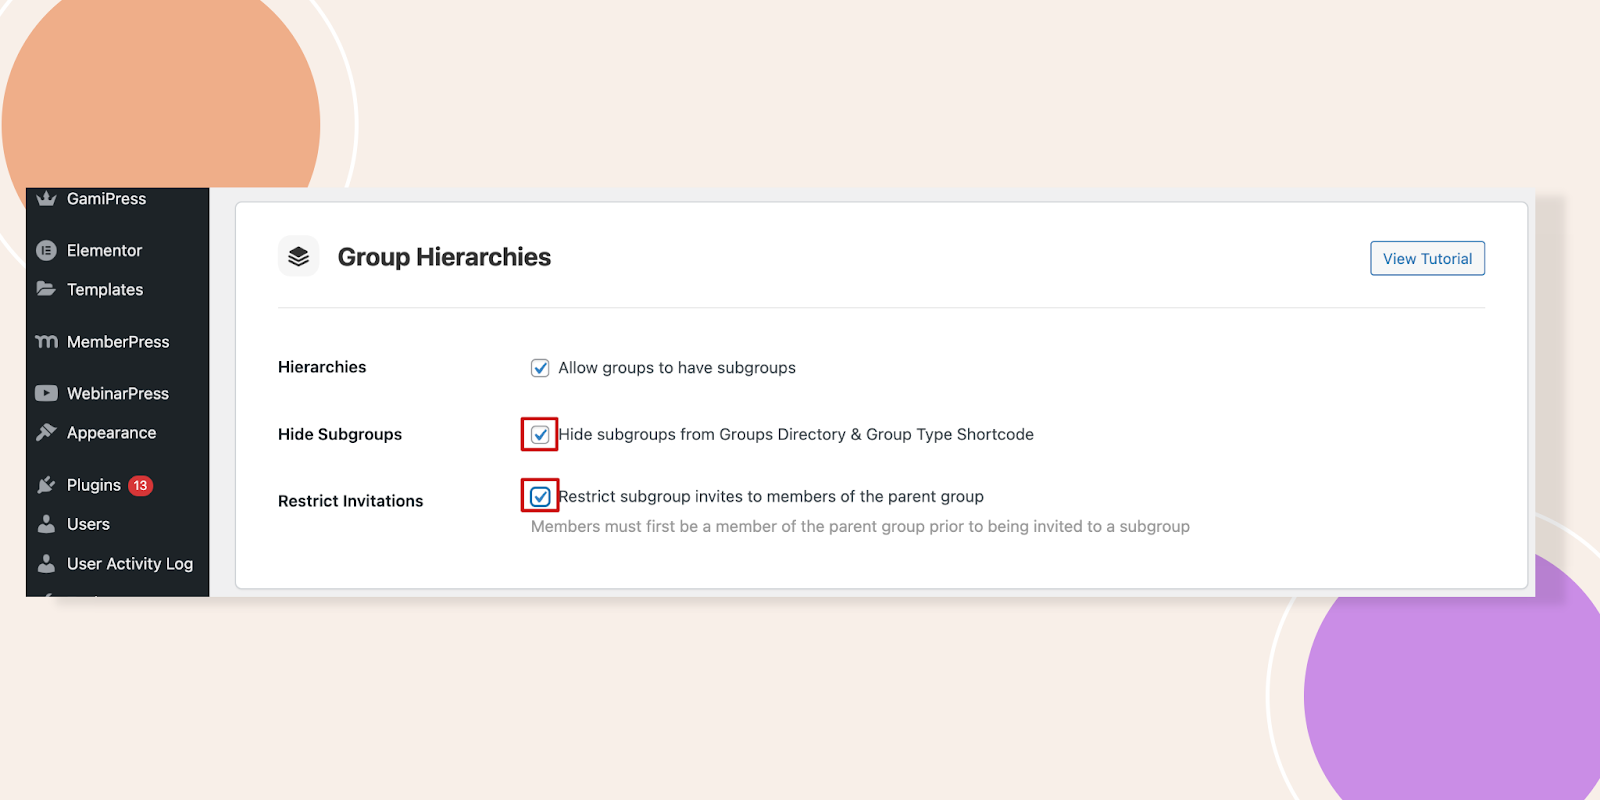
After clicking the Hierarchies two other options will appear. We will get back to them after a while.
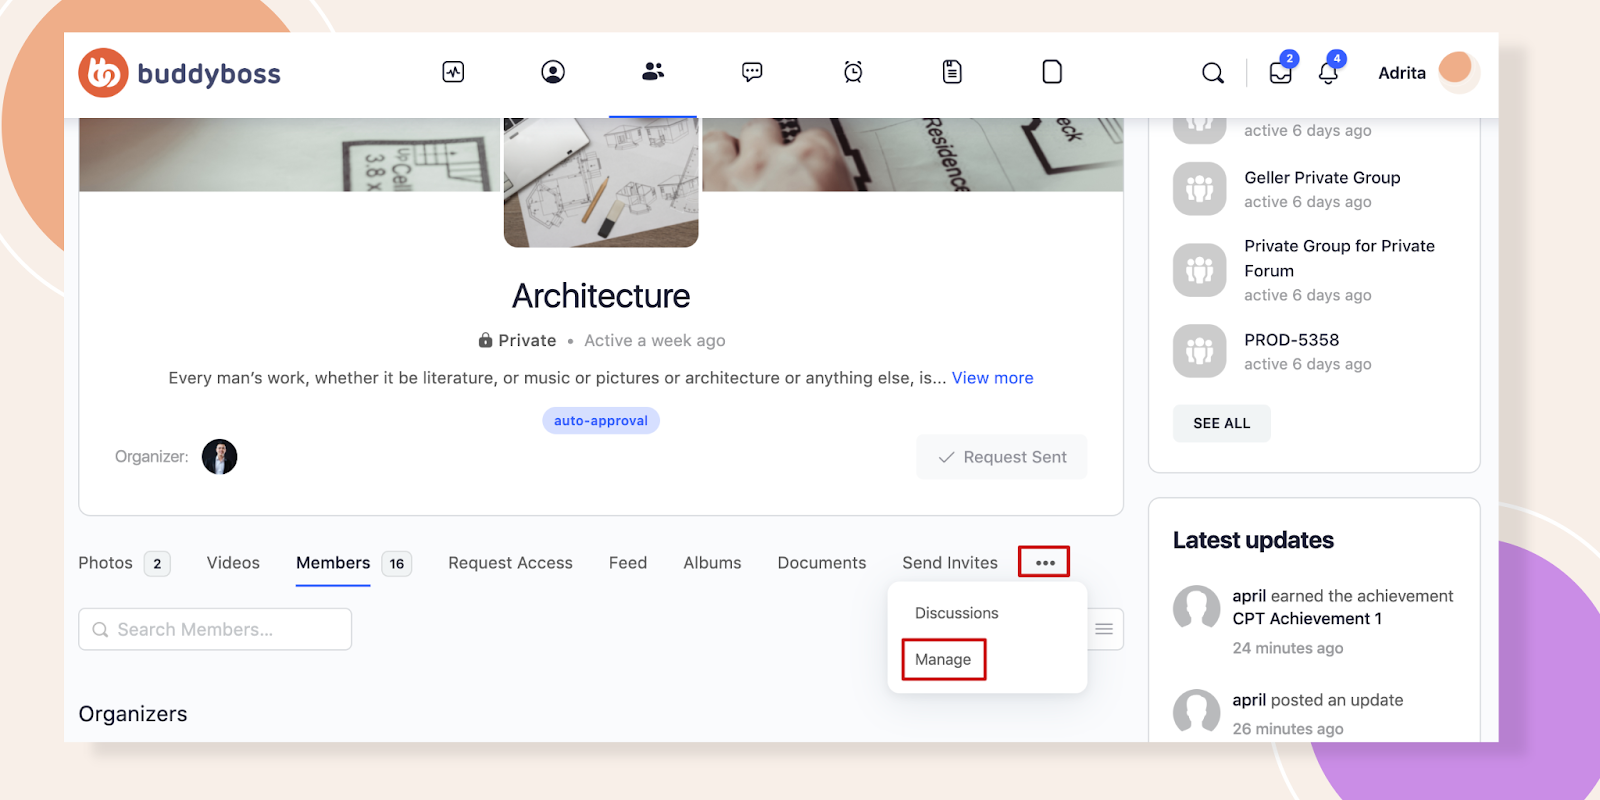
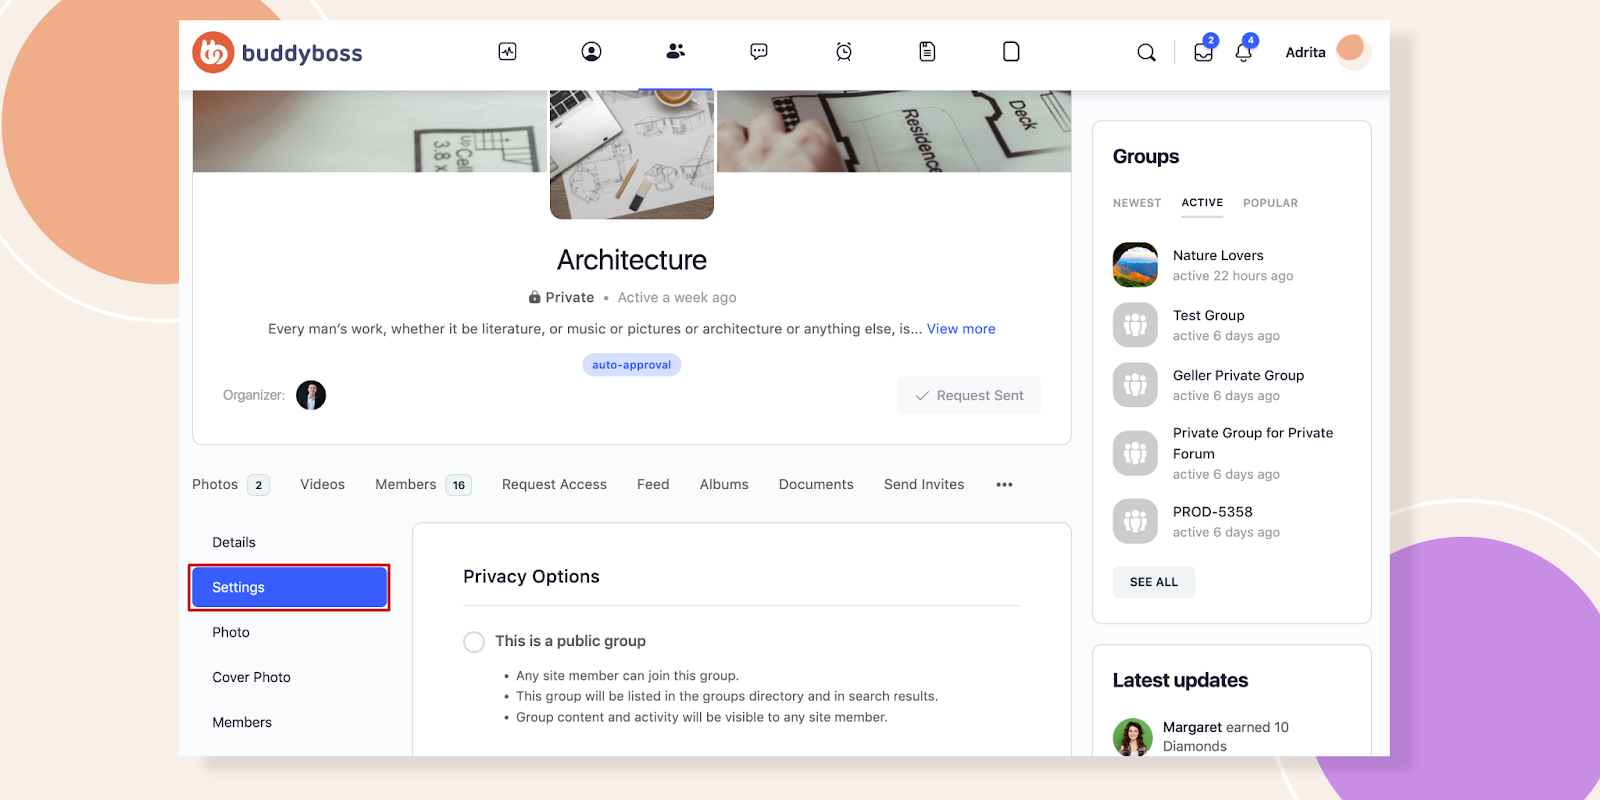
Let’s navigate to a group. Under the drop down menu of three dots you will find Manage option, click on it.
Now, hit the Settings of this group.
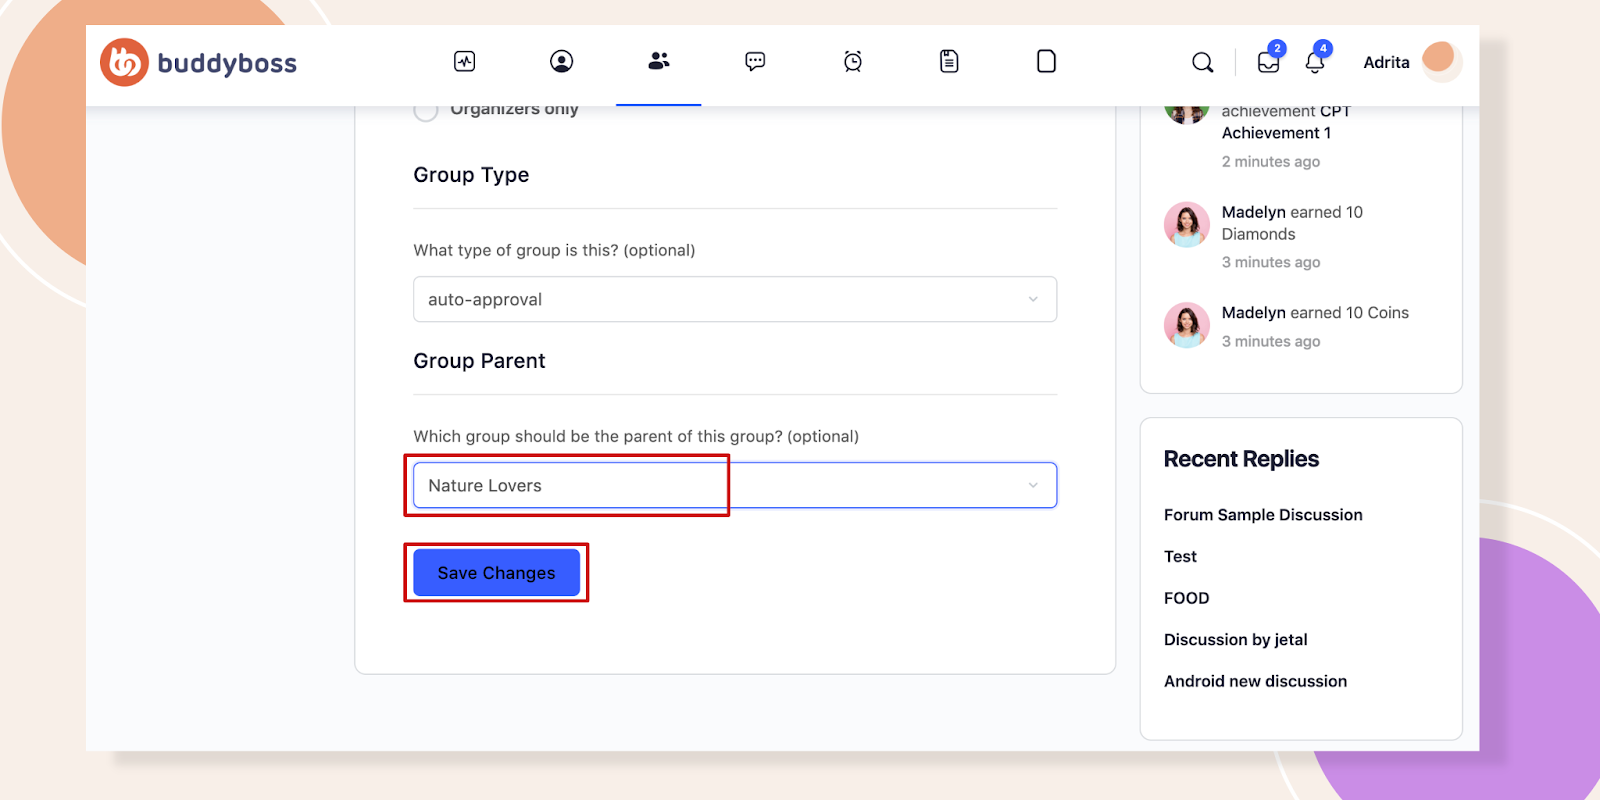
Scroll down to find the option where you can set the parent group. You can see we have set Nature Lovers as the parent group. Don’t miss out on clicking the Save Changes button.
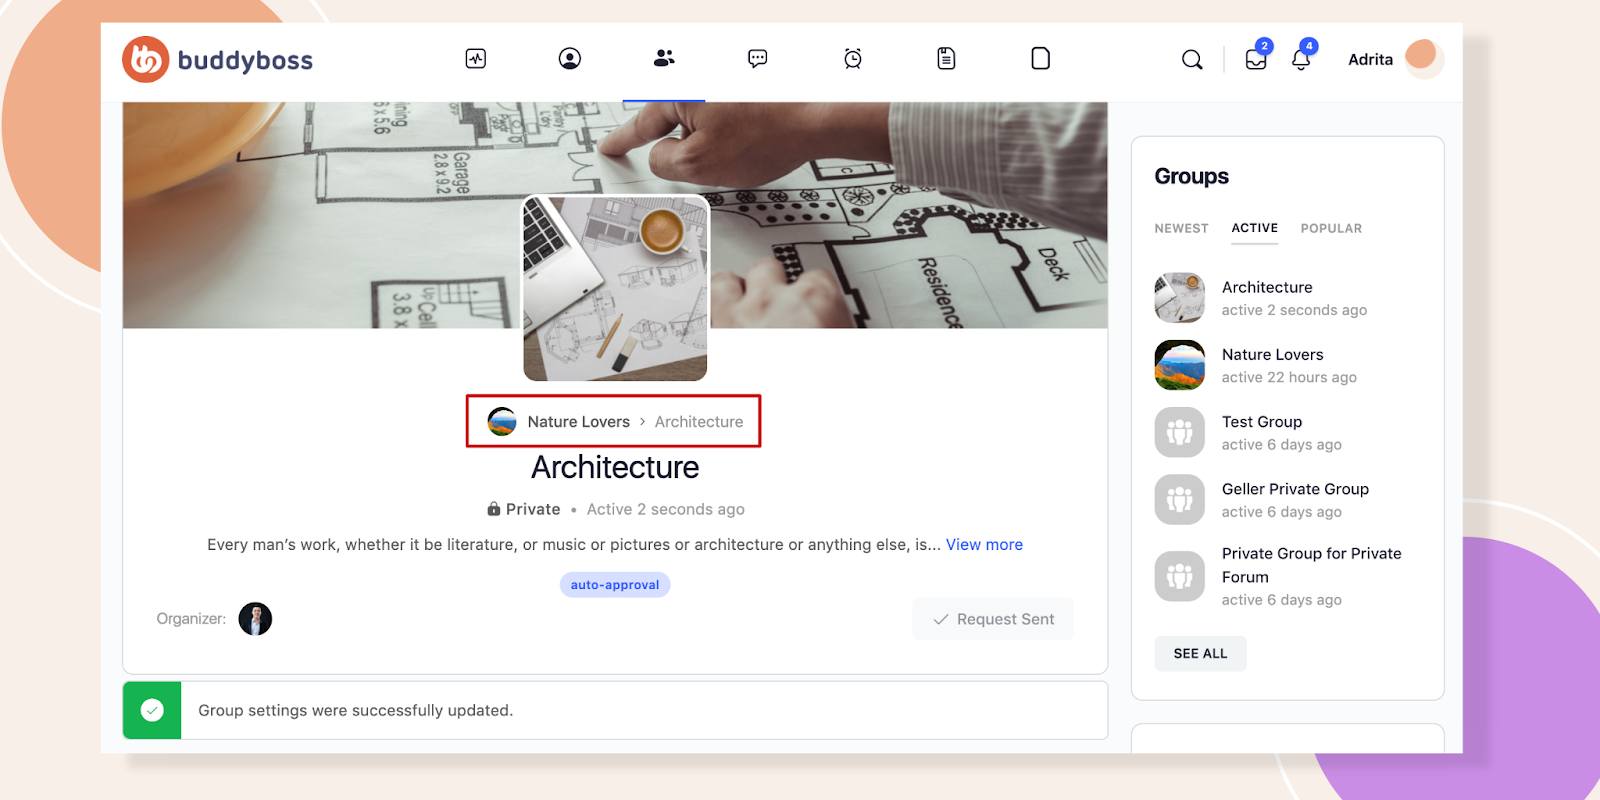
At the Group Header you will find it’s already showing, Architecture is a subgroup of Nature Lovers.
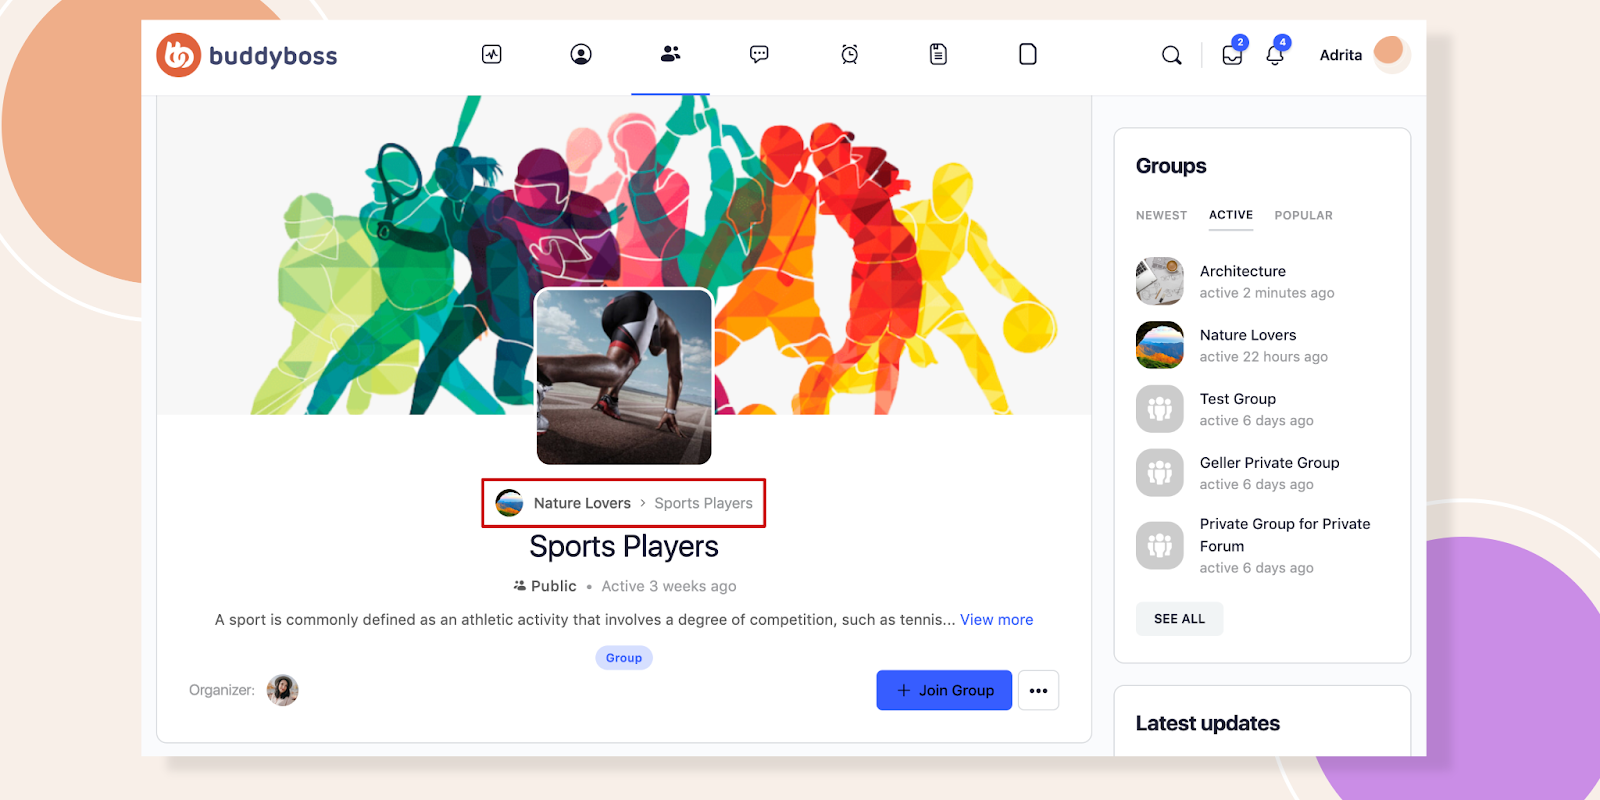
We have done the same to another group called- Sports Players.
Now let’s move to the Nature Lovers group. Under the 3 dots, you will find the Subgroups option.
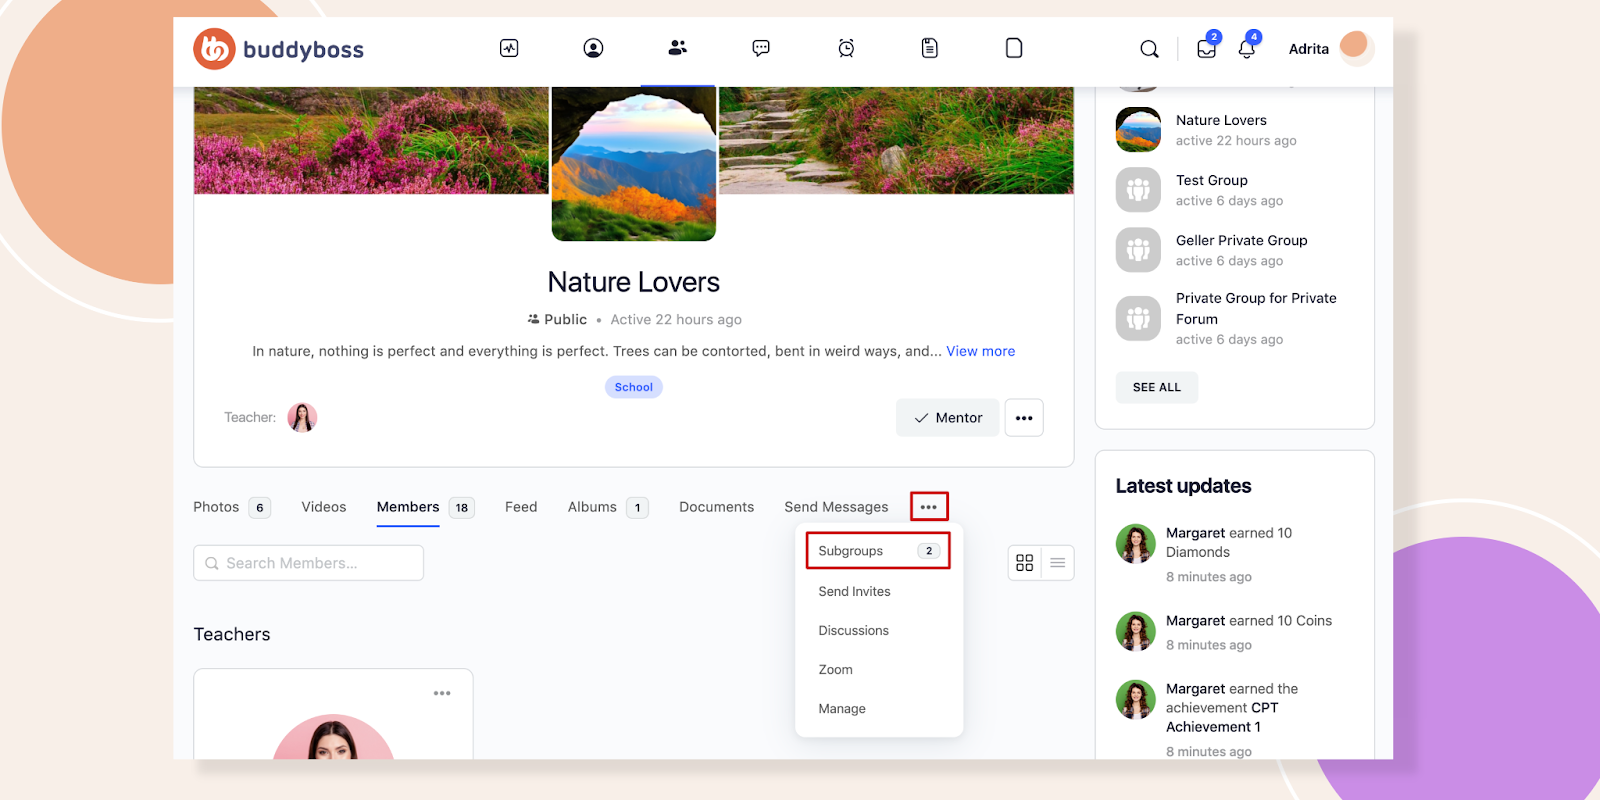
After clicking Subgroups, you will appear to the subgroups of Nature Lovers.

Do you remember the two options we left earlier? With enabling Hide Subgroups, all the subgroups will disappear from the Group Directory. And if you enable the Restrict Invitations, the members need to be a members of the parent group prior to being invited to a subgroup.
Hope this feature will assist you to manage groups more effectively.