
What is Email Domain Restriction?
With this feature, you will be able to list email domains, extensions or specific email addresses that you wish to restrict from registering, or specifically whitelist to allow for registration.
Configure Registration Restrictions
Navigate to BuddyBoss – Settings – General. In the Registration section tick the box of Enable Restriction and select BuddyBoss Registration under Registration Form. On this page, you will see the Registration Restrictions section.
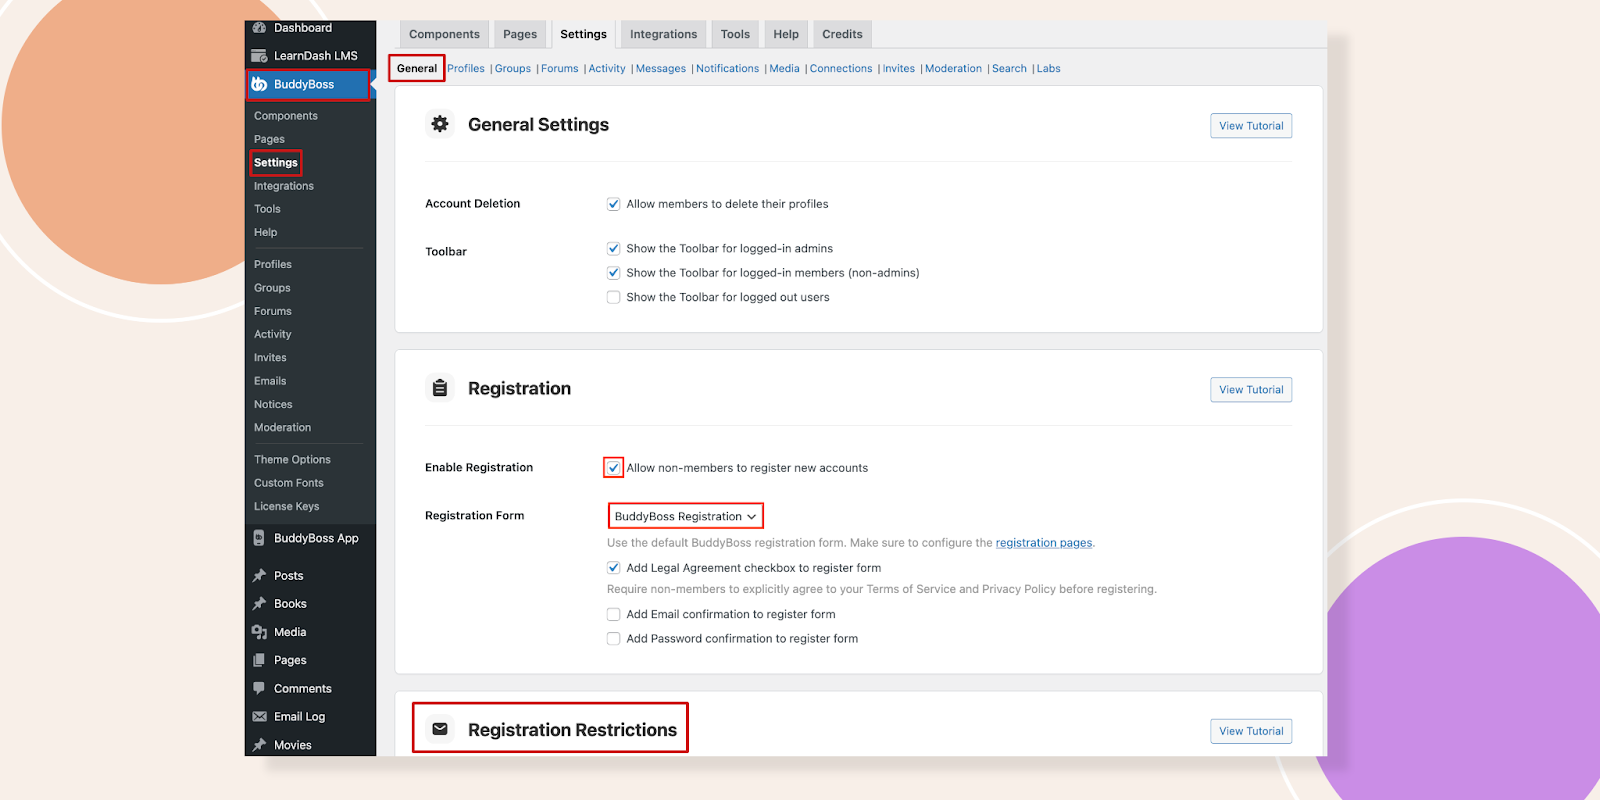
Please note that you must use the BuddyBoss Registration Form for this feature to be accessible.
Here we can enter email domains, extensions, or specific addresses that we want to allow or restrict for new user registrations. Click the Add Domain and Add Email button.
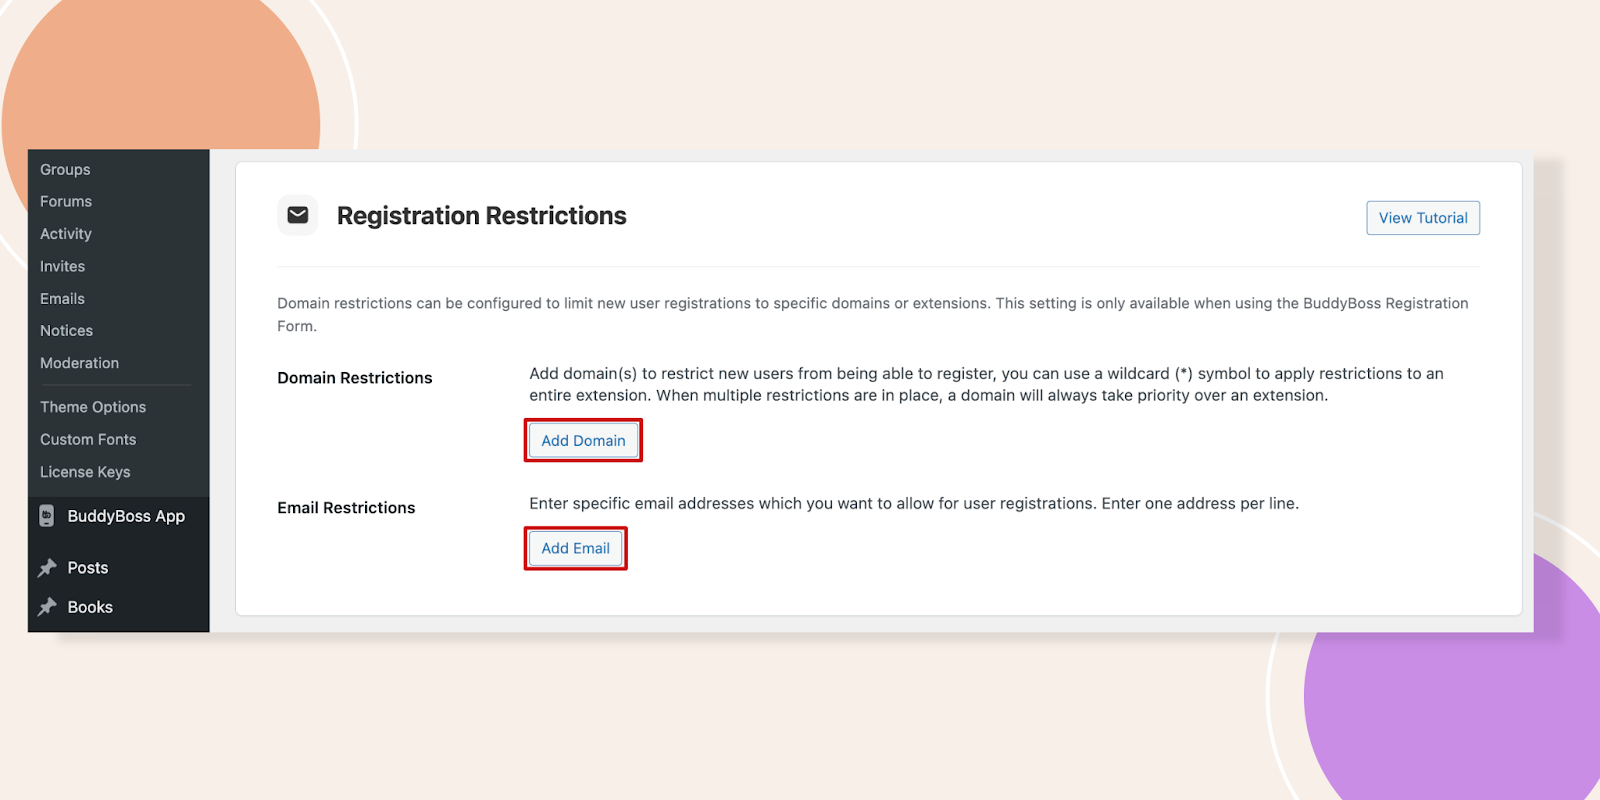
You can enter one domain or address per line. Let’s say we want to allow @buddyboss.com domains to register on my site and app. To do that, just simply put buddyboss inside the Domain Name and com in the Extension box. You can also decide to use a wildcard (*) symbol if you wish to block entire extensions.
With the domain entered you now need to Select the Condition. There are three conditions to choose from:
- Always Allow
- Only Allow
- Never Allow
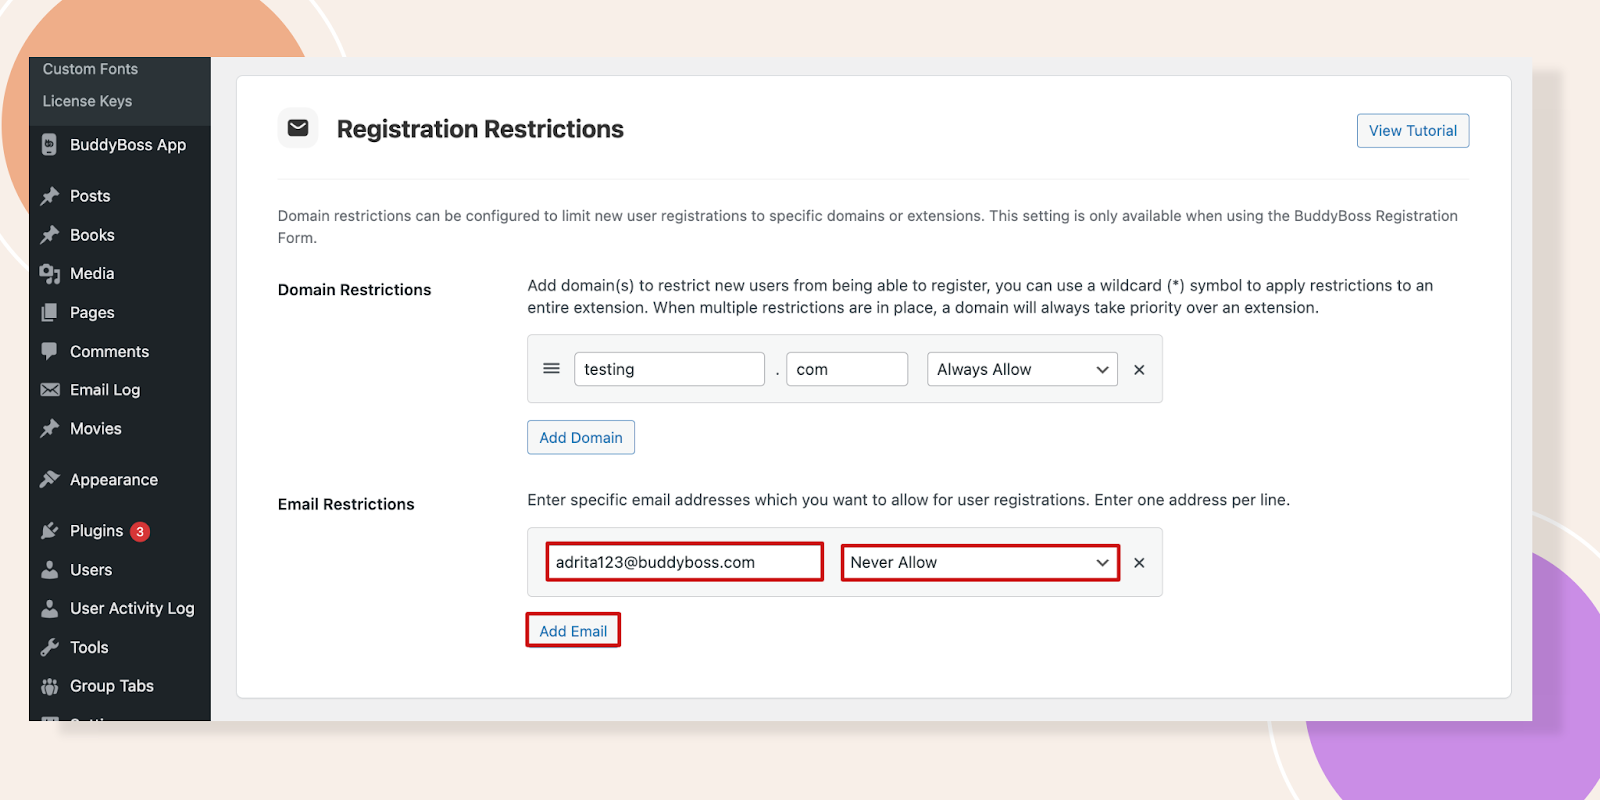
By using the Always Allow and the Never Allow rules you have the ability to restrict registrations, so that you can stop or allow specific domains or top-level domains from registering.
And Only Allow allows you to completely lock down your user registrations so that you require an exact match, while every other domain or extension is blocked. This is perfect for sites that are being used as an intranet or employee-only community.
For instance, we have chosen Always Allow.

You can also type a specific email address under the Email Restrictions. Just add a new line and type the email address. You can also add more emails just by clicking the Add Email. Then click Save Settings.
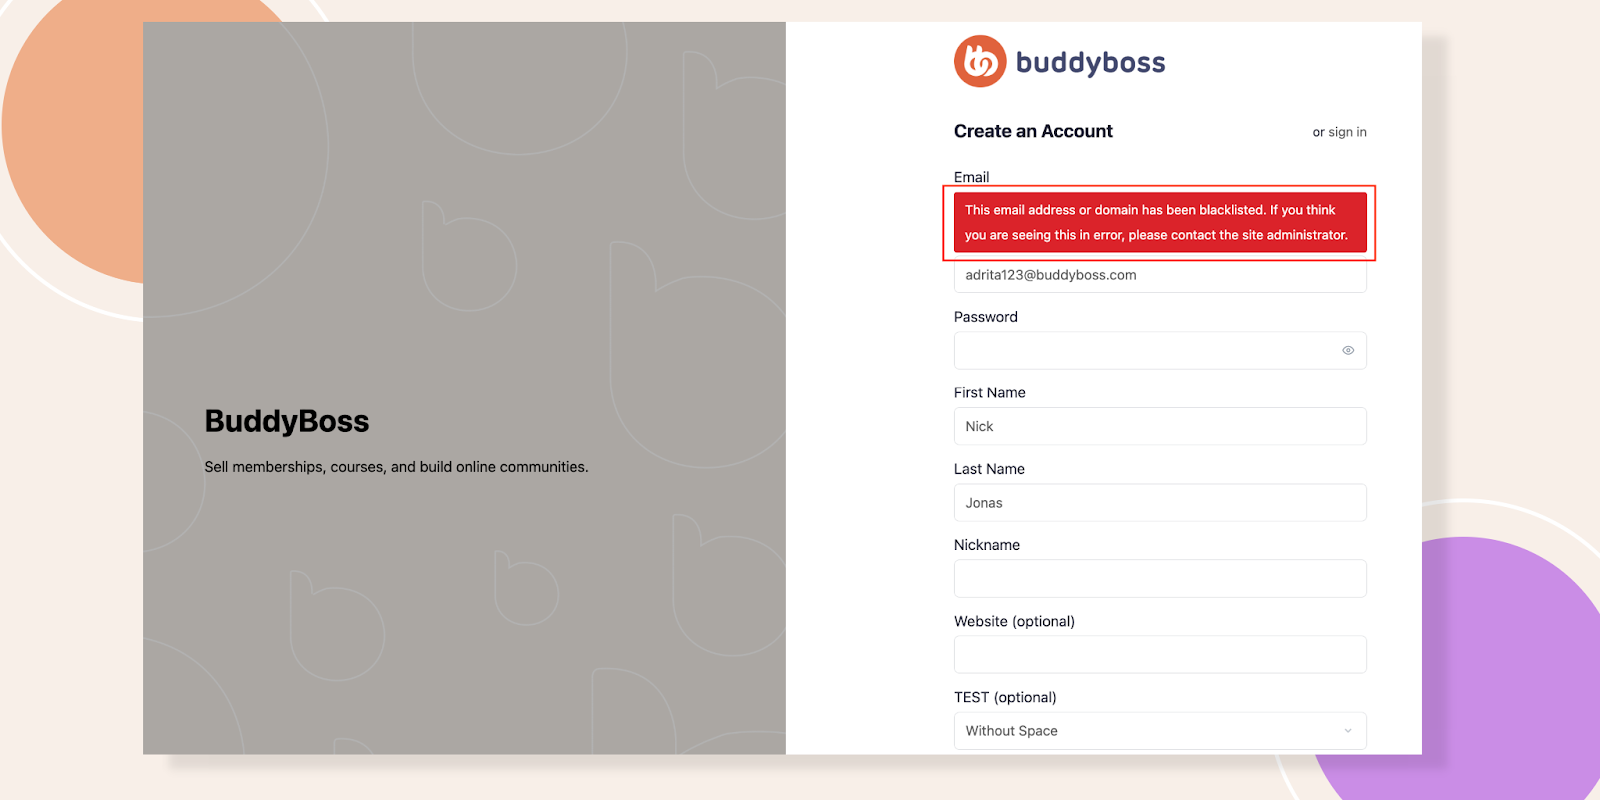
Now let’s go to the site and try to register a new account. On the registration page try to create a new account, we have filled all boxes with sample details here using a restricted email domain. Then click the Create Account.
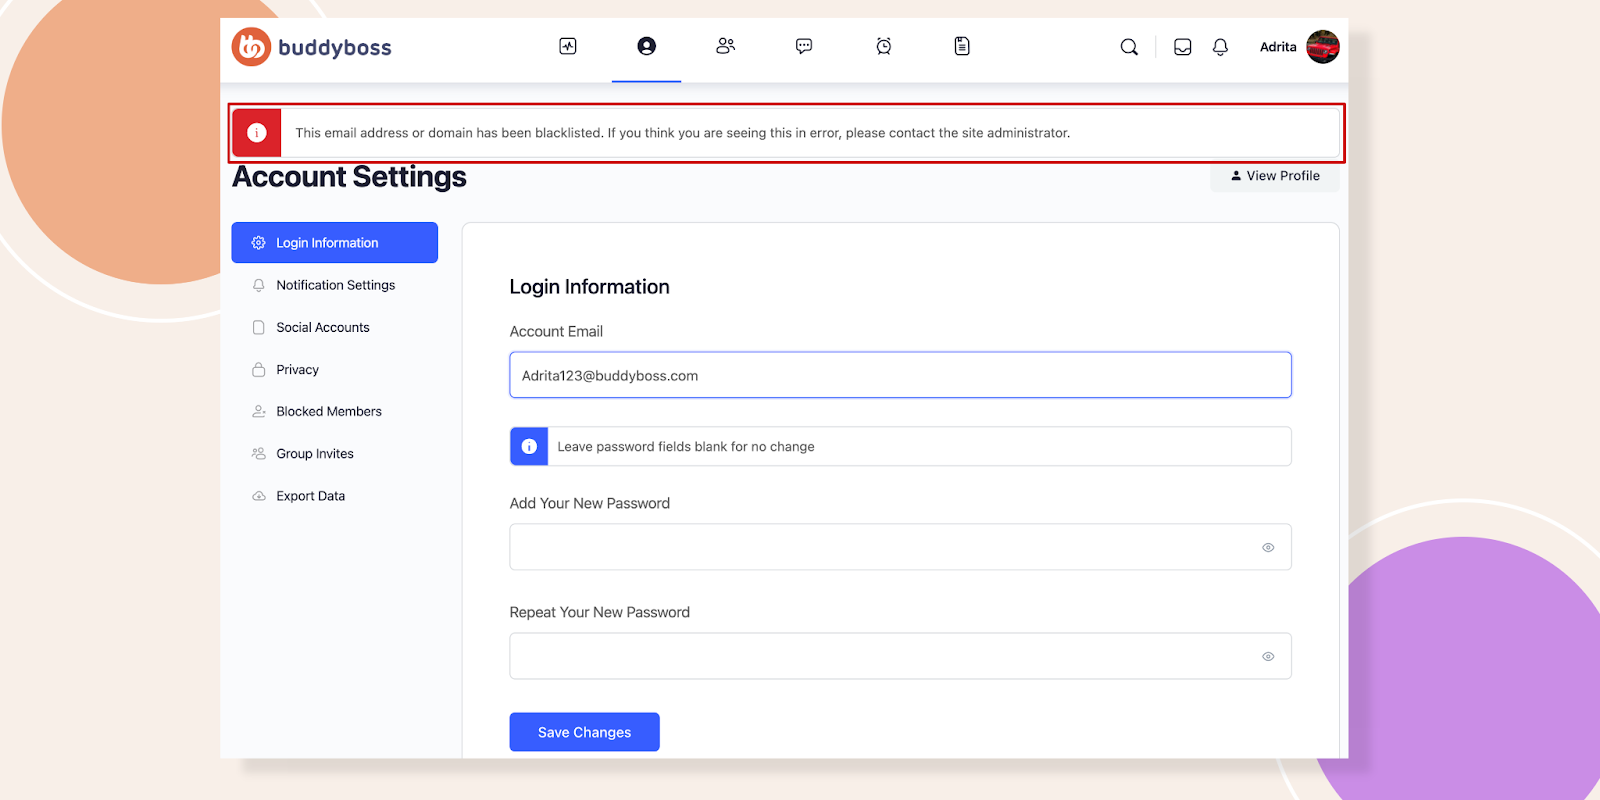
And it gives me an error saying – This email address or domain has been blacklisted. If you think you are seeing this in error, please contact the site administrator.
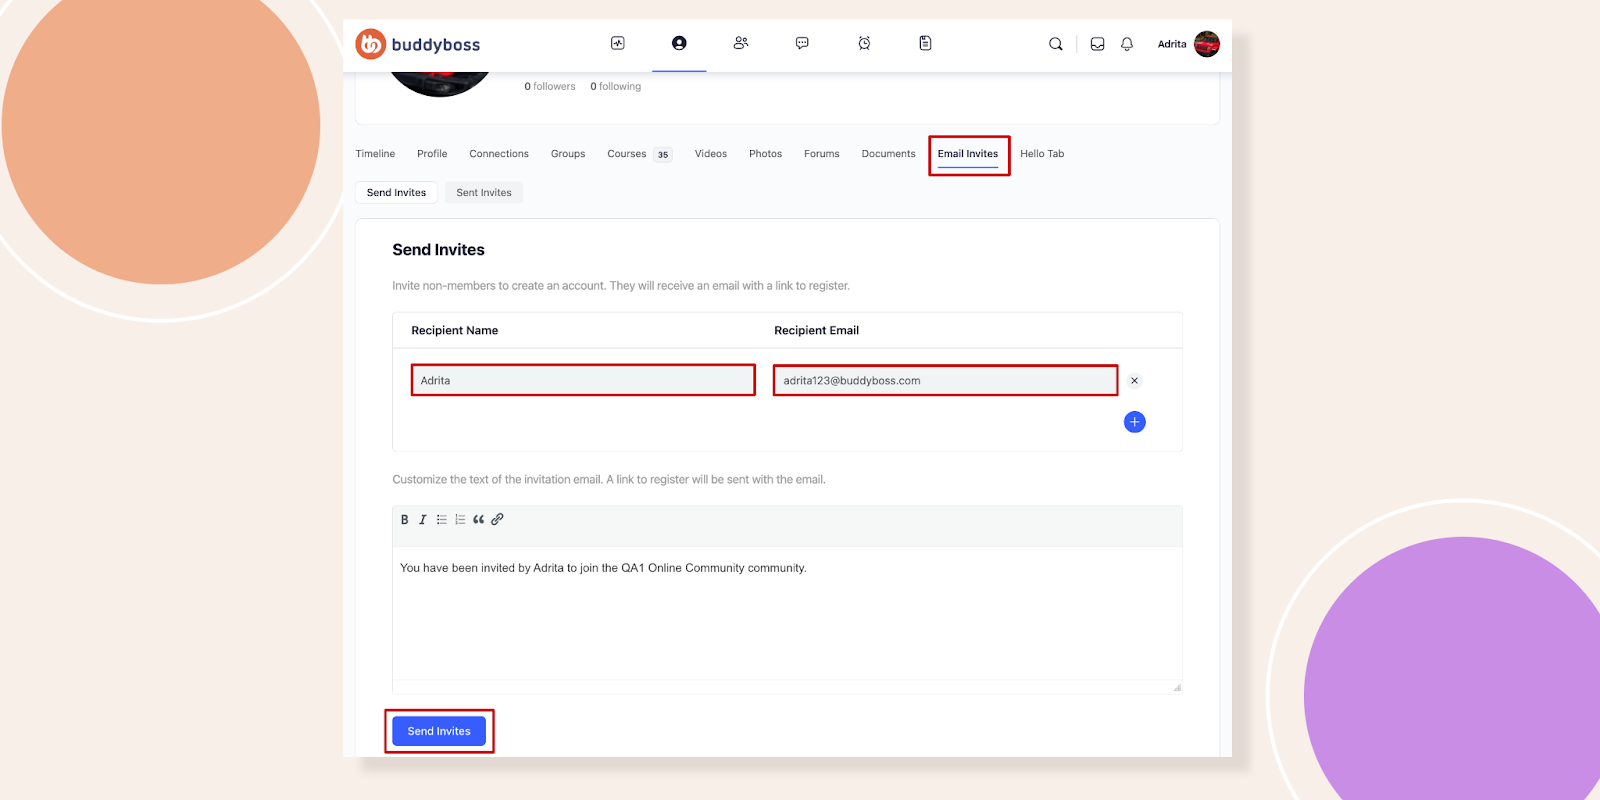
Go to your profile and click on Email Invites. Now, write down the Recipient Name and Recipient Email. By clicking on Send Invites you can send an invite to that email holder.
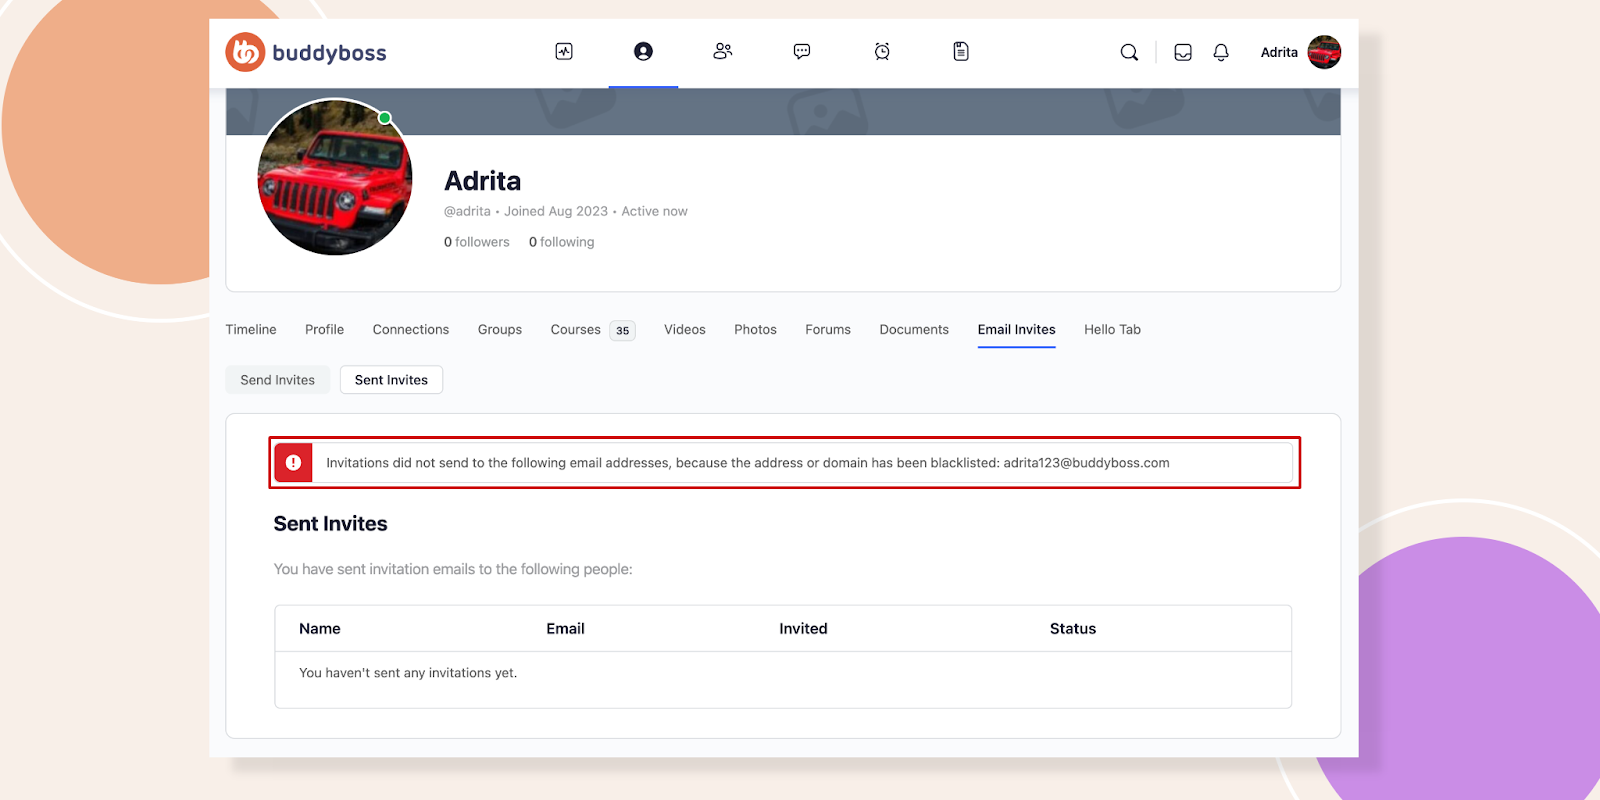
But as you have restricted the email you will see a warning like the image below-
While this feature only applies to new registrations, if your user attempts to update their existing email address with a blacklisted email address, domain, or extension, they will see the same message.
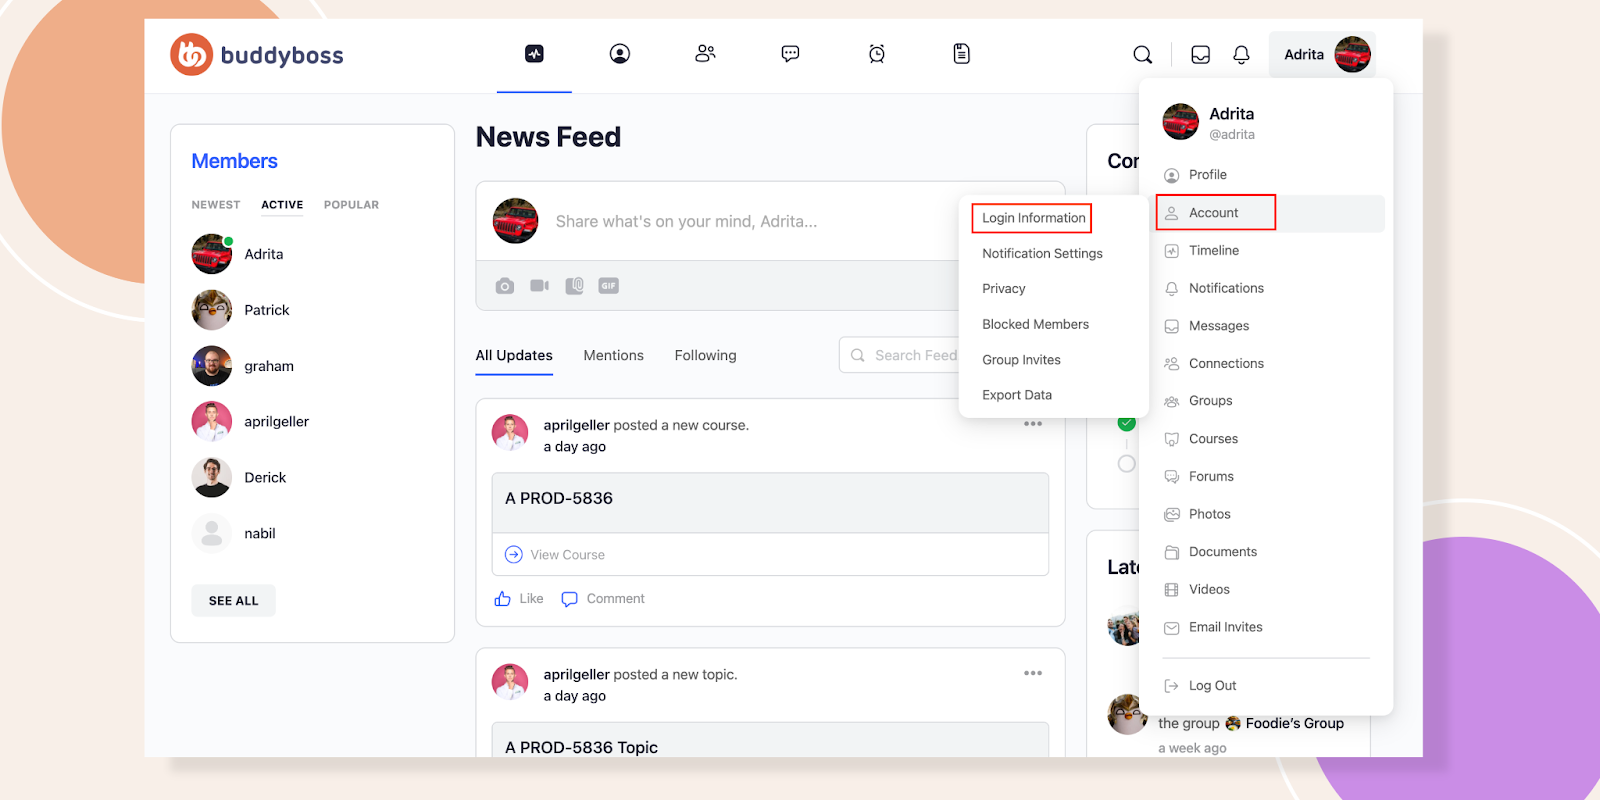
Navigate to User Profile dropdown, then to Account – Login Information.
Let’s say the user wants to update the email address to [email protected], click Save Changes and the user will see the message above.
And that’s it! you have successfully configured the new Email Domain Restrictions option. It gives you more control over new registrations, whether it’s to lock your site to only allow a specific domain, or whether it’s being used to block and allow emails and extensions.