
Live Messaging is one of the key integrations we’ve provided that help improve engagements in your community.By enabling this feature, you will instantly begin seeing a typing indicator, showing another member typing and receiving a message, without requiring a window refresh. In addition to this, you also also see an online status indicator in real time.
Configure Live Messaging (Web)
Step 1
As part of the project, we have upgraded many visual interfaces of messaging- including an improved messaging experience and an improved Archived messaging interface. To get this new Live Messaging Feature just update latest version of-
- BuddyBoss Platform
- BuddyBoss Platform Pro
- BuddyBoss Theme
For the App customer, ensure the update of the App Plugin and then create an App Build. Now, let’s have a look at the WordPress Admin.
Step 2
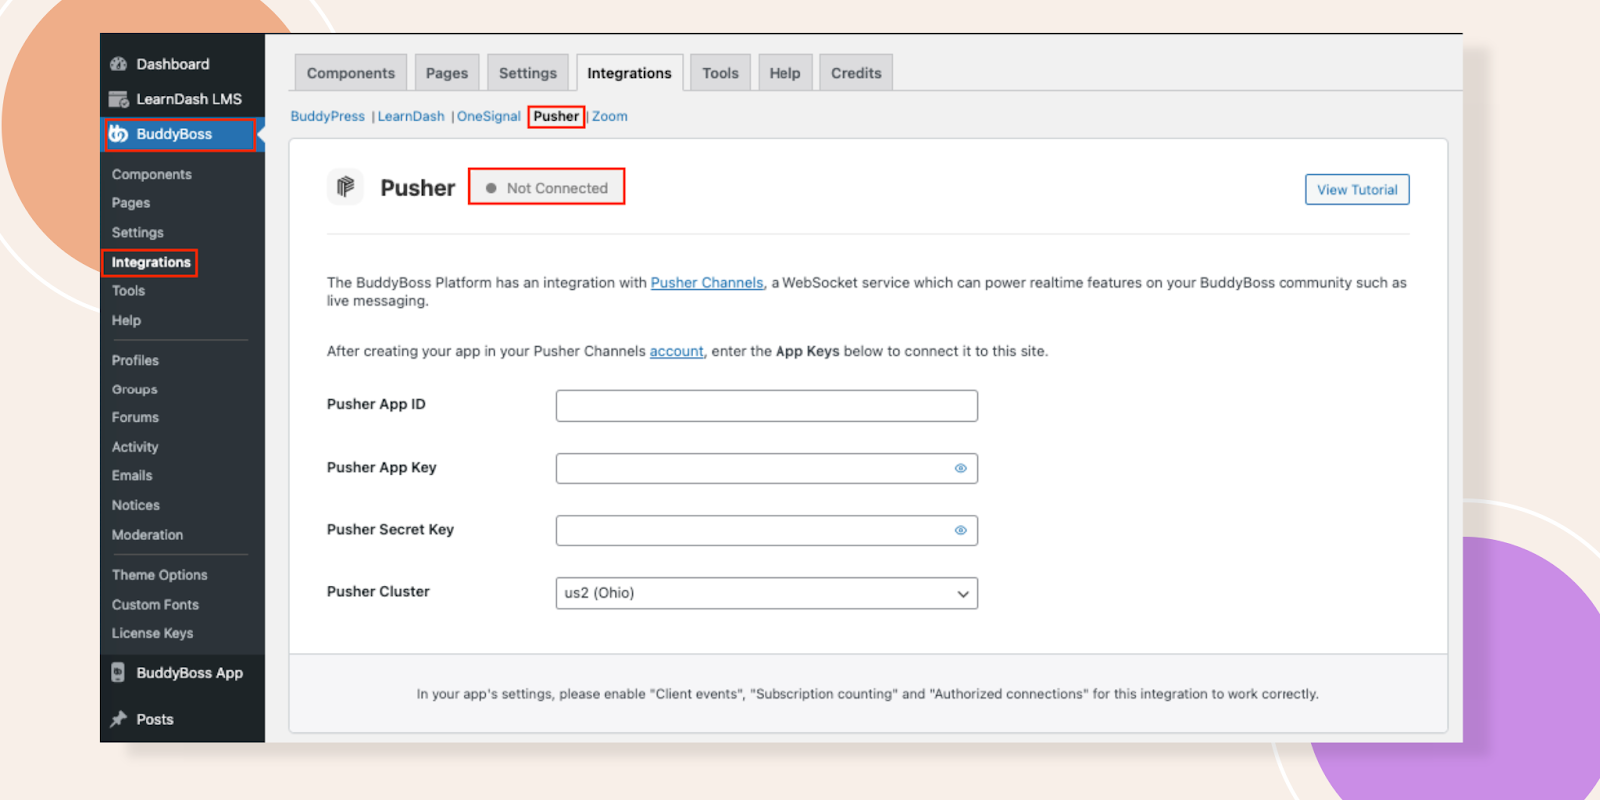
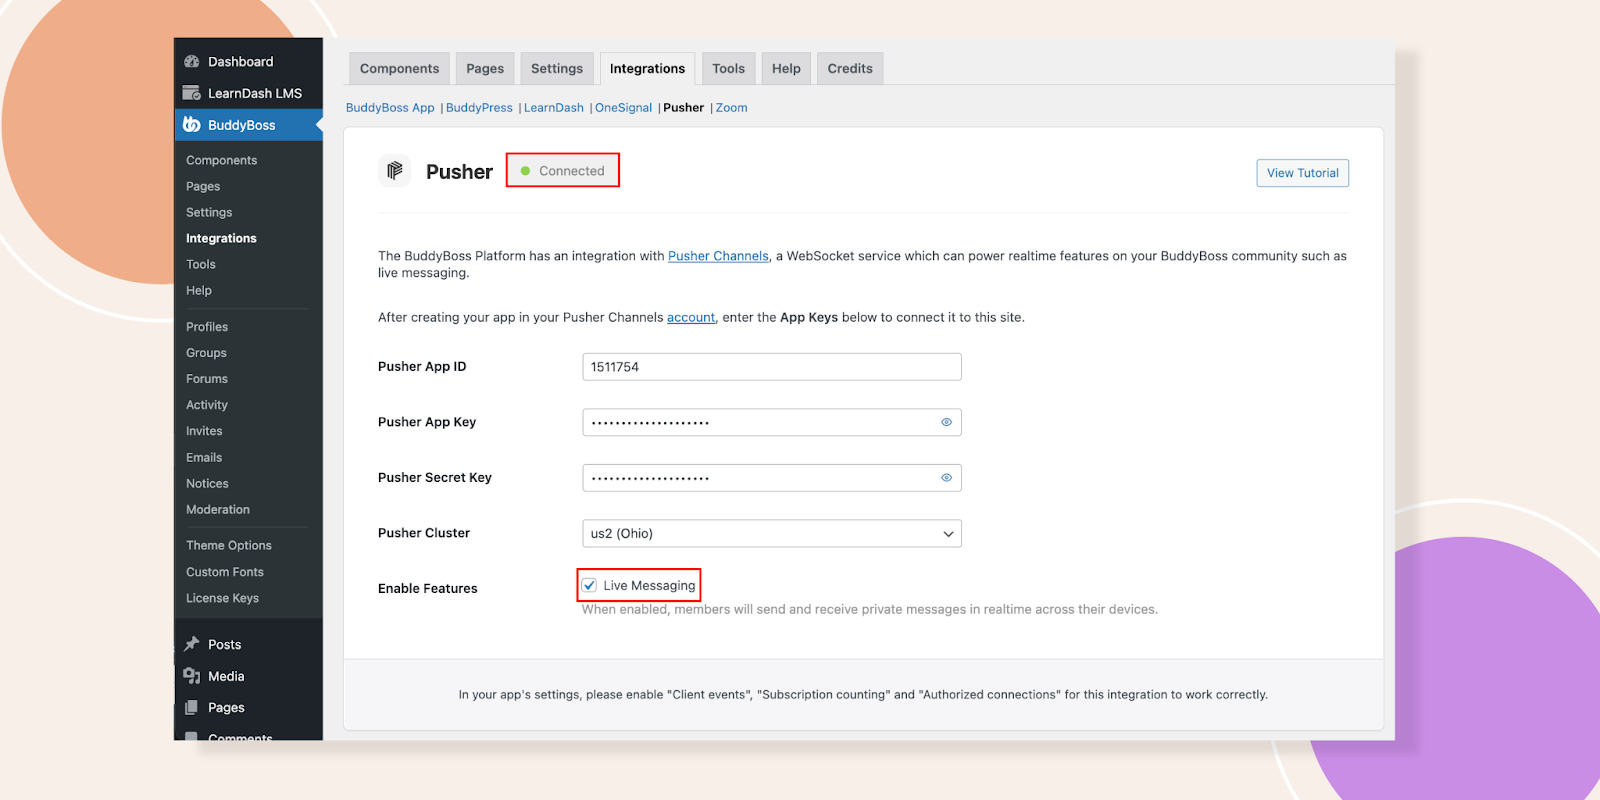
- Navigate to the BuddyBoss – Integration – Pusher. For this Live Messaging, we are integrating with the Pusher Channel service. Basically, it allows you to add real-time features to your apps, including live messaging.
If we go to the Pusher Pricing tab, let’s click on Channels. Here you will see the flexible pricing that allows many sites to use the service for free. Pusher allows up to 200k messages per day on their free plan.
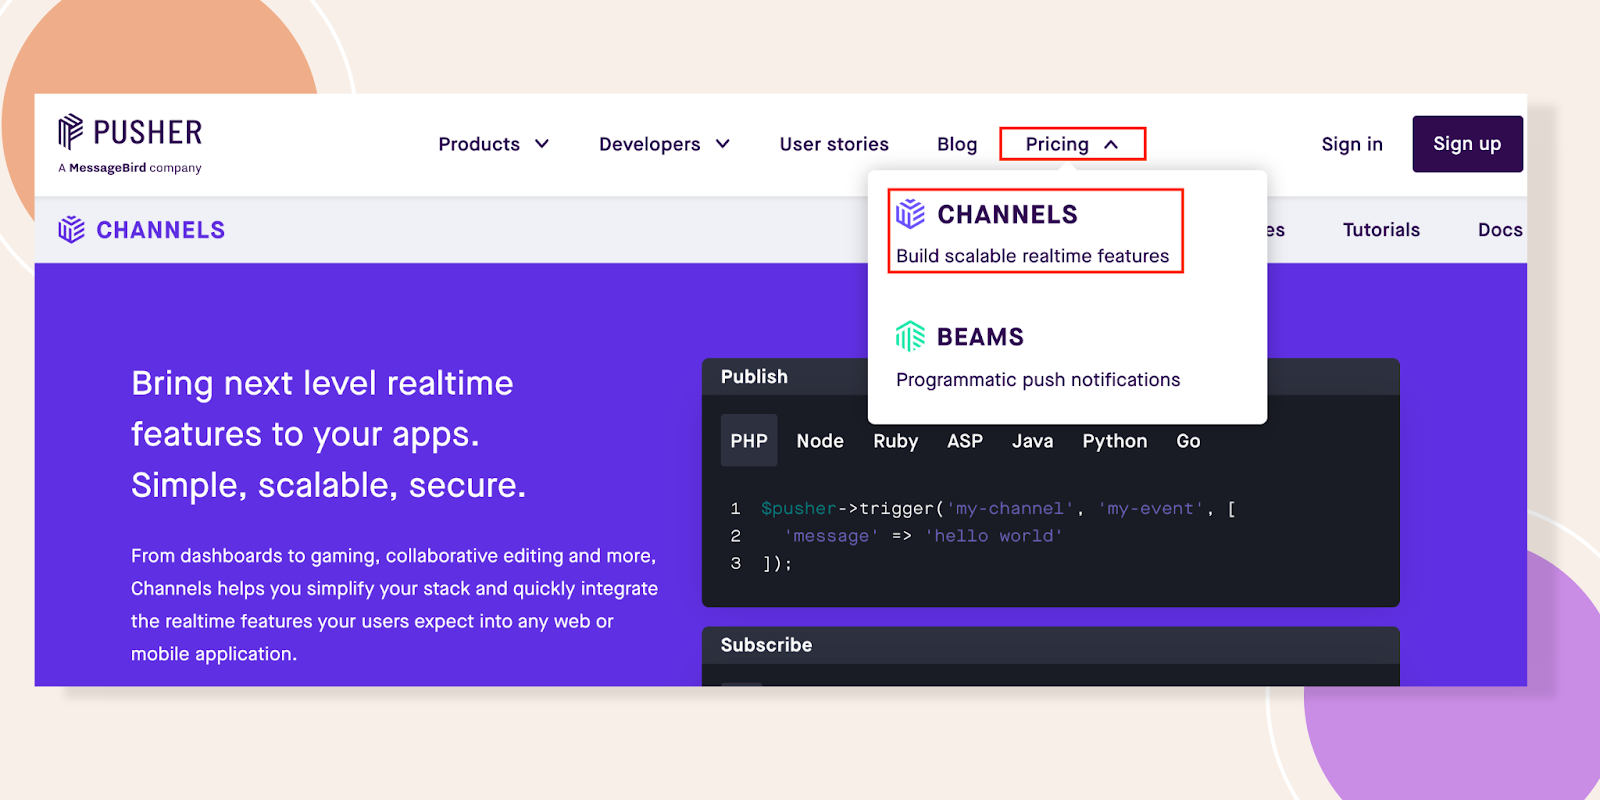
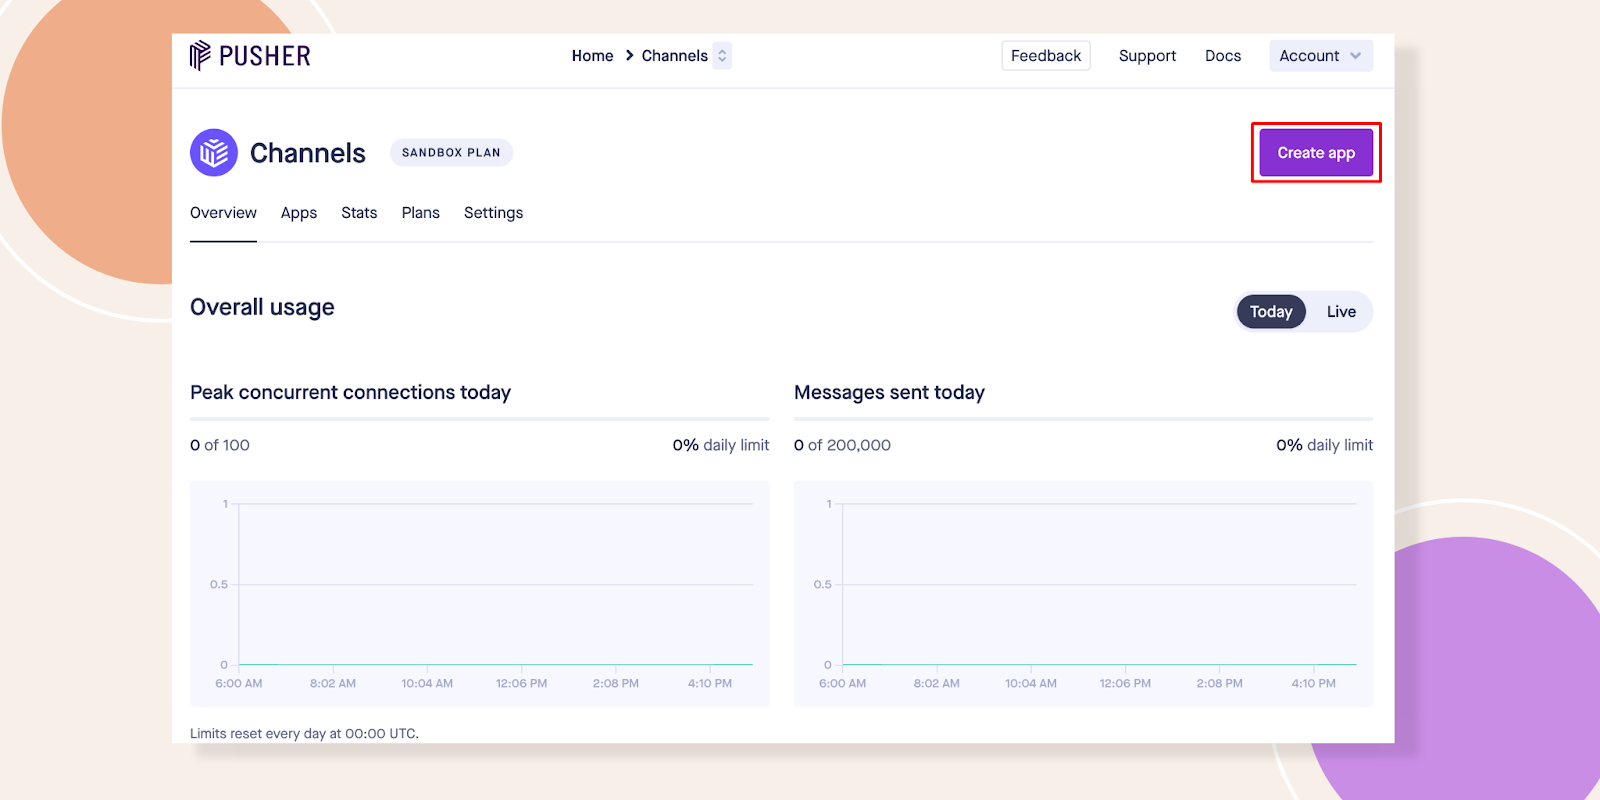
- Create your free Pusher Account by clicking on Sign Up. I’ve already created my account, so I’ll sign in now. Then hit the Channels and after that click Create App.
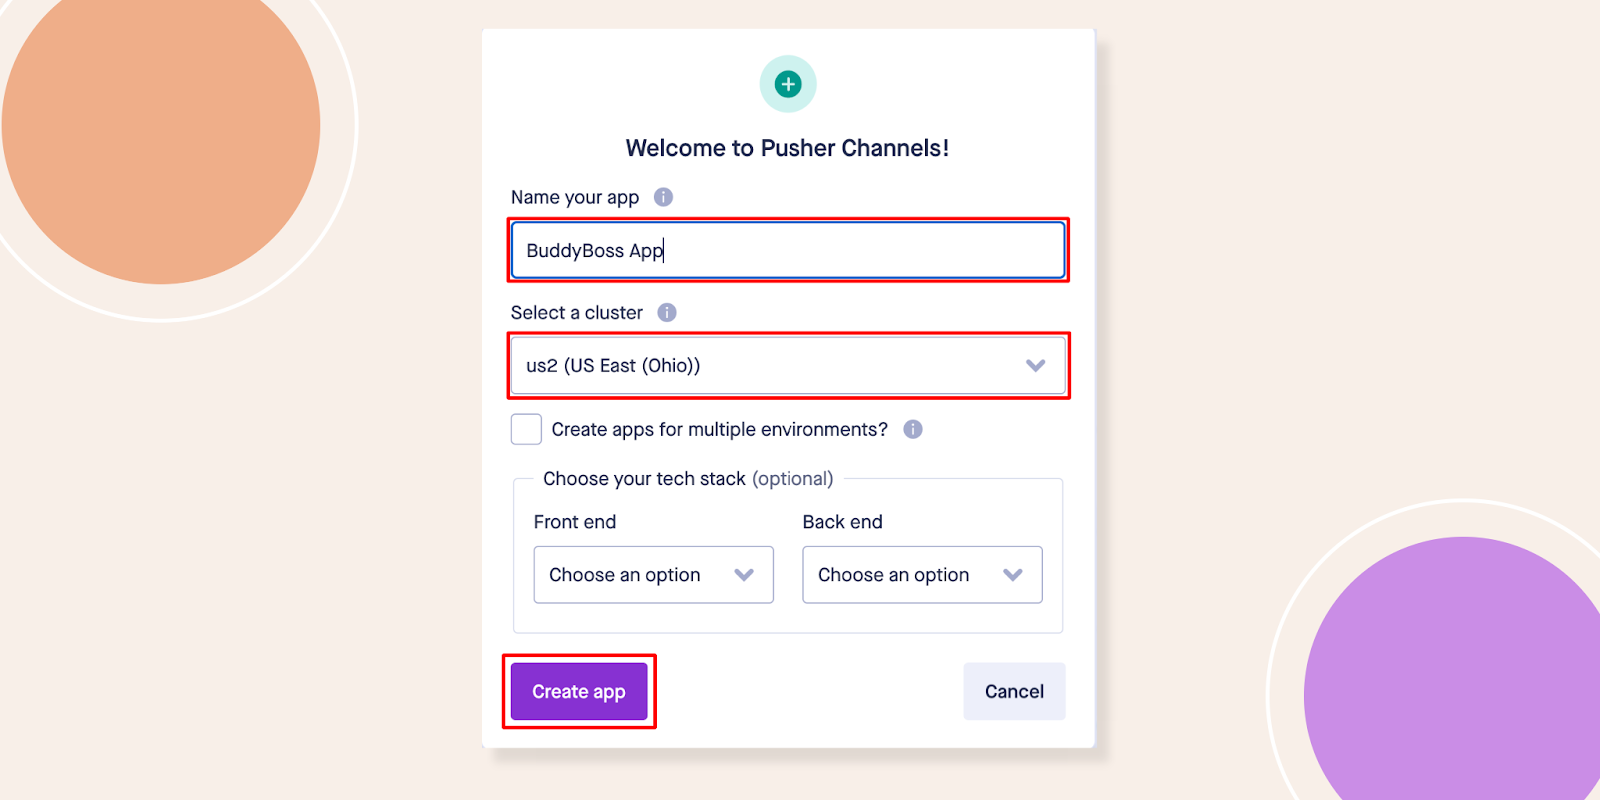
Now, enter the app name, for example, I have added “BuddyBoss App”. Next, you’ll need to select a Cluster. A cluster represents the physical location of the servers that handle requests from your Channels app. Here, we select the us2 (US East (Ohio)).
You can optionally create channel apps for multiple environments, such as a staging or development server. If you have purchased more than one BuddyBoss license and you want to use live messaging on multiple websites or apps that are not related to each other, we recommend unchecking this, instead, you can create a unique channel app for each of your primary websites. For now, I’ll keep this Unchecked. Finally, click Create App. The App has been created.
- There is one more step before this app is fully configured. From the left sidebar click on App Settings and turn on Enable Client Events.
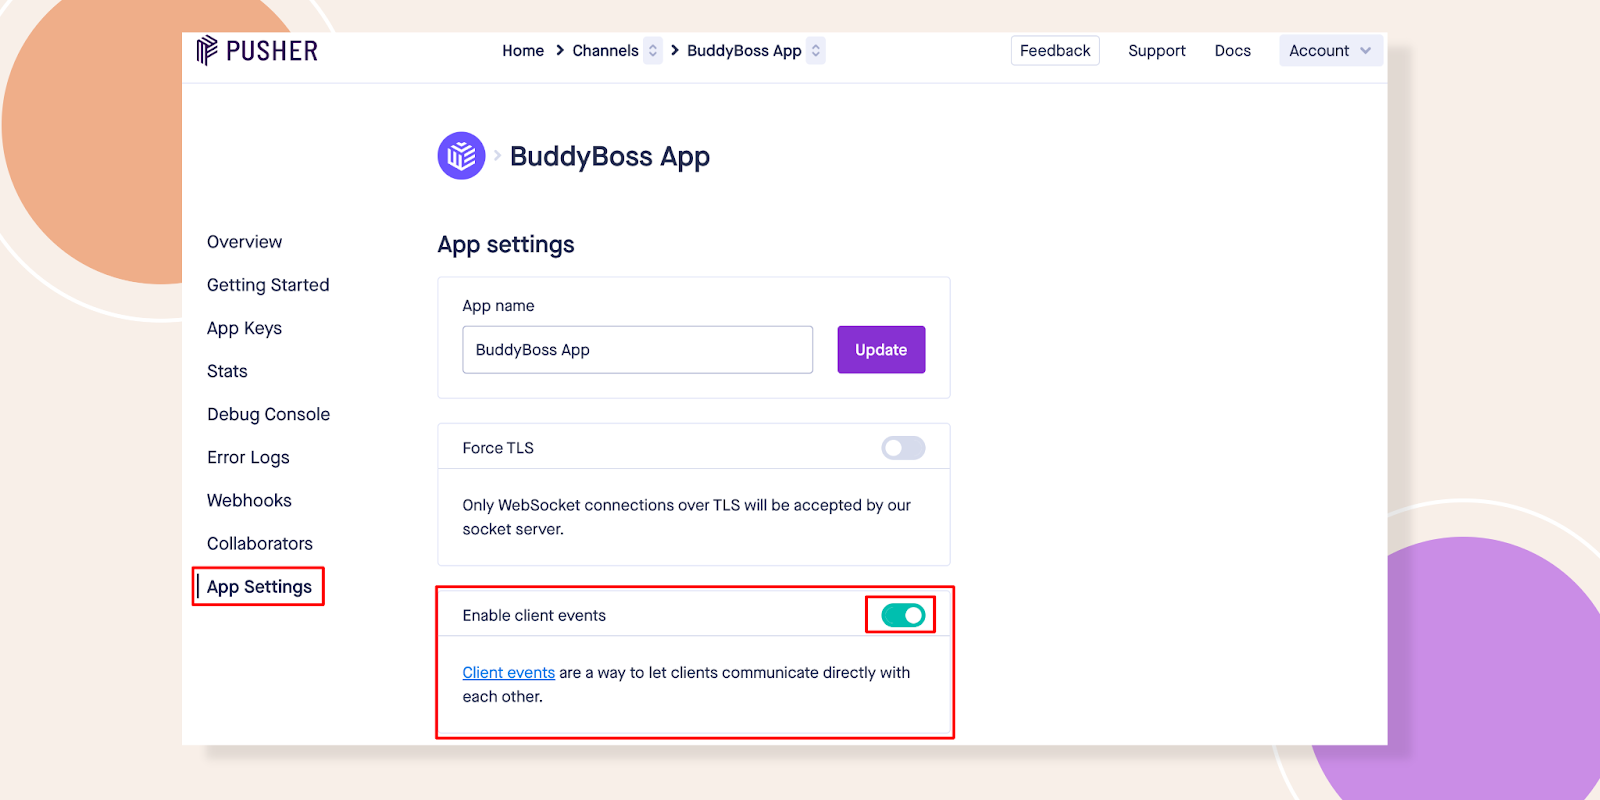
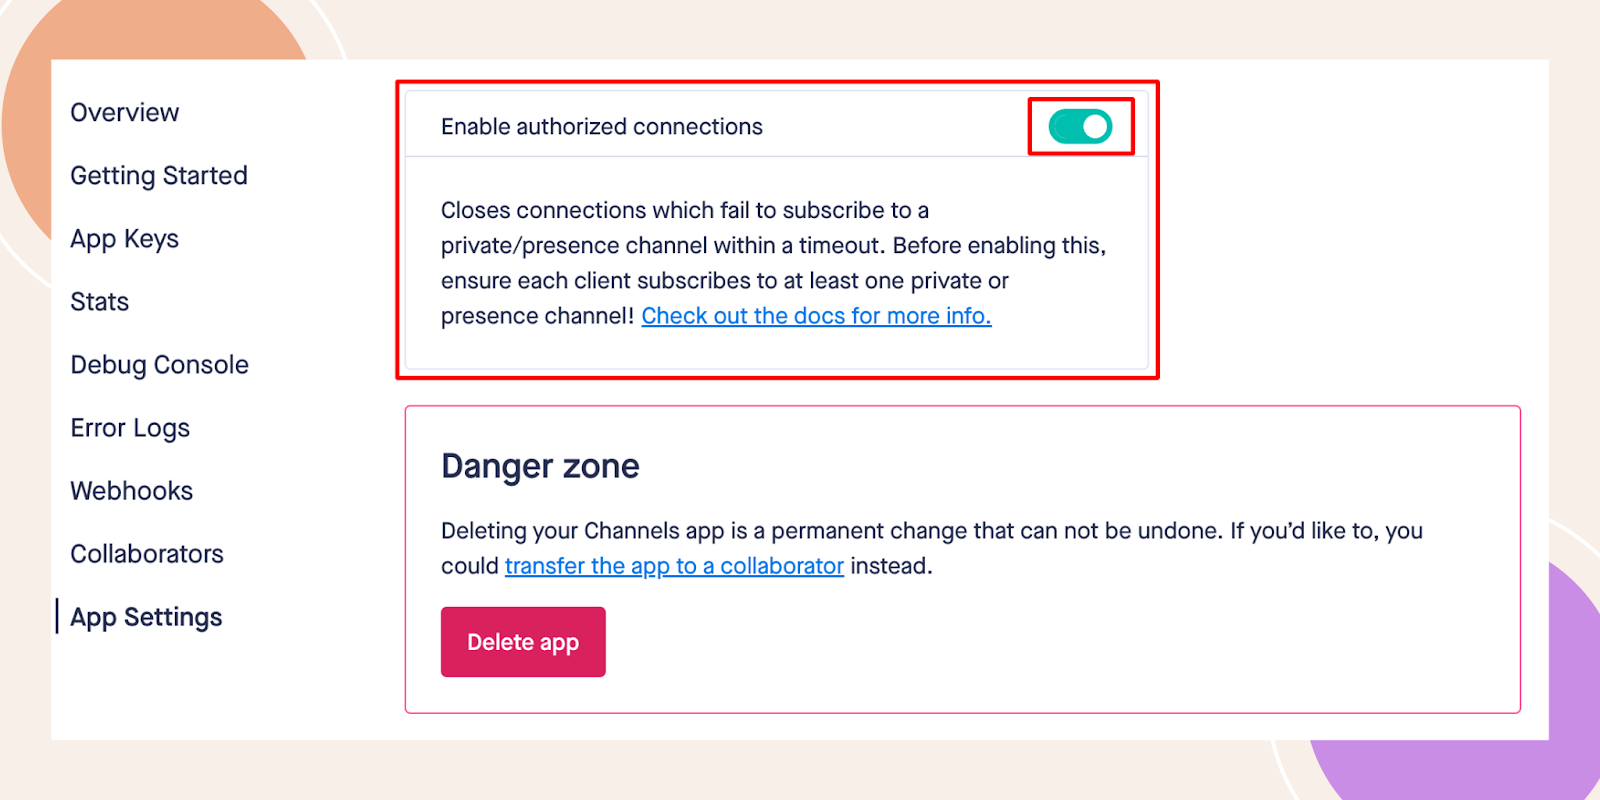
Scroll down, and turn on the Enable authorized connections option. It is very crucial, if you forget to enable these two options, live messaging will not work.
Again from the left side bar, click on App Keys. From here, copy this information back into your WordPress settings.
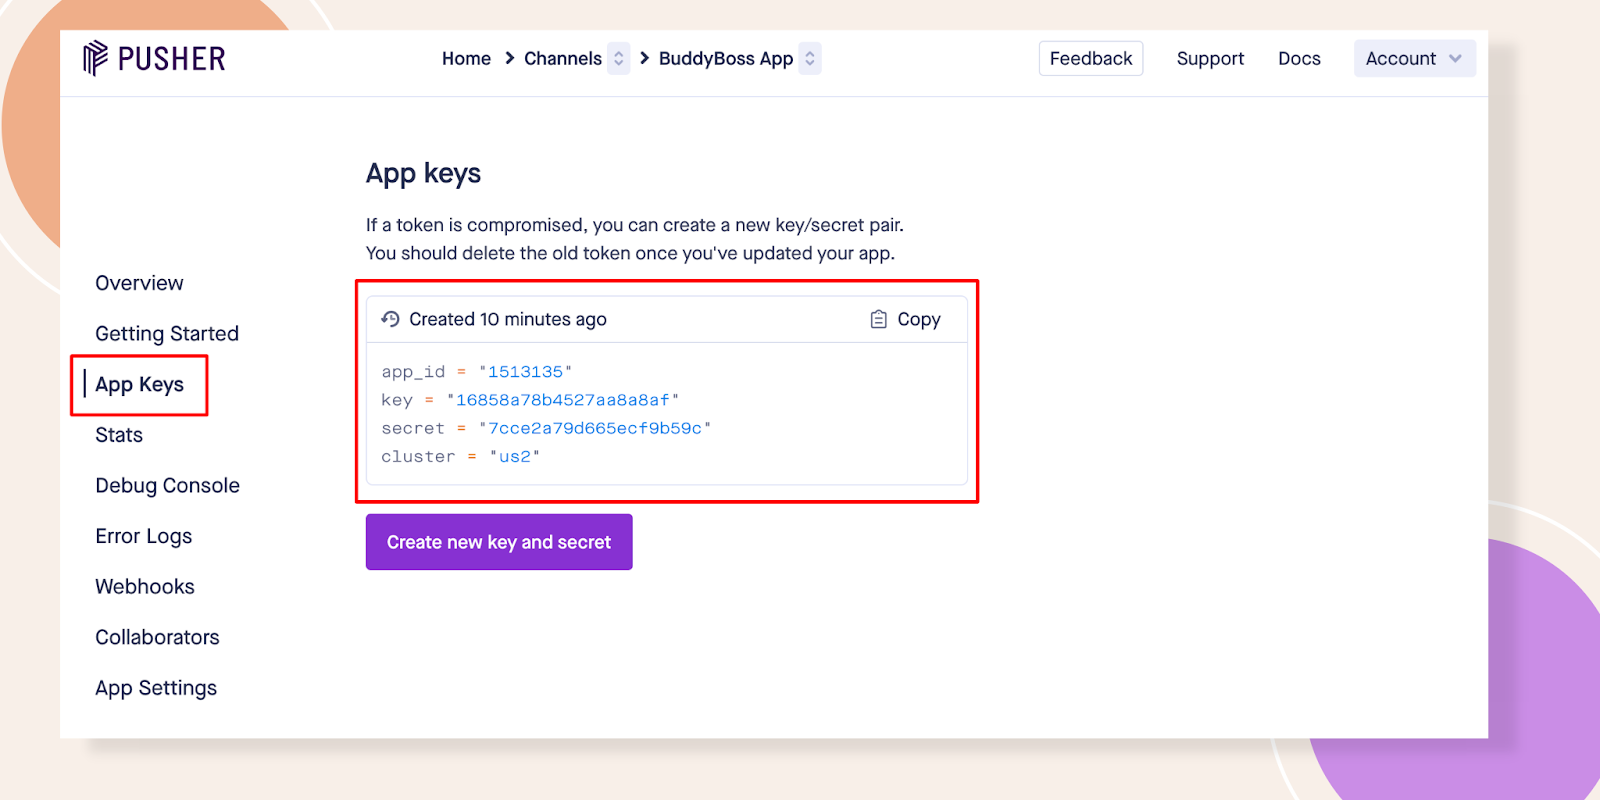
- Copy the app_id and paste it into our Pusher settings, as the Pusher App ID.
- Copy the Key and paste it as the Pusher App Key.
- Copy the Secret Key and paste it as the Pusher Secret Key.
- Lastly, check the cluster. Here it says us2, select the same from the Pusher Cluster drop-down.
- Click Save Settings.
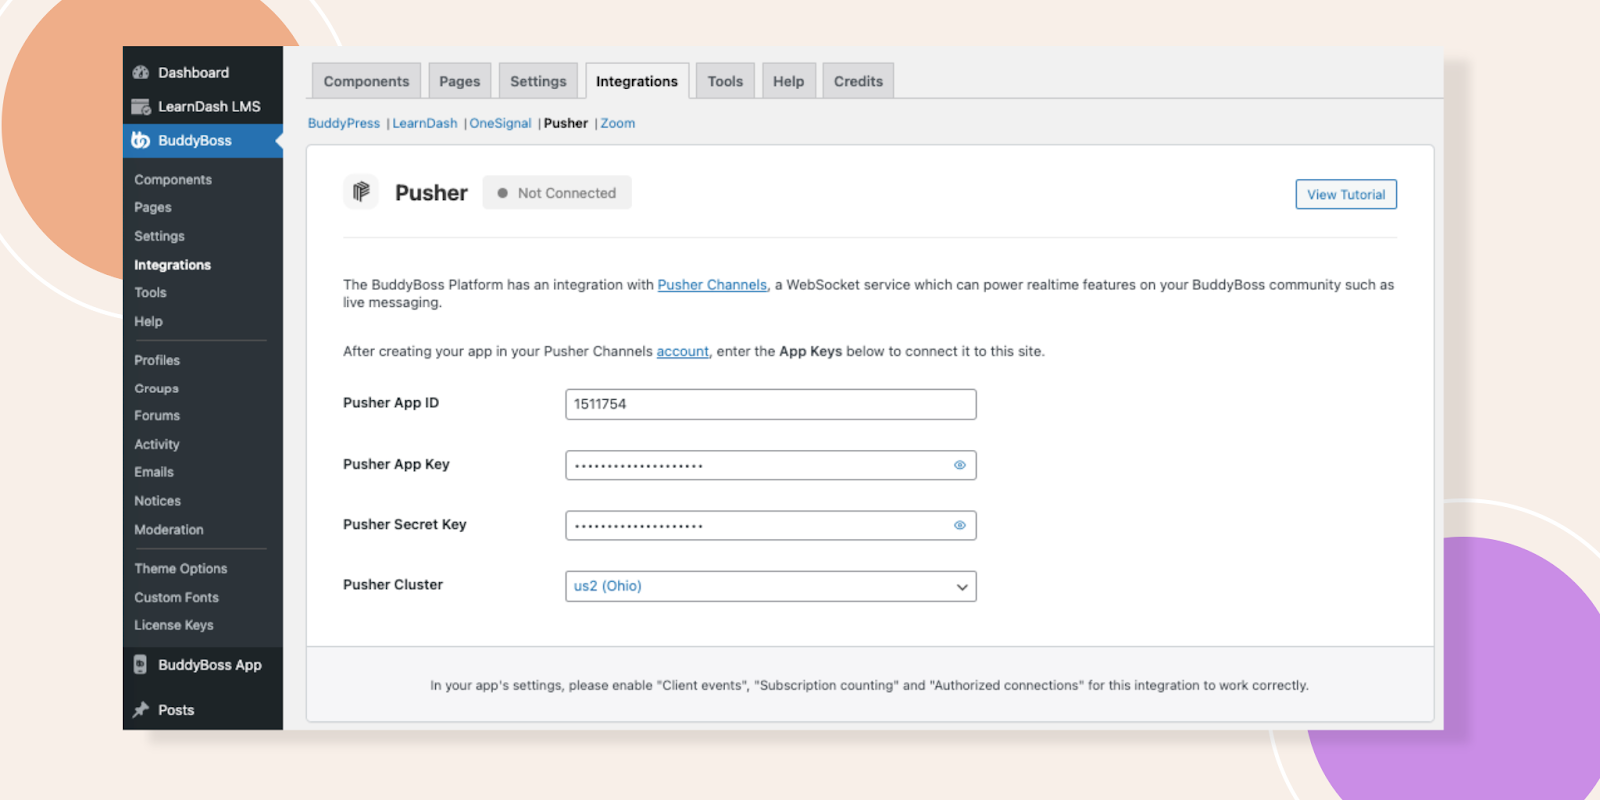
Now, you will see the Pusher status has changed to Connected. Then, let’s check to Enable Live Messaging. Click Save Settings one more time. And, Live Messaging will now work on the frontend.
Step 3
Alright, now that we have everything configured let’s go see how it looks on the web, and then we’ll play with it in the app afterwards.
- Open two different browsers, each logged in with a different member, as I have done here. One browser logged in as John and another logged in as Luna. Type a message to Luna and don’t press send.
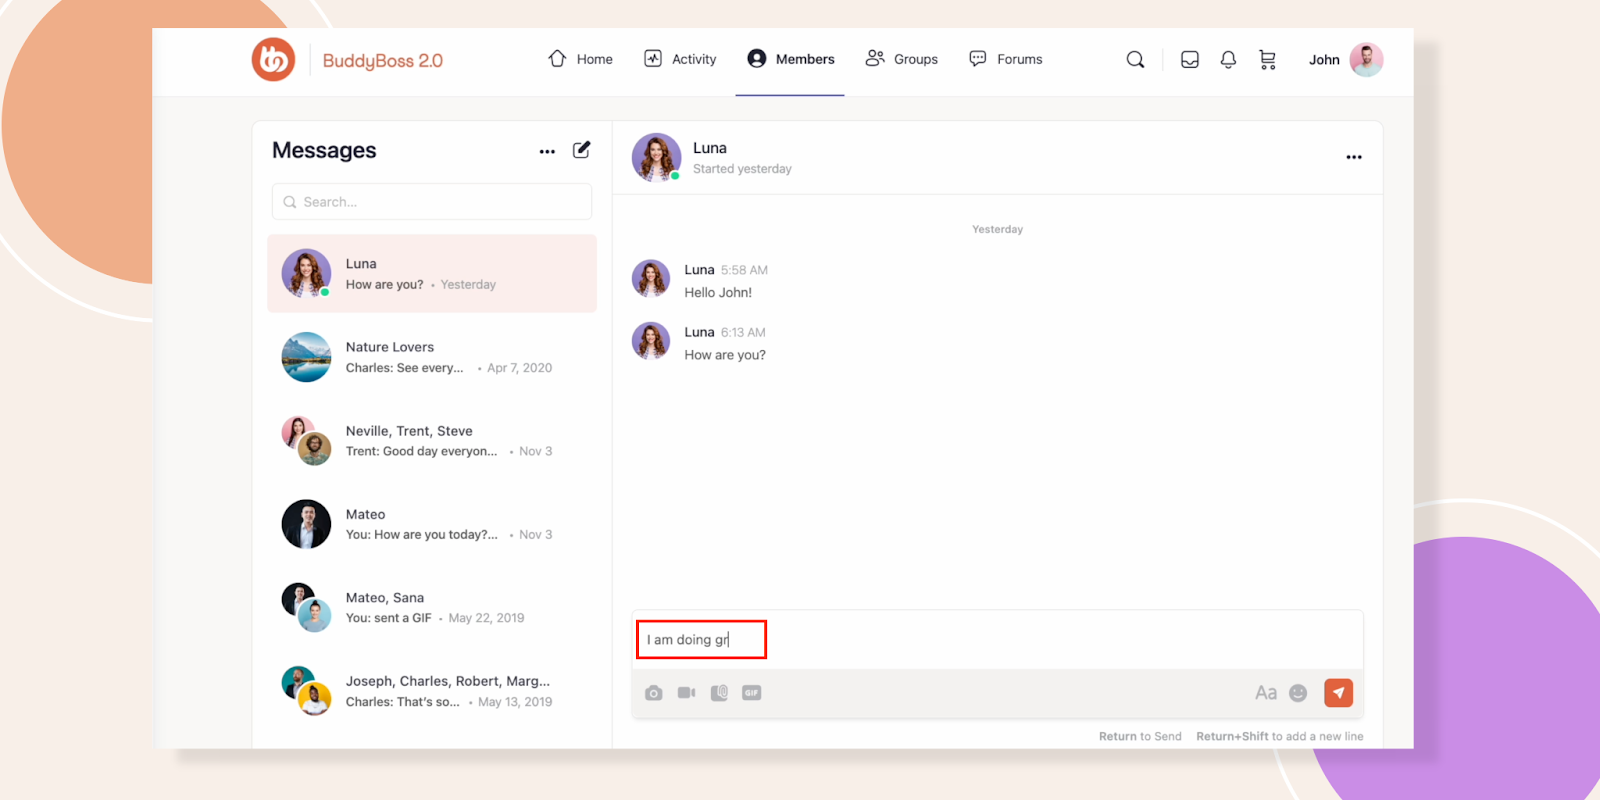
And if I go to Luna’s browser, we can see this indicator showing that I am typing a message. Let’s click send.
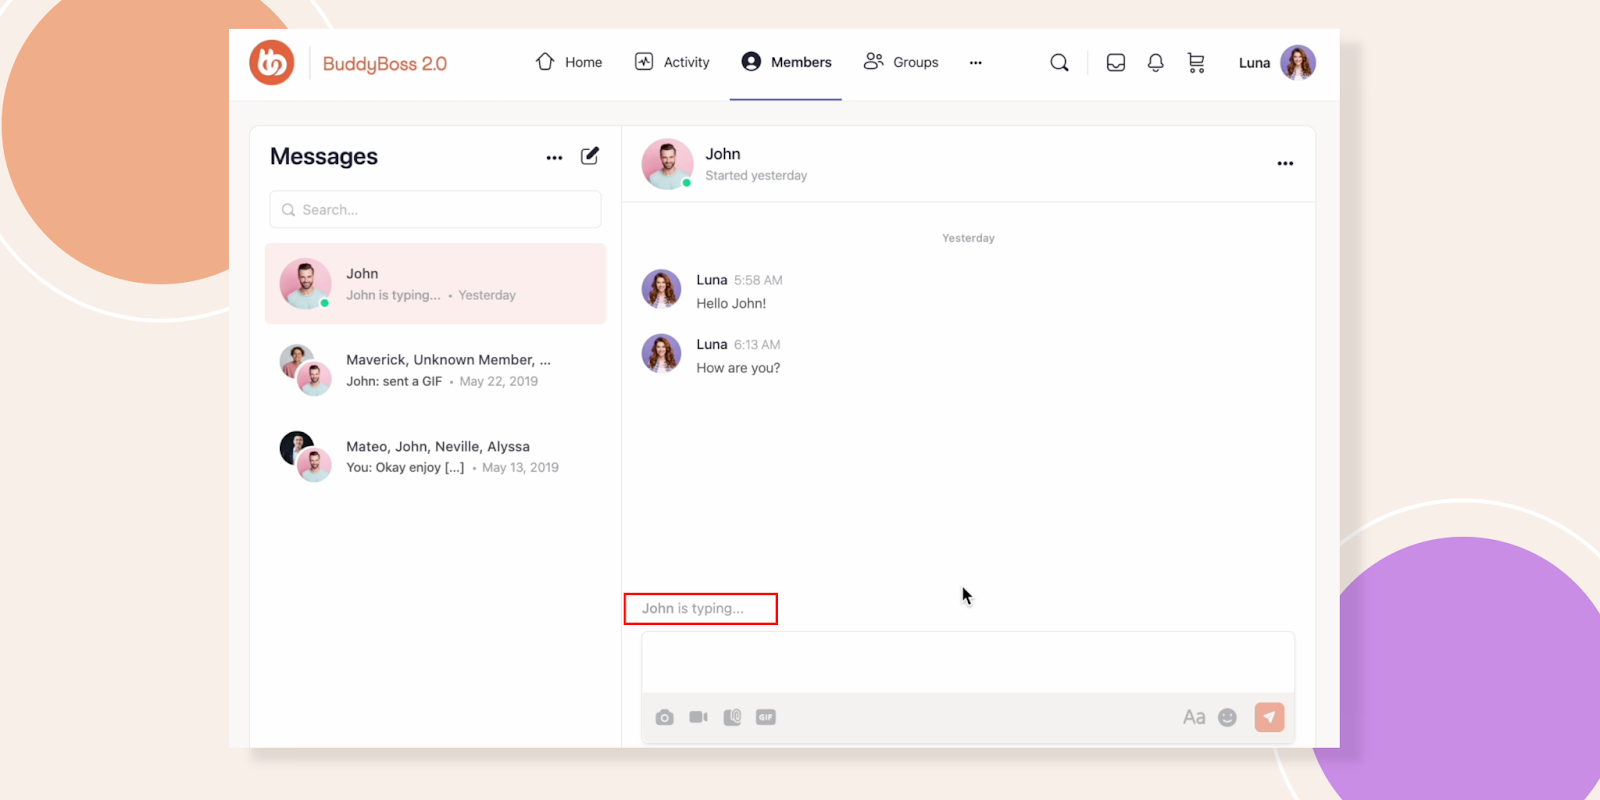
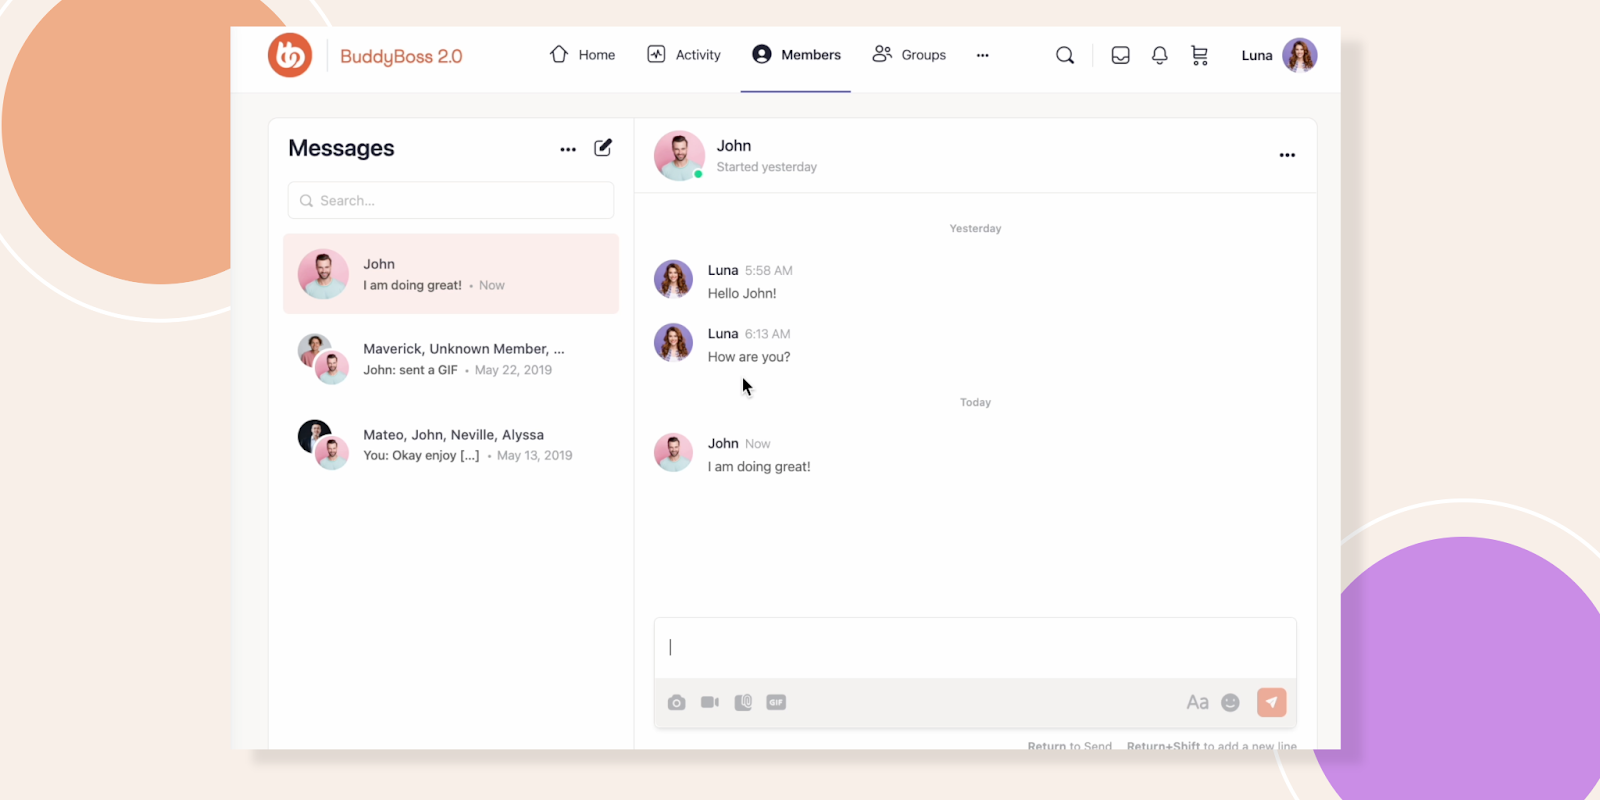
- And if I go back to Luna, you can see she received the Message instantly, without having to refresh the browser. This also works when sending media like Photos and Videos.
Isn’t the experience super engaging?
Additionally, you can also see this online status indicator updating in real time. As members come online and sign off, this will update instantly.
Configure Live Messaging (App)
Next, let me show you how this feature works on the app.
- I have 2 phones here, each with a BuddyBoss App installed. The phone on the left is logged in as John. And the phone on the right is logged in as Luna. Let’s go to our Messages on both phones.
John can see a green indicator on the upper right corner of Luna’s avatar showing that she is online. Just like on the web, this online indicator is updated in real-time. And of course on Luna’s phone, she can see a green indicator showing that John is online. On John’s account, I will open my thread with Luna and I will write a message to her.
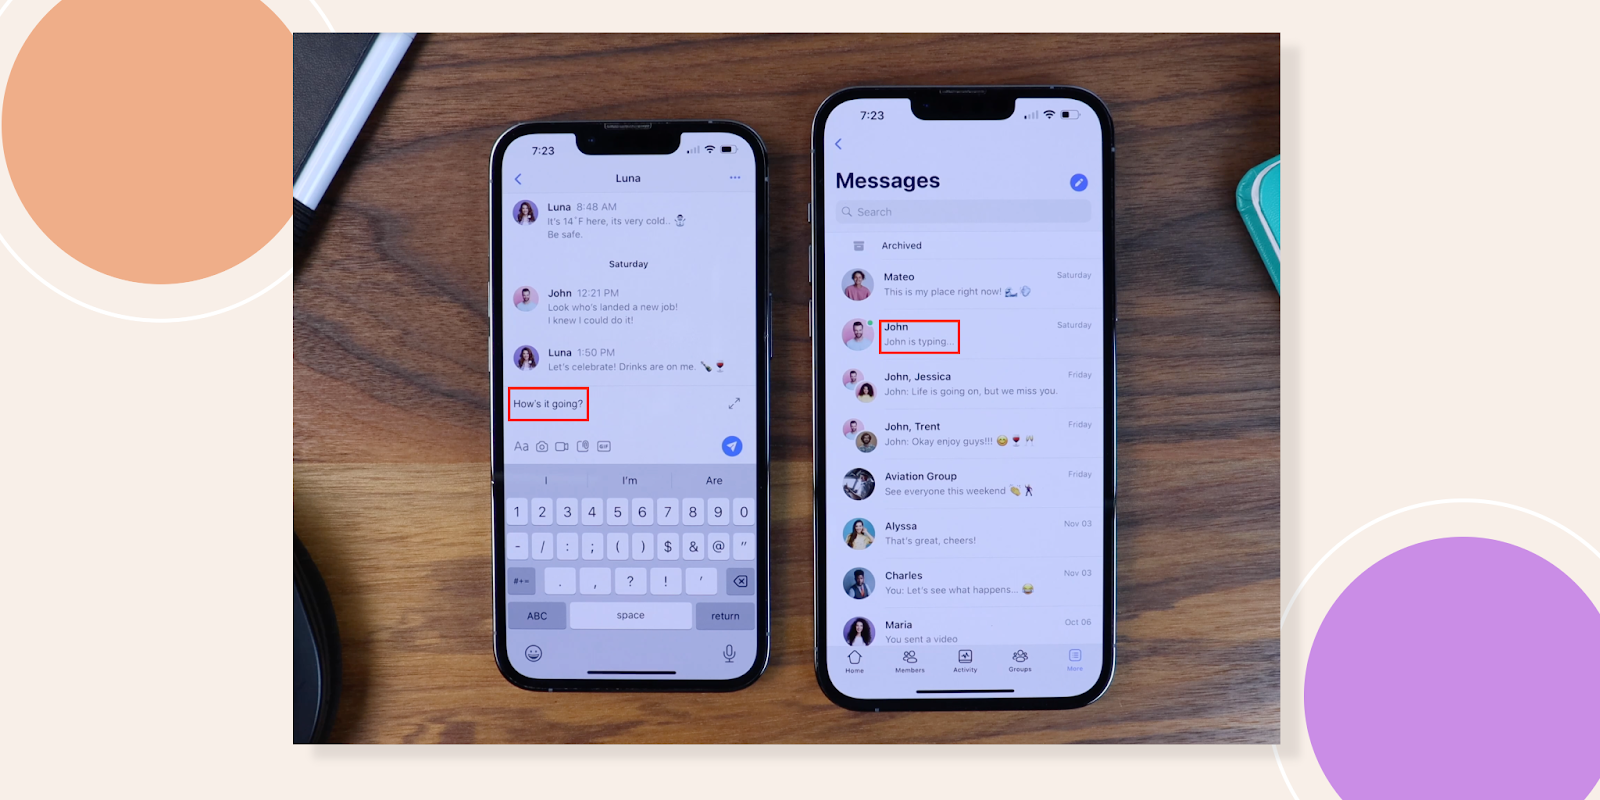
- As soon as I type a message, a typing indicator immediately appears on Luna’s screen. And if I click Send, Luna instantly receives the message without refreshing the screen. Now, on Luna’s account, I will open John’s message and reply to it. A typing indicator also appears on John’s screen. Let’s hit send, John immediately receives the message as well.

This live typing indicator also works on group messages. So if you are a part of a group thread, you will immediately see who’s typing a message.
We’re so excited to deliver this Live Messaging feature to all of you. We know how important this feature is to your communities and we’re so excited to finally get this into your hands.