
Introducing our Reactions feature. Users can now express their reactions to activity posts and comments through options such as Like, Heart, Laugh, Angry and more.
There is a huge emotion library for you to set up reactions according to your community site. Additionally, you have the flexibility to upload custom icons tailored to the specific needs of your community.
This feature is available for both the BuddyBoss Web and App.
Configure Reactions
Step 1: Enable Likes Mode
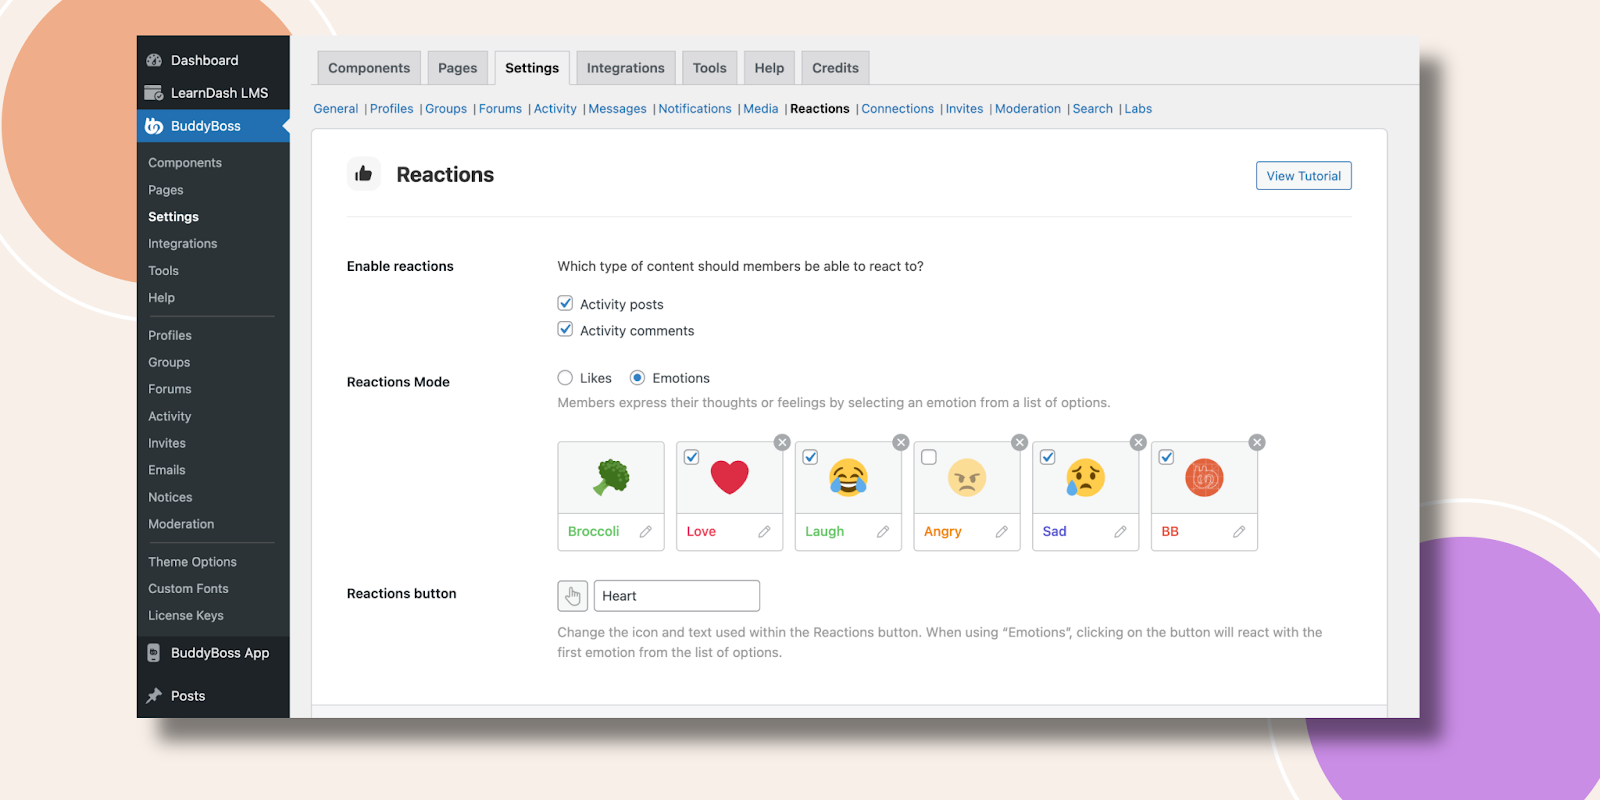
Navigate to BuddyBoss > Settings > Reactions. You can choose whether to enable reactions for Activity Posts and/or Activity Comments.
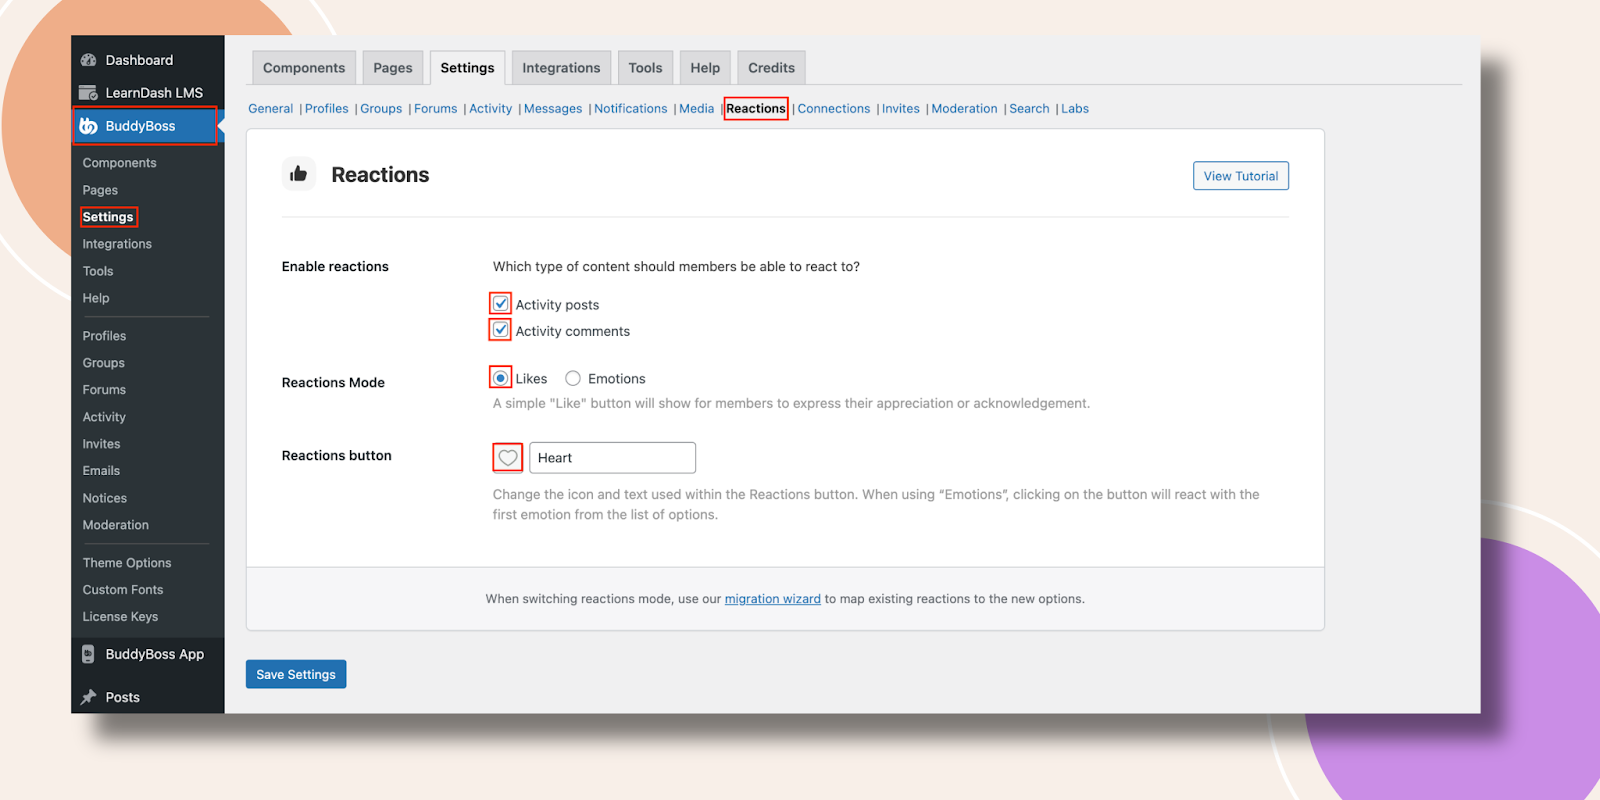
The next setting is the Reactions Mode. It’s in Likes mode by default, this means there will be a Like indicator on all posts in the BuddyBoss Web and App
With Likes configured, we can change the default Like icon to another by replacing the Reactions button. Click on the existing button and an Icons modal will appear with a wide selection of reactions. For this example, we will select the Hand Pointer. Now, hit the Select Icon button below.

As you can see the reaction is changed, also here you can edit the text. This label is shown as Heart. Don’t forget to hit the Save Settings button.

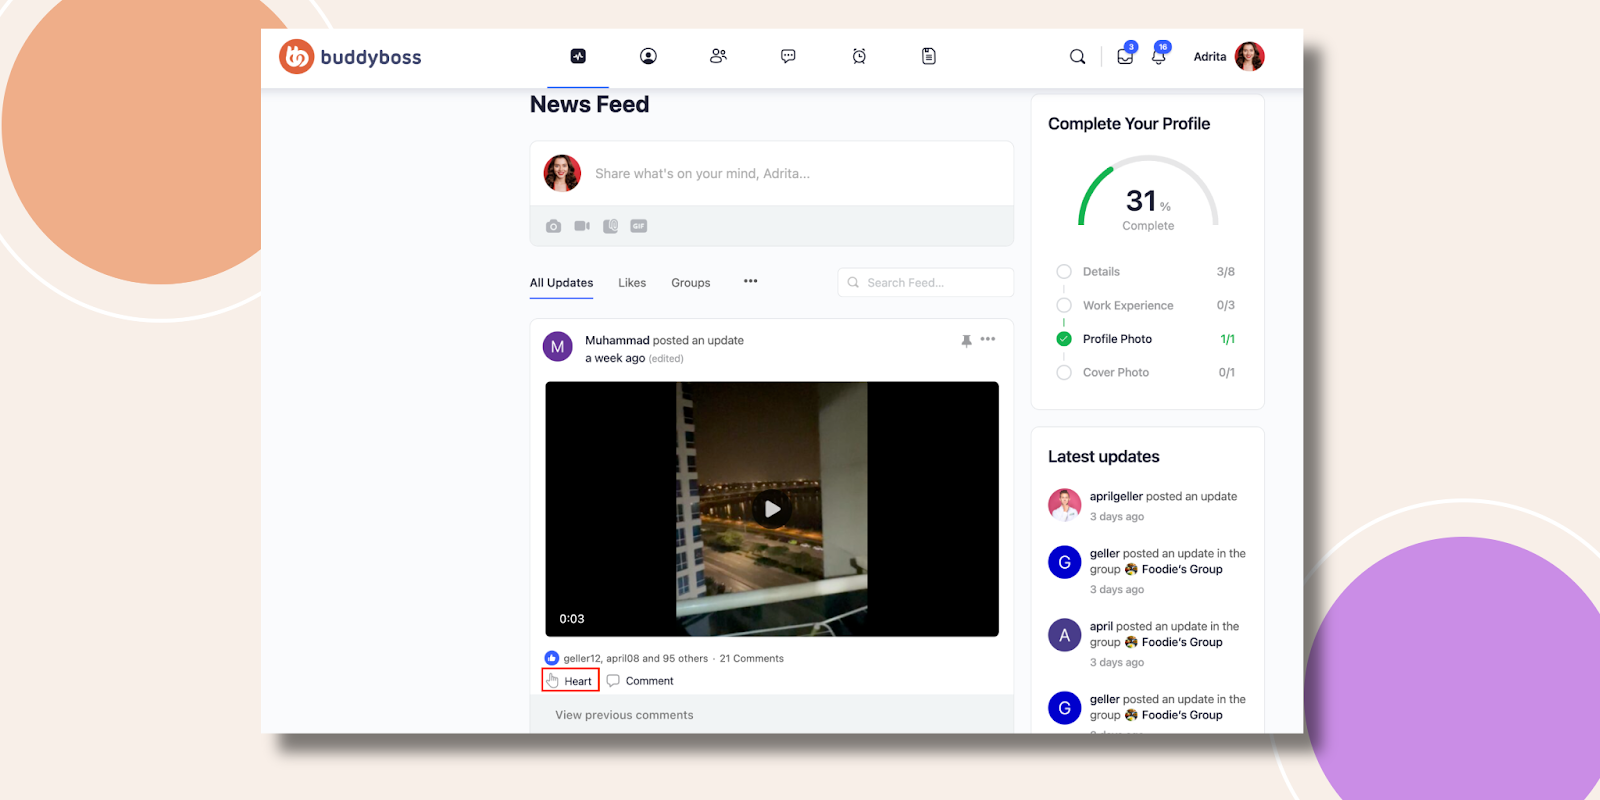
Let’s move to the News Feed and see the Hand Pointer icon is there with your label.
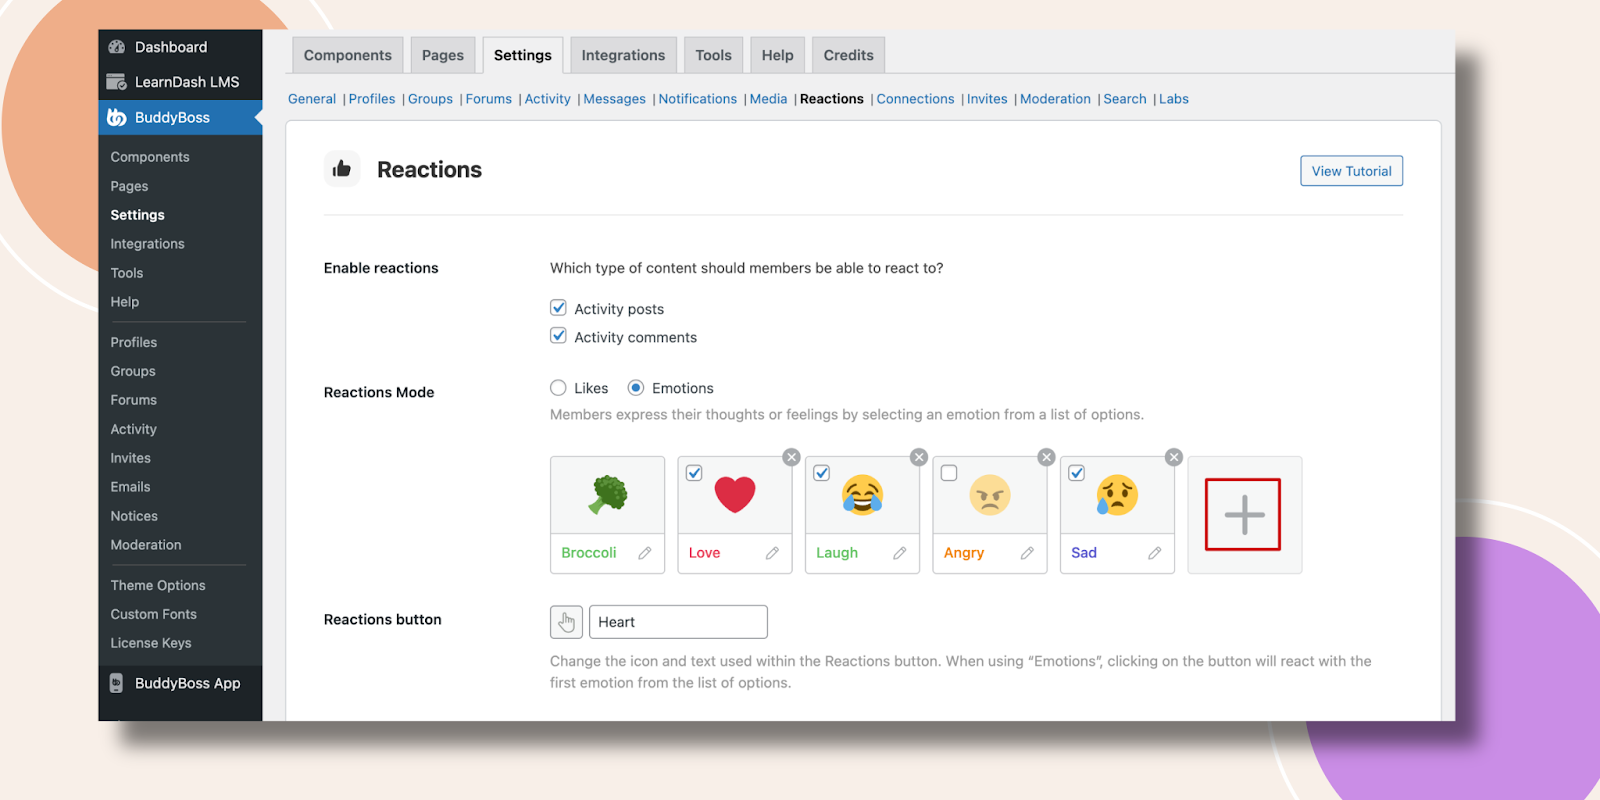
Step 2: Enable Emotions Mode
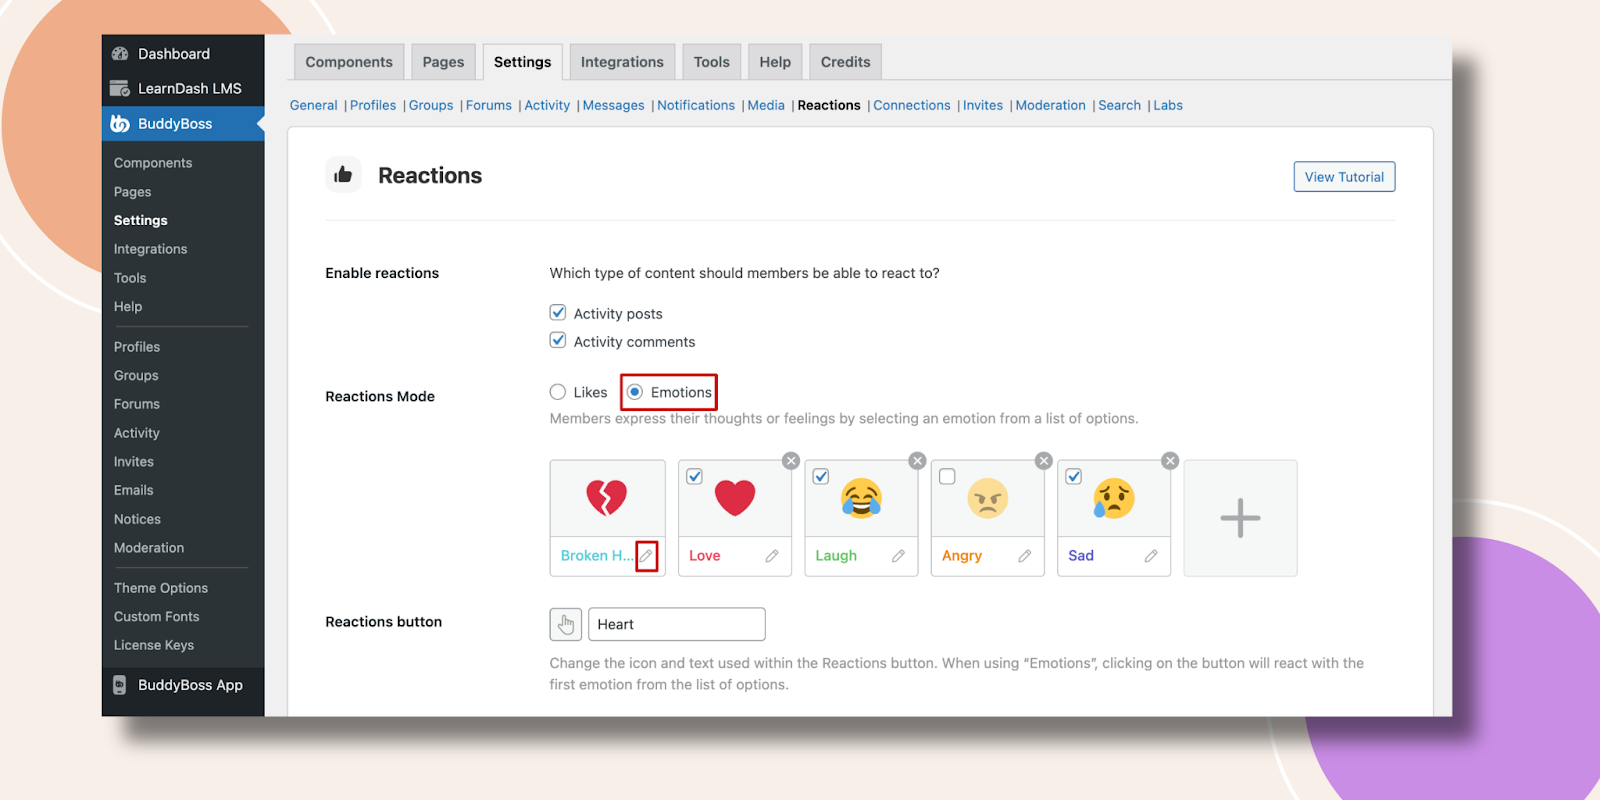
Let’s enable the Emotions mode. This will now display our default emotion icons, and each one has a specific label. We can re-order the emotions, remove them by clicking the X, and add another one by clicking the +, for a maximum of 6.
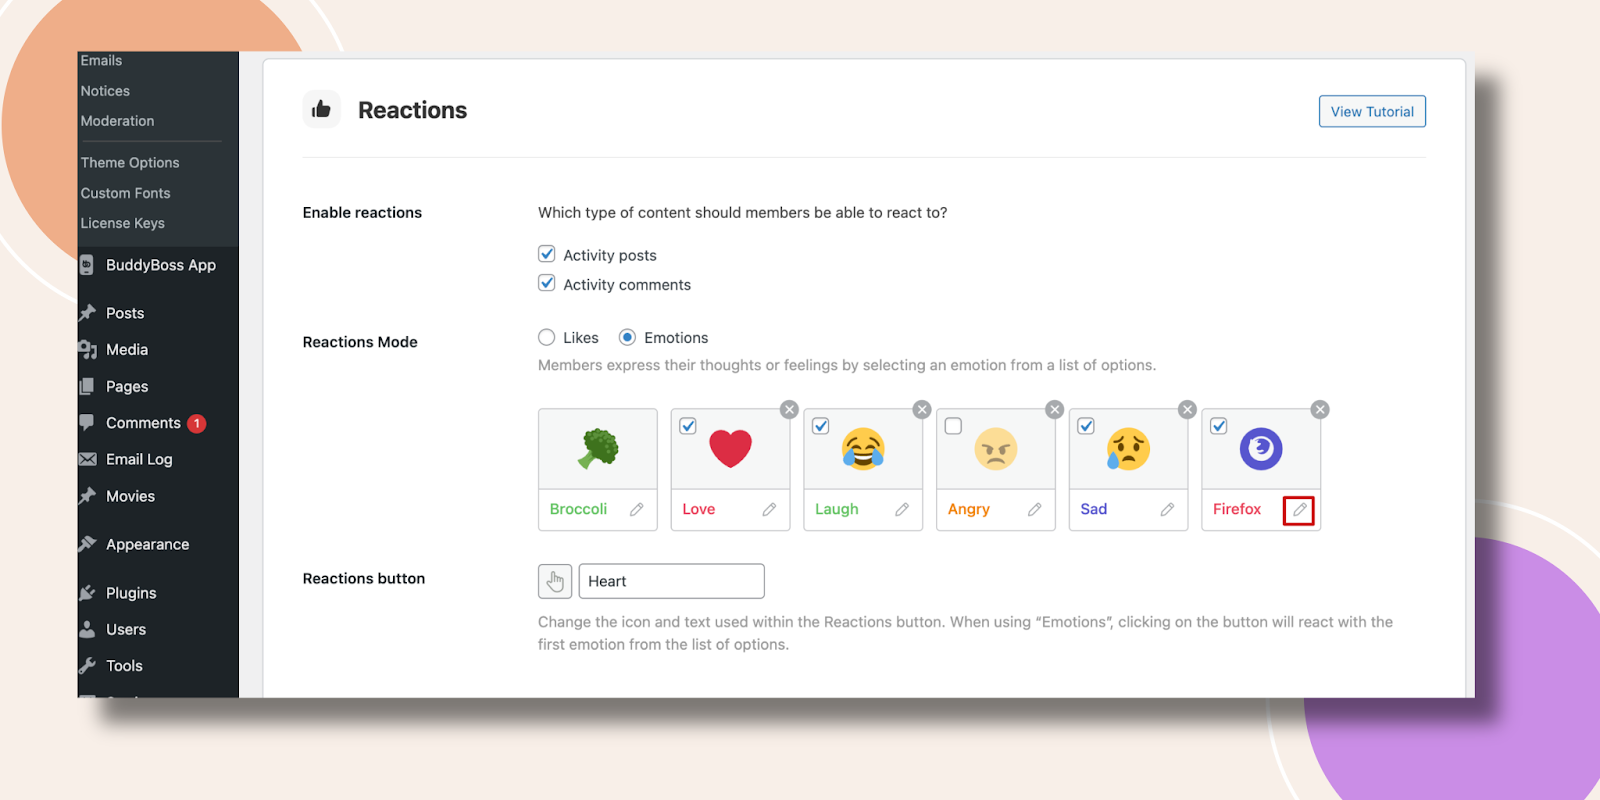
We will now change an emotion, and click on the pencil icon below any emotion.
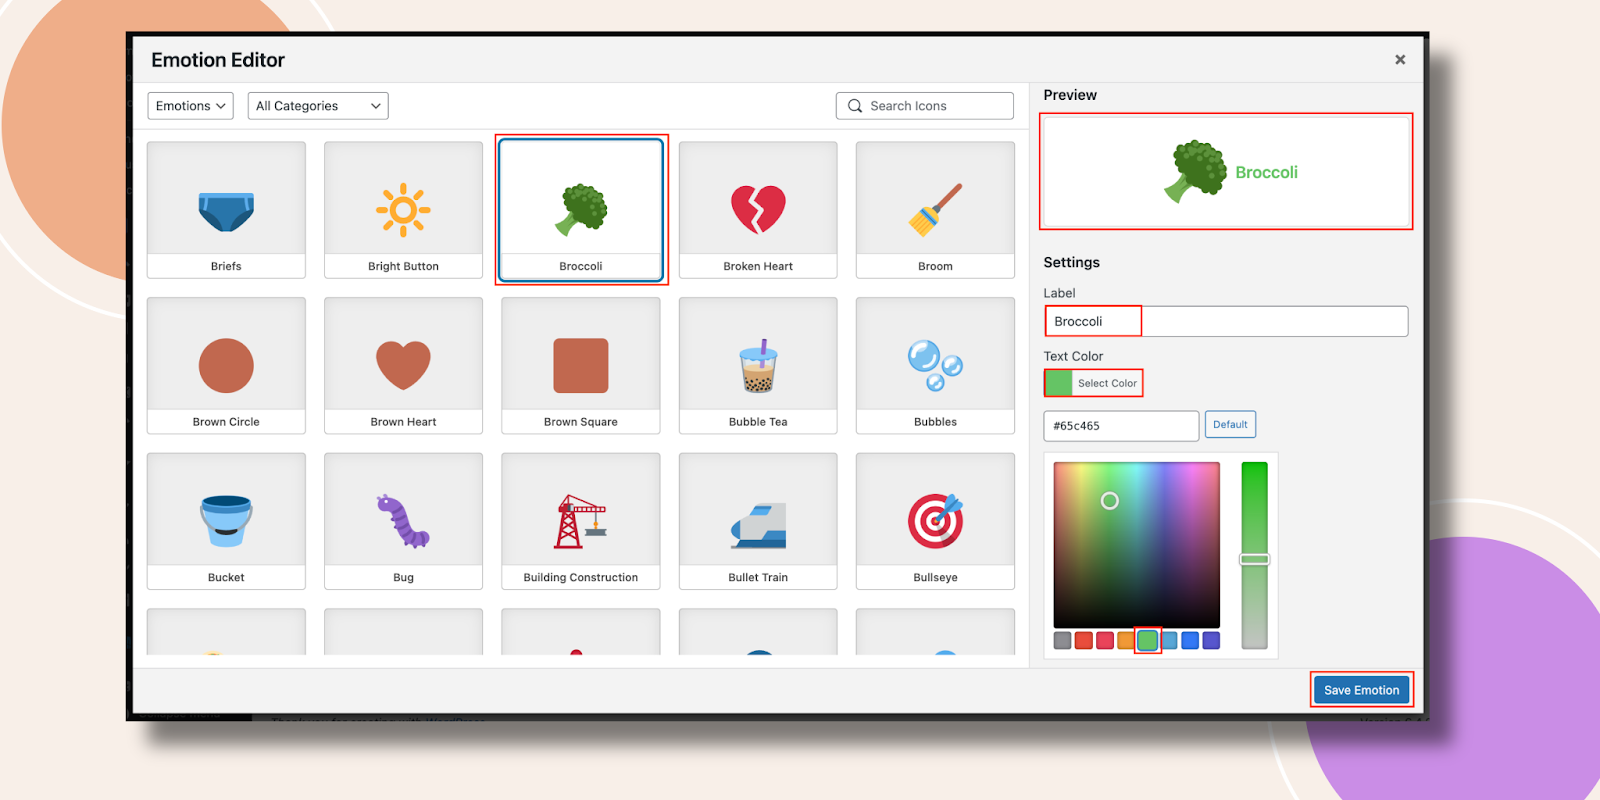
We have chosen Broccoli. On the right side, you can change the Label and Text Color of this emotion. You can check the Preview of this emotion as well. Lastly, hit the Save Emotion button.
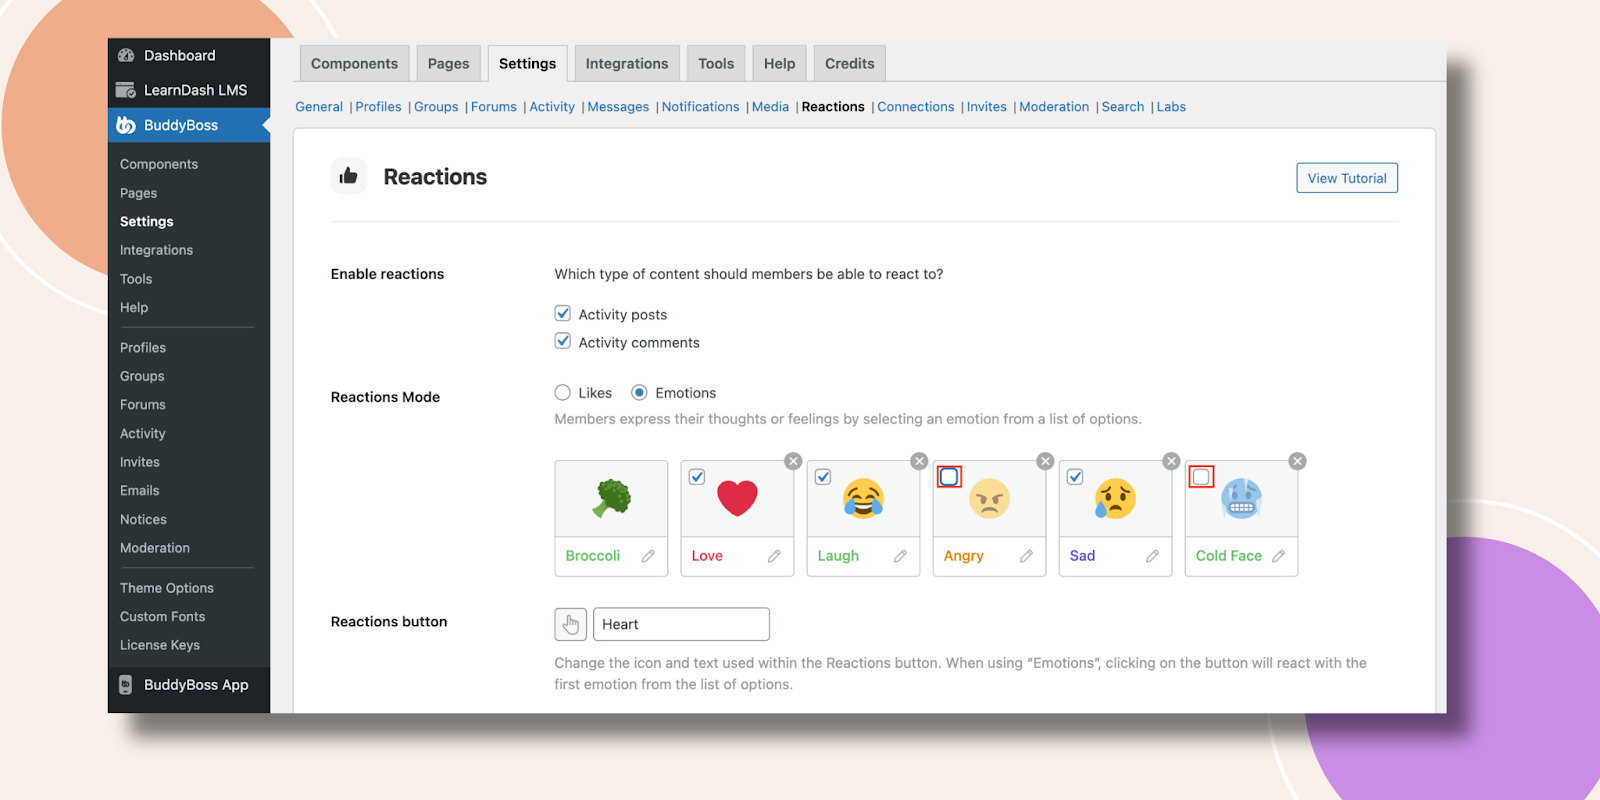
Step 3: Add Emotions
After selecting an emotion we will now discover how to add an emotion. Press on the plus icon.
An emotions modal will appear. We choose Cold Face and again just like before you can change the Label and Text Color of this emotion. Now, press the Save Emotions button.

You can see the Cold Face emotion right here. Now suppose, you don’t want to activate all the emotions you have, you want to deactivate some of them. Simply uncheck the emotions you want to deactivate. For instance, we uncheck the Angry and Cold Face. Don’t forget to hit the Save Settings button below to see the changes in the frontend.
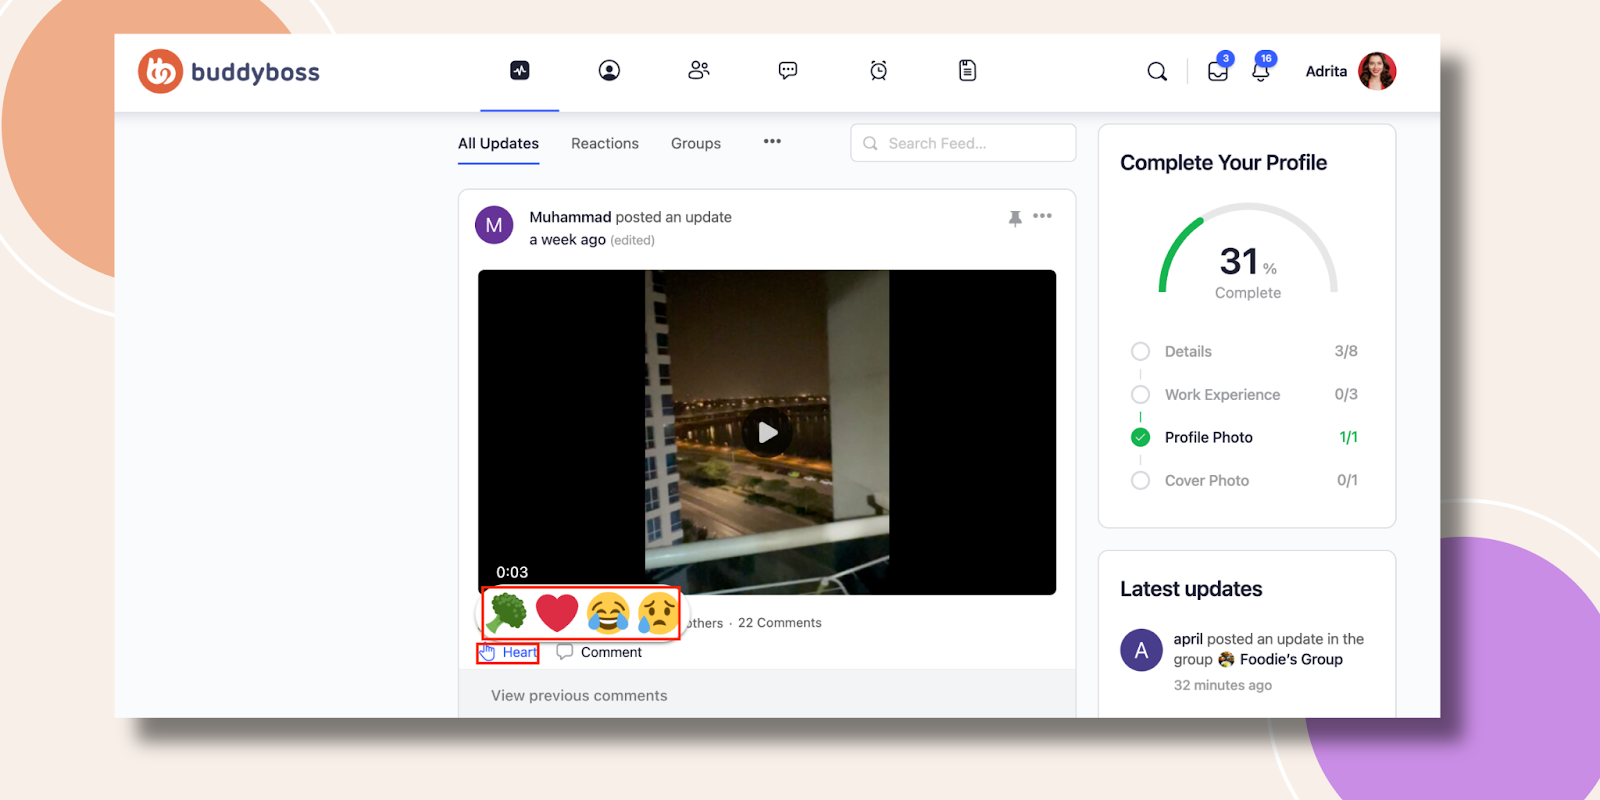
Check the frontend now. Yes, only 4 emotions are visible to the users.
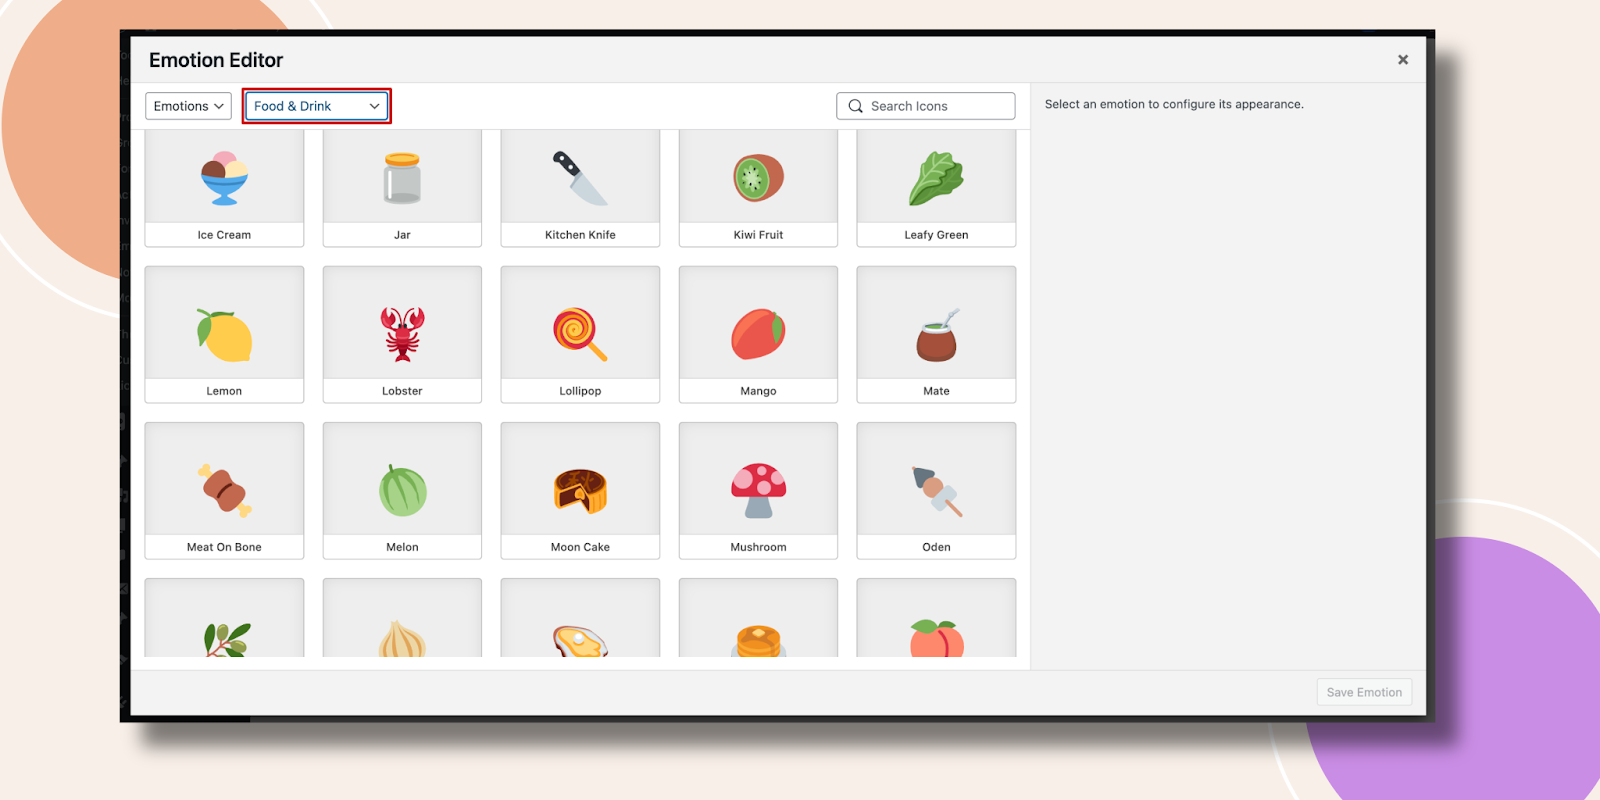
Moreover, if you navigate to the emotion modal you can explore the wide category we made for you. Here, you can select your emotions based on the category.

Here we have selected the Food & Drink category emotions.
Step 4: Add Icons
Apart from Emotions, we have a vast collection of Icons. Just navigate the same way you add new emotions by clicking on the plus icon.
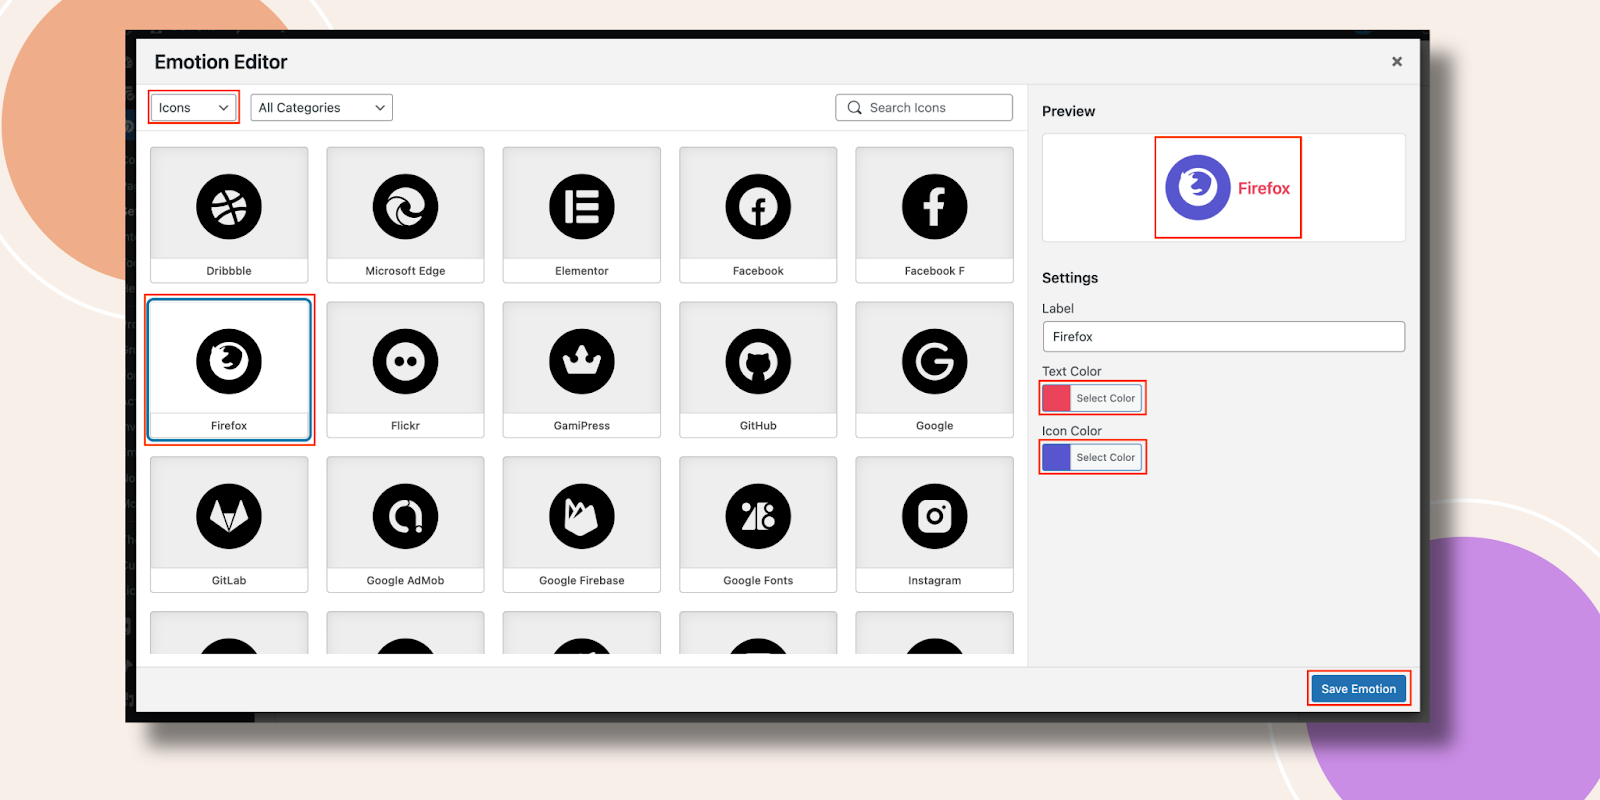
At the top left corner, select the Icons option. Choose any icon you like. Just like emotions you can edit the Label, Text Color, and Icon Color. Now hit the Save Emotion button.
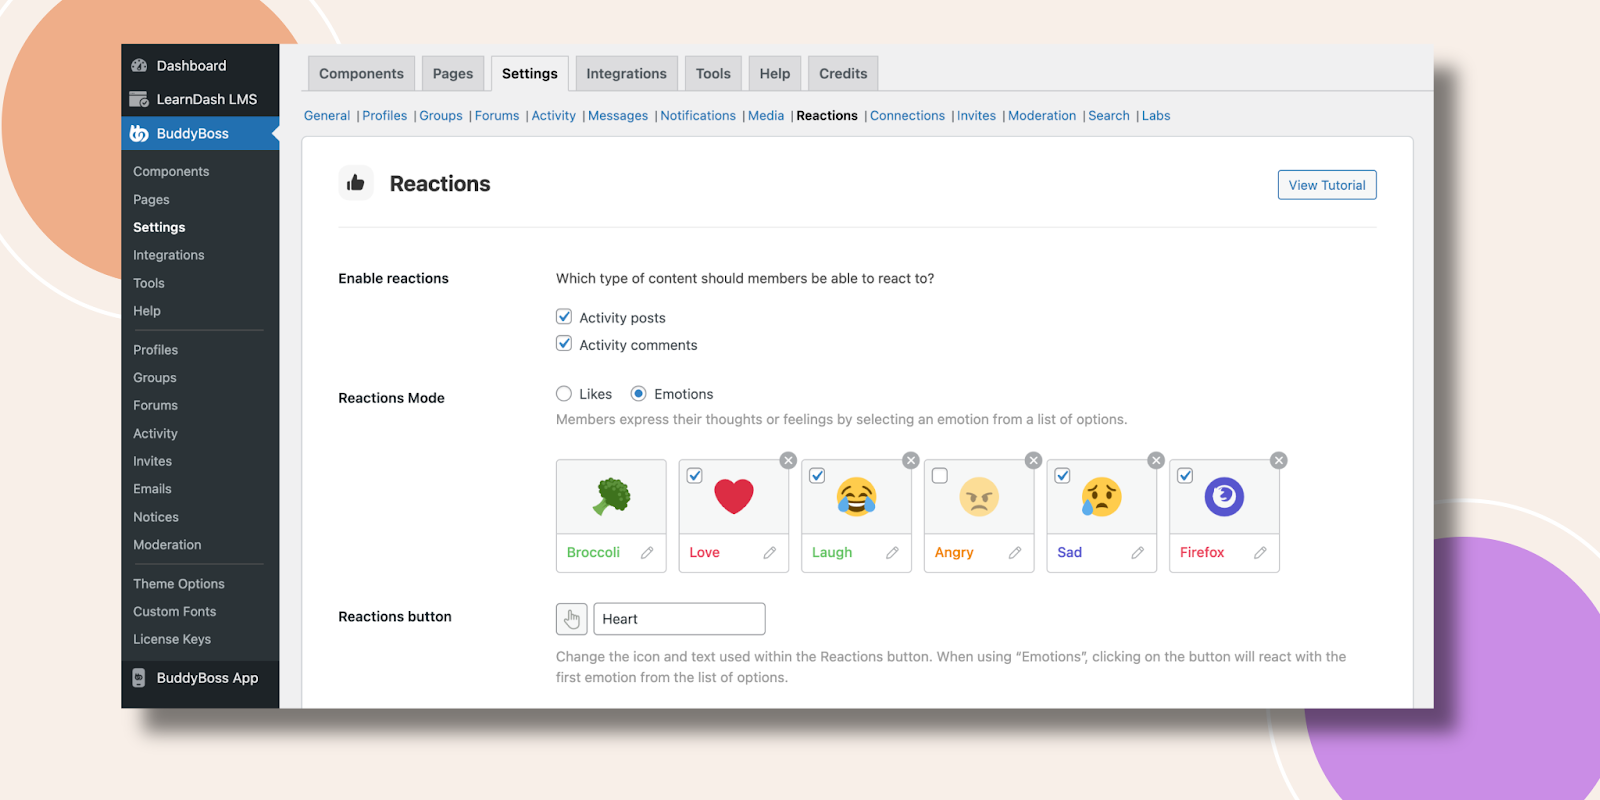
Now you can see your chosen icon in the emotions list.
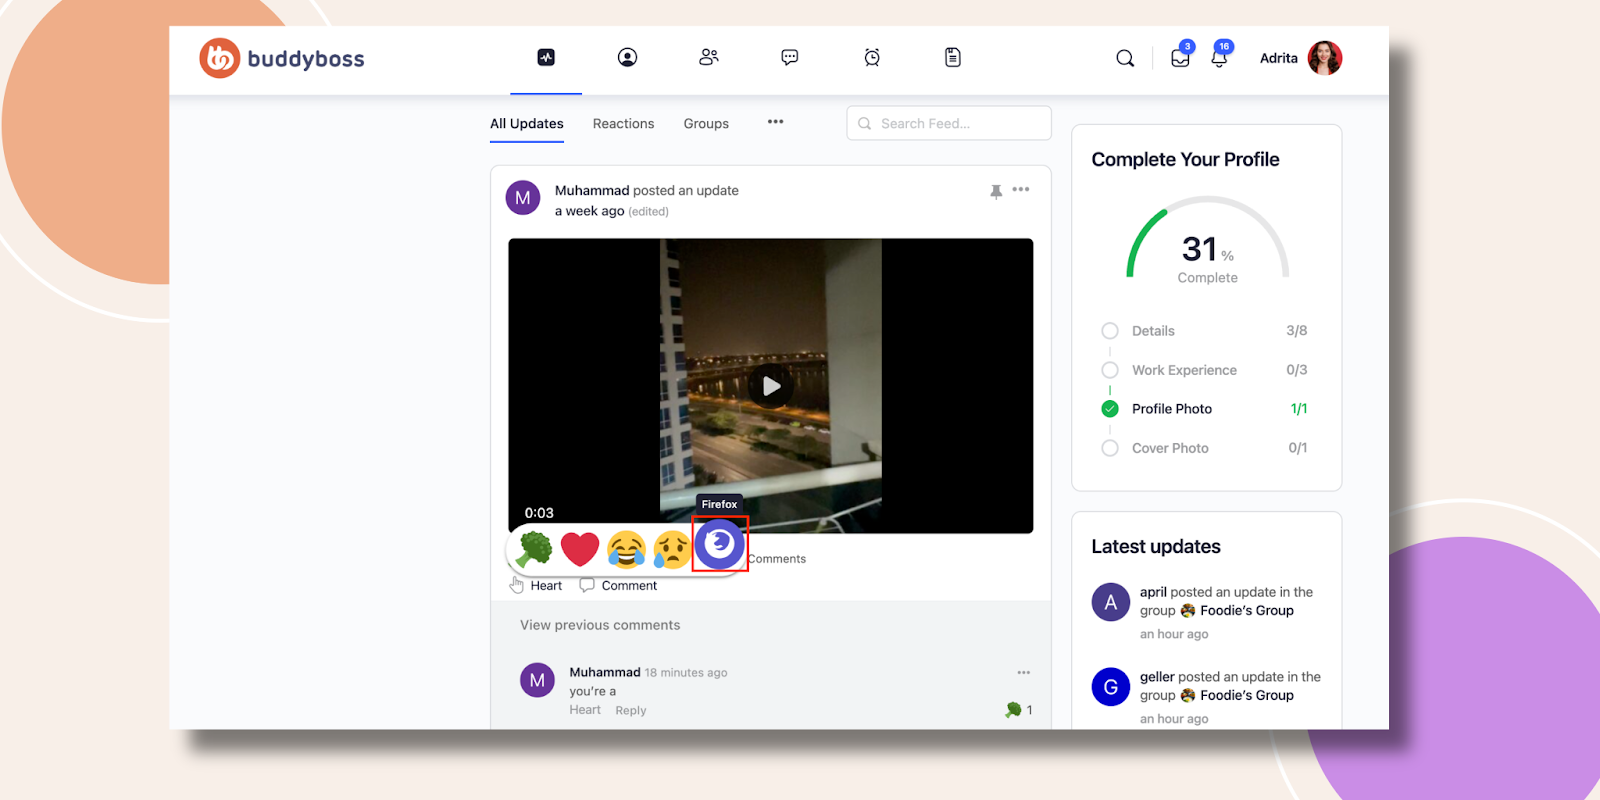
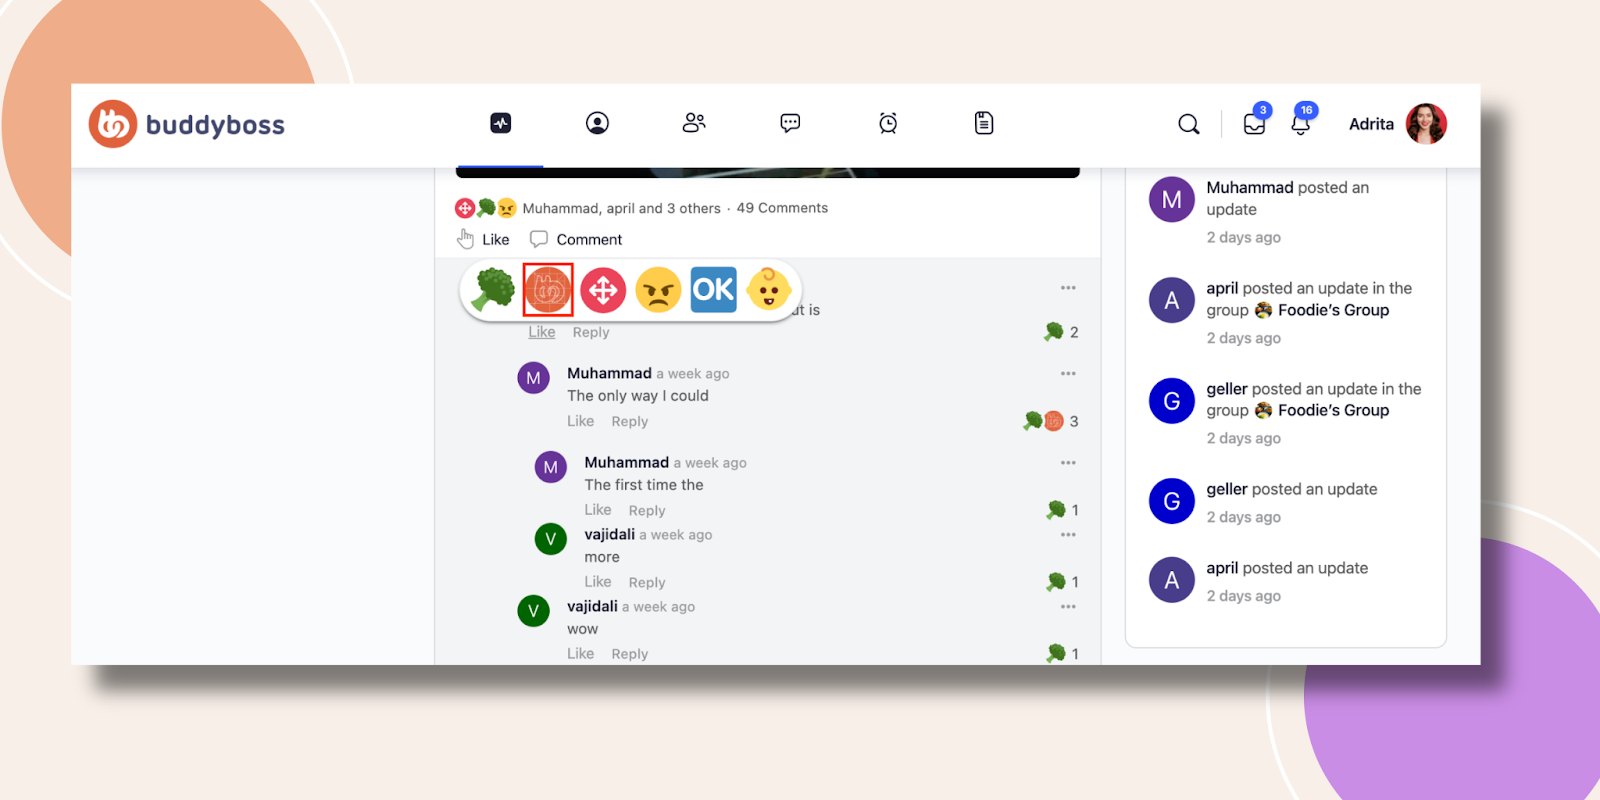
Let’s watch out how this icon emotion will look on the frontend.
Step 5: Upload Your Custom Icon
Another option to use your reaction is Custom Icon. You can upload your customized icon and use it as a reaction. Click on the pencil icon of any emotion.
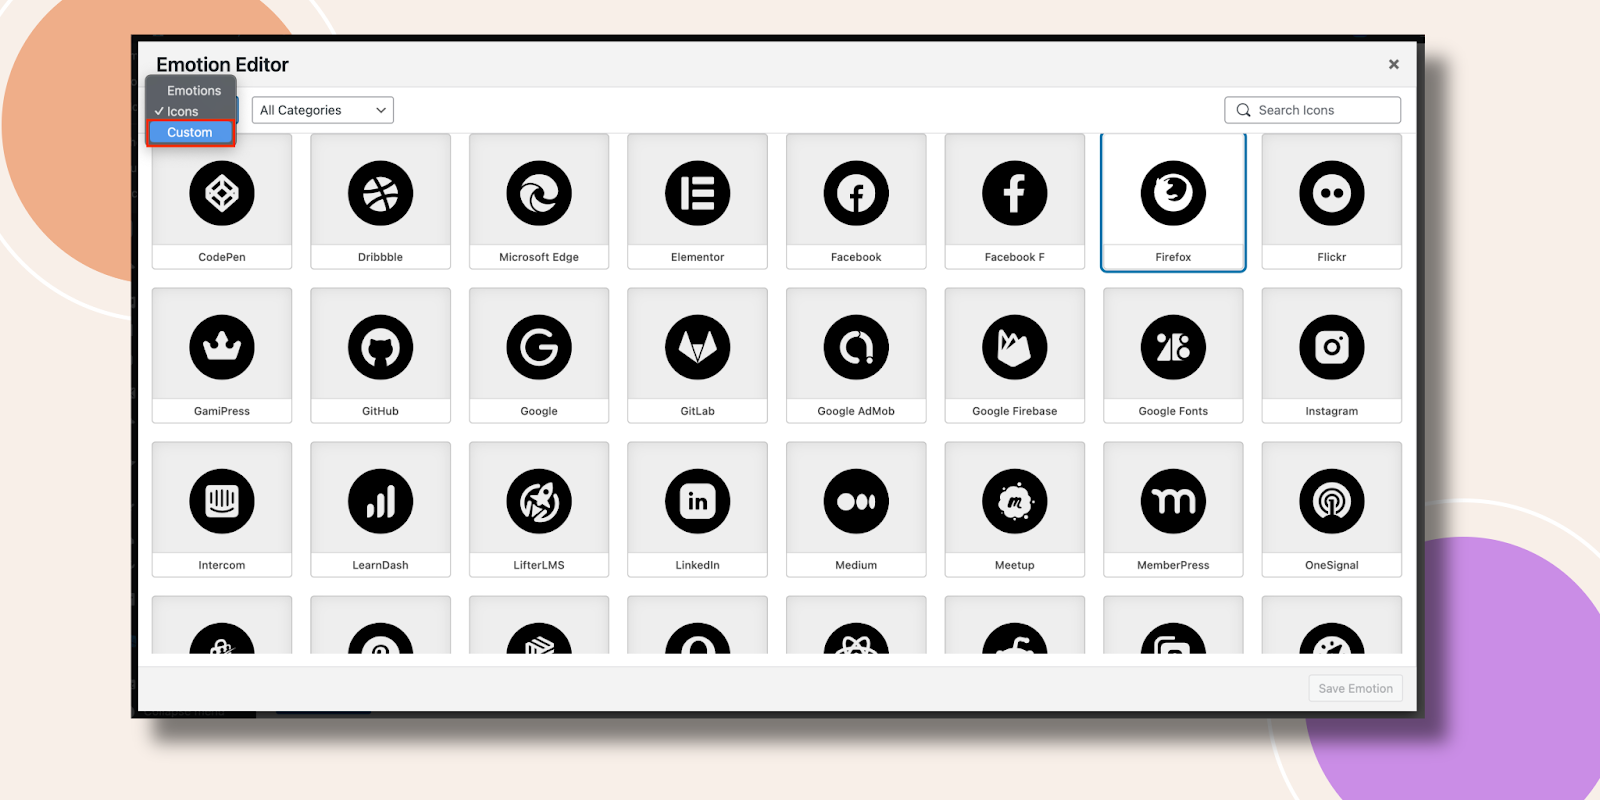
Select Custom, from the left upper corner.
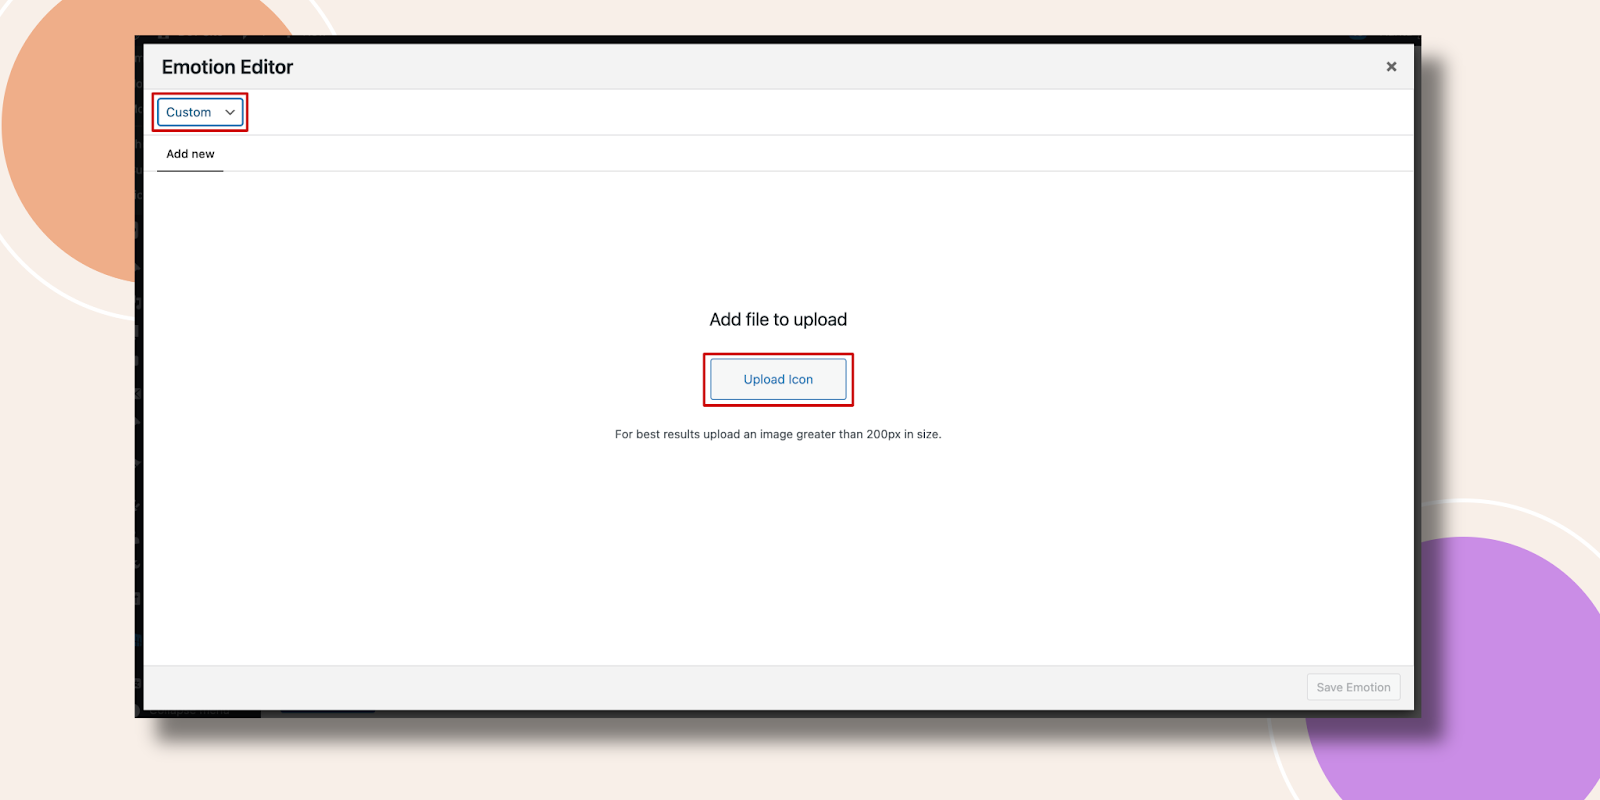
Now, you have to upload your own custom icon. Hit on the Upload Icon button.
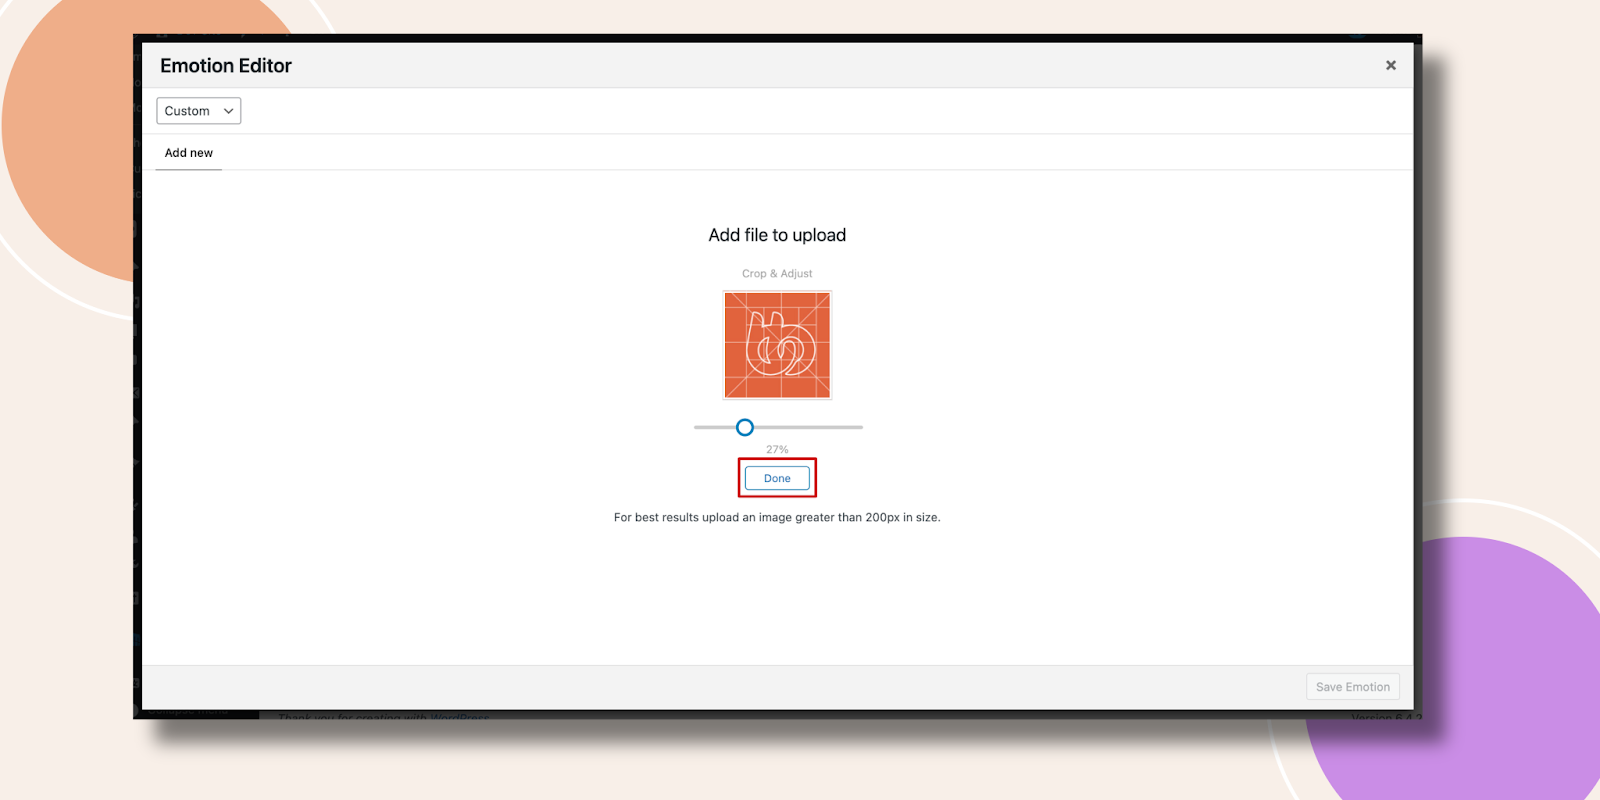
Here, you can resize according to your preference and press the Done button.
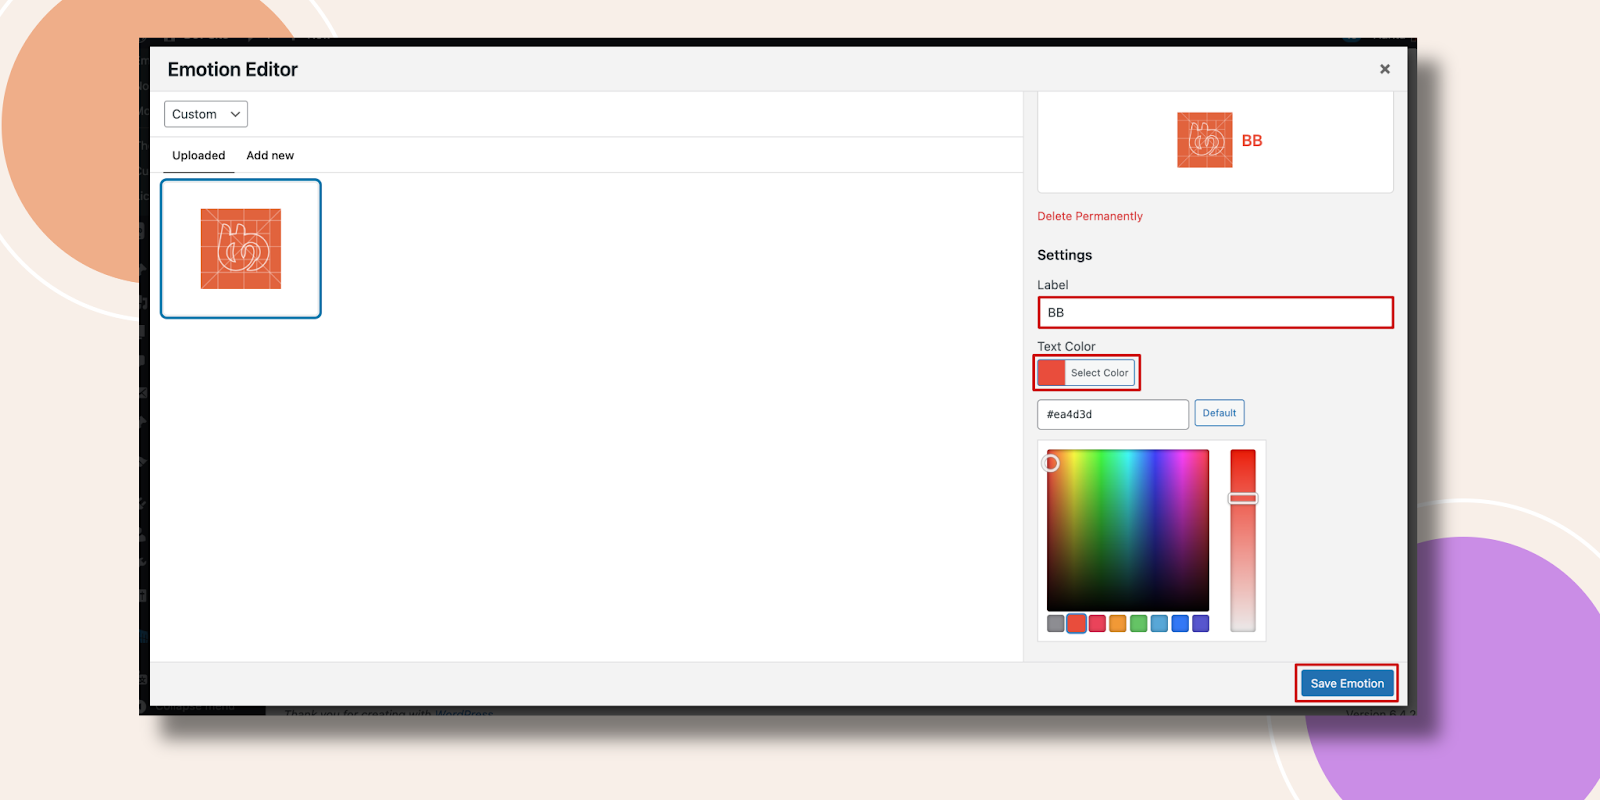
Write down the Label and select Text Color. Lastly, hit the Save Emotion button.
So, this is how your custom emotion can be set.
Let’s see how the custom icon reacts in the frontend.

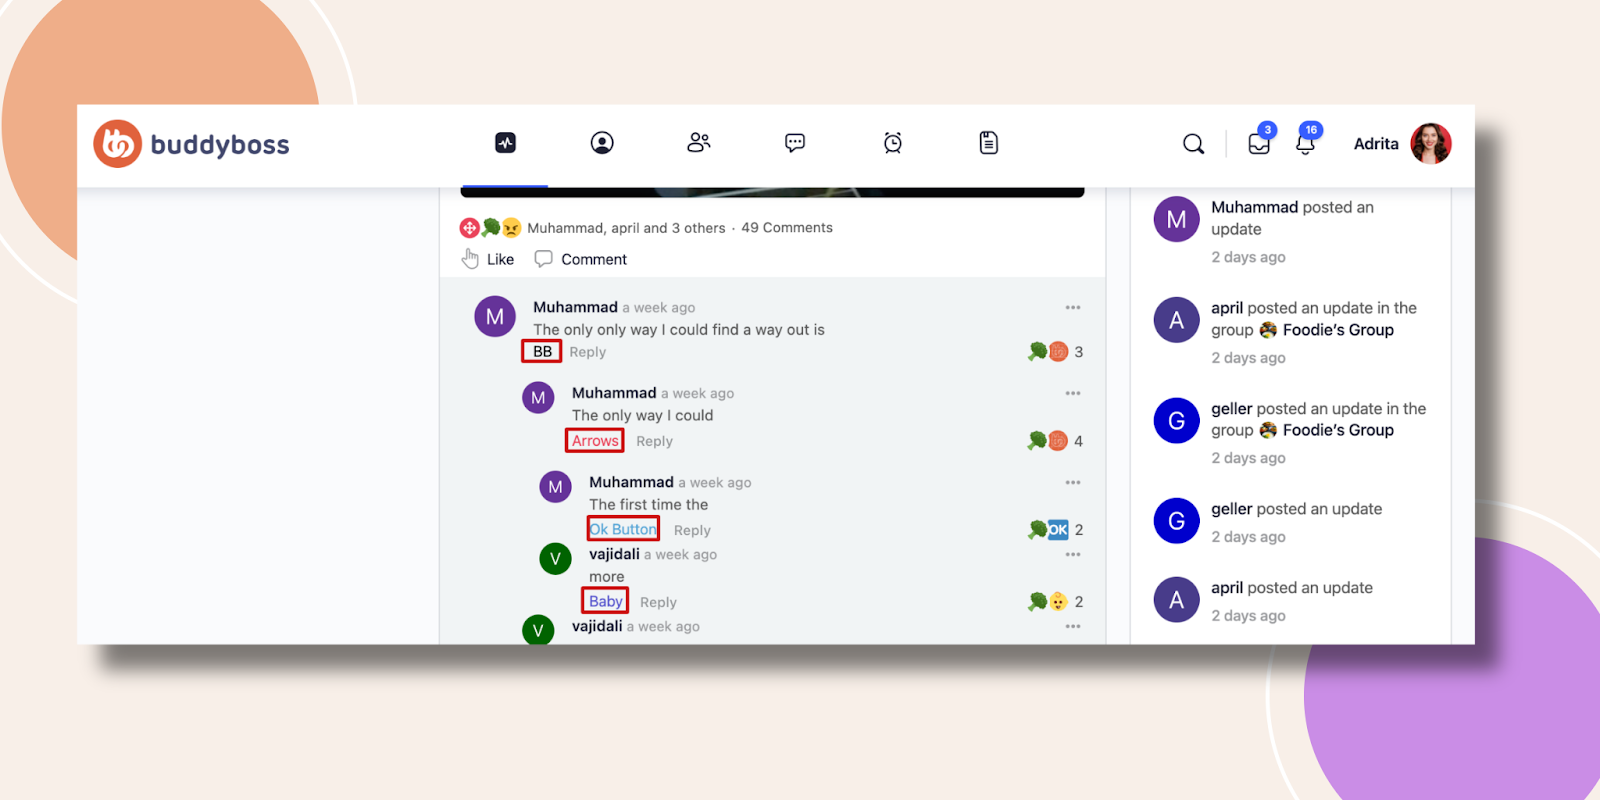
You can use your reactions to the comments as well.
Like here we have reacted in the comments.
Step 6: Delete Reactions
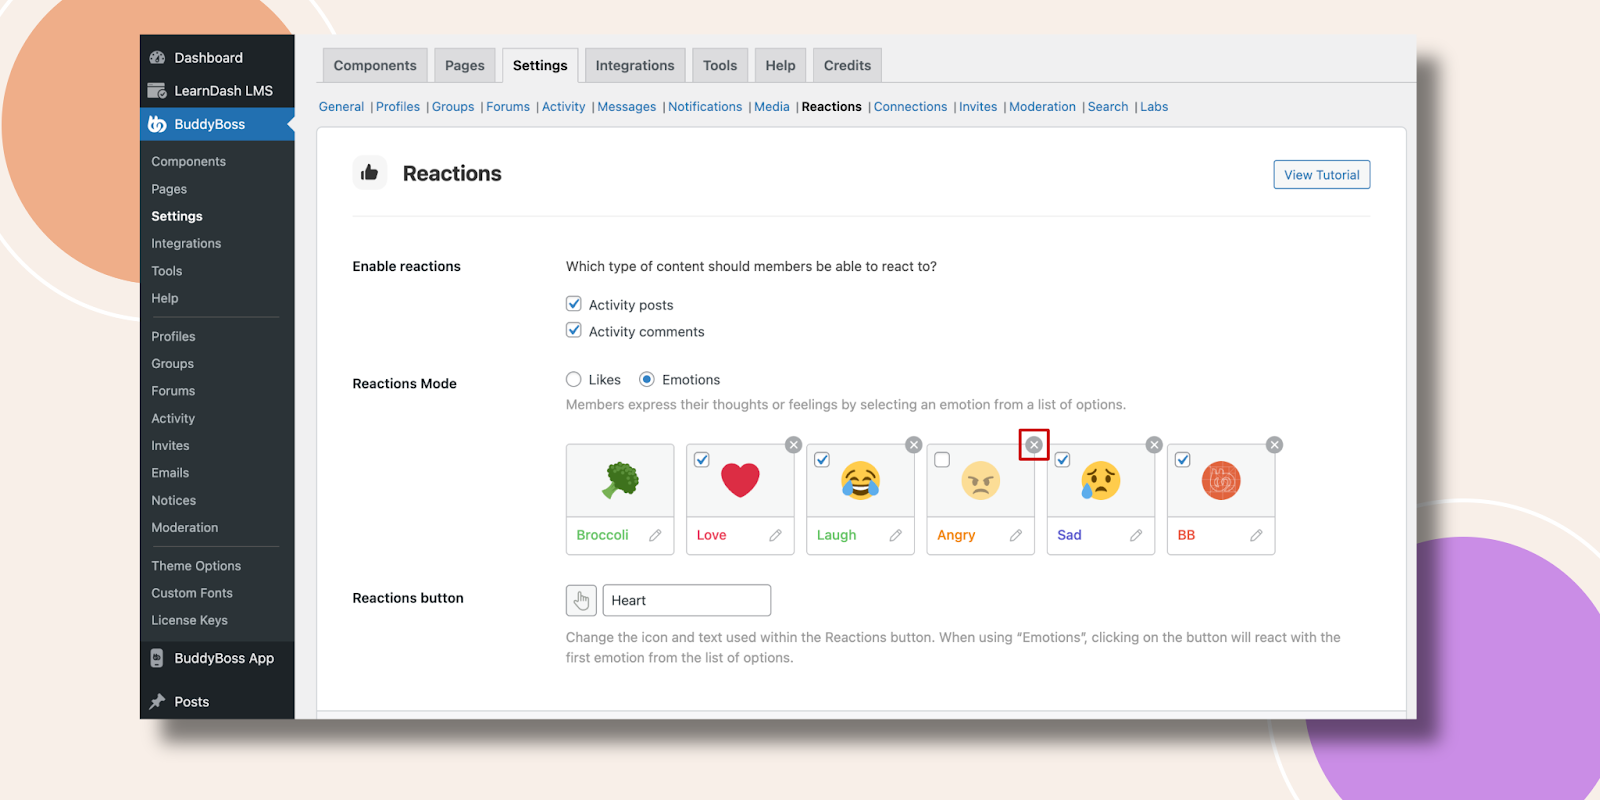
There might be a time when you want to delete any reactions. For example, you are getting lots of Angry reactions and it’s affecting your membership website’s authority badly. In this situation, you can delete that particular reaction. If you want to delete any reaction just click in the cross (X) button in the right corner of that reaction. Please remember that you can delete as much reactions as you want.
A warning popup will appear to confirm your deleting emotion. Hit the Confirm button and that emotion will be deleted.

Step 7: Use Migration Wizard
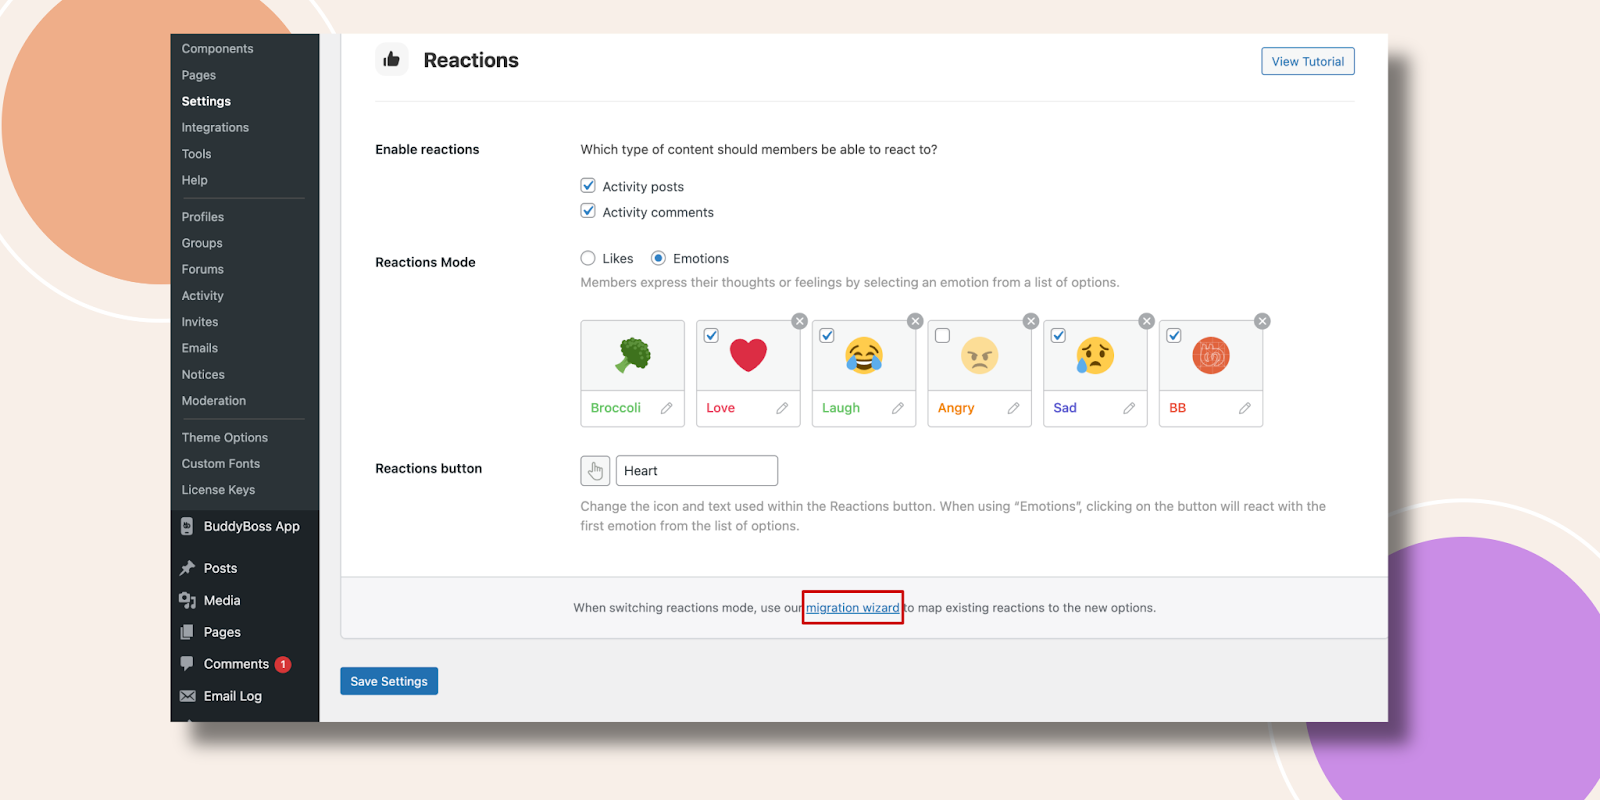
When switching reactions mode, use our Migration Wizard to map existing reactions to the new options. This action will convert reactions previously submitted by members on your site to an Emotion of your choice. Reactions not selected can be converted at any point in the future using this migration wizard.
There are two processes in Migration Wizard. One is for Likes and the other one is for Emotions. As we are now in Emotions mode let’s see that at first.
If you carefully look at the bottom, there is a Migration Wizard hyperlinked. Click on it.
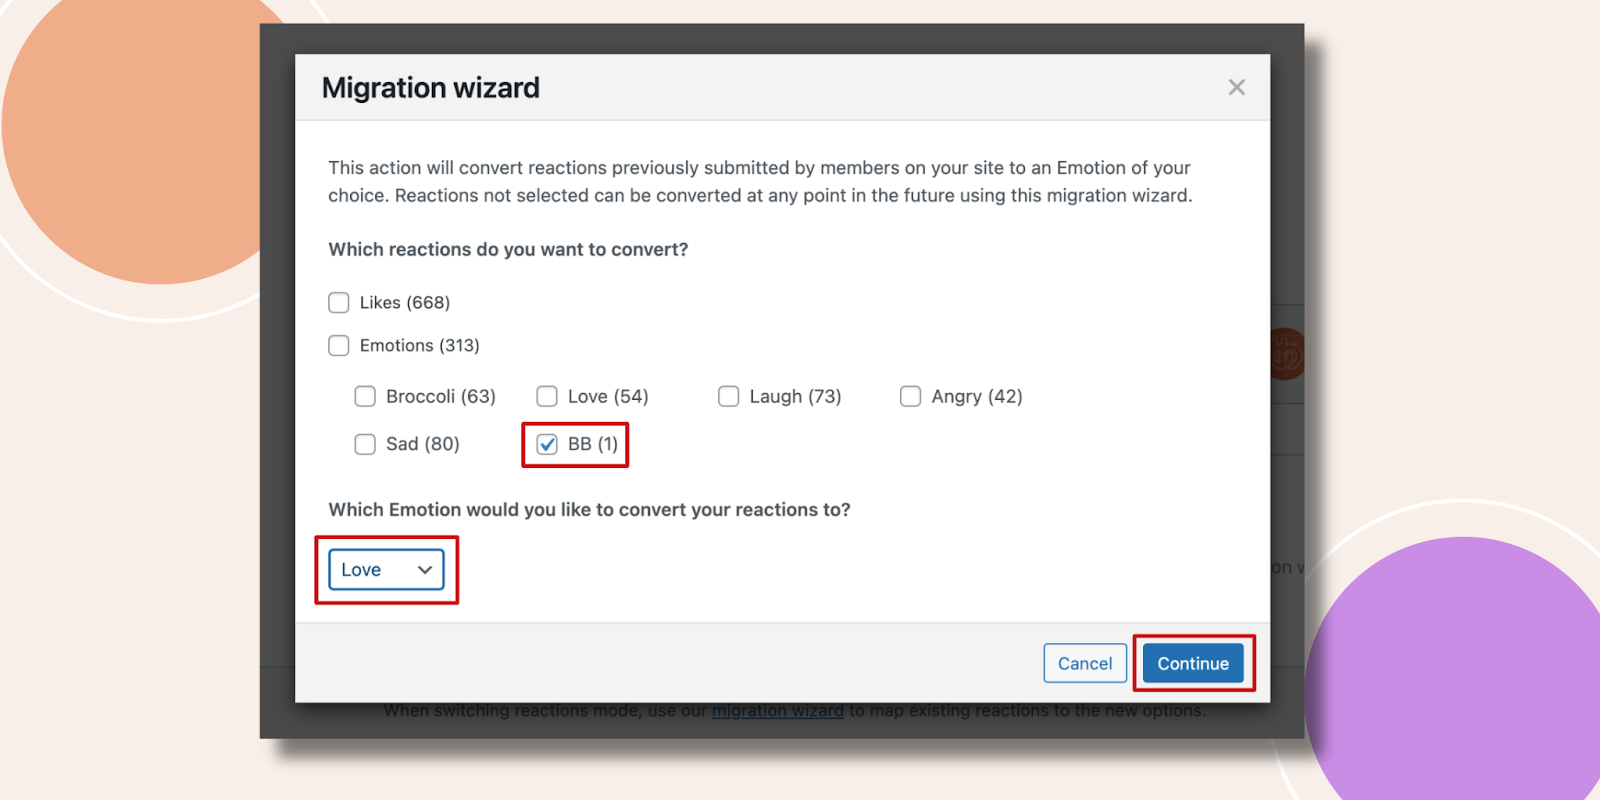
This popup will appear. Here, you can convert reactions previously submitted by members on your site to an Emotion of yours. We have selected BB Emotion to Love and pressed the Continue button.
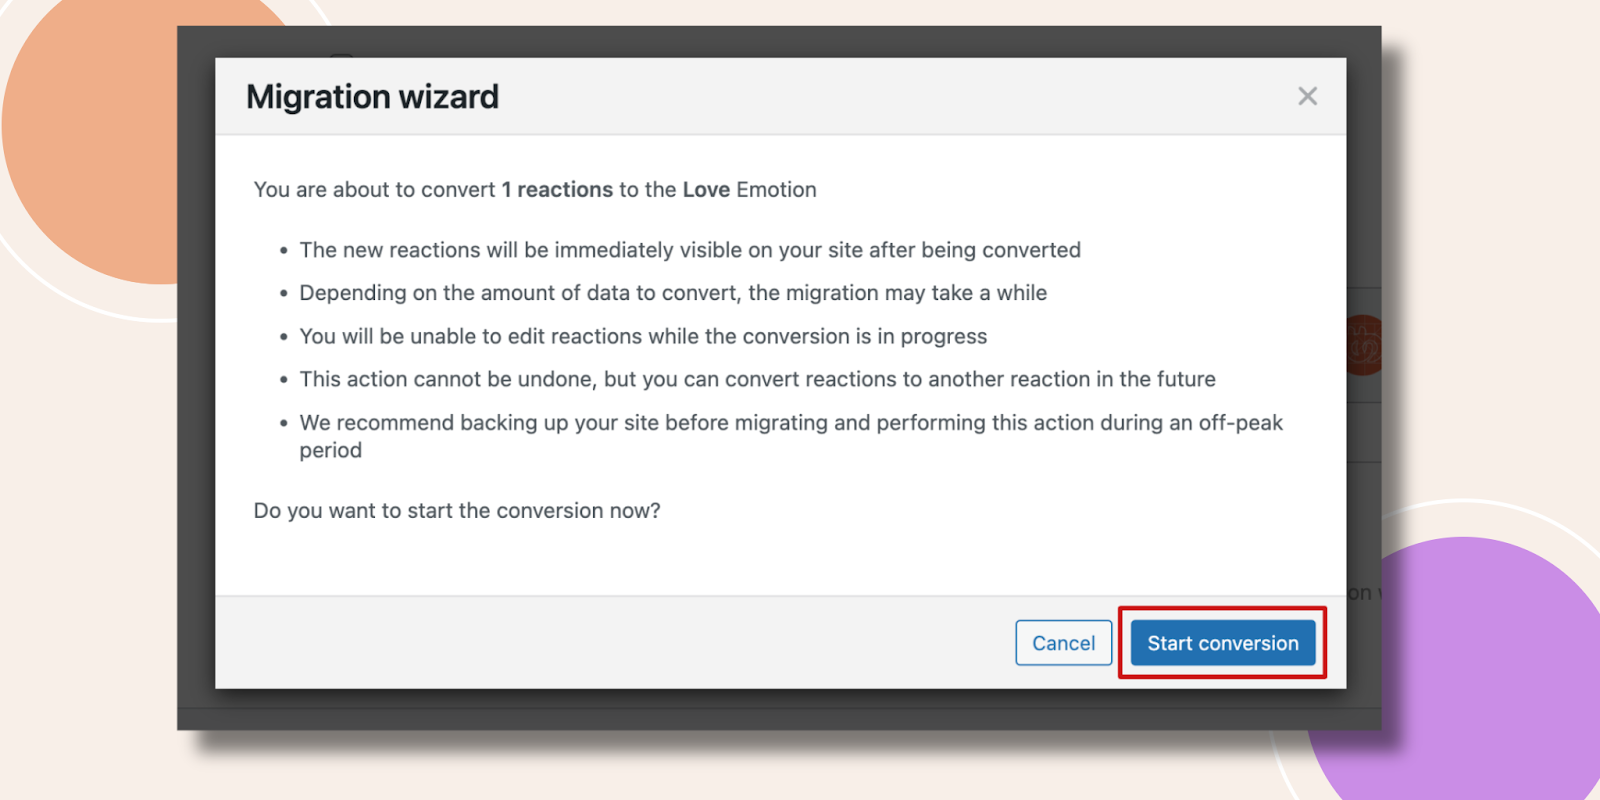
Then this popup appears, watch out for these warnings before hitting the Start conversion button.
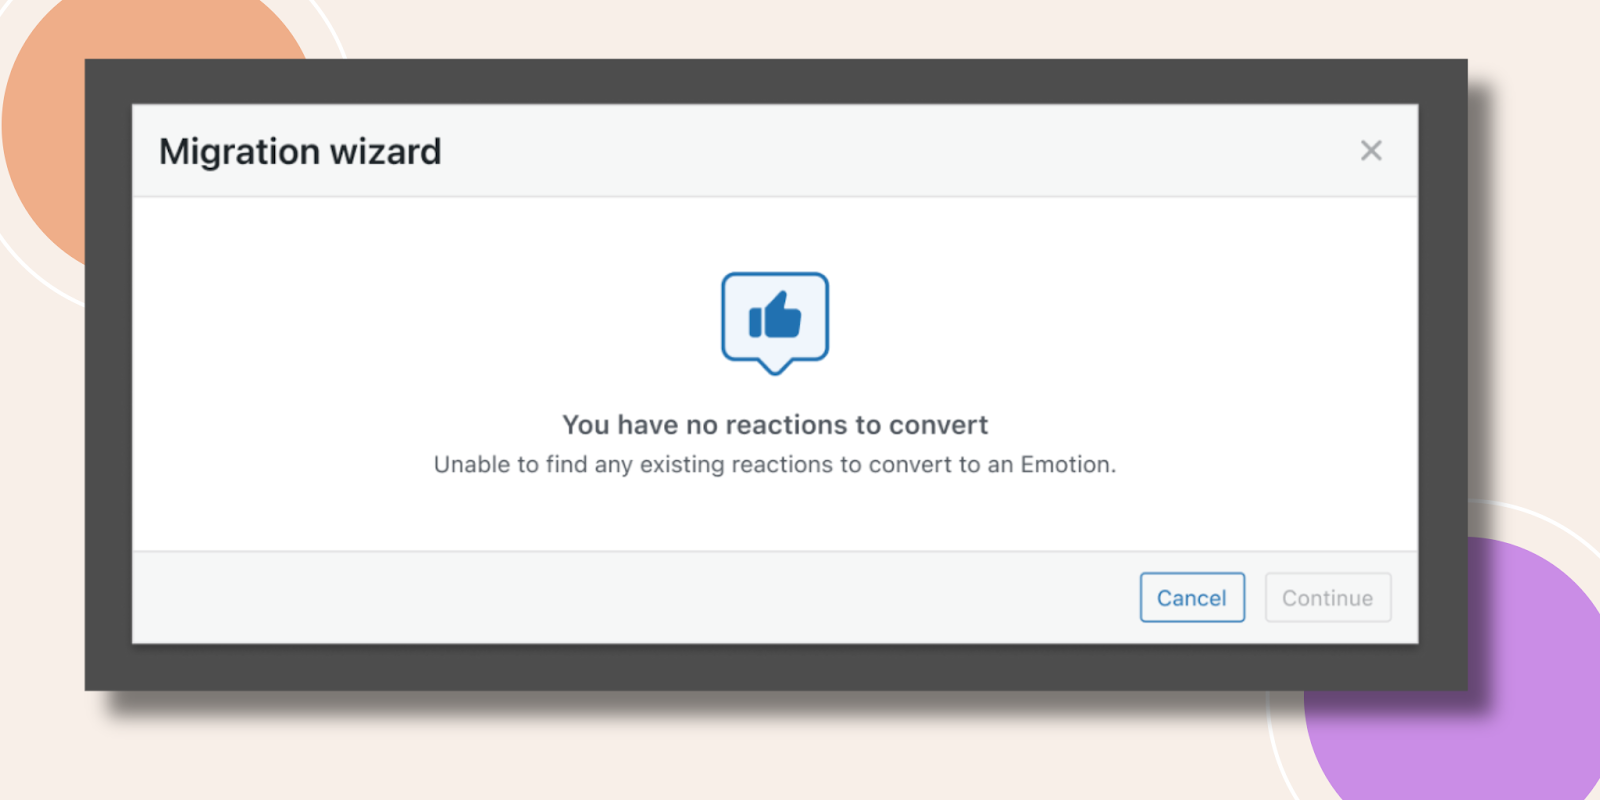
If you don’t have any reactions to convert then you will get this message.
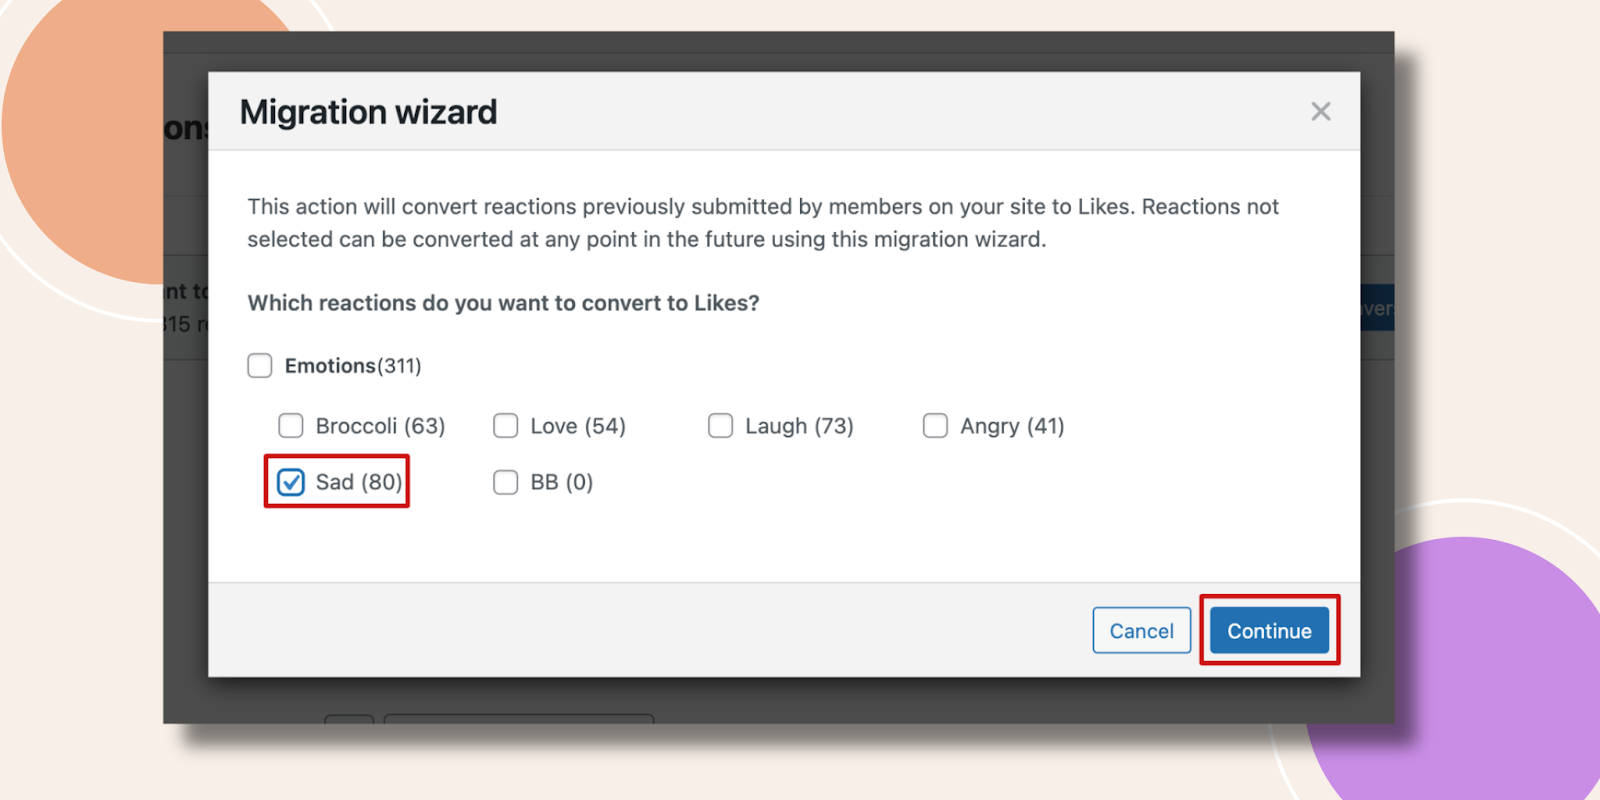
Now, if you select the Likes mode and then the Migration Wizard.

Here, you can only turn Emotions into Likes. Then press the Continue button.
Again this warning message will appear and hit the Start conversion button.

Incorporating reactions into a community site can significantly enhance user engagement, facilitate diverse forms of communication, and provide valuable insights for community management. Hope you get the full benefit out of this feature.