
In this tutorial, you will learn how to connect your Google Developer Account to your BuddyBoss App. Once you’ve connected your Google account, you’ll be able to sync your in-app products with your products in your Google Play Developer Account and be able to submit the Android version of your app to be published through our publishing service.
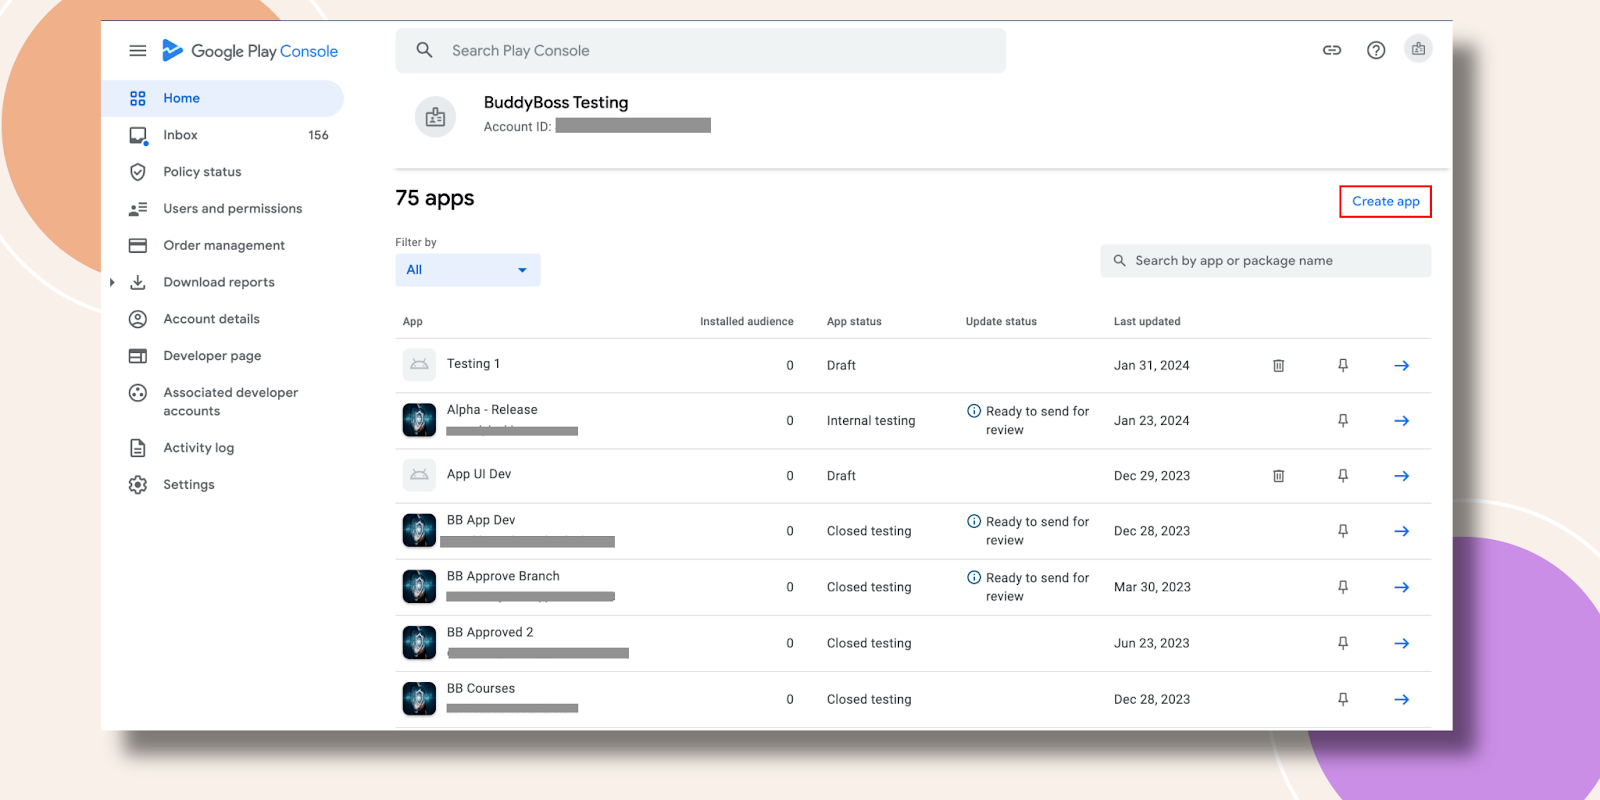
Step 1- Create an App
Navigating Google Play Console, click on the Create App button.
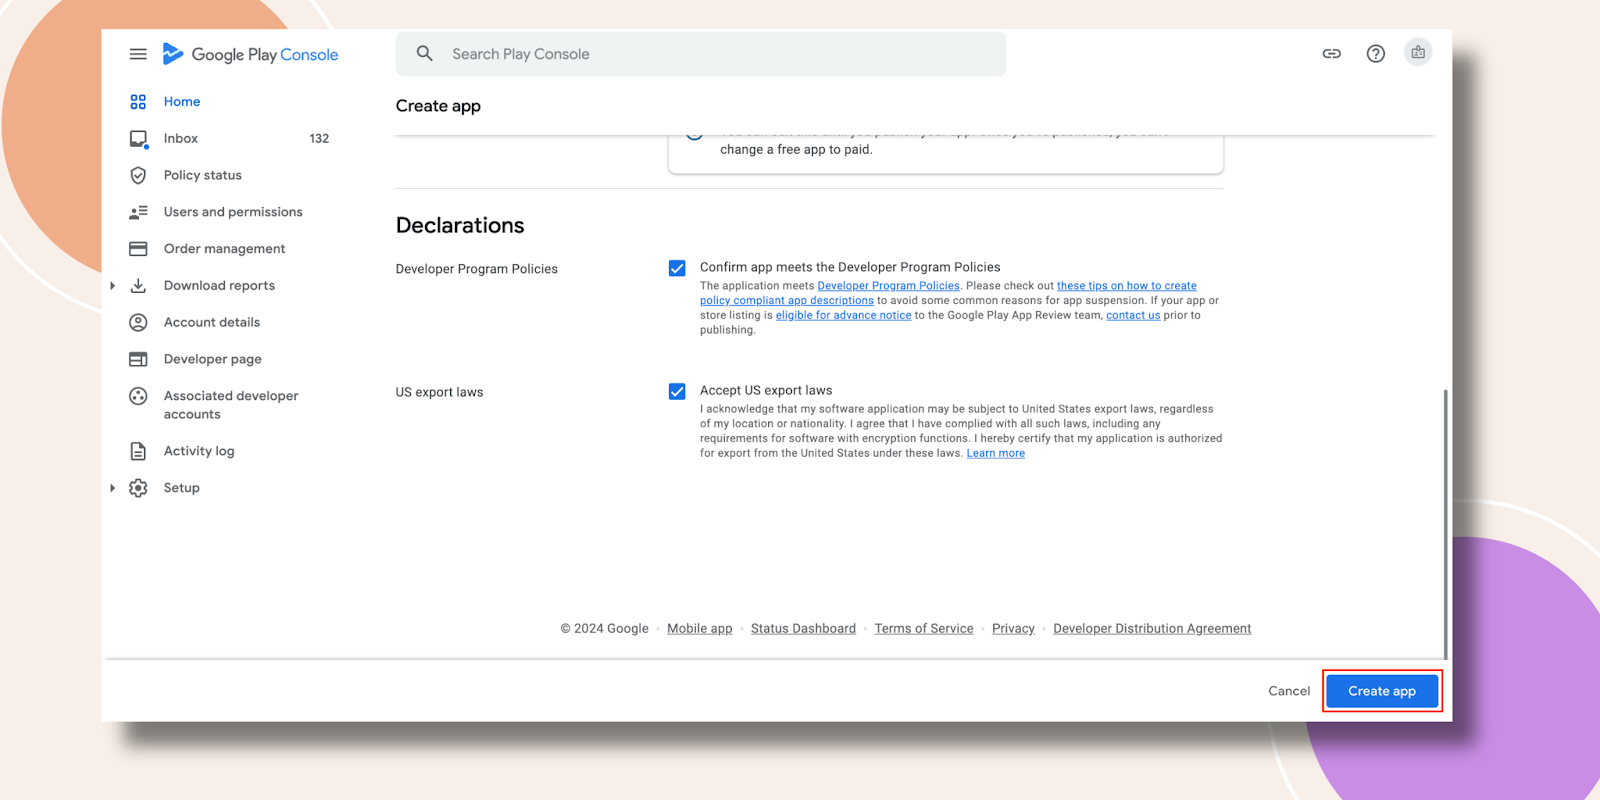
Fill out the App name and Default language. Select App then select if it’s a Free or paid app.

Then scroll down to tick the Developer Program Policies and US report laws options. Now, hit the Create App button.
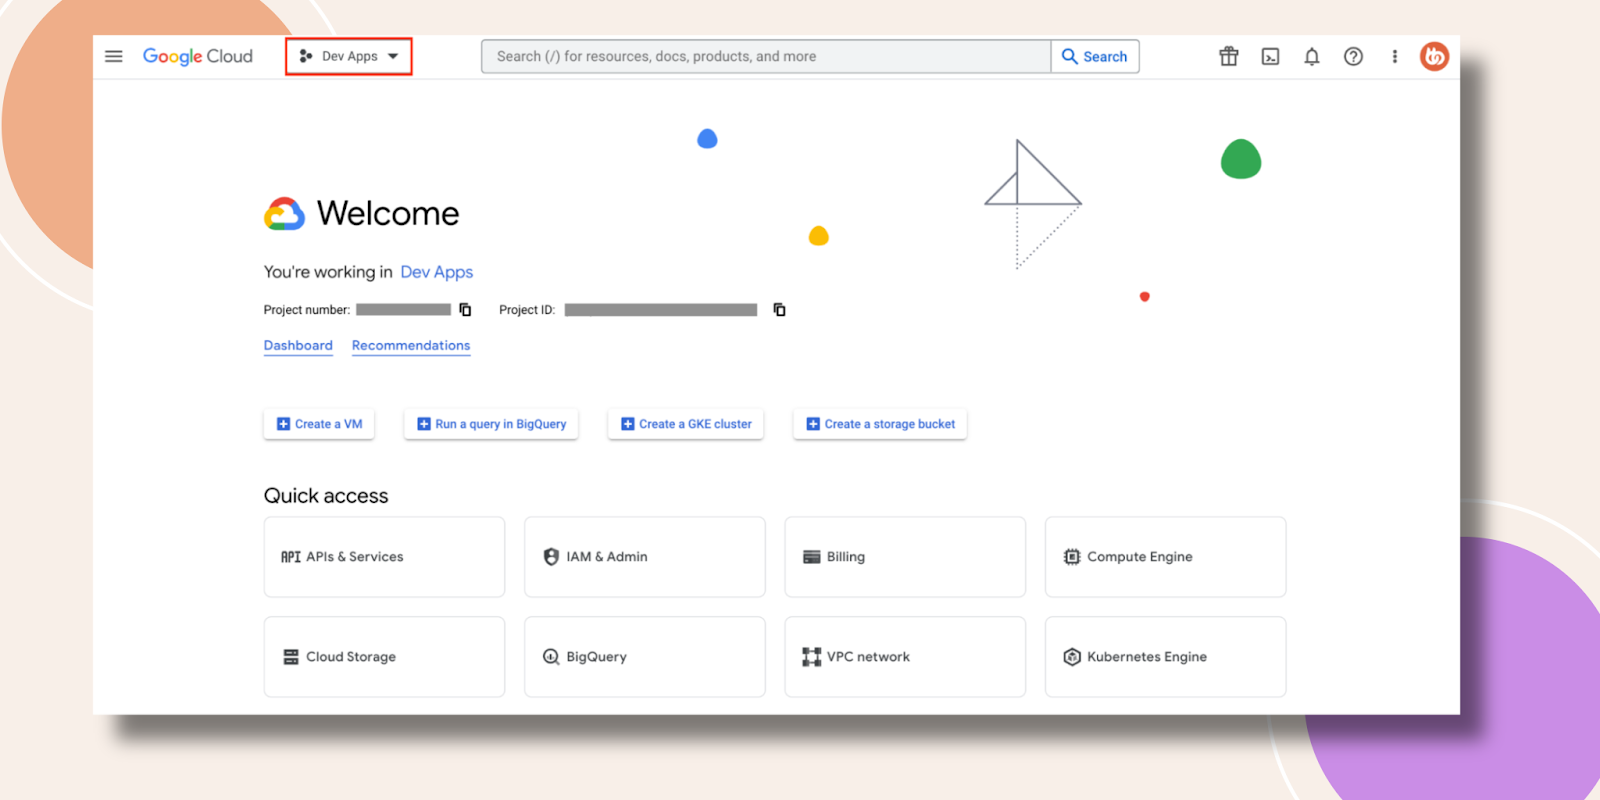
Step 2 – Set Up Your Google Console and Google Play Store
Navigate to Google Console. After you log in click on the project in the header section.
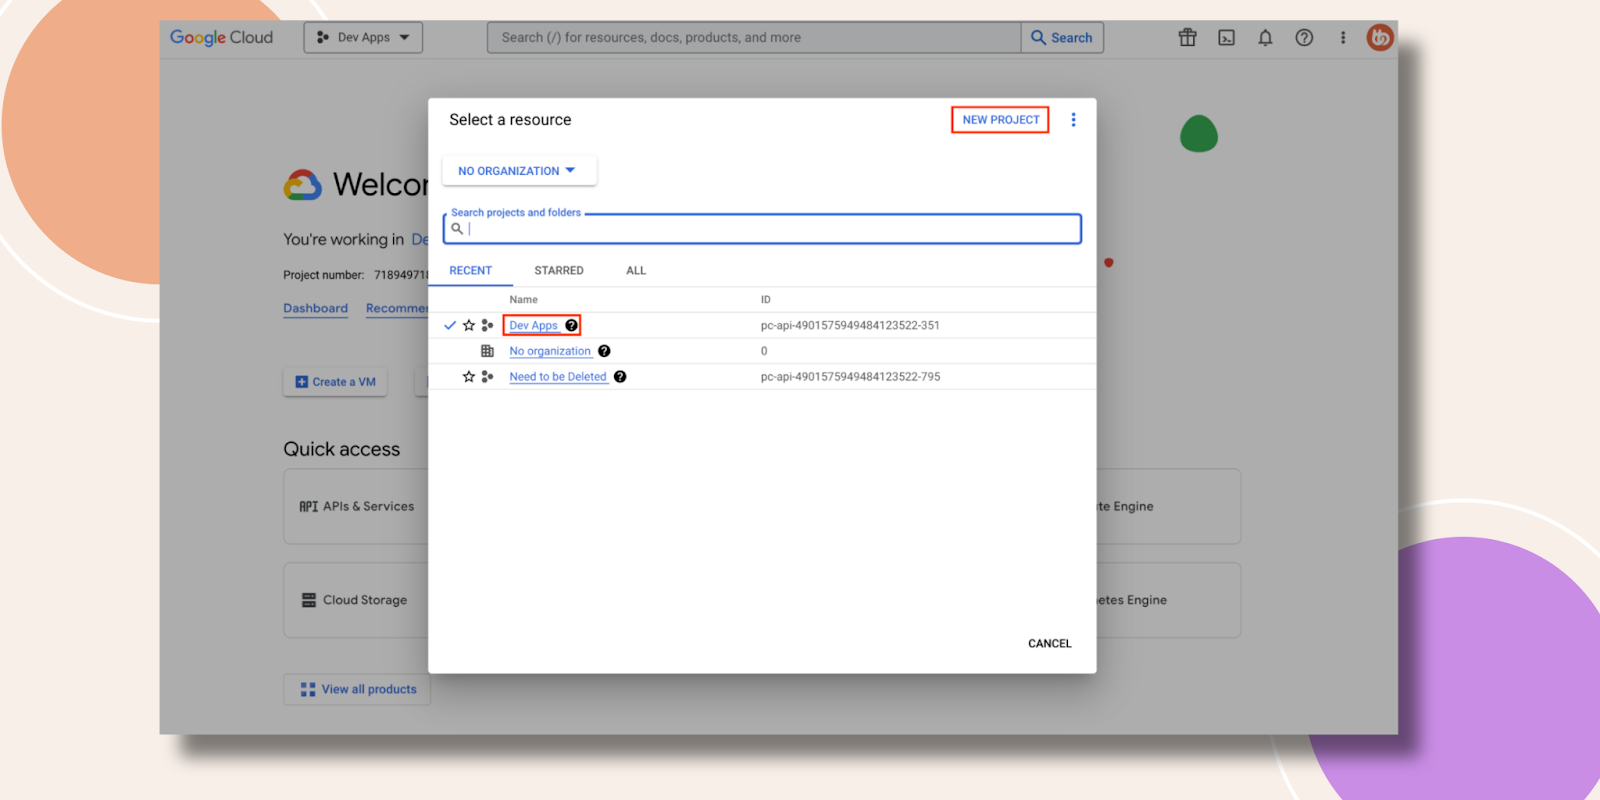
Here, you can navigate to your projects or create a new one just by clicking on NEW PROJECT.
Once created, from the sidebar, navigate to API & Services > Enable API & Services.
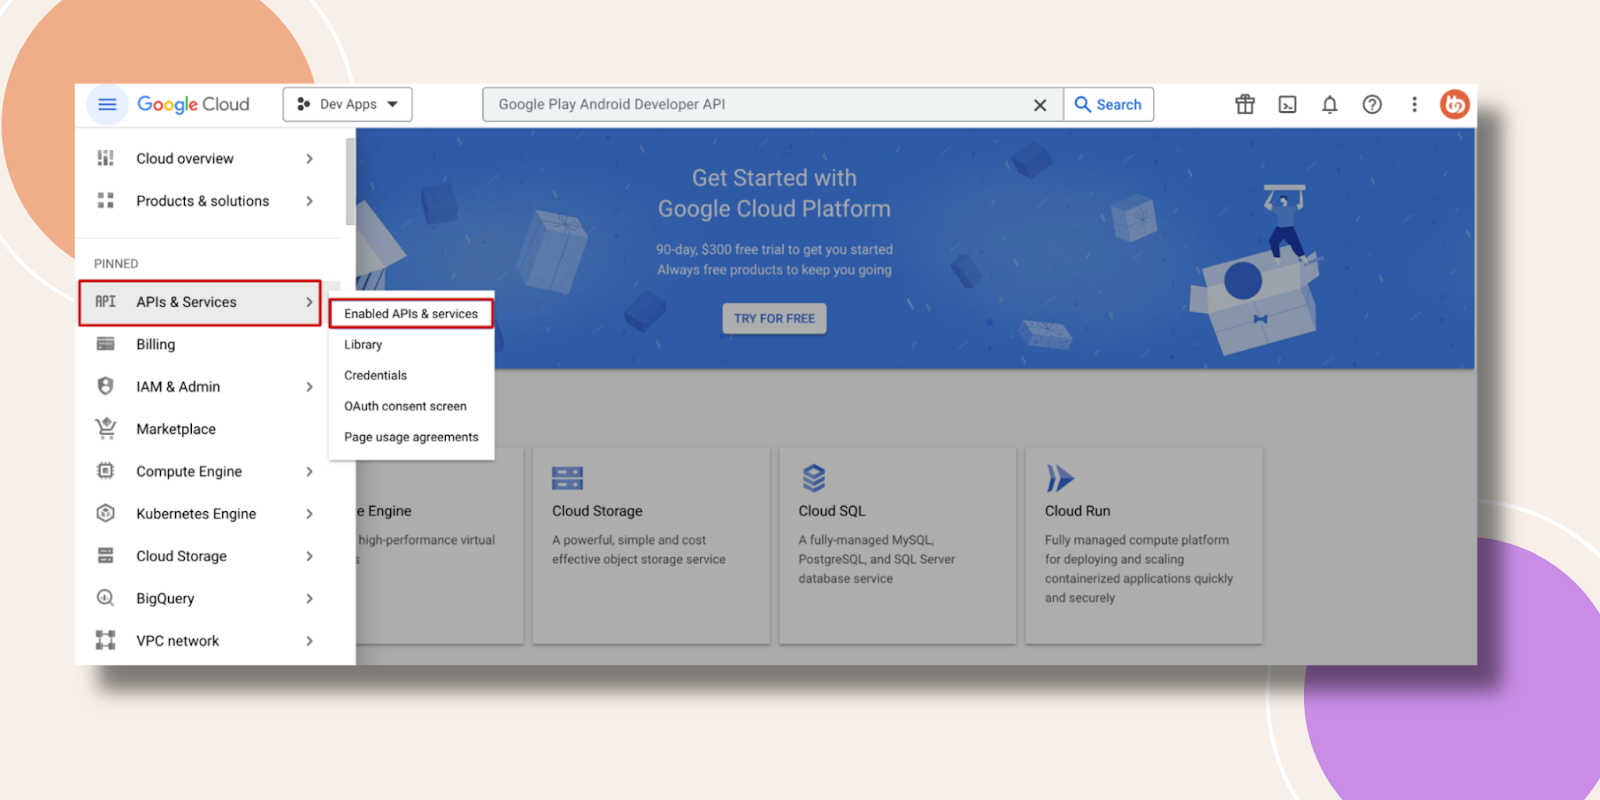
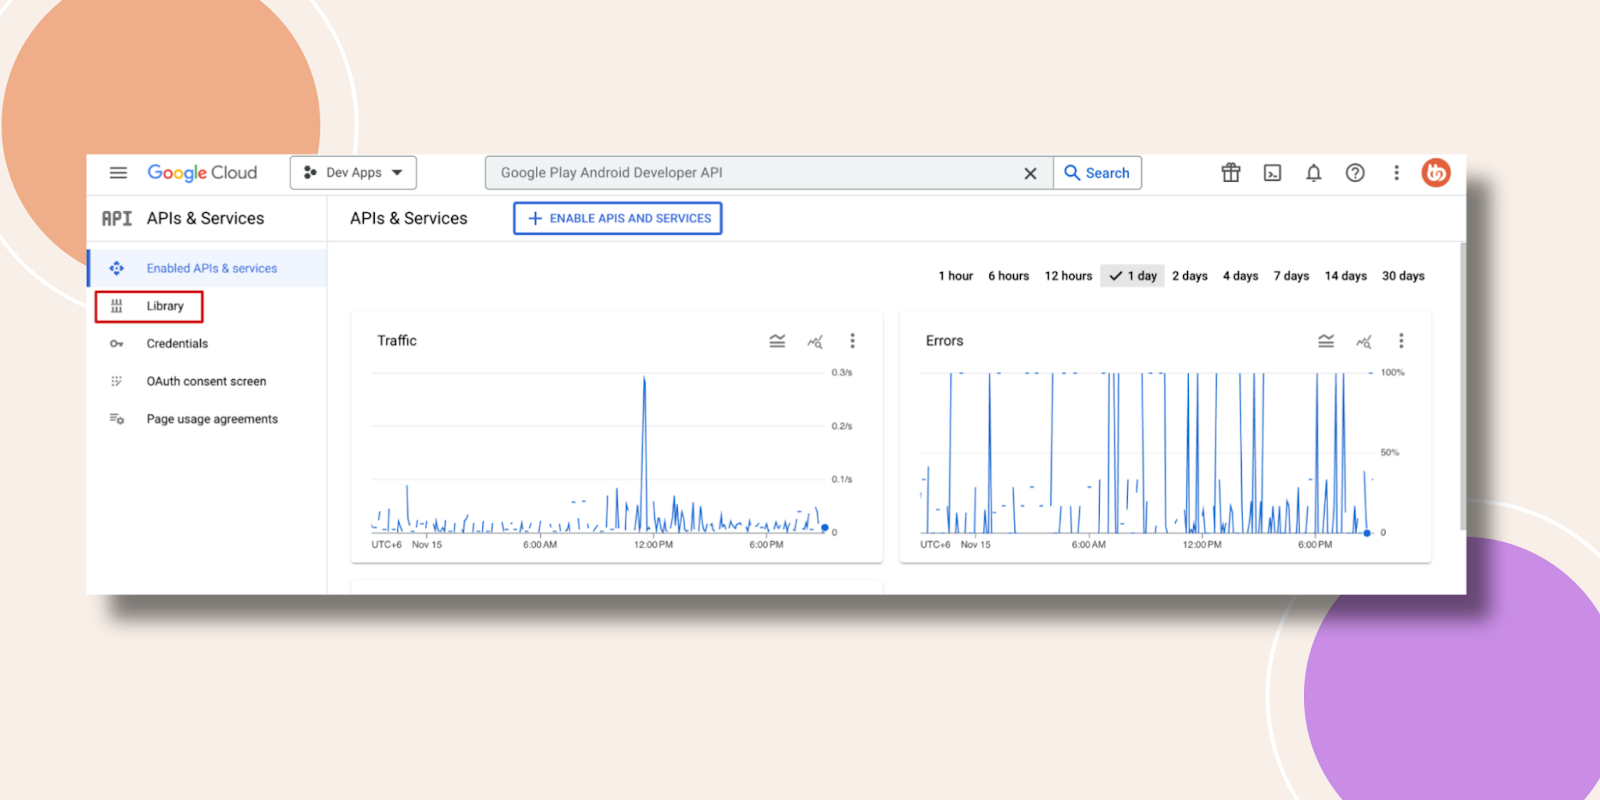
Click on Library.
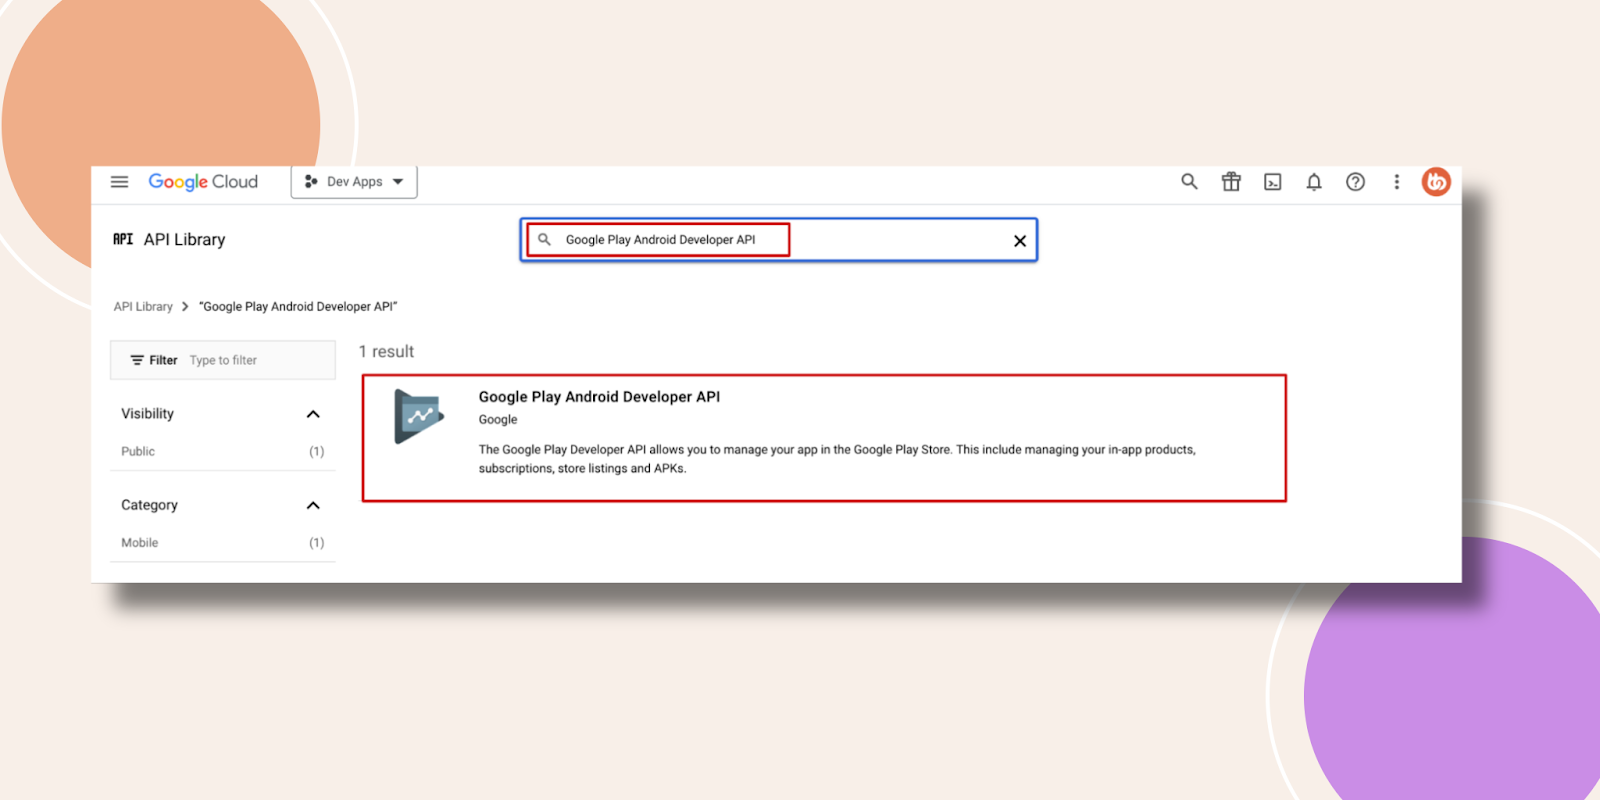
Here, search Google Play Android Developer API and click on the result below.
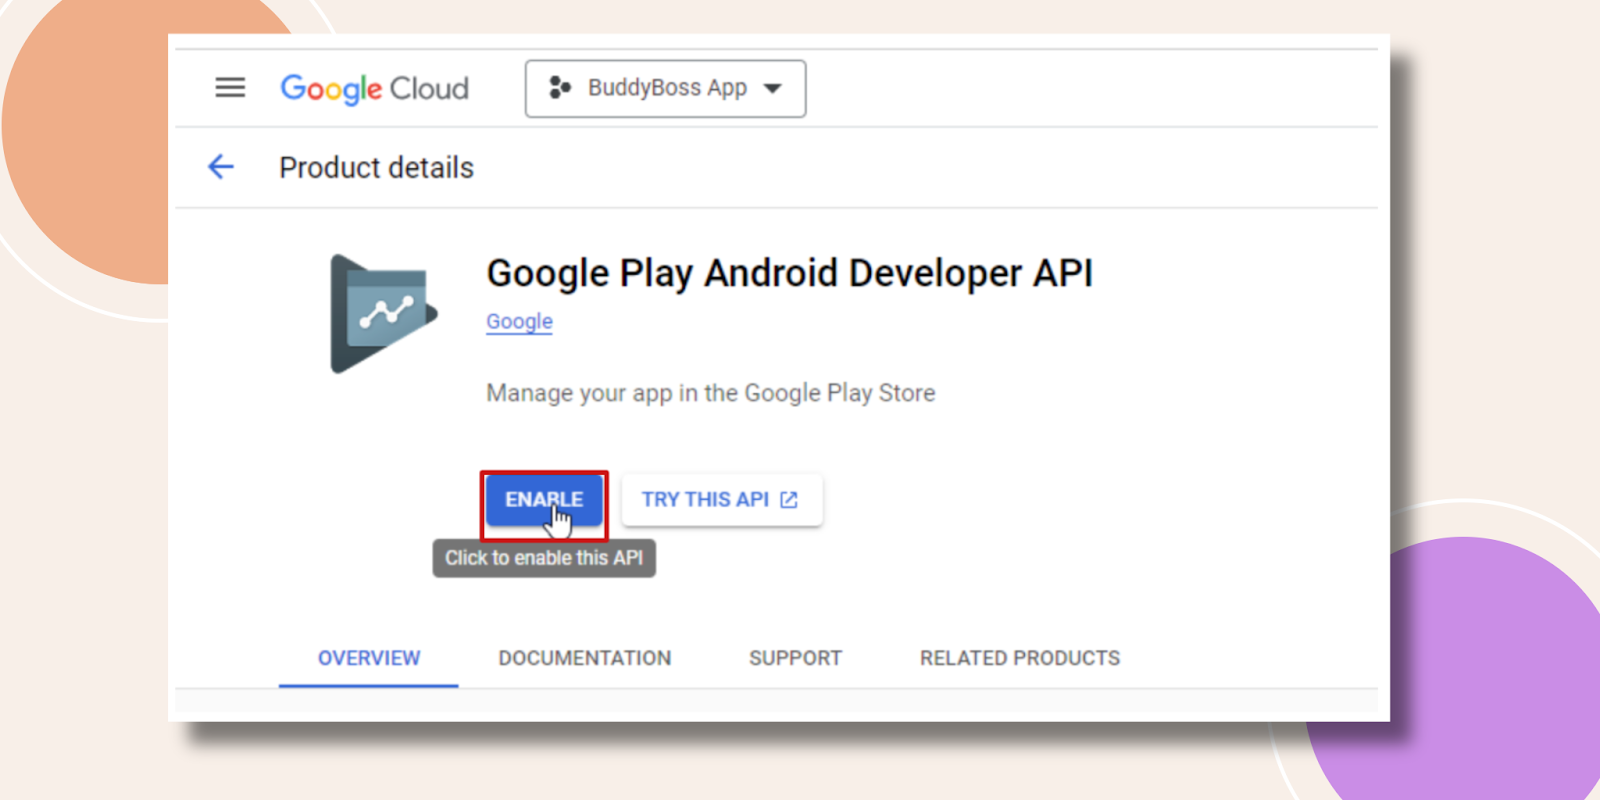
Hit the ENABLE button using this API.
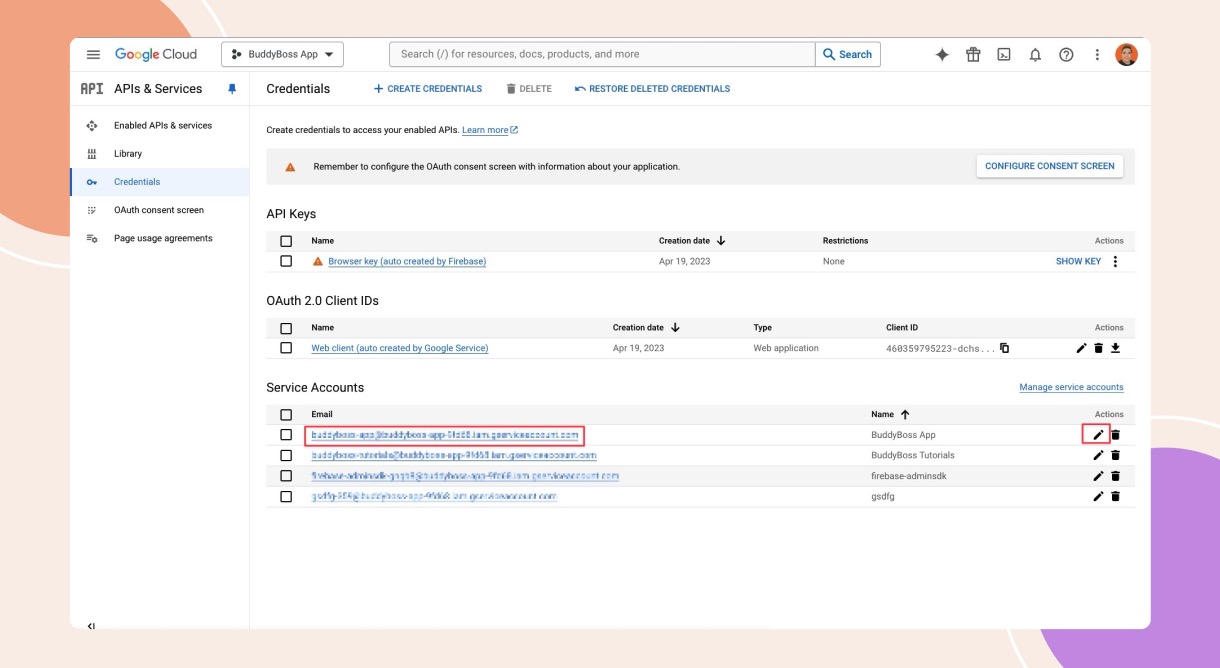
After enabling the API, it will redirect you to the API screen, from there, click Credentials. Scroll down a little you should see the section for Service Accounts.
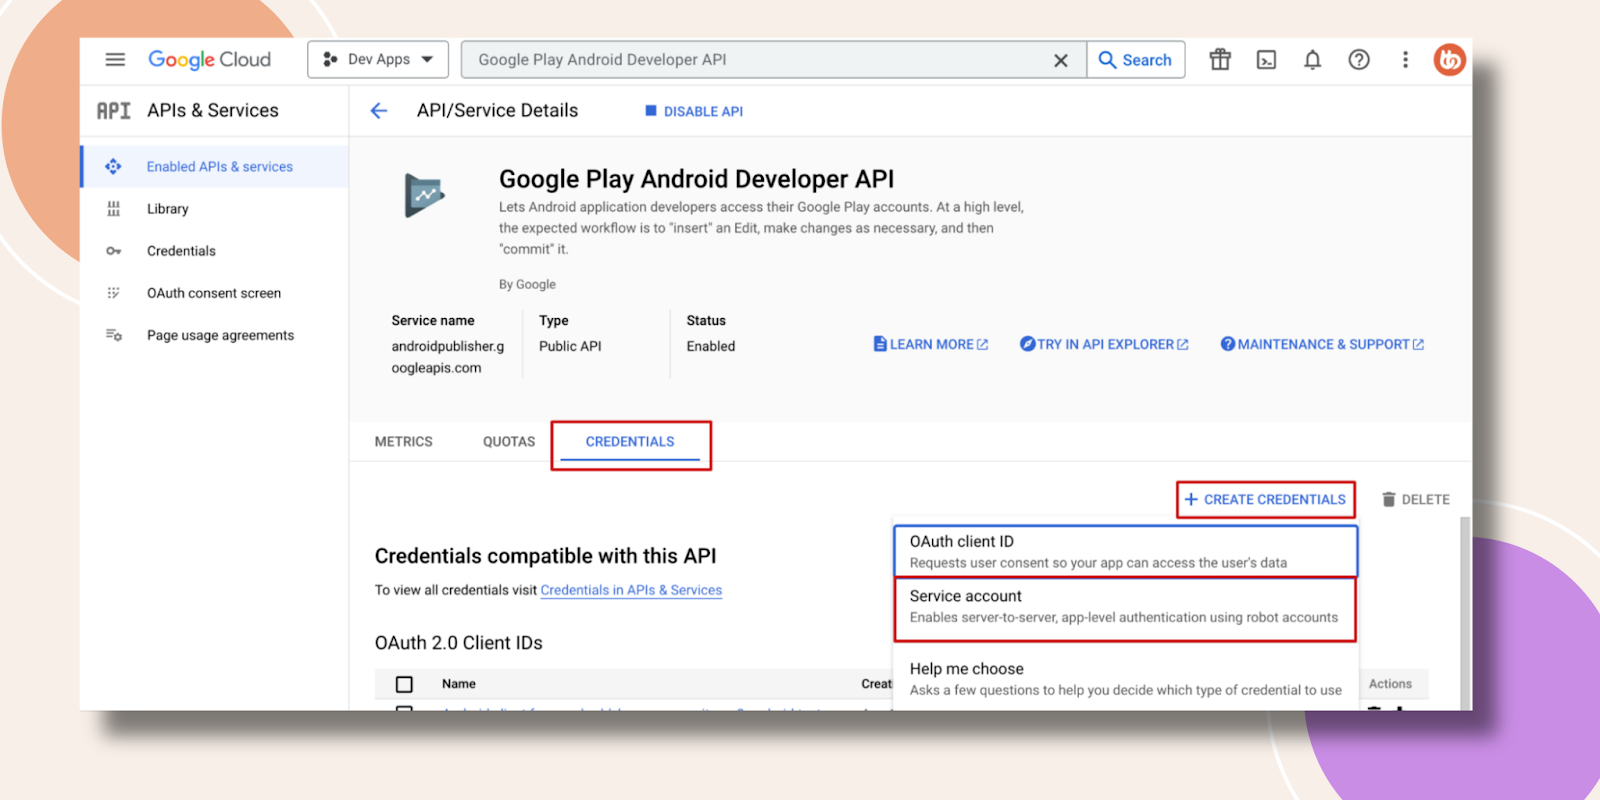
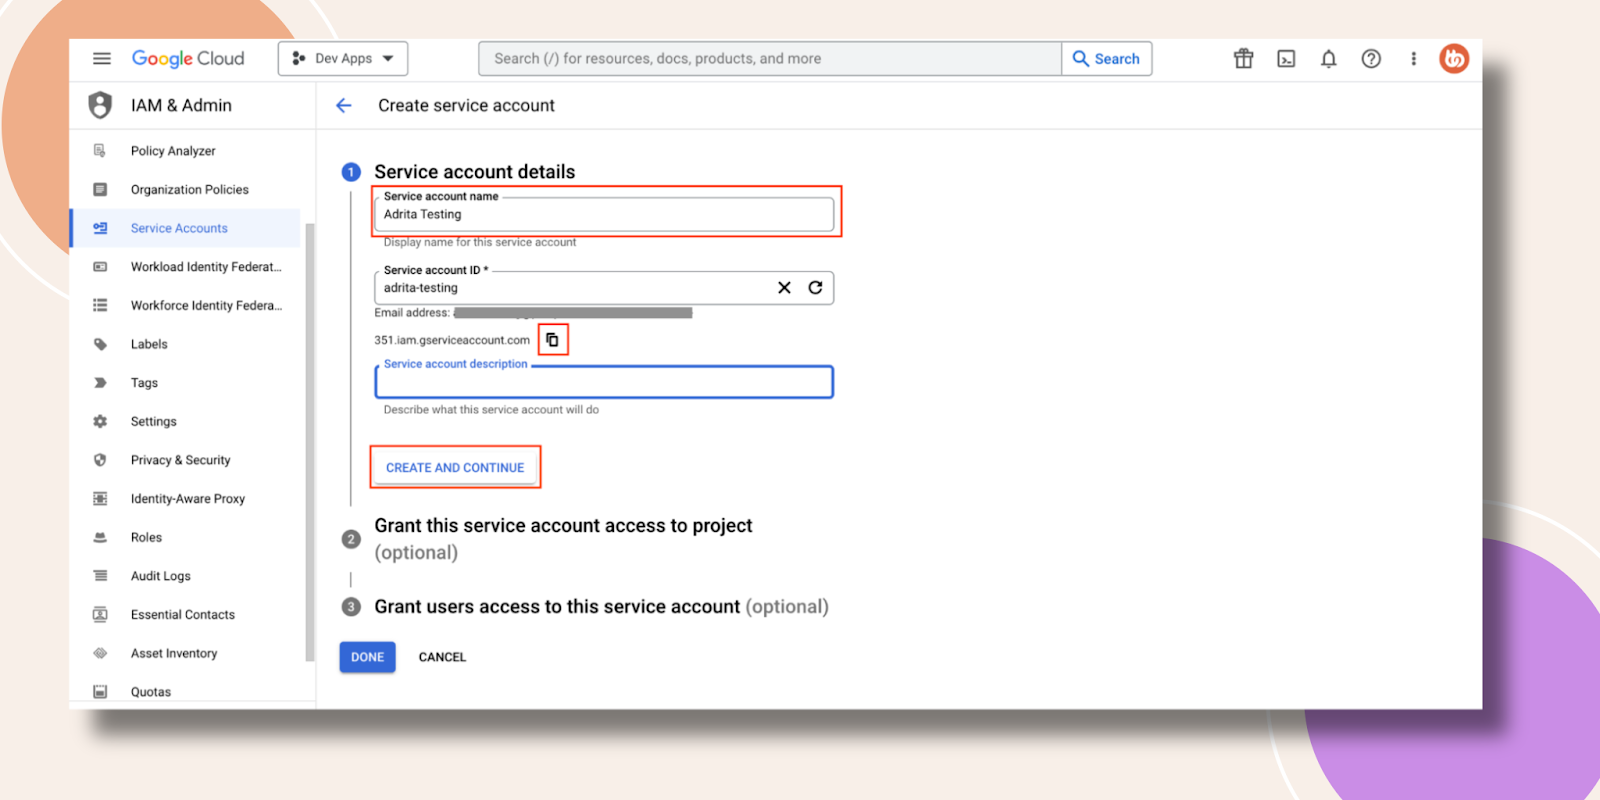
Enter a Service Account name. It can be anything, such as the name of your app or business. Then press the CREATE AND CONTINUE button.
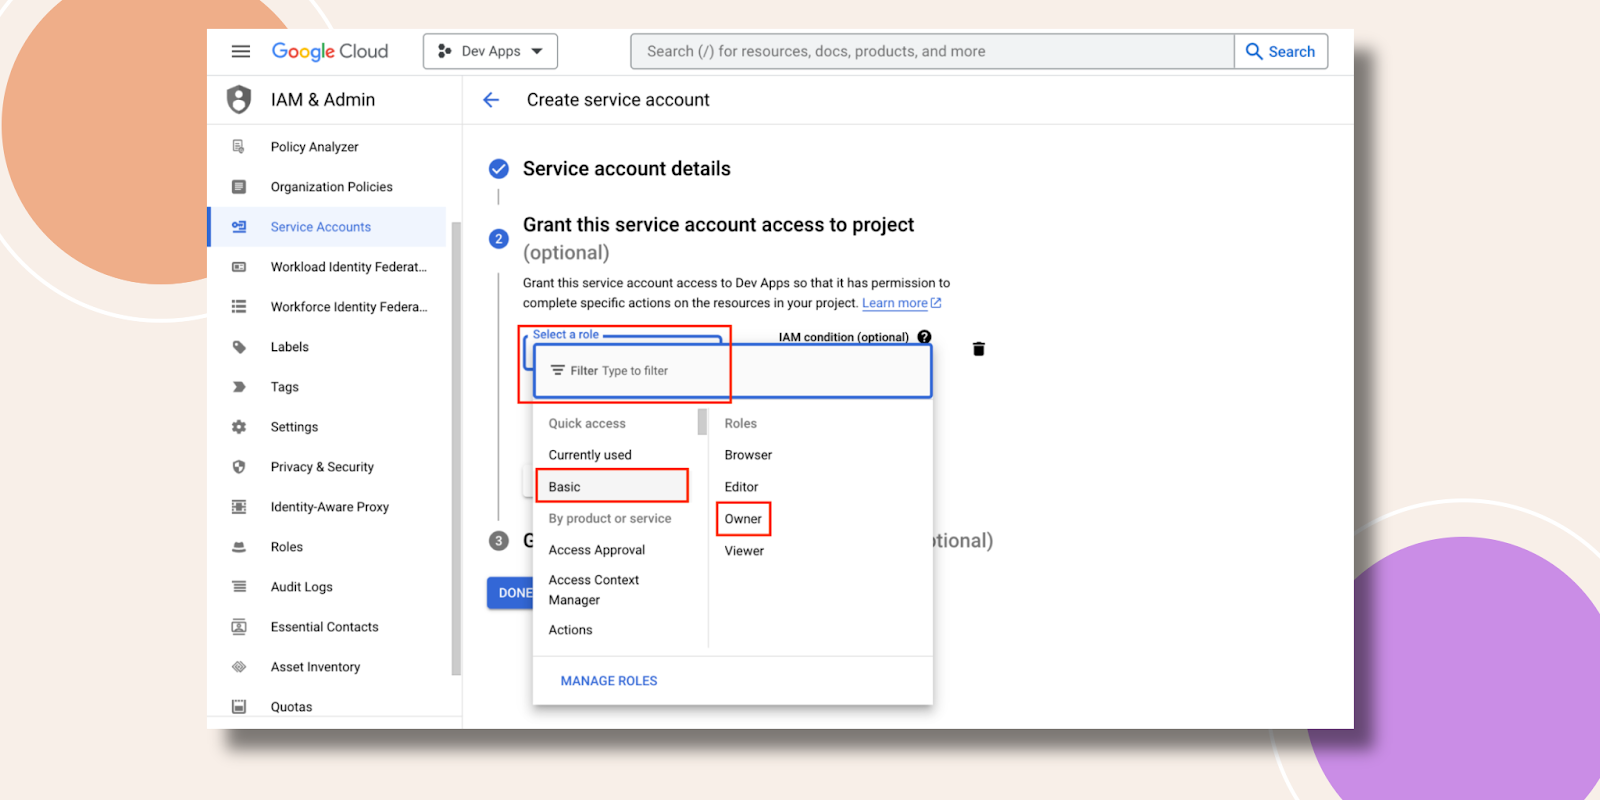
Select a role from Basic then Owner.
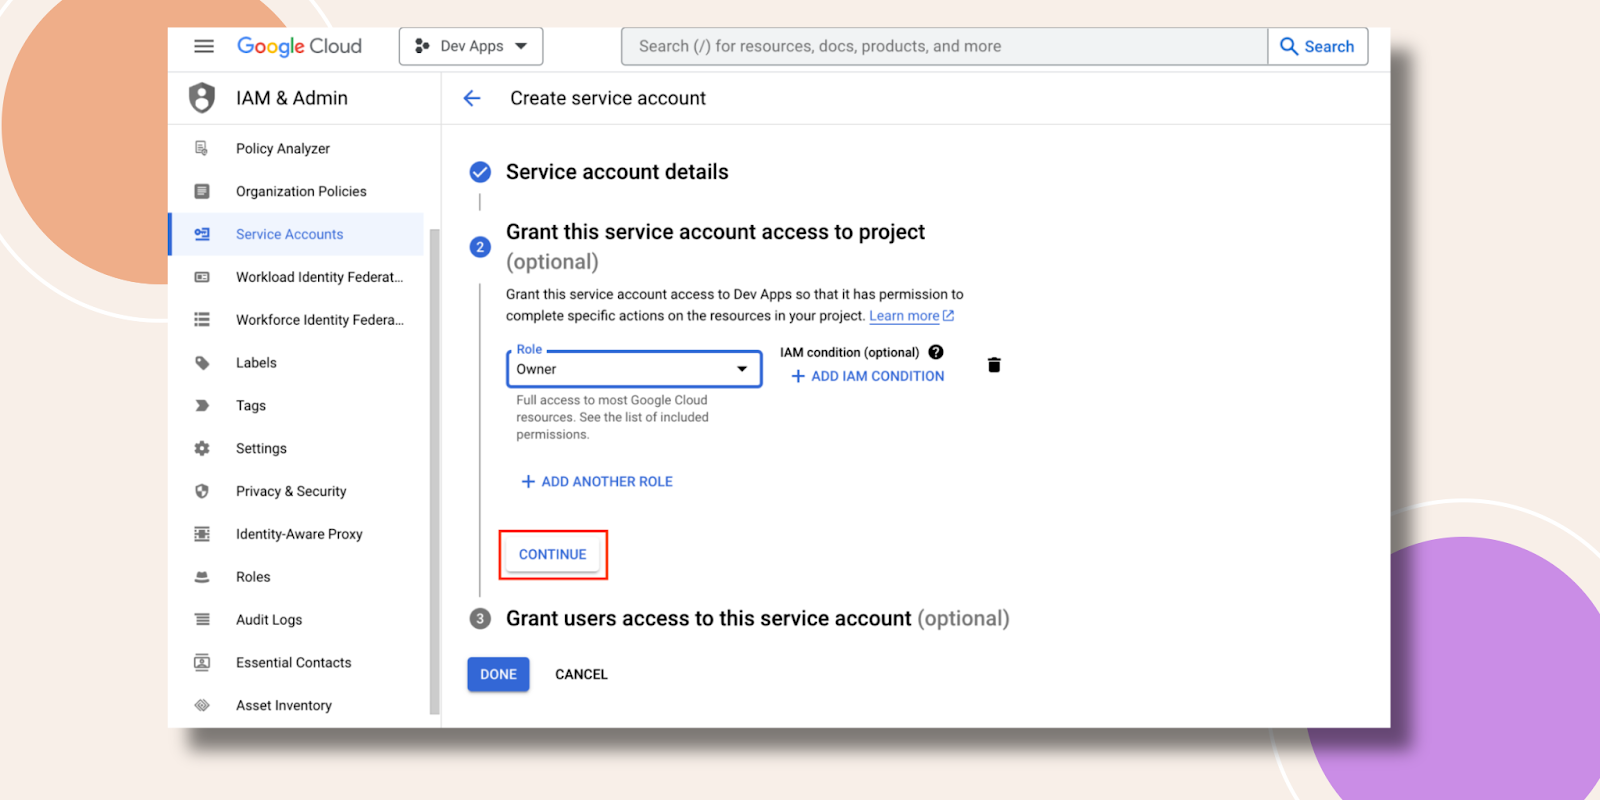
Now Press CONTINUE.
Finally hit the DONE button.

From the next page click on the pencil icon.
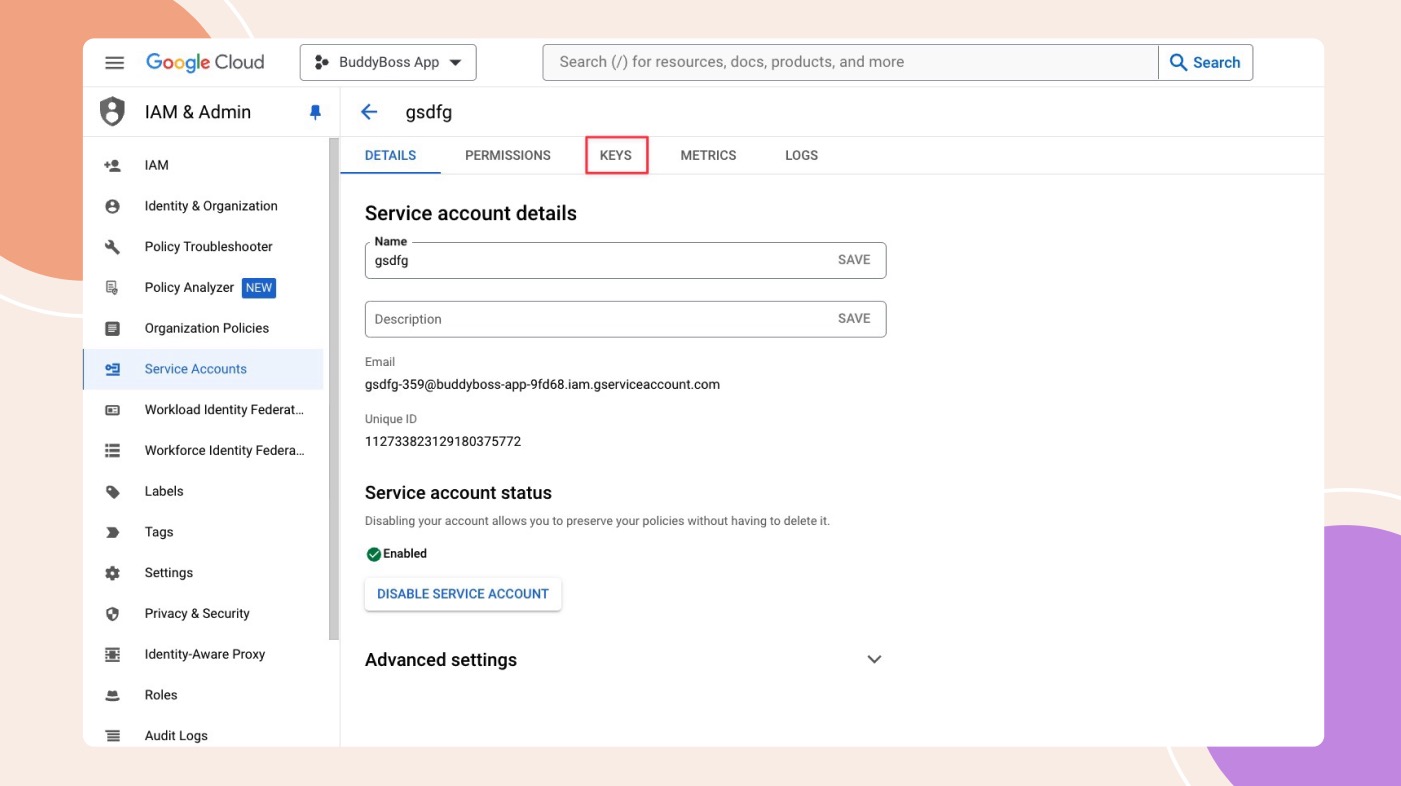
On the following page hit the KEYS option.
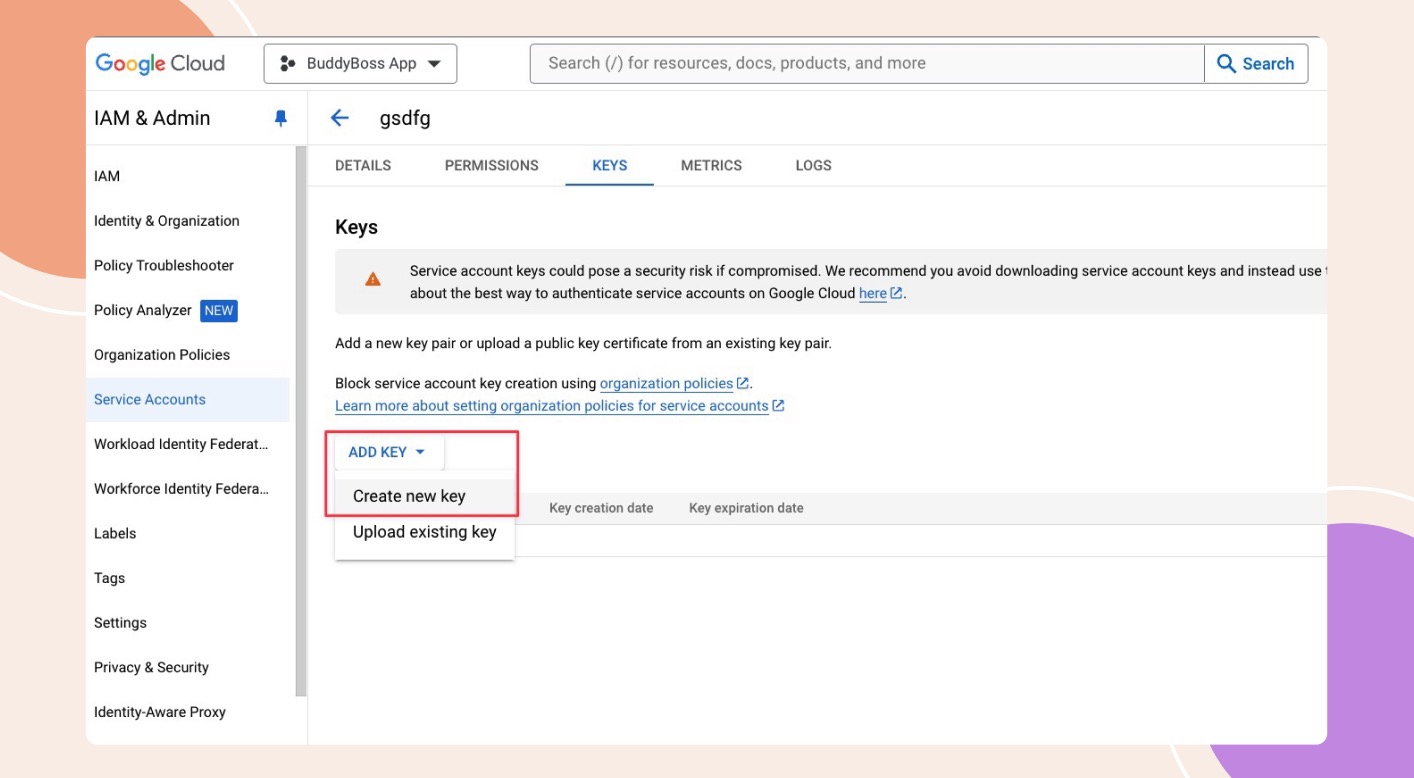
Click the ADD KEY dropdown then select Create new key.
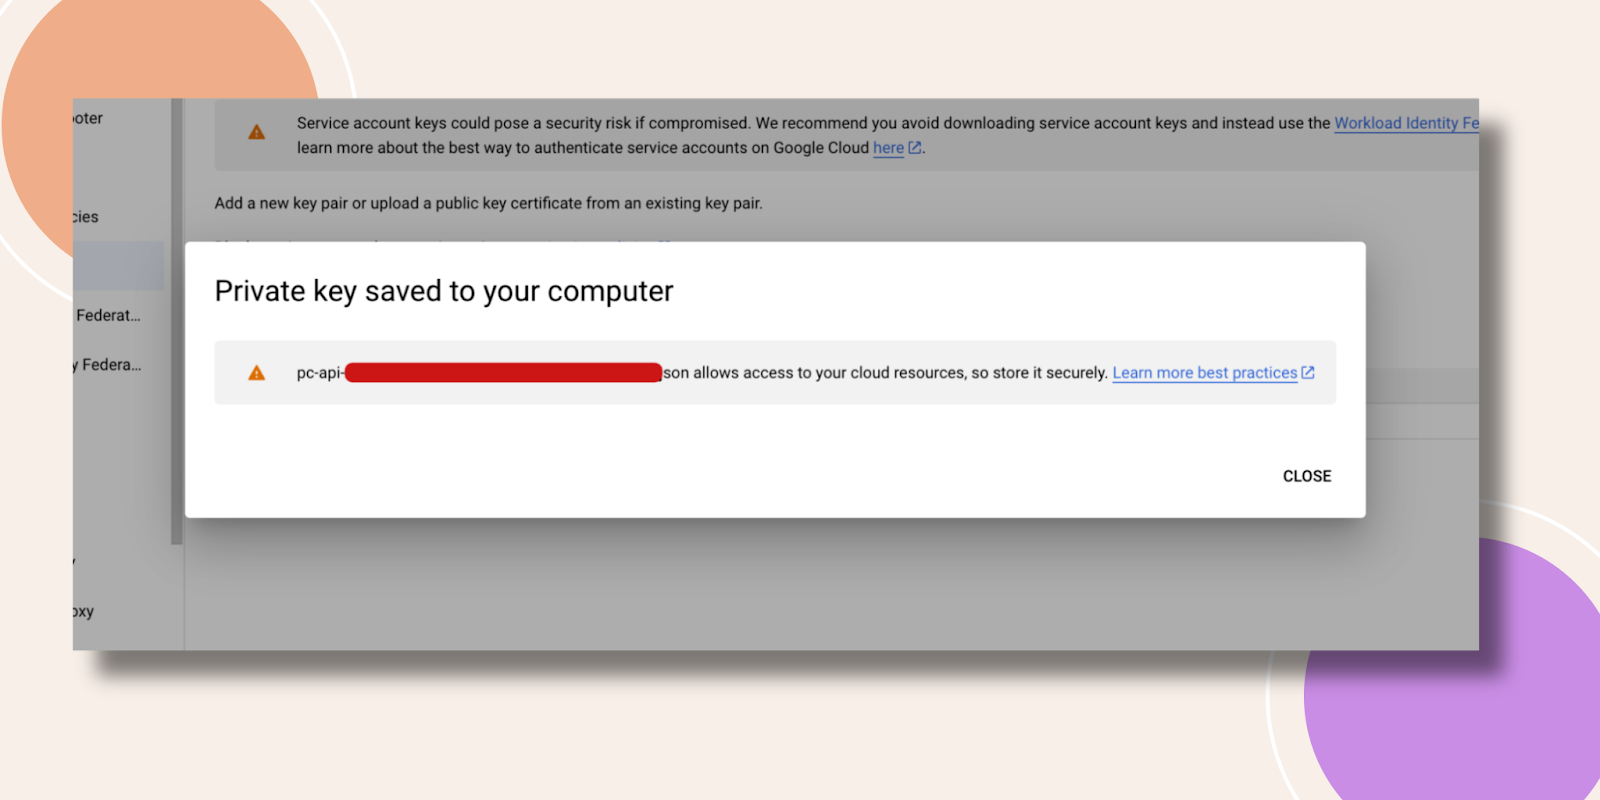
Select JSON and hit the CREATE button.
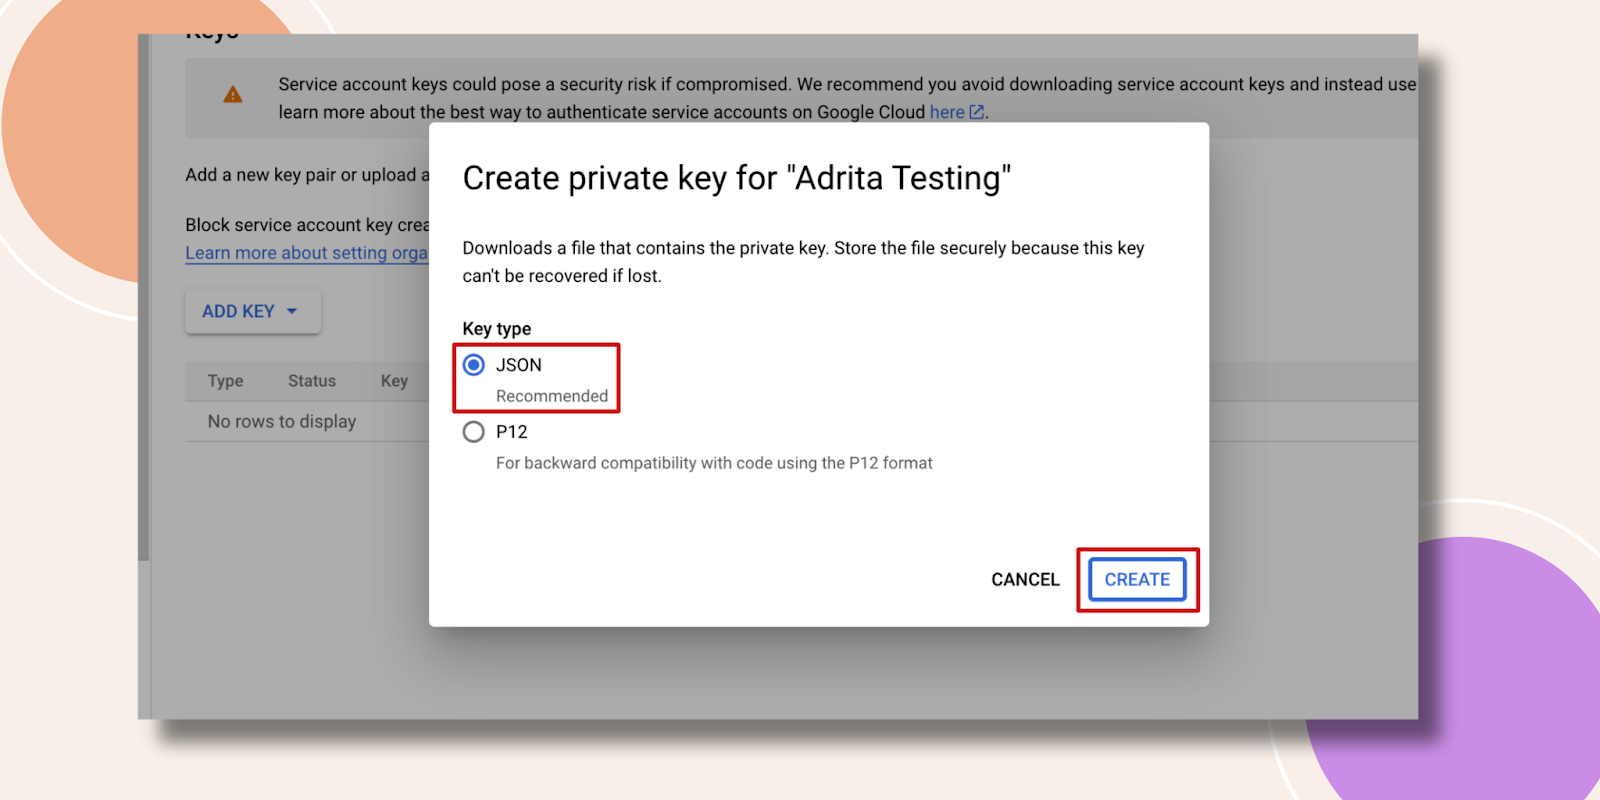
After that a notification will appear and the Service Account Key will be saved to your computer, ready to upload in the BuddyBoss App’s settings. Please be aware that you can download this file only once. Kindly ensure to secure it in case you require it in the future.
Step 3 – Setup App Configuration
From the Service Accounts page, copy the Email address.
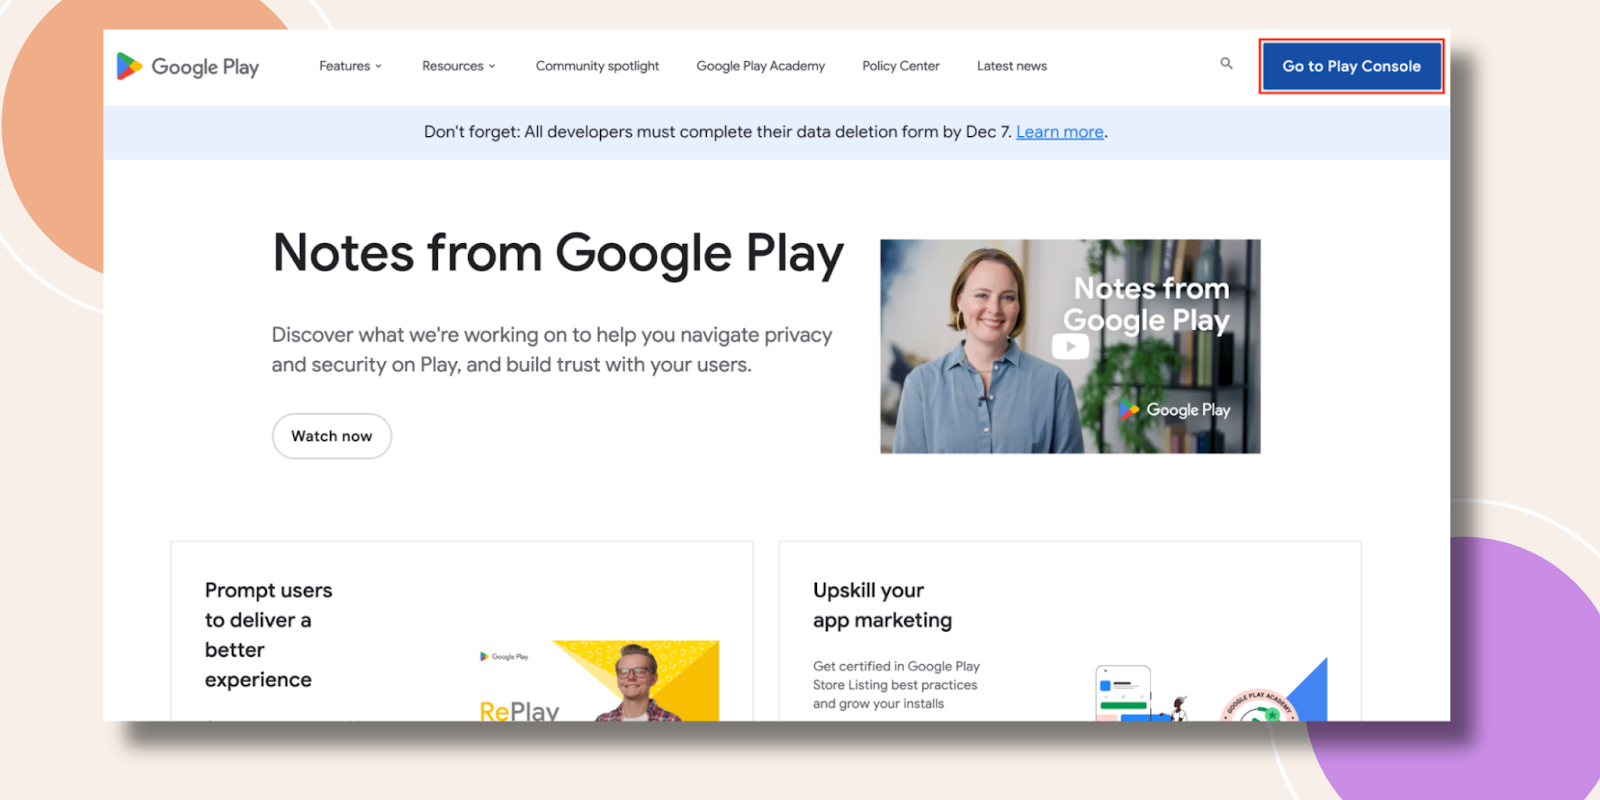
Navigate to Google Play Store and click on the Go to Play Console Button.
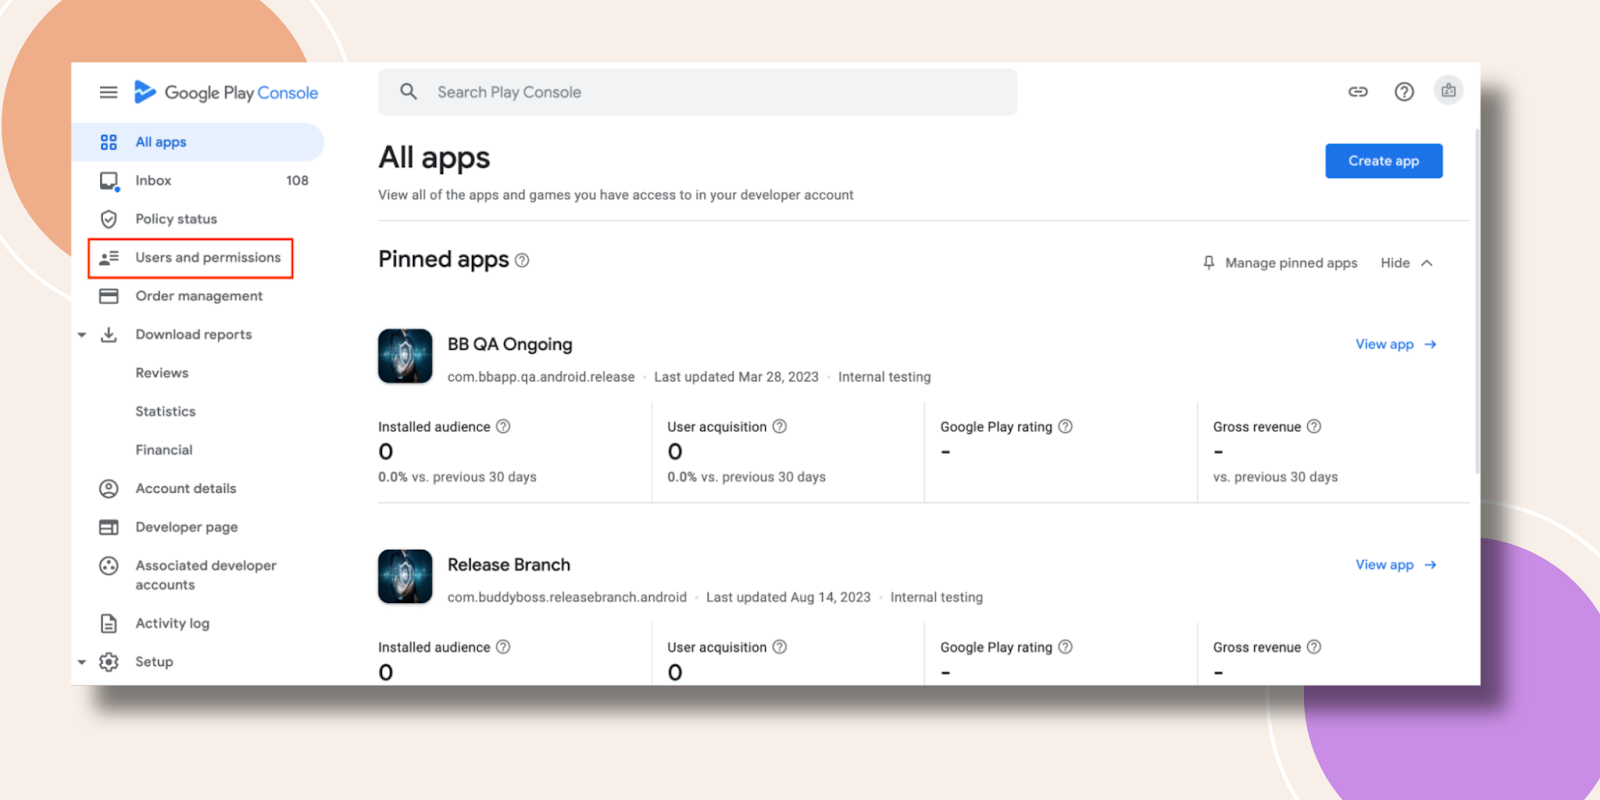
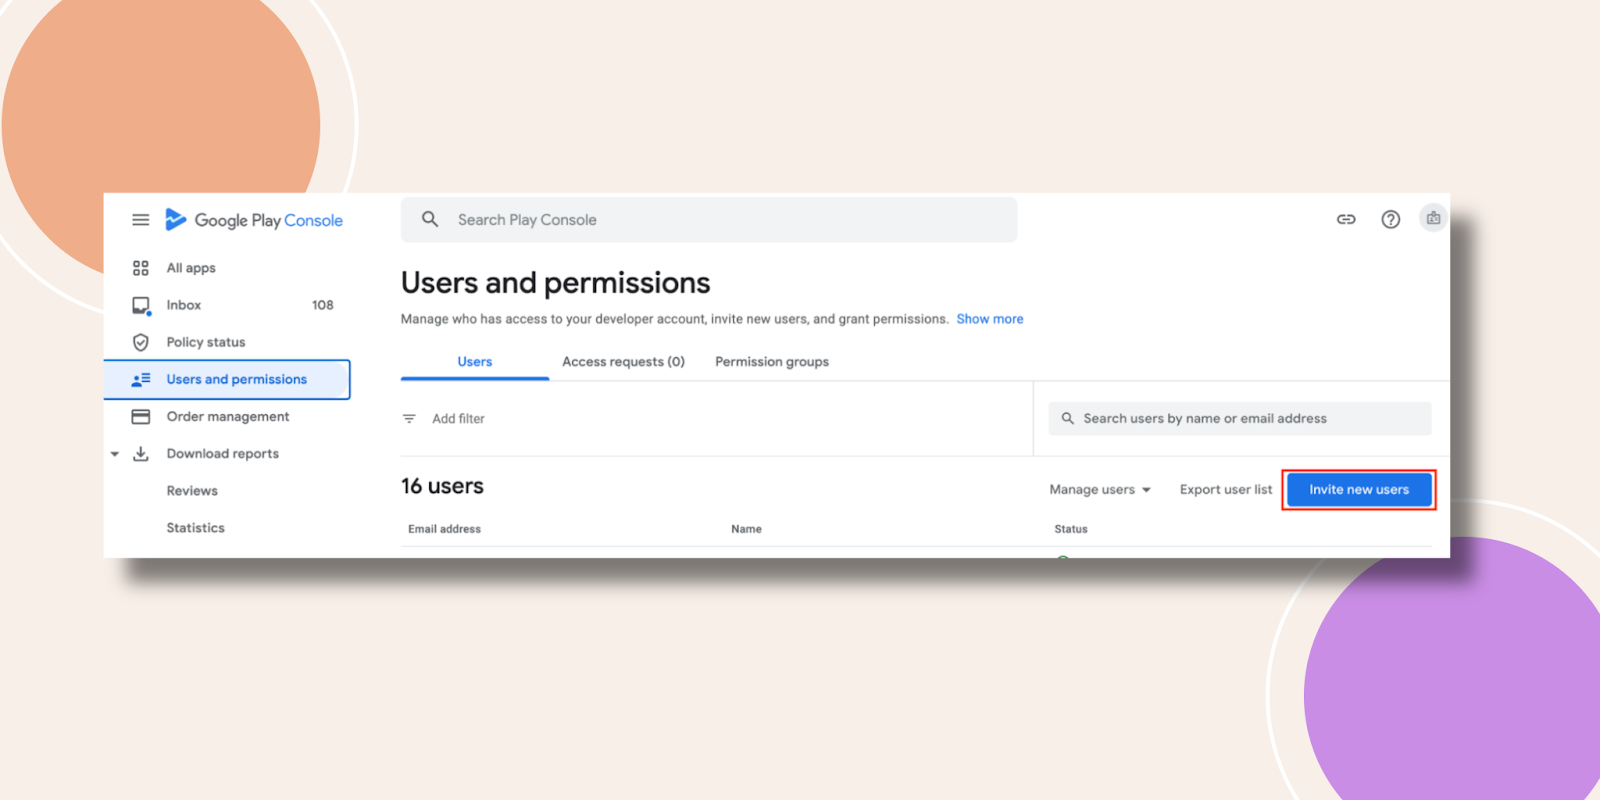
From the left side bar click on Users and Permissions.
Press on Invite new users.
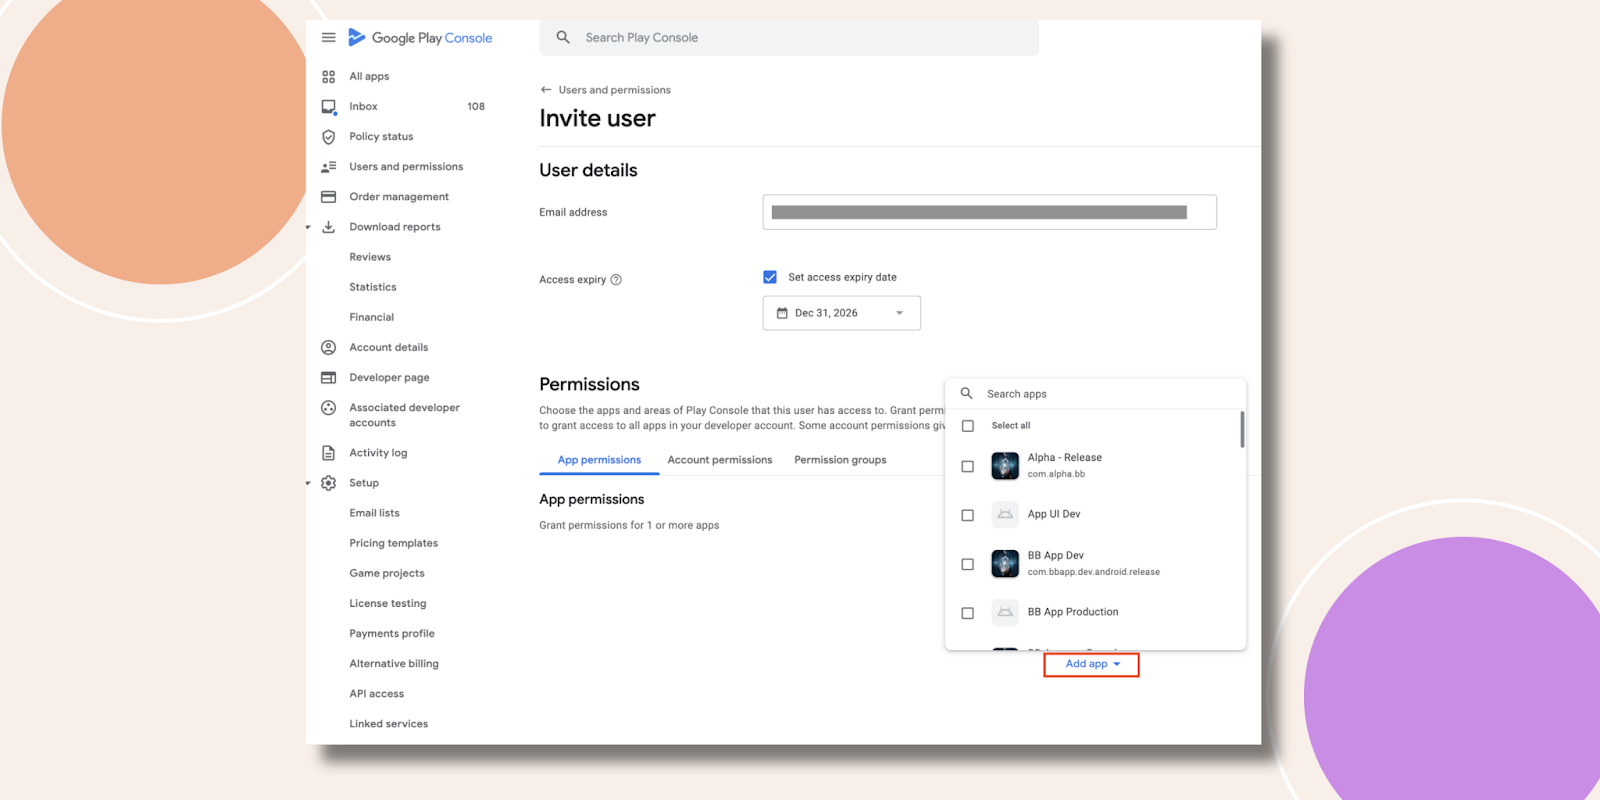
In the Email address field paste the copied email. To give App Permissions, click Add app and select your app.
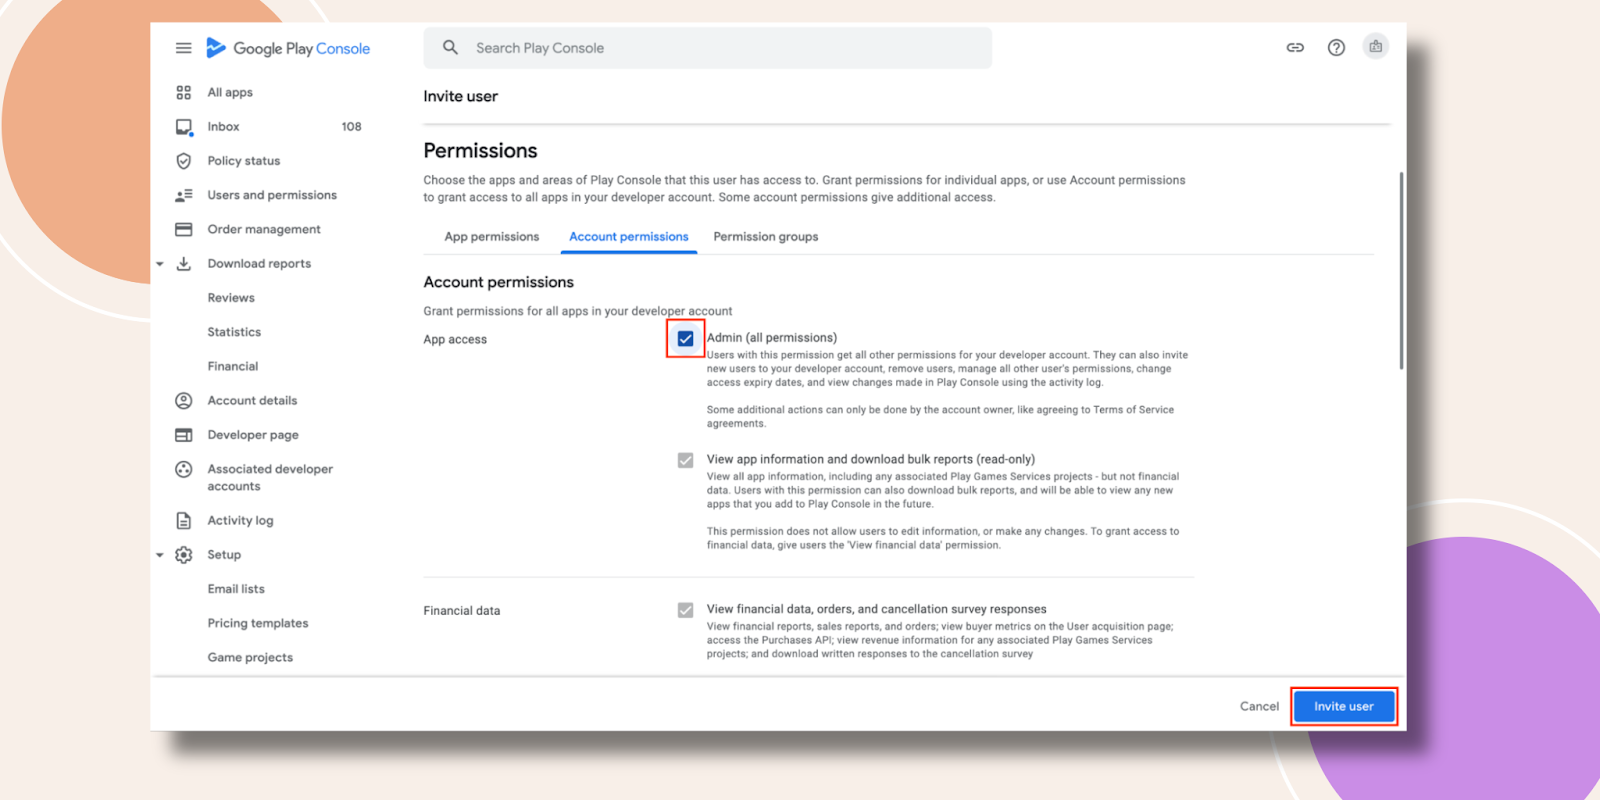
Next, go to the Account Permissions. Select Admin (all permissions) if you want to give full access or you can tick only the Financial Data and any other data on this page. Once done, click the Invite user.
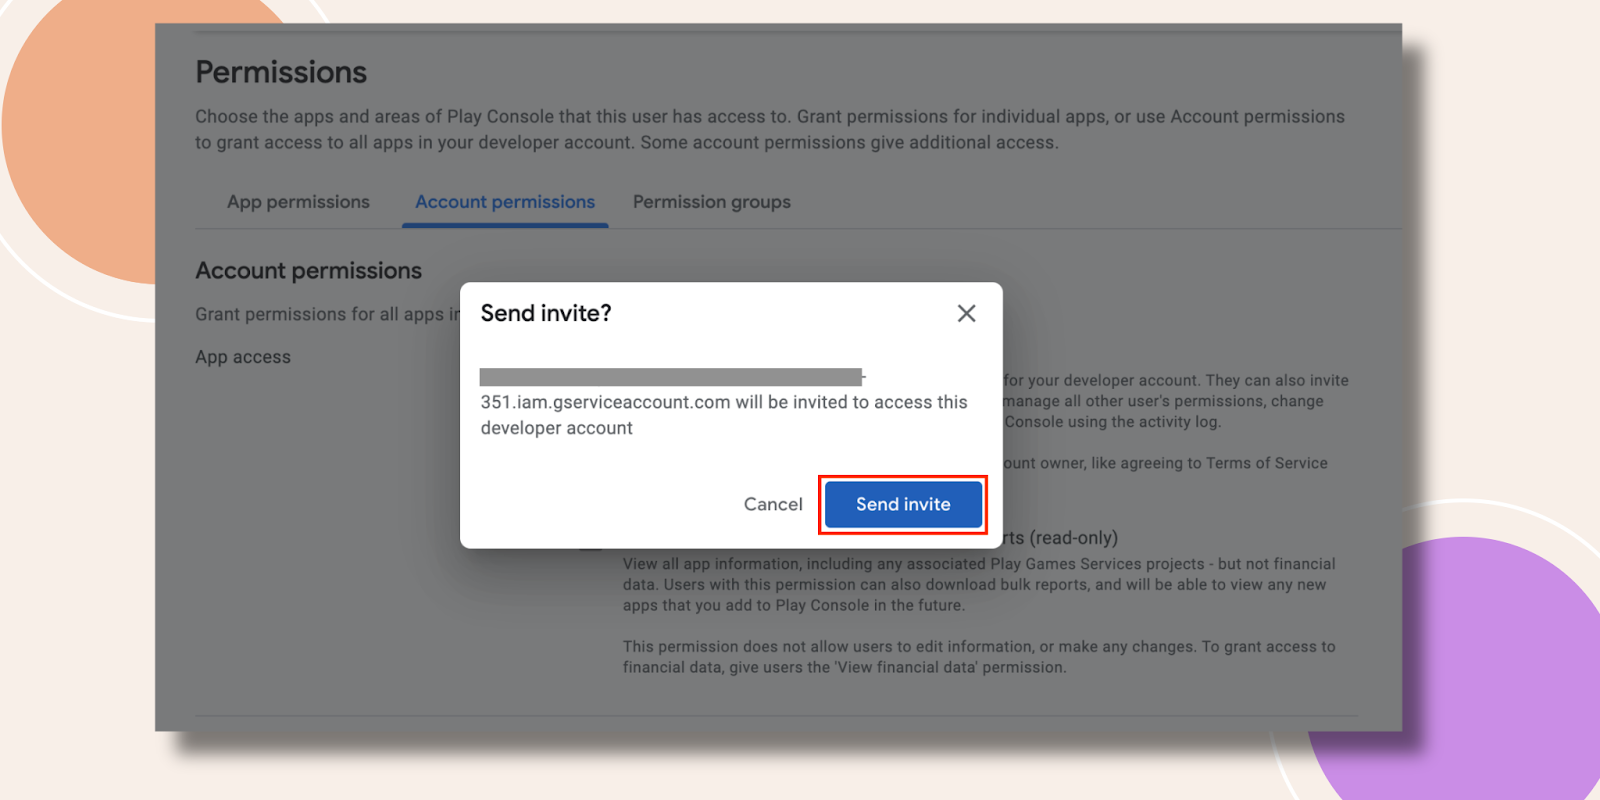
Now a popup will appear where you have to confirm it by clicking the Send invite button.
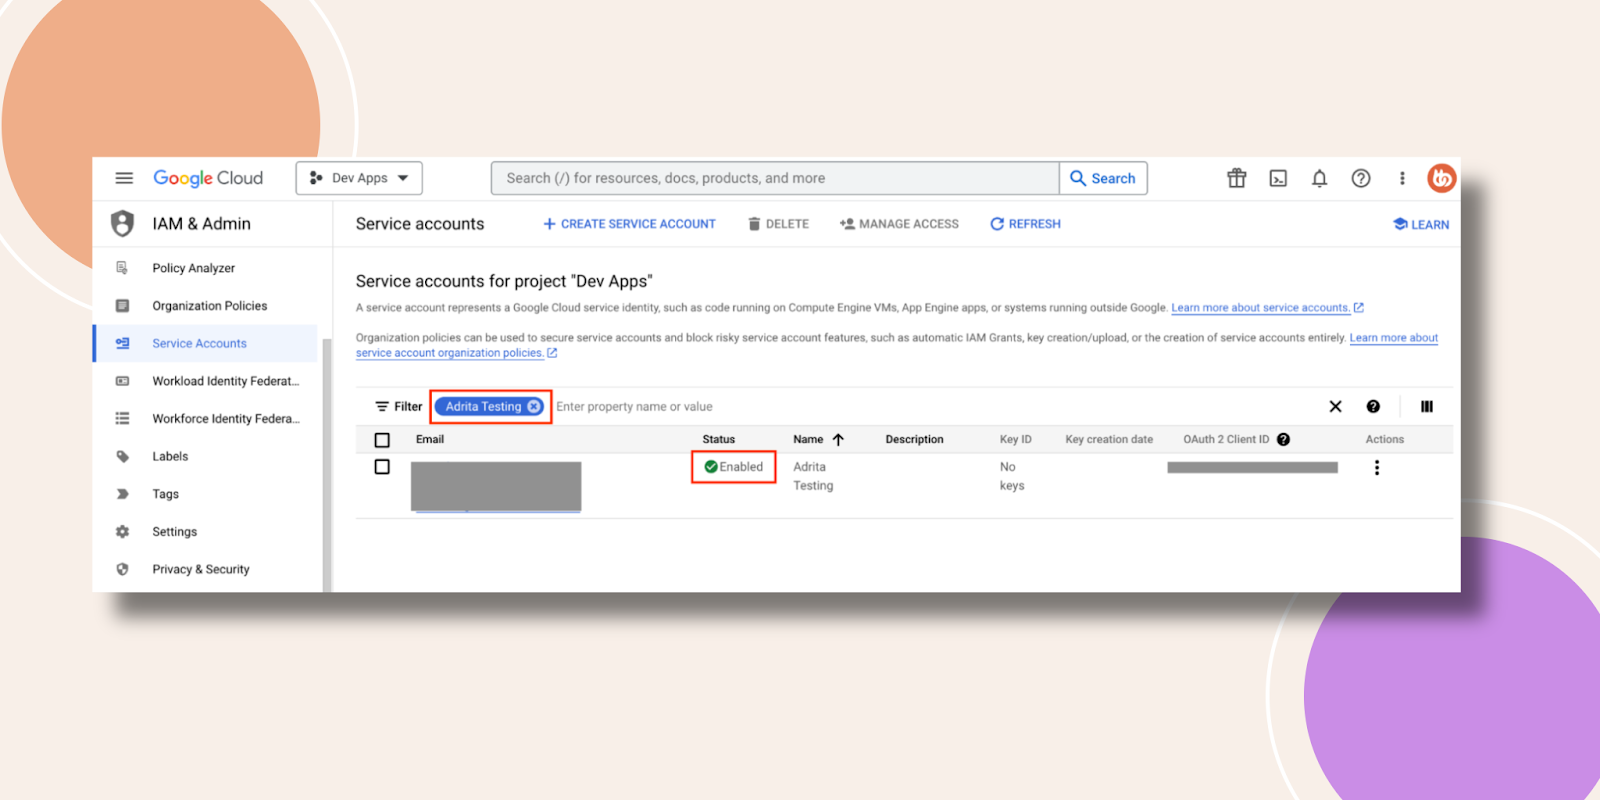
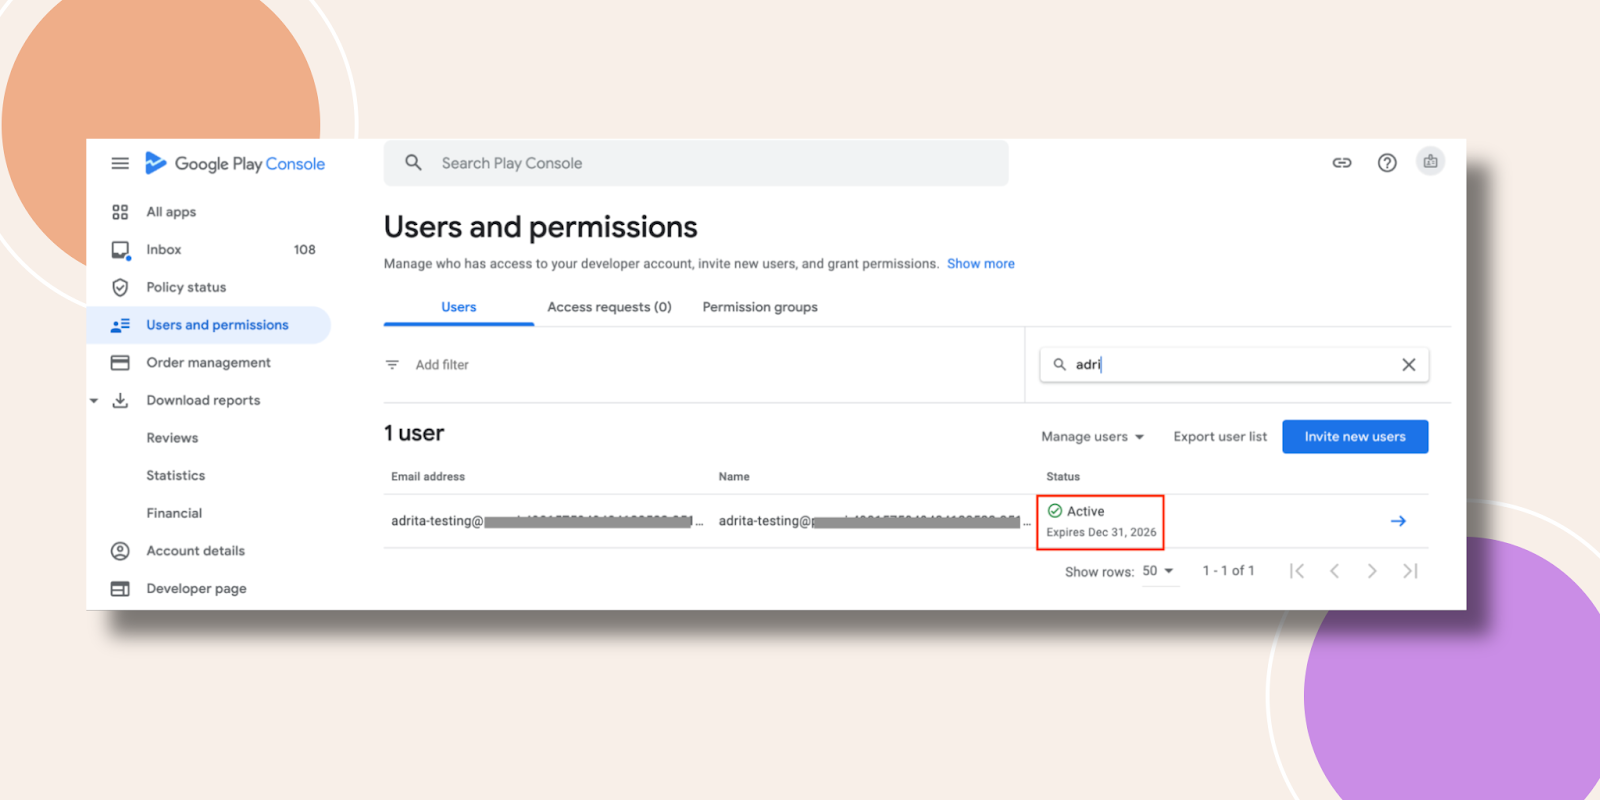
Now if you search with your service account name you will see the status is Active now.
Step 4 – Upload Service Account Key
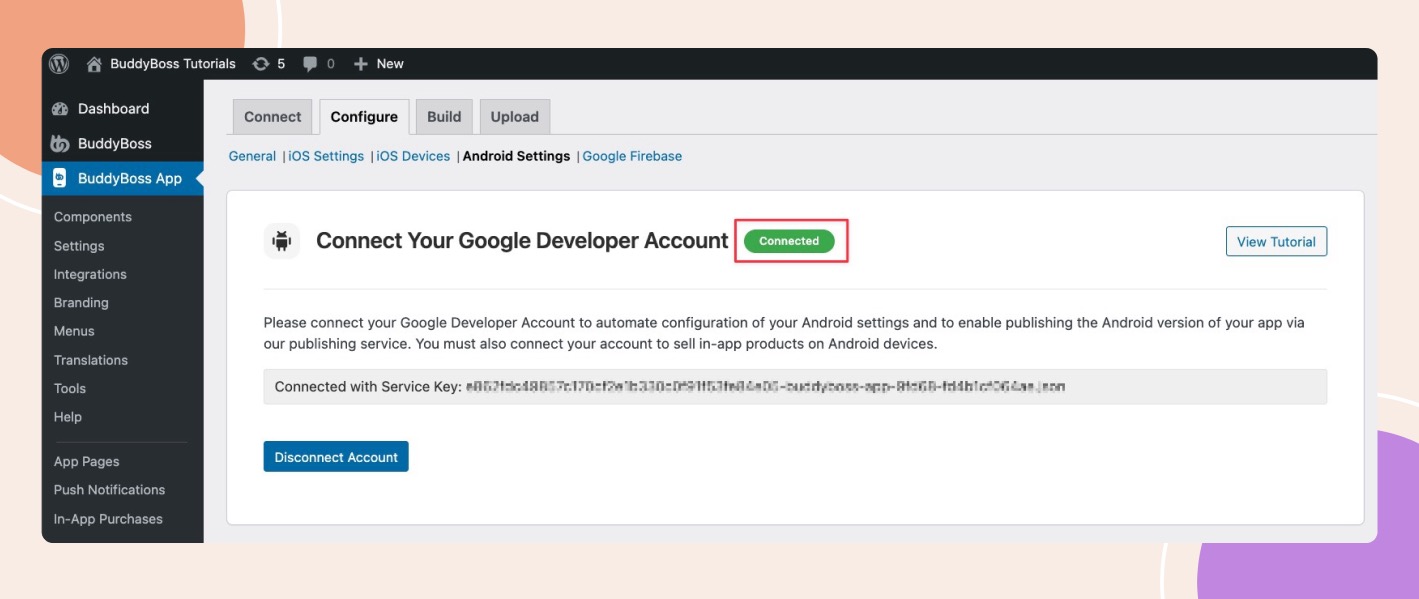
Navigate back to your WordPress dashboard under BuddyBoss – Configure – Android Settings. Upload the JSON file you just downloaded. Then click Connect Account.
If successful, it will say Connected.
Step 5 – Set Up Internal Testing
Go back to the Home page then click on your App.
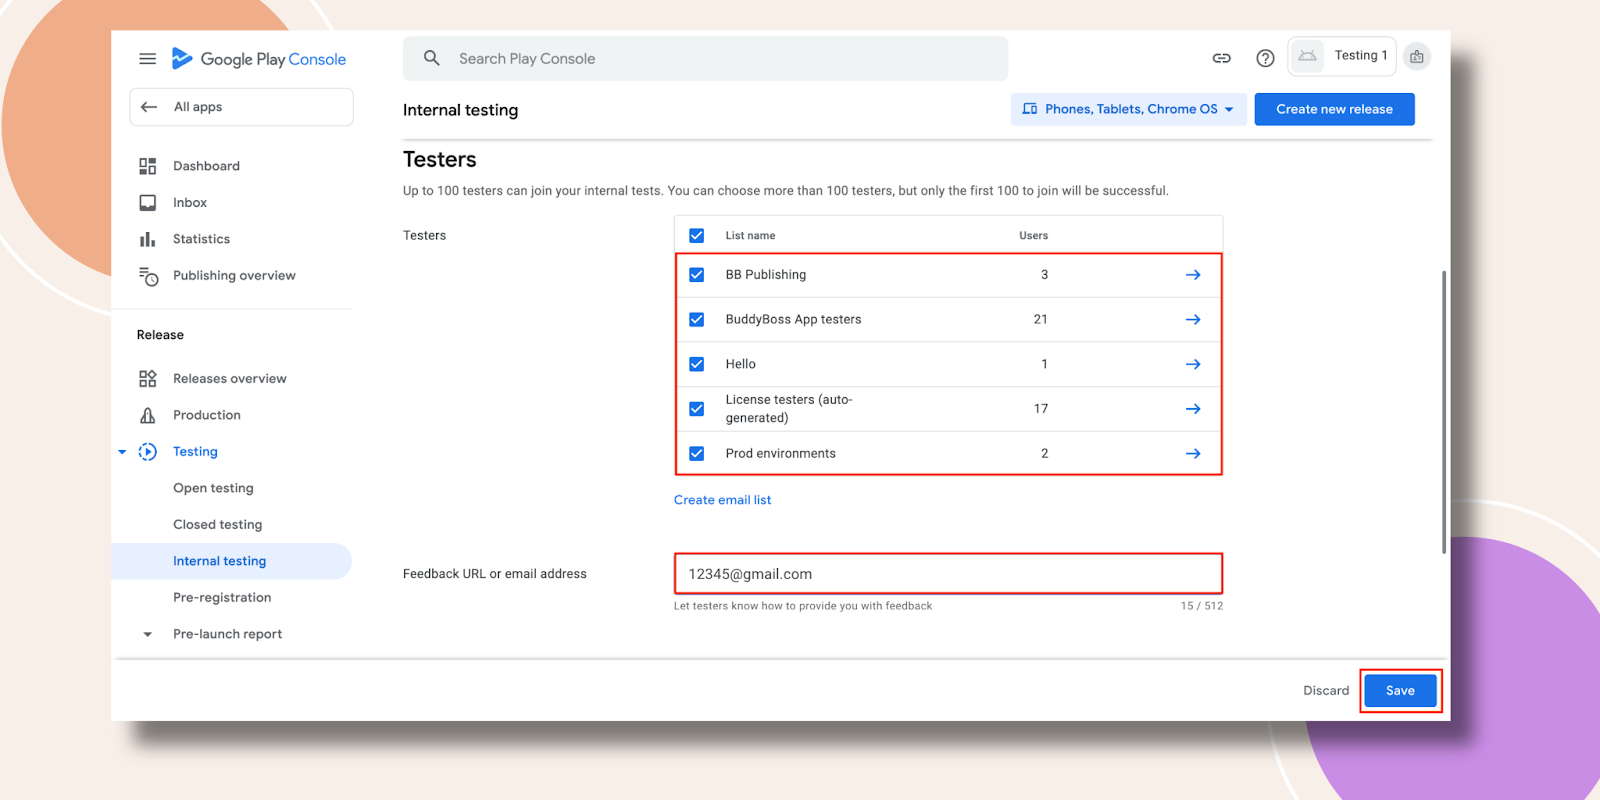
Next, navigate to Testing > Internal Testing. Select your testers and provide a Feedback URL or email address. Press the Save button.
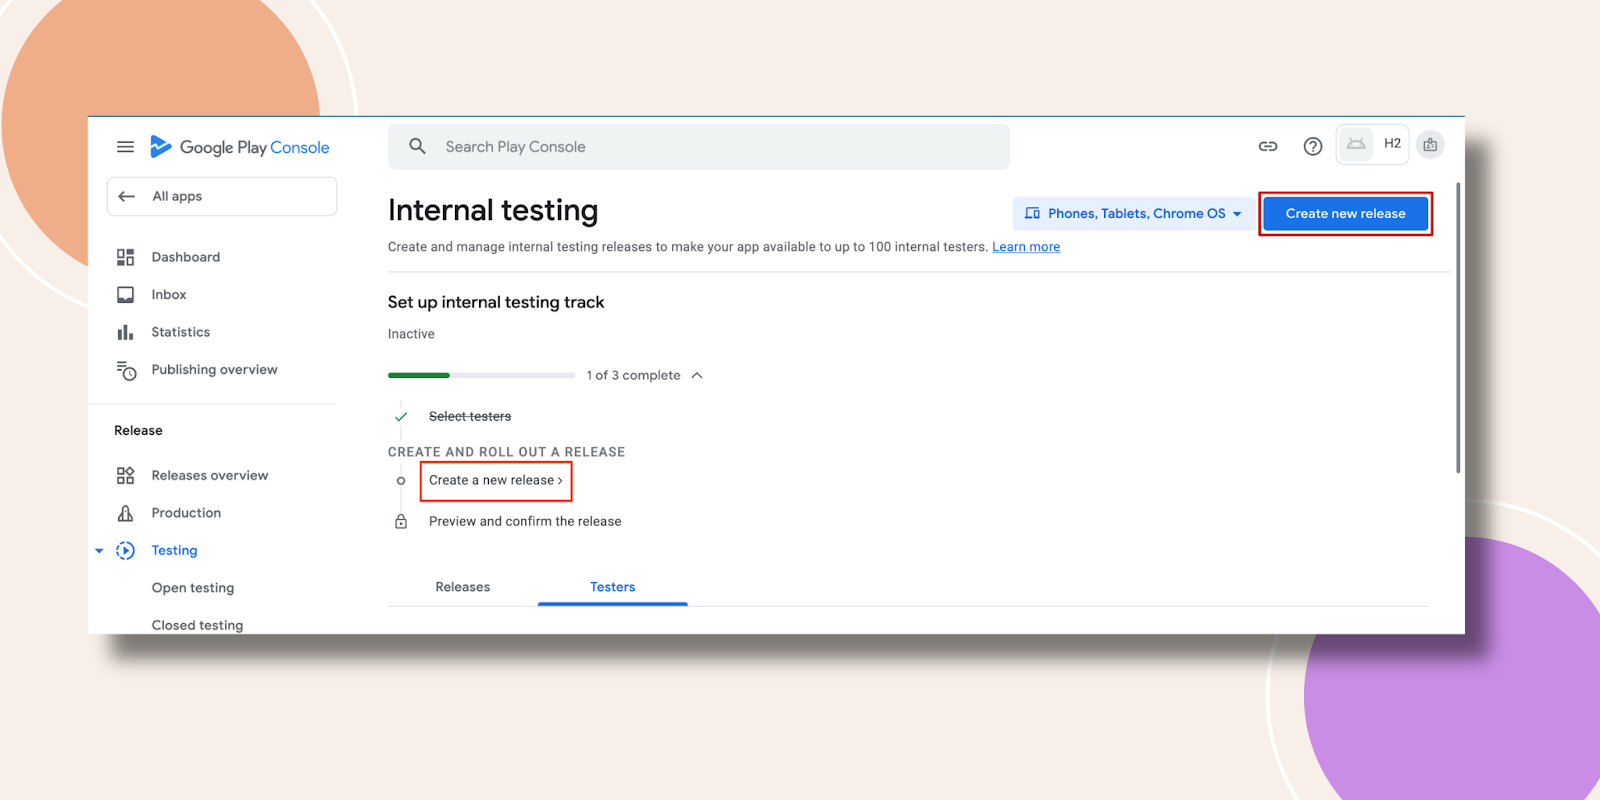
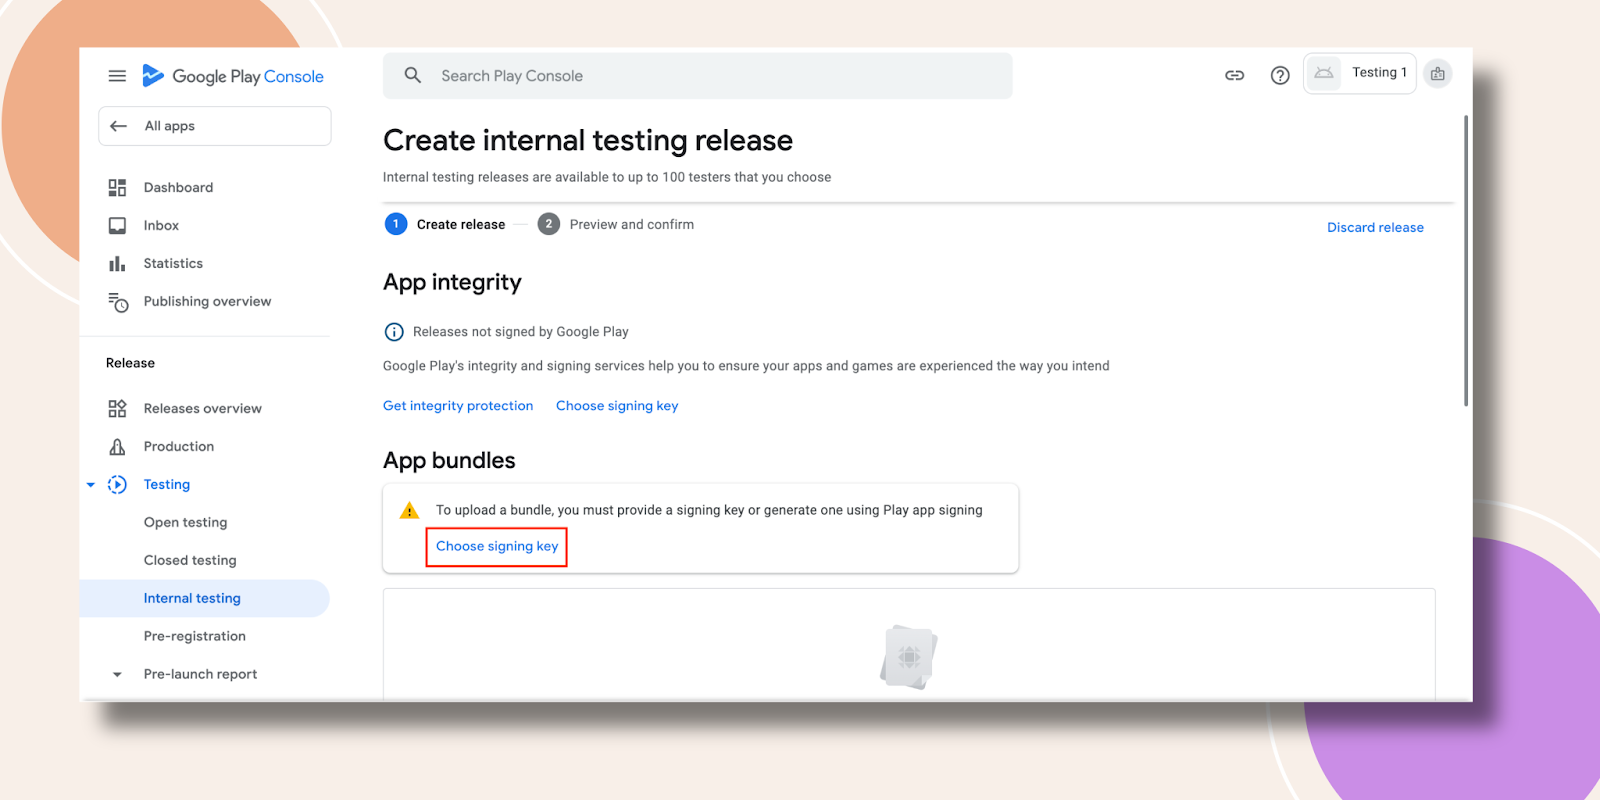
Next, you will need to Create a new release.
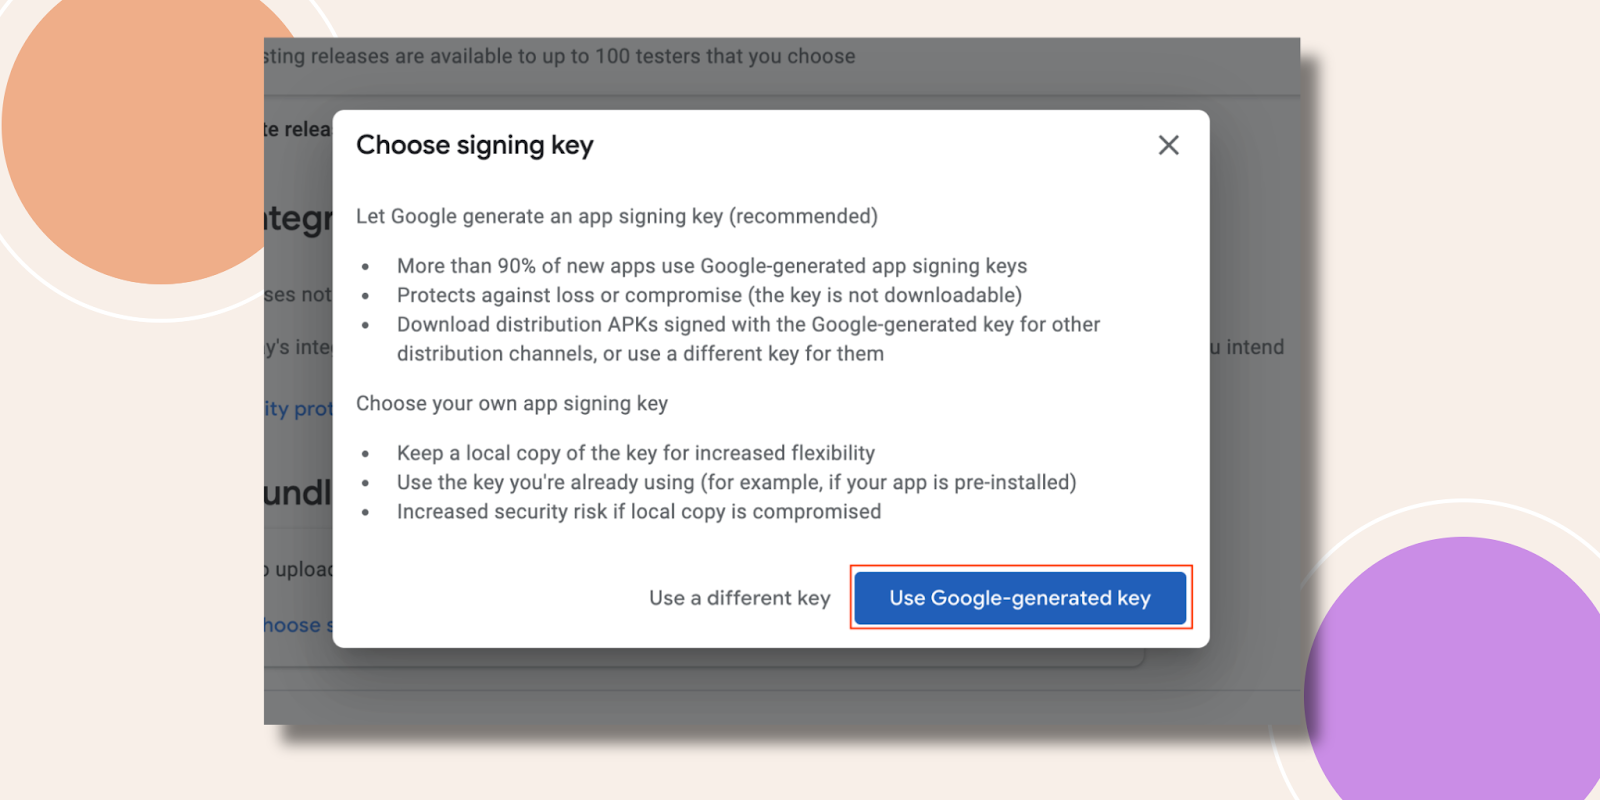
For that releases must signed by Google Play. Click on the Choose singing key.
Now hit the Use Google-generated key.
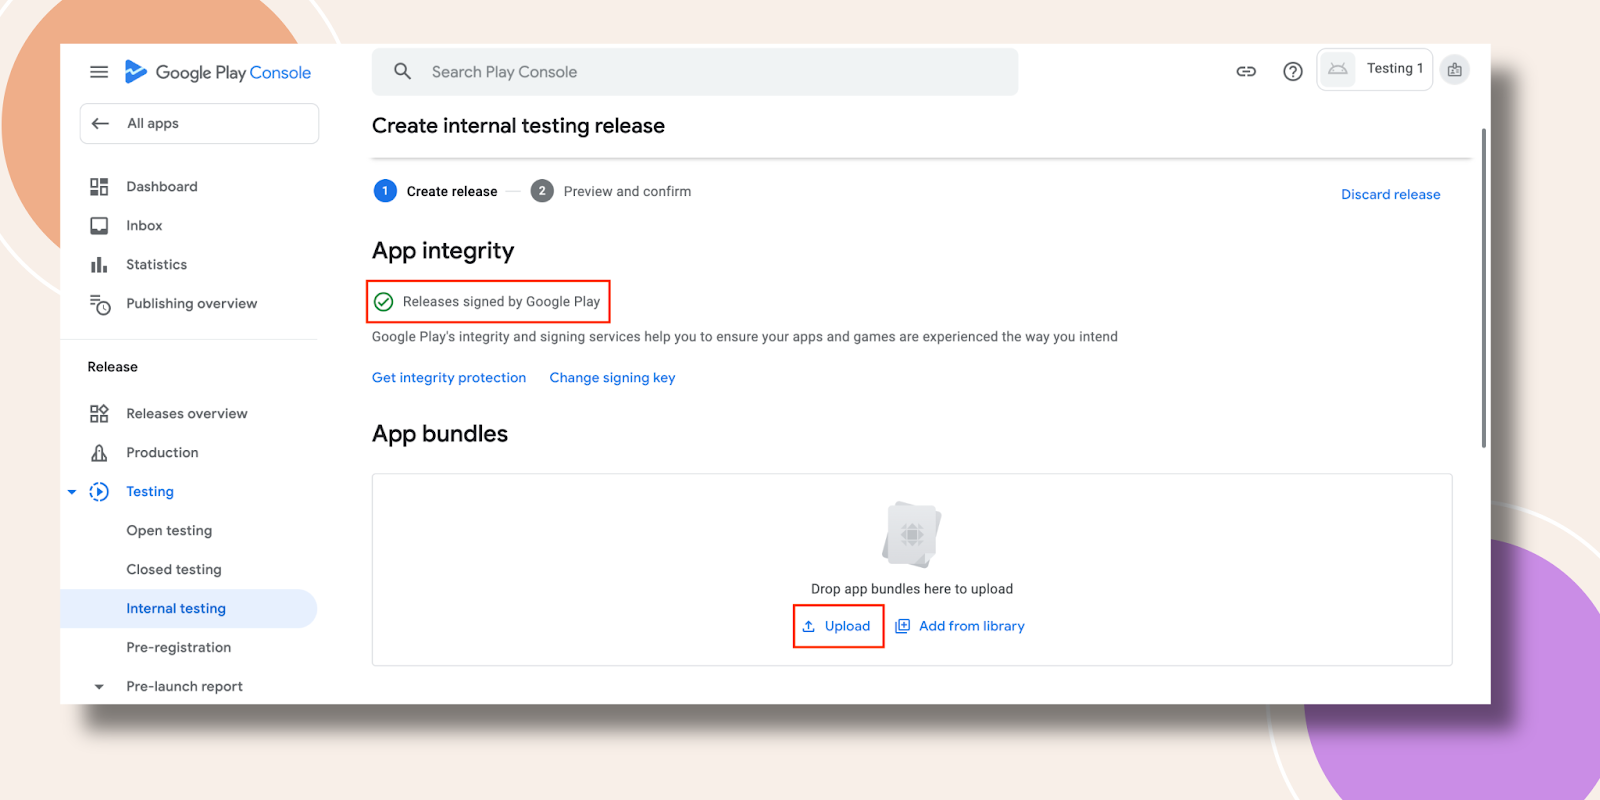
You will get a notification mentioning Releases signed by Google Play. Then under App bundles, you need to upload your app file.
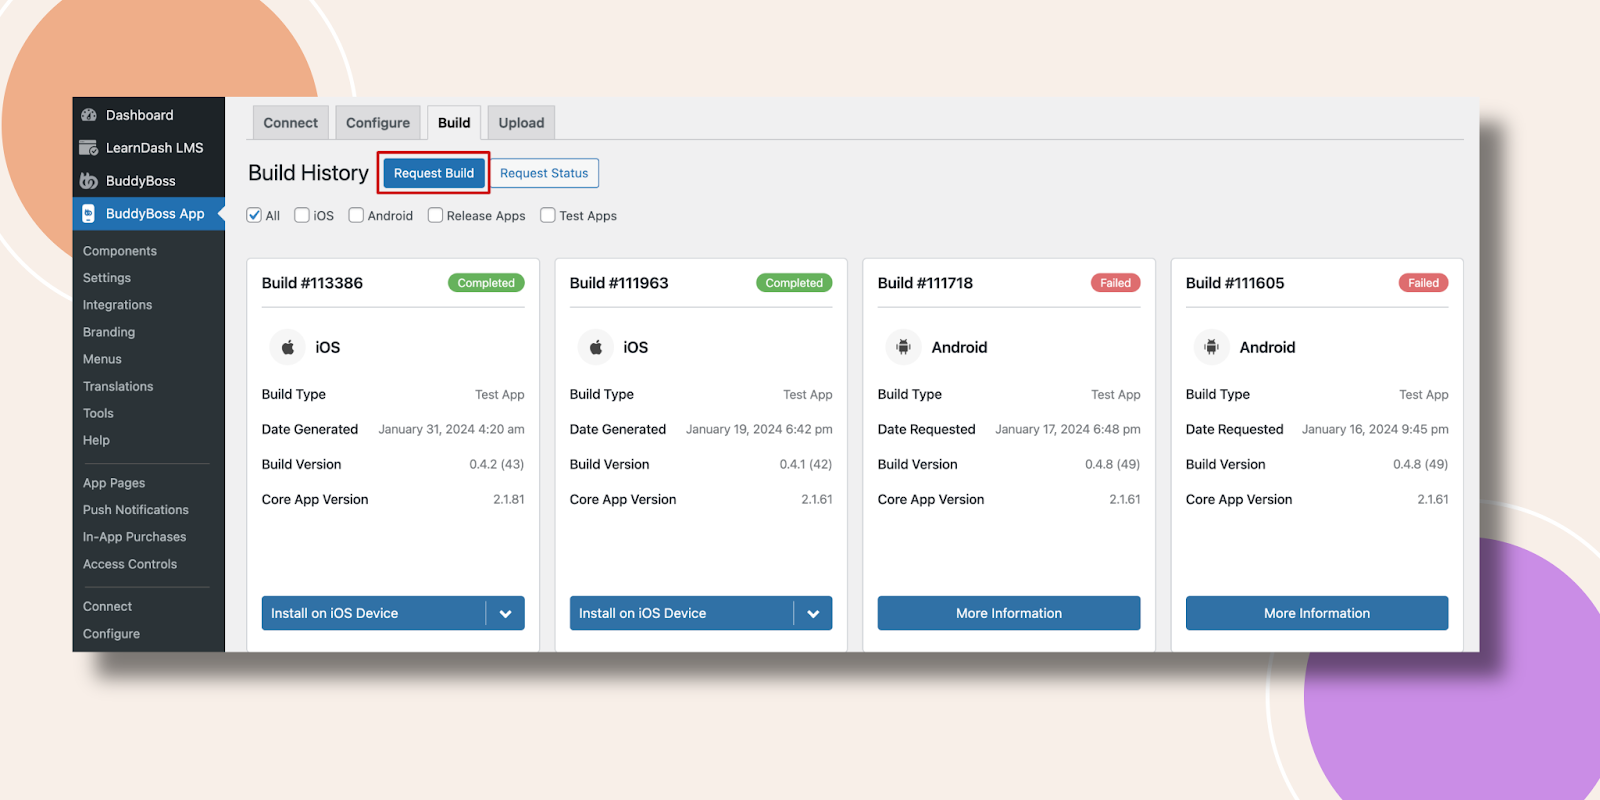
Don’t get puzzled, you will get the app file from the BuddyBoss App. Navigate to BuddyBoss App – Build. Now click on the Request Build option.
On this page tick the Android as your platform then the Release App as your build type then click Next.
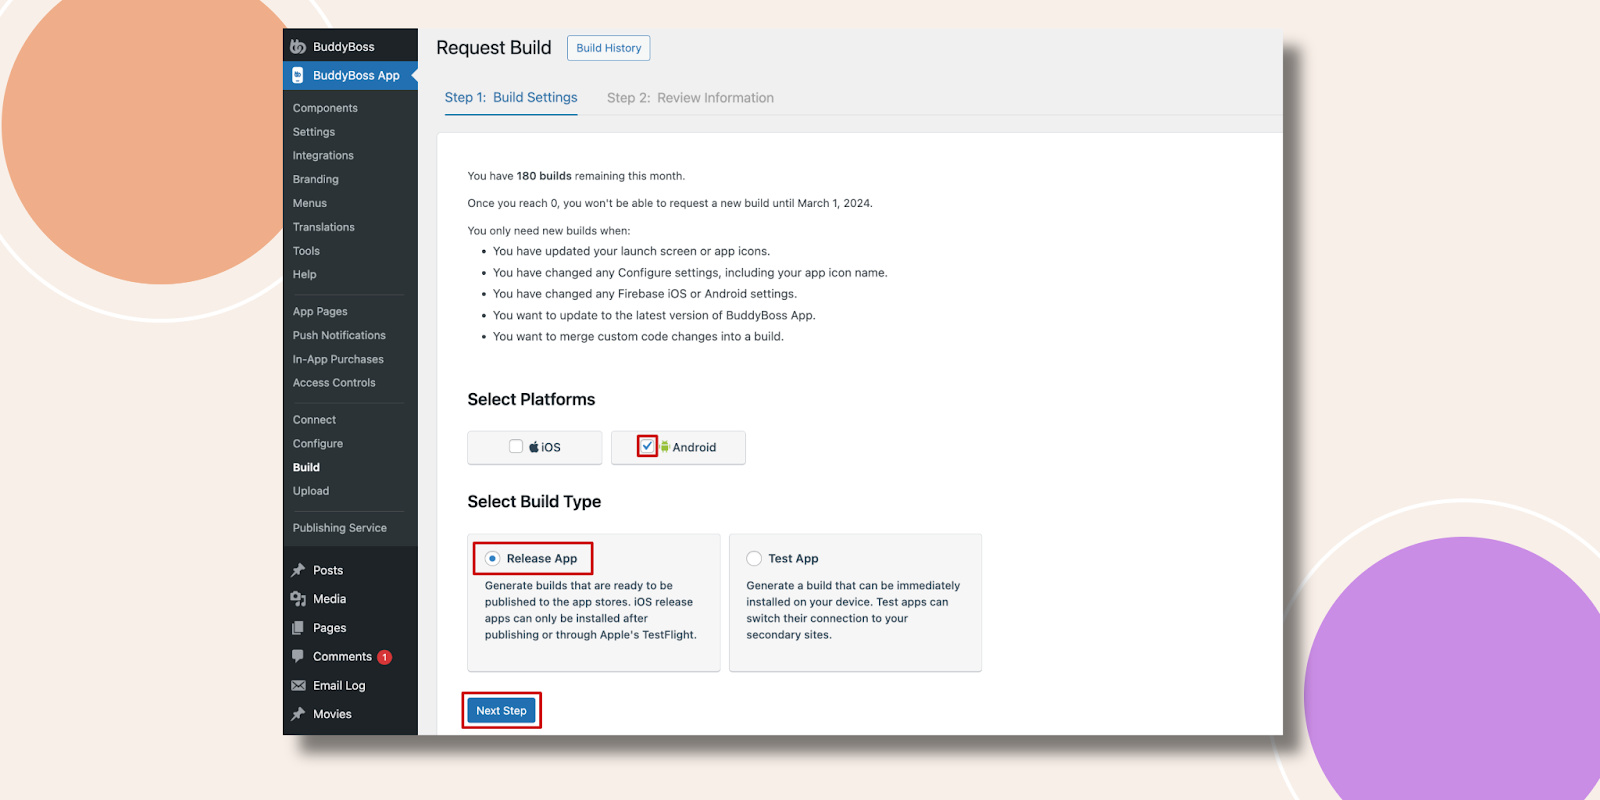
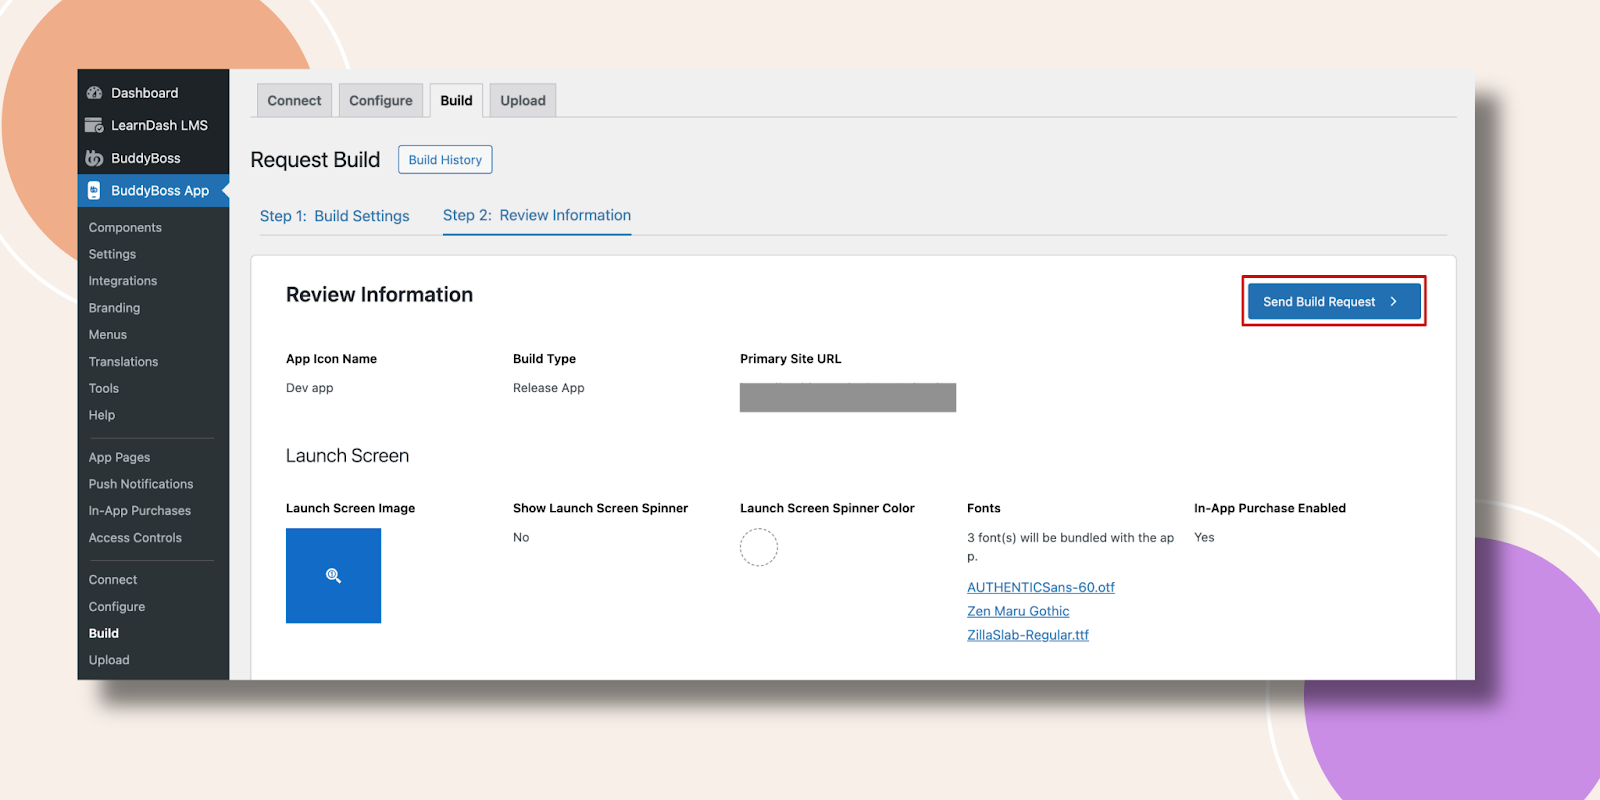
Click Send Build Request.
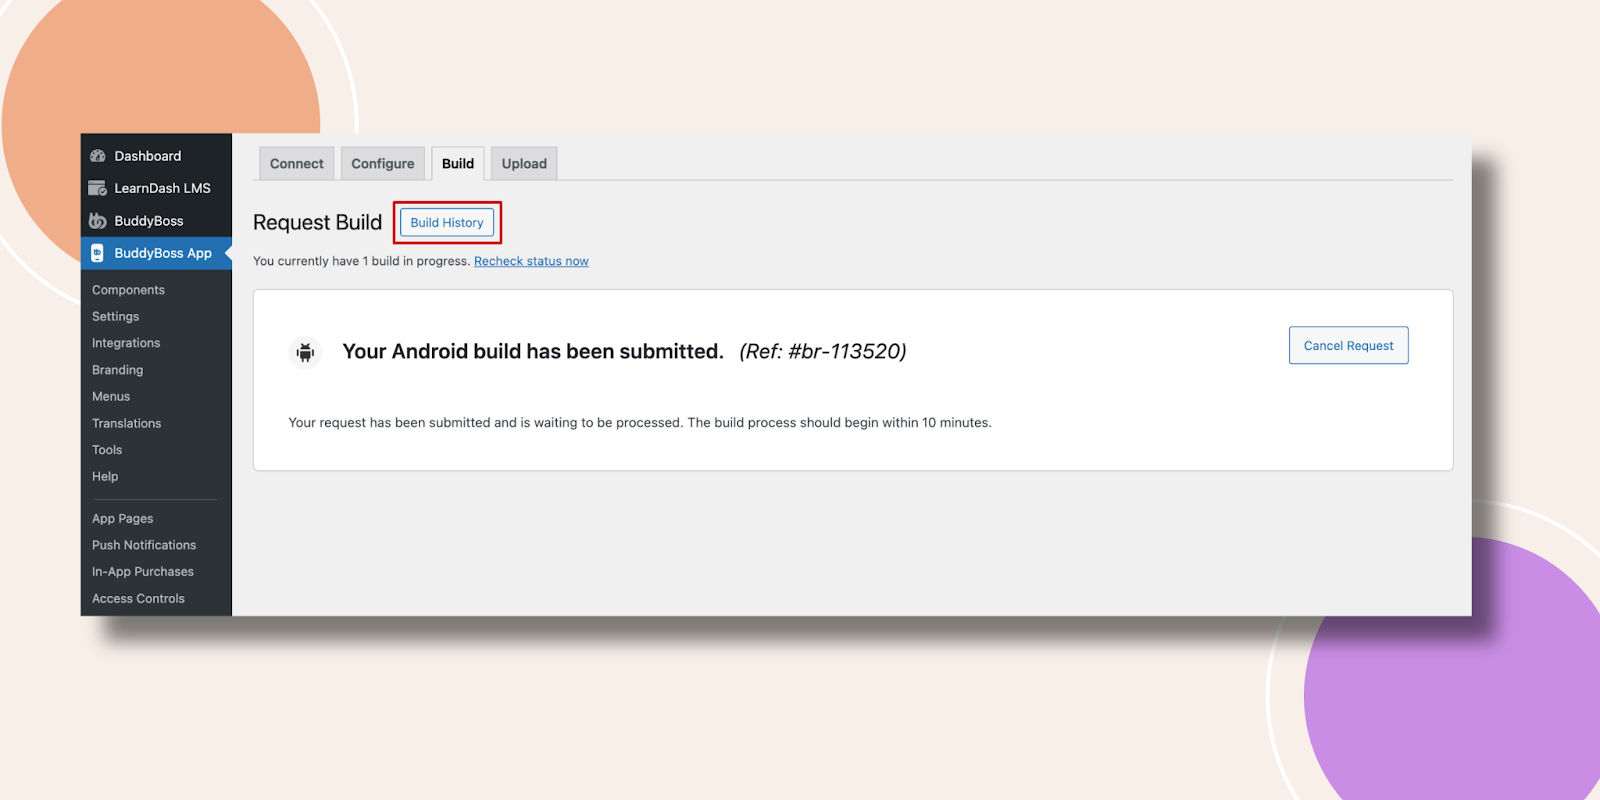
To check the status of your request, click Build History.
After around 5-10 minutes hit on the Upload to Google Play Console button.
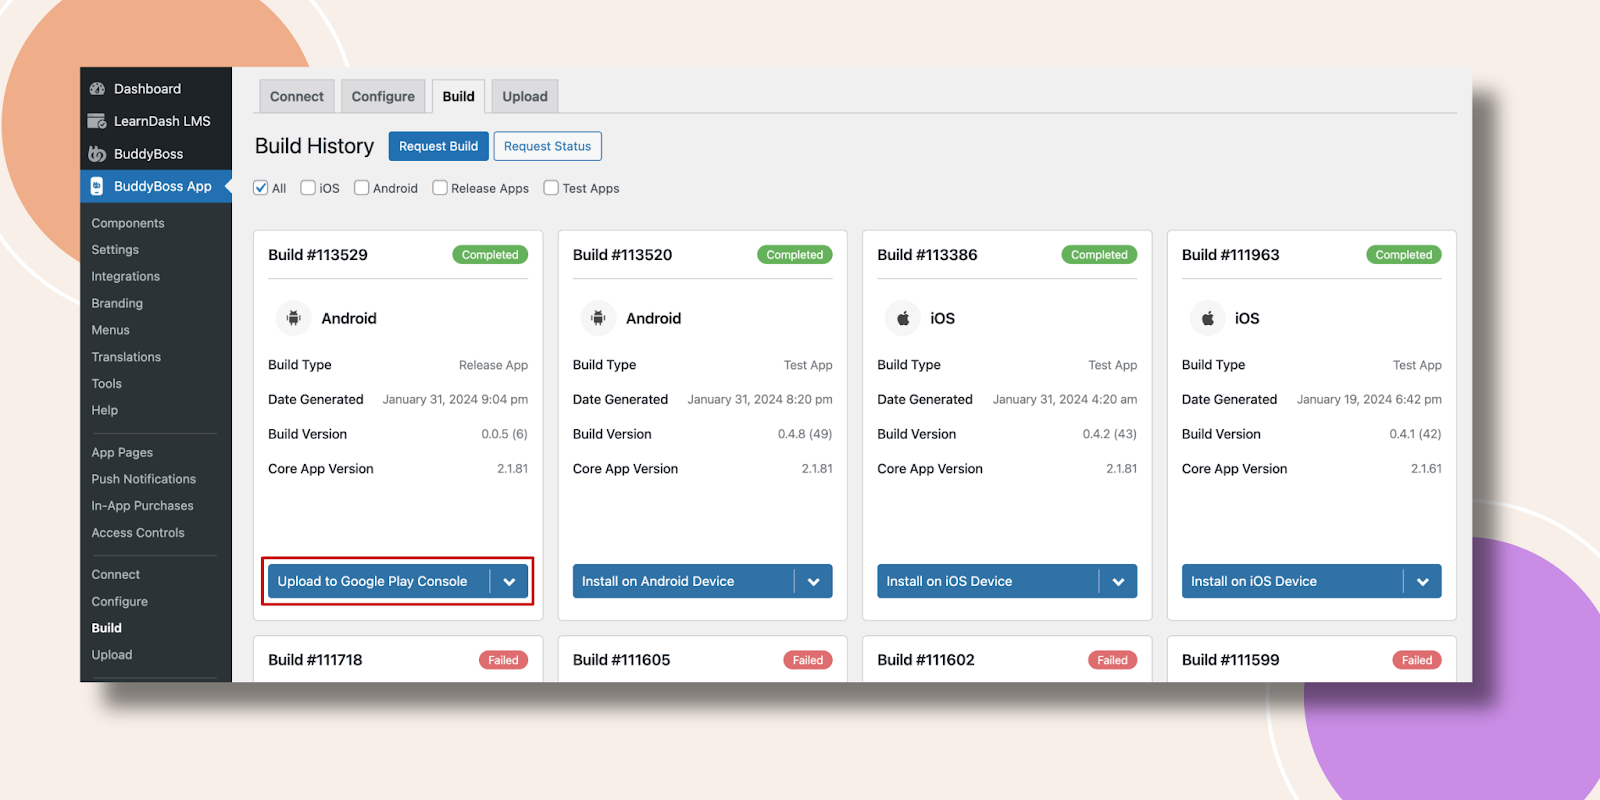
Select Build and Format. Your app file must be AAB because the APK file can only be uploaded to apps published in the Google Play Store prior to August 2021. Now Download Build.
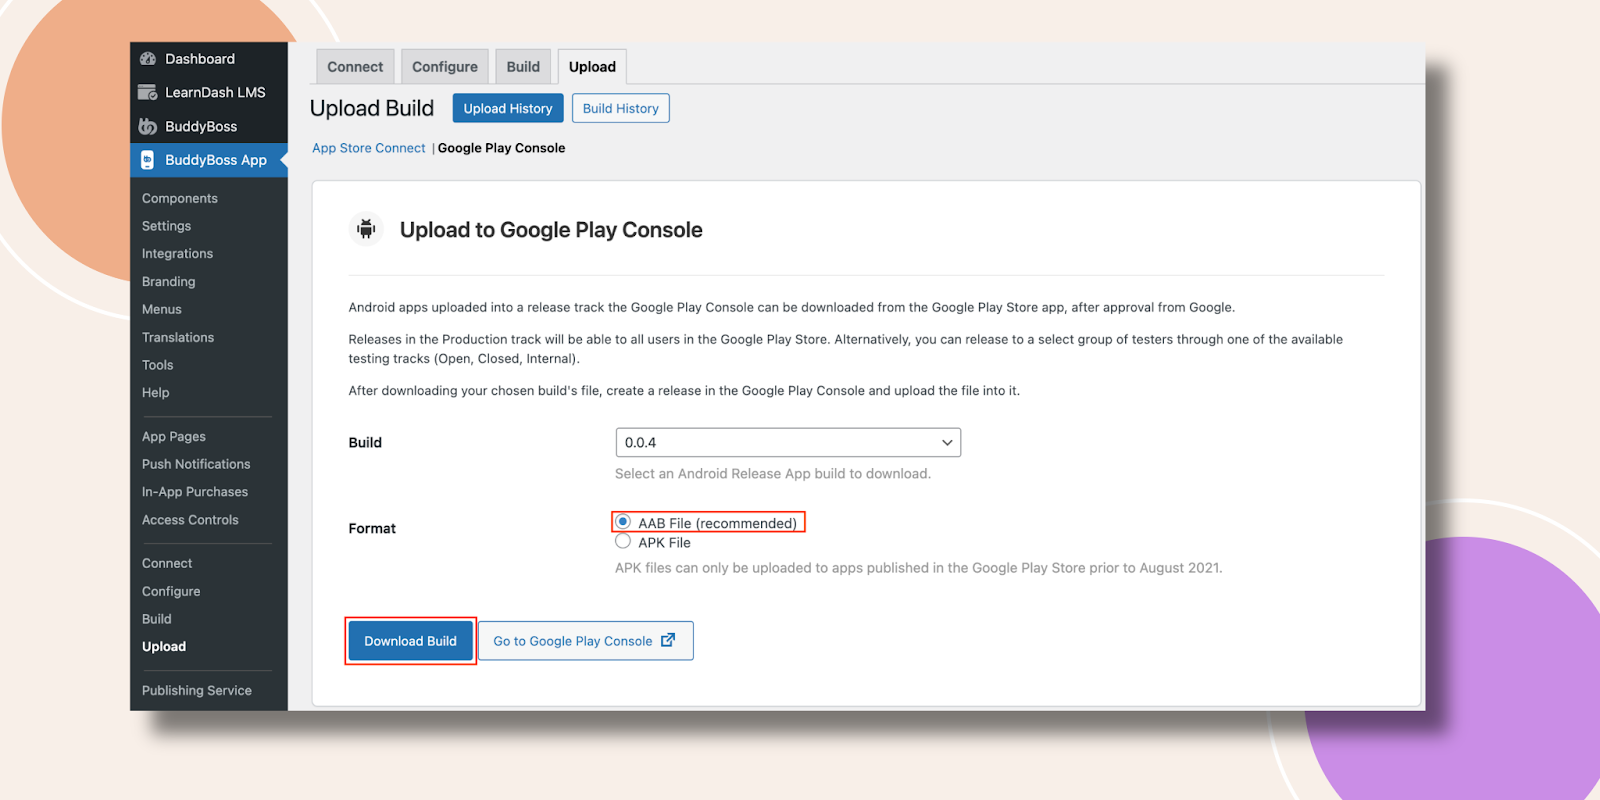
You can now go to your Google Play Console and Upload the AAB file.
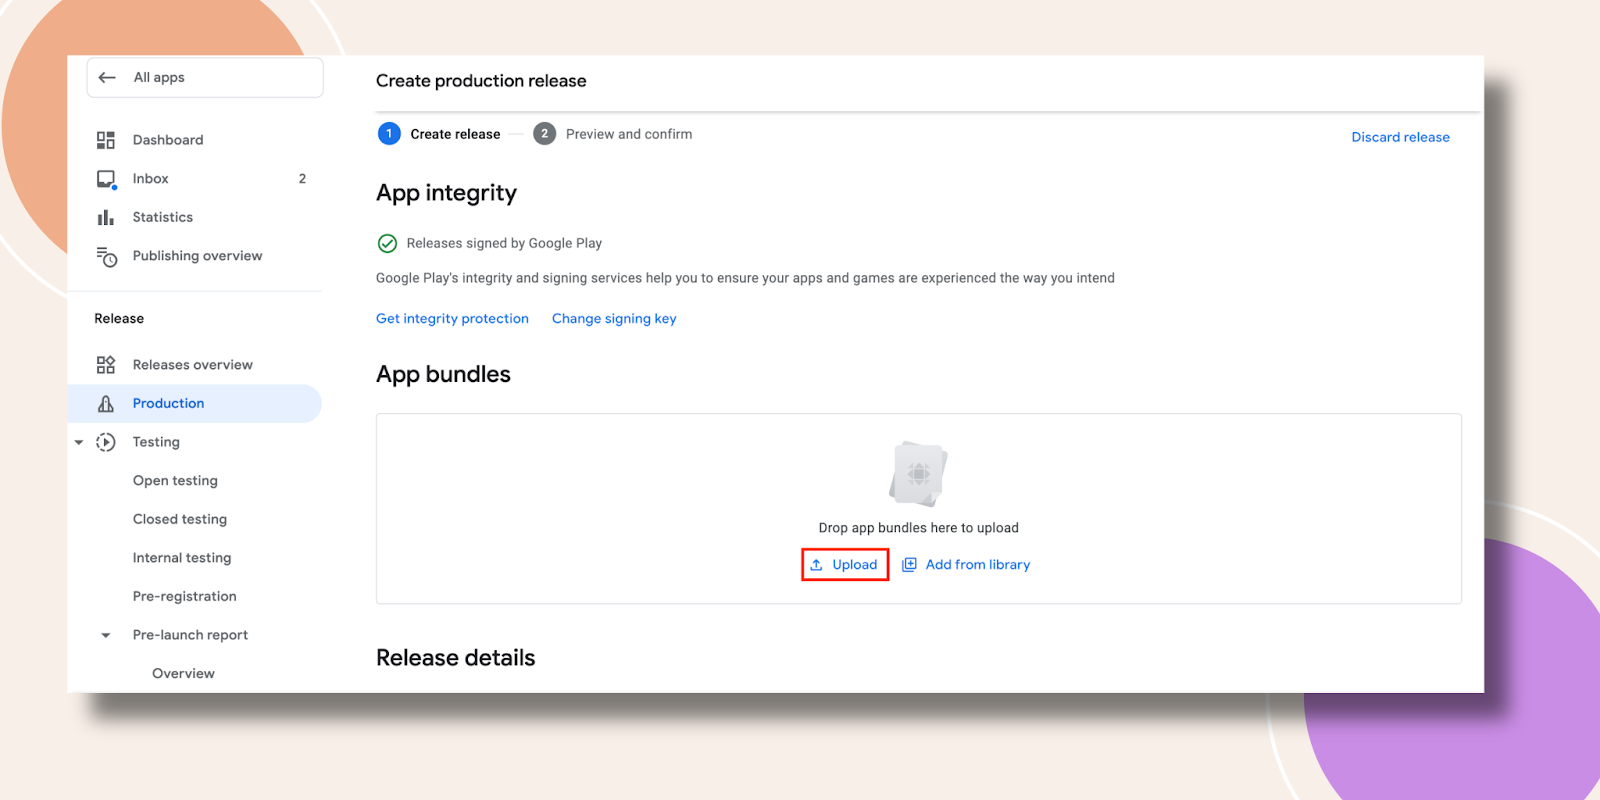
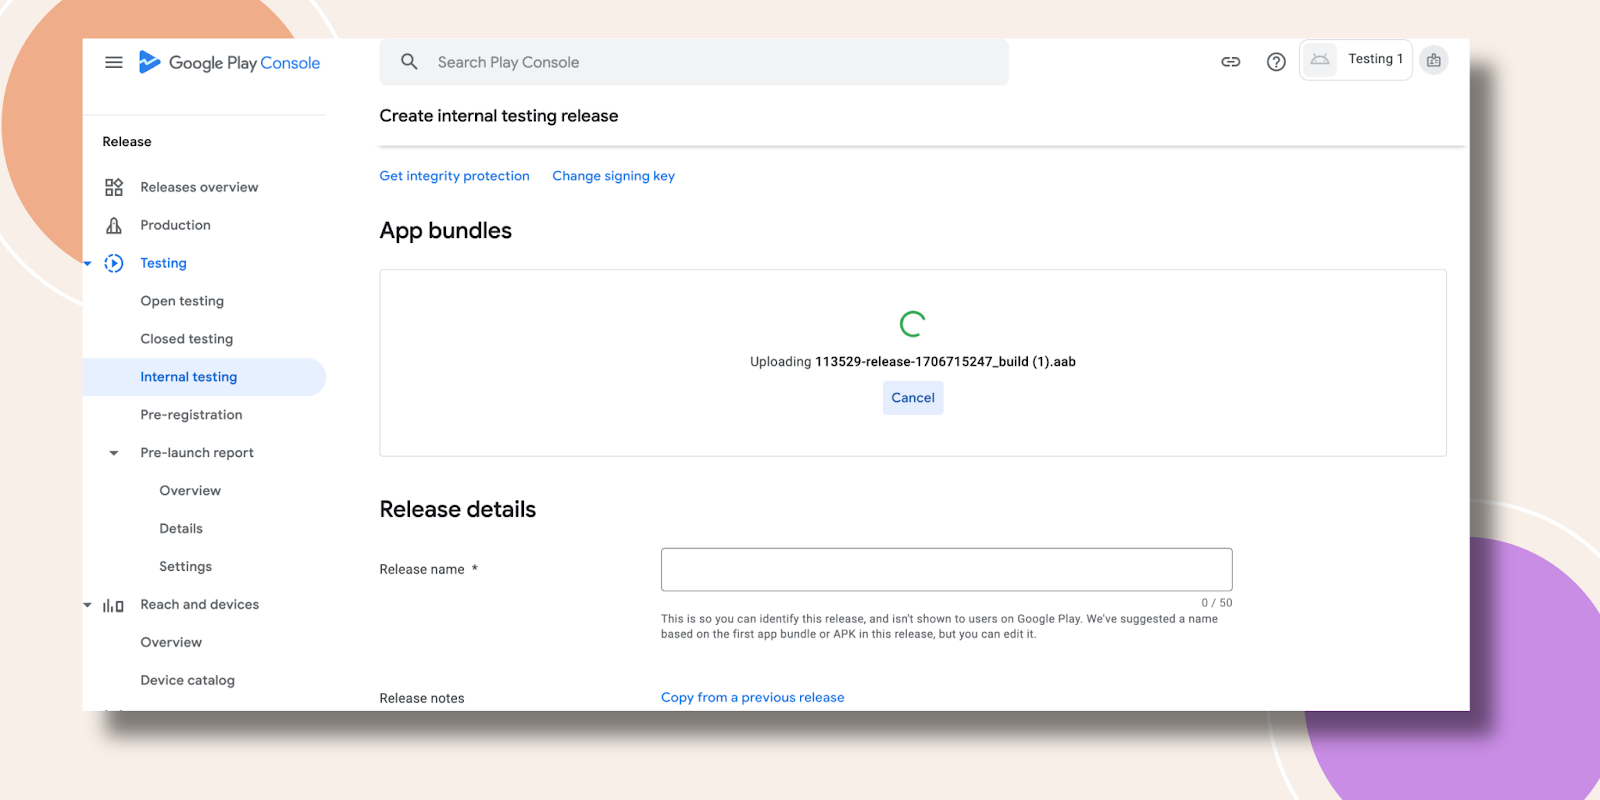
It may take some time to upload this file.
This is how your uploaded App bundle will look.
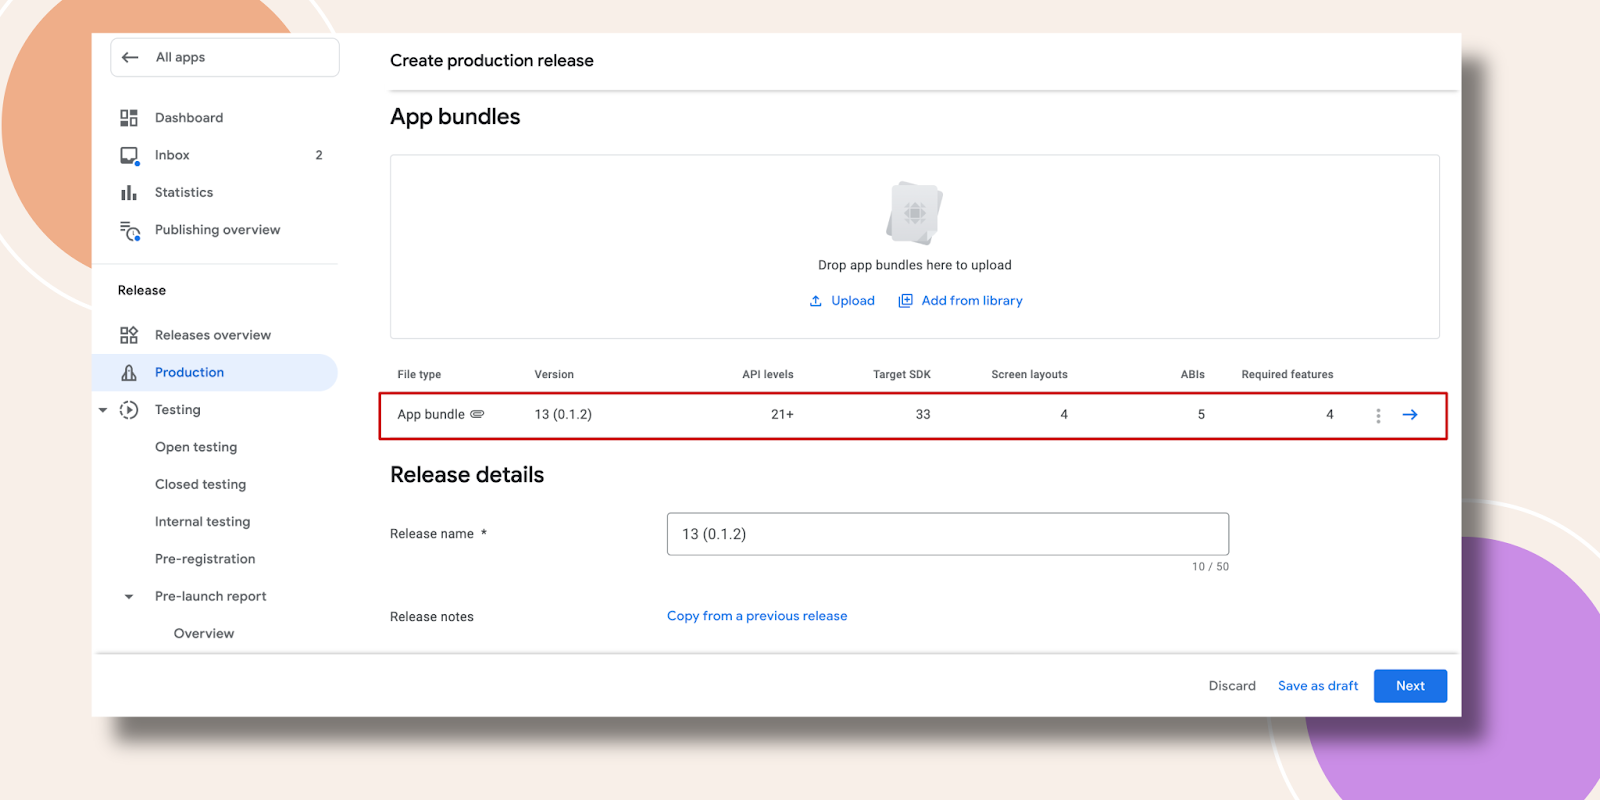
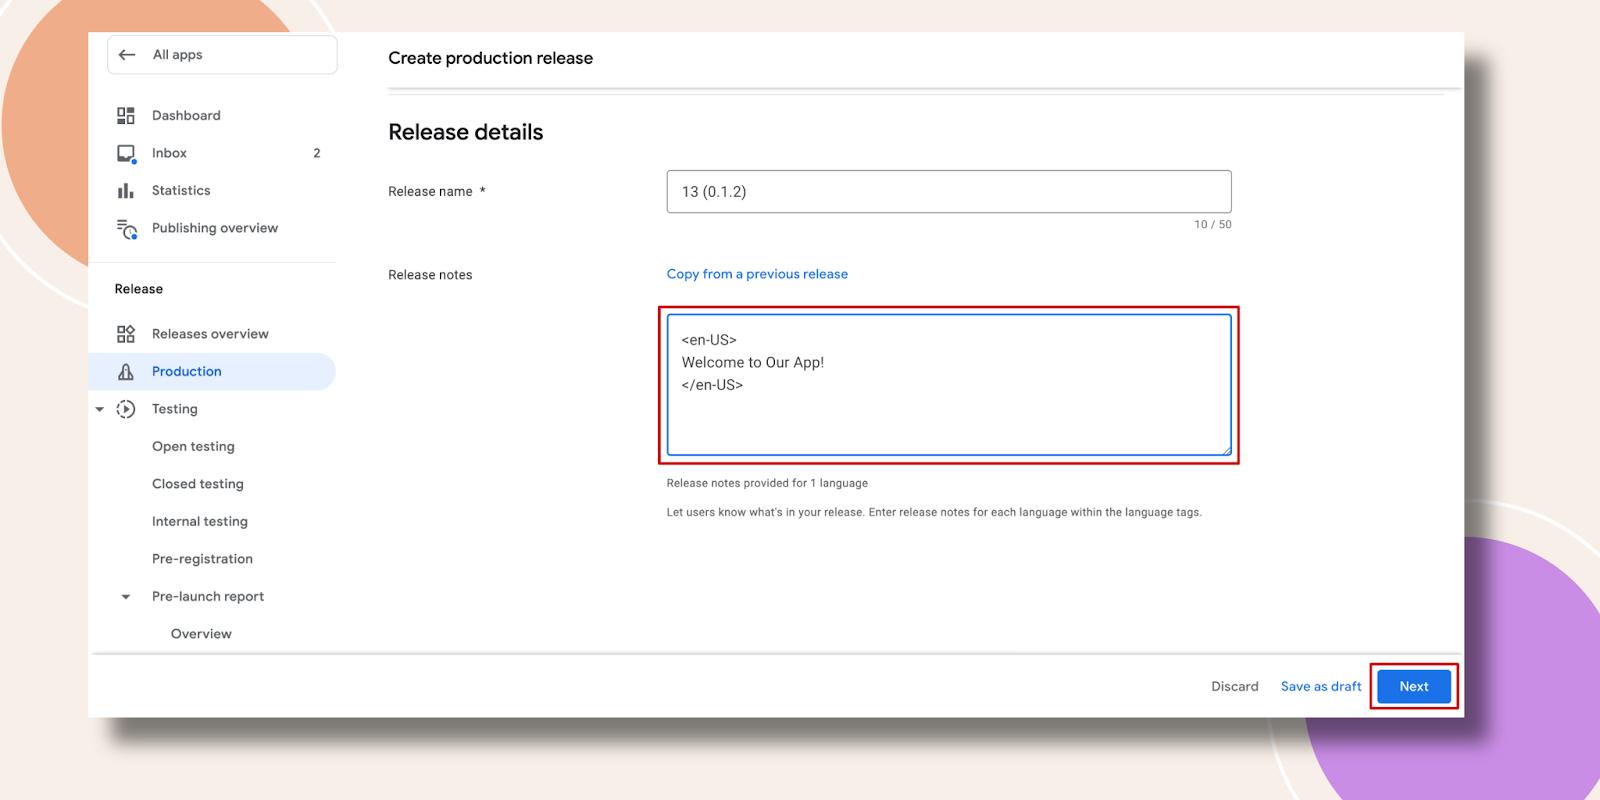
Scroll down a little and write down the Release notes. Then press the Next button.
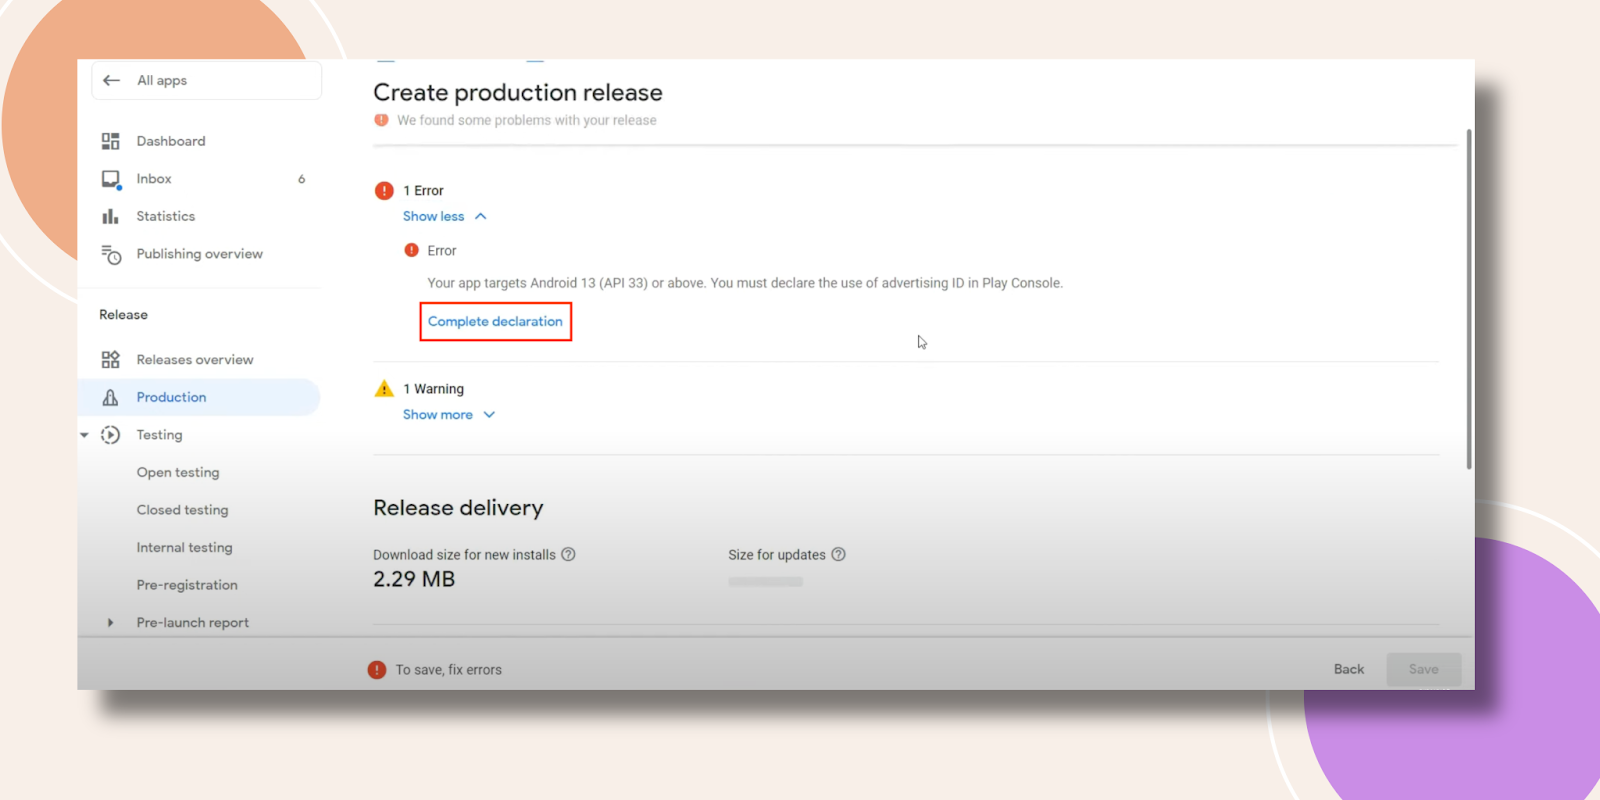
You may get an error message. Let’s click on the Complete declaration to solve it.
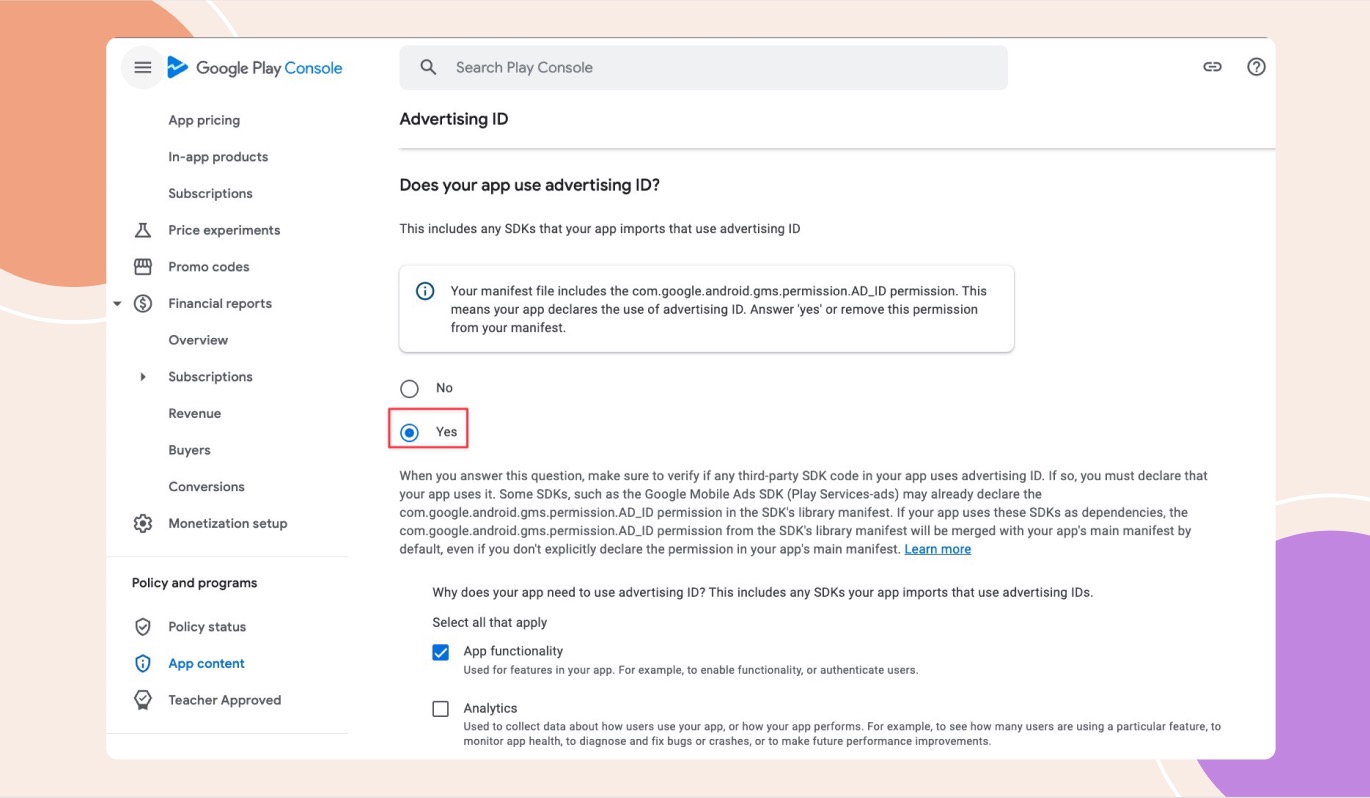
This will lead you to the Advertising ID page. Select Yes under “Does your app use advertising ID” then click Save.
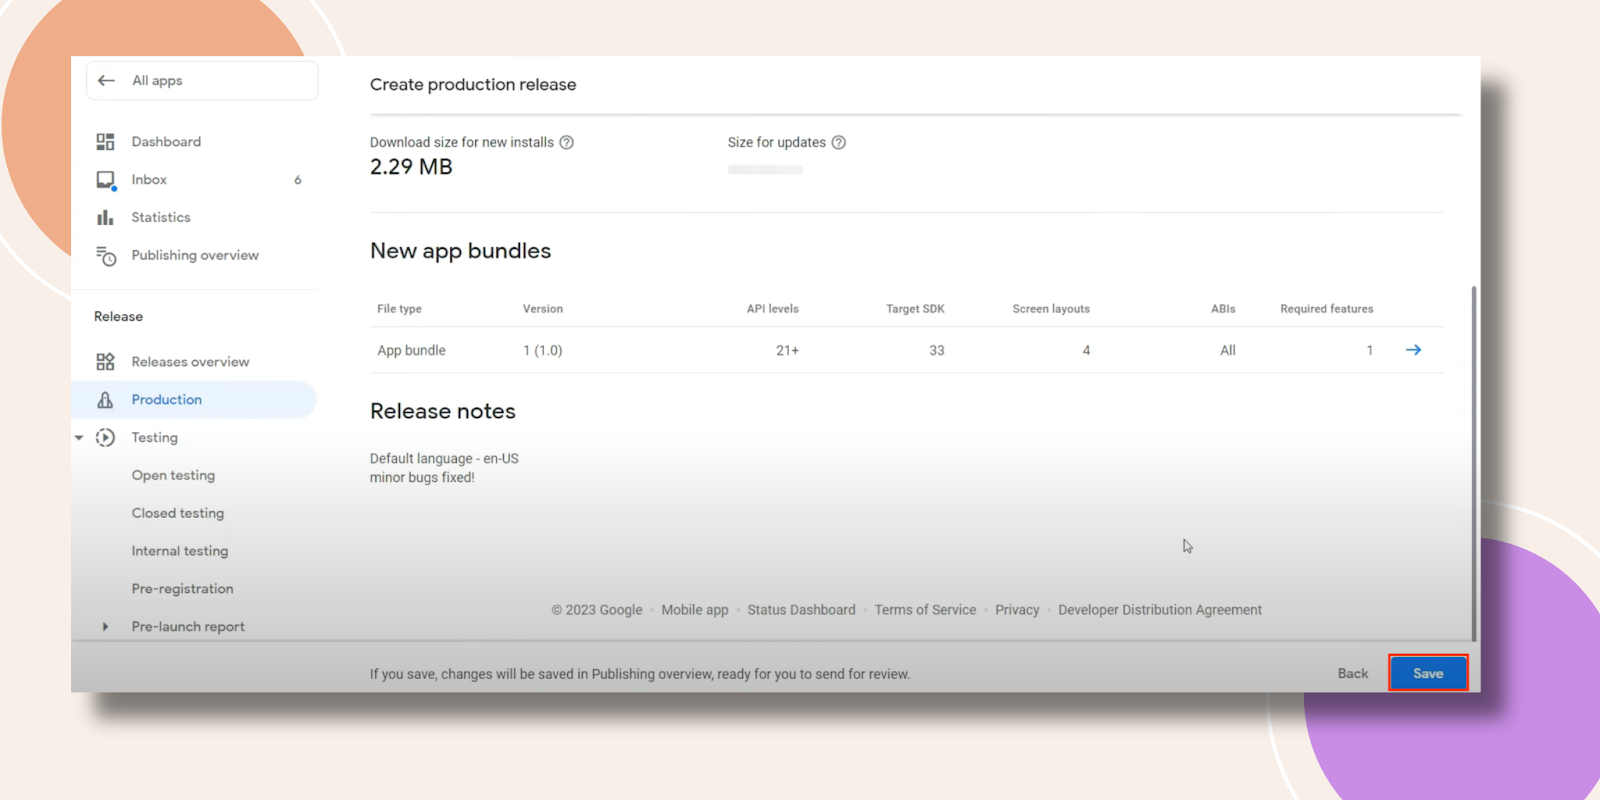
Now the error message will be gone and hit Save again.
Connect your Google Developer Account to your BuddyBoss App for streamlined product synchronization and Android app submission. Let us know if you have any questions.