
In this tutorial, you will learn how to generate Release Apps for Android, and how to test Release App builds from Testing Tracks. You should be doing your regular daily testing and custom development from a Test App, while the Release App is used as the file that will be submitted for publishing to the Google Play Store.
There are some scenarios where you may want to test with an Android Release App on your device before submitting it to Google for publishing. If you are using In-App Purchases, you will only be able to truly test the purchases from a Release App. You can still view your products from your Test App and make fake “purchases”, however, those products will not be able to display real pricing and product terms (subscription duration, etc.) unless viewed from a Release App that has been submitted to Google and approved in a Testing Track. By testing from a Release App that has been approved, you will be able to see the actual pricing and terms in the app, and you will be able to make test purchases of the products using Google’s official methods.
In order to view an Android Release App on your device, you can simply download the Release App AAB file from the Build History in the BuddyBoss App plugin admin, and then install it onto your device. However, if you want to fully test your In-App Purchases in the app, you will need to upload the AAB file into a Testing Track in your Google Play Console, wait for Google to approve the app for testing, and then invite testers and have them download the app from a special Testing Track URL. Follow the steps below to do this:
Create an Android Release App build
- Log into your WordPress admin
- Navigate to BuddyBoss App > Build
- Click on Request Build
- Select Android as the Platform, and Release App as the Build Type
- Click Next Step, and then Send Build Request
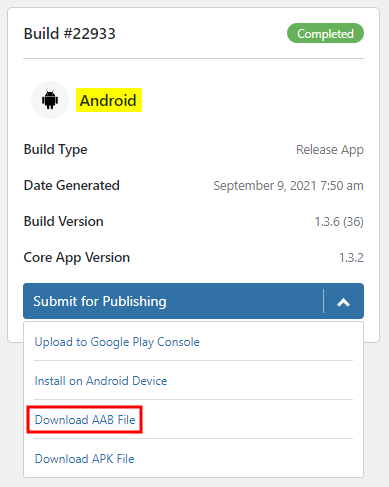
- Once the build completes, go to Build History
- Click the button on the completed release build to Download AAB File
- From August 2021, Google requires you to upload an AAB file, however, if you have previously published your app then you can still upload the APK files for your ‘release’ builds.
- Save this file somewhere safe. You will use it in the next steps.
Upload build to a Testing Track
- Log into your Google Play Console
- Go to All apps, and click to open your app
- In the Release section in the sidebar, click on Production
- Click the tab for Countries / regions, and then click Add countries / regions
- Select the countries where you want your app to be available, or click the first box to add to all countries
- Click Add countries / regions and confirm any save dialogues
- In the Release section in the sidebar, click on Testing
- You will see three options for testing tracks:
- Internal testing
- Create an internal testing release to quickly distribute your app to up to 100 testers for initial quality assurance checks.
- Closed testing
- Create a closed testing release to test pre-release versions of your app with a wider set of testers to gather more targeted feedback. Once you’ve tested with a smaller group of colleagues or trusted users, you can optionally expand your test to an open release, or promote the release to Production.
- Open testing
- Create an open testing release to run a test with a large group and put your app’s test version on Google Play. If you run an open test, anyone can join your testing program and submit private feedback to you. Before choosing this option, make sure your app and store listing is ready to be visible on Google Play.
- Internal testing
- We recommend selecting Closed testing.
- In-App Purchases can be tested from this testing track, and from this track you can invite internal testers, and can easily promote the release to Production.
- After clicking Closed Testing, you will need to select from your Active tracks
- Alpha is the default track, and it is fine to use this track. Just click Manage track
- Alternatively, if you want to run multiple tests, you can click Create track, then add a Track name to create the track, and then click Manage track next to your newly added track
- If this is your first time uploading a build to a testing track, you may need to agree to Google’s terms and conditions before you can proceed
- Once in the track, click Create new release
- Under App bundles and APKs, upload the AAB file you downloaded from WordPress earlier
- Wait for this to finish before proceeding to the next step
- Under Release details, add the Release name and Release notes
- Release name should be auto-filled with the app’s version number. Leave it as is.
- For Release notes, you can add any details you want testers to see. You might want to paste in the official BuddyBoss App release notes for that app version.
- Click Save
- If you have not done so already, you should create your Android In-App Products in the Google Play Console before submitting this release for review, and then return to the release track and continue to the next steps. Otherwise you may need to re-submit the app for review after adding your In-App products.
- Then click Review release
- Then click Start rollout to [track name]
- Your app is now submitted to Google for review. You will need to wait for Google to approve the app for your testing track before it can be downloaded and used. This can be quick, or can take several days sometimes.
- While waiting for the app review, you can proceed to the next steps to add Testers to your track.
Add Testers to Testing Track
- While in your testing track, click the tab for Testers
- If you are logged out already, then log back into Google Play Console. Click on All apps, and then select your app. Under Release in the sidebar, under Testing, click on Closed testing, and then click Manage track. If you used a different testing track in the steps above, then click that track instead. Then click the tab for Testers.
- Under Testers section, you will see Email lists. Click the list name, and then click the right arrow.
- If you do not already see an email list, then click Create email list
- Under Add Email addresses, add 1 or more emails, separated by a comma
- Add the email for every user who will be testing this app, including yourself
- Make sure the emails are the ones they use for logging into Google Play Store with on their phones
- Once all emails are added, press Enter (or Return) on your keyboard
- You should see the emails in the Email addresses added list
- Click Save Changes
- Scroll down to How testers join your test
- Under Join on Android, click on Copy link
- Save this link! This will be used for testing your app.
- At the top of the left sidebar, navigate back to All apps
- Under Settings in the sidebar, click on License testing
- Under Add license testers, add 1 or more emails, separated by a comma
- Add the email for every user who will be testing this app, including yourself
- Make sure the emails are the ones they use for logging into Google Play Store with on their phones
- Once all emails are added, press Enter (or Return) on your keyboard
- You should see the emails in the License testers list
- Click Save Changes
- Under Add license testers, add 1 or more emails, separated by a comma
- Once done, share the link you copied in Step 2 above with all of your testers. They will need to open this link from their Android device to download the release app that is connected to your testing track. In-App Purchases will not be fully testable unless the app has been downloaded from this link. This link will not actually provide the app release however, until Google has approved your app for testing.
Upload new builds to Testing Track
Once you have completed the above steps and your app has been approved for testing, to upload newer Release App builds to the same Testing Track, you will need to follow many of the same steps from before. In your Google Play Console, navigate back to the same Testing Track, click Manage track, then click on the Releases tab, and click Create new release. You will need to upload your new Release App AAB file and then click Save, then Review release, and then Start rollout to [track name]. You will then need to wait again for Google to approve it. Your existing testers will be able to download the updated release from the same URL once it has been approved.