
Why Use the Color Feature in Your BuddyBoss App?
The Color feature assists you in taking your own brand look to the next level without any hassle. Only you need to pick your color in the specific area. The fun part is you can check the preview of your app just the way your customers will see it.
Configure Colors
Navigate to BuddyBoss App – Branding – Colors. First, we will check the General section. Here you can choose your desired color, even if there is an option to use the color code. Like we change the Background Color. On the right side, you can see the preview of the App Page.
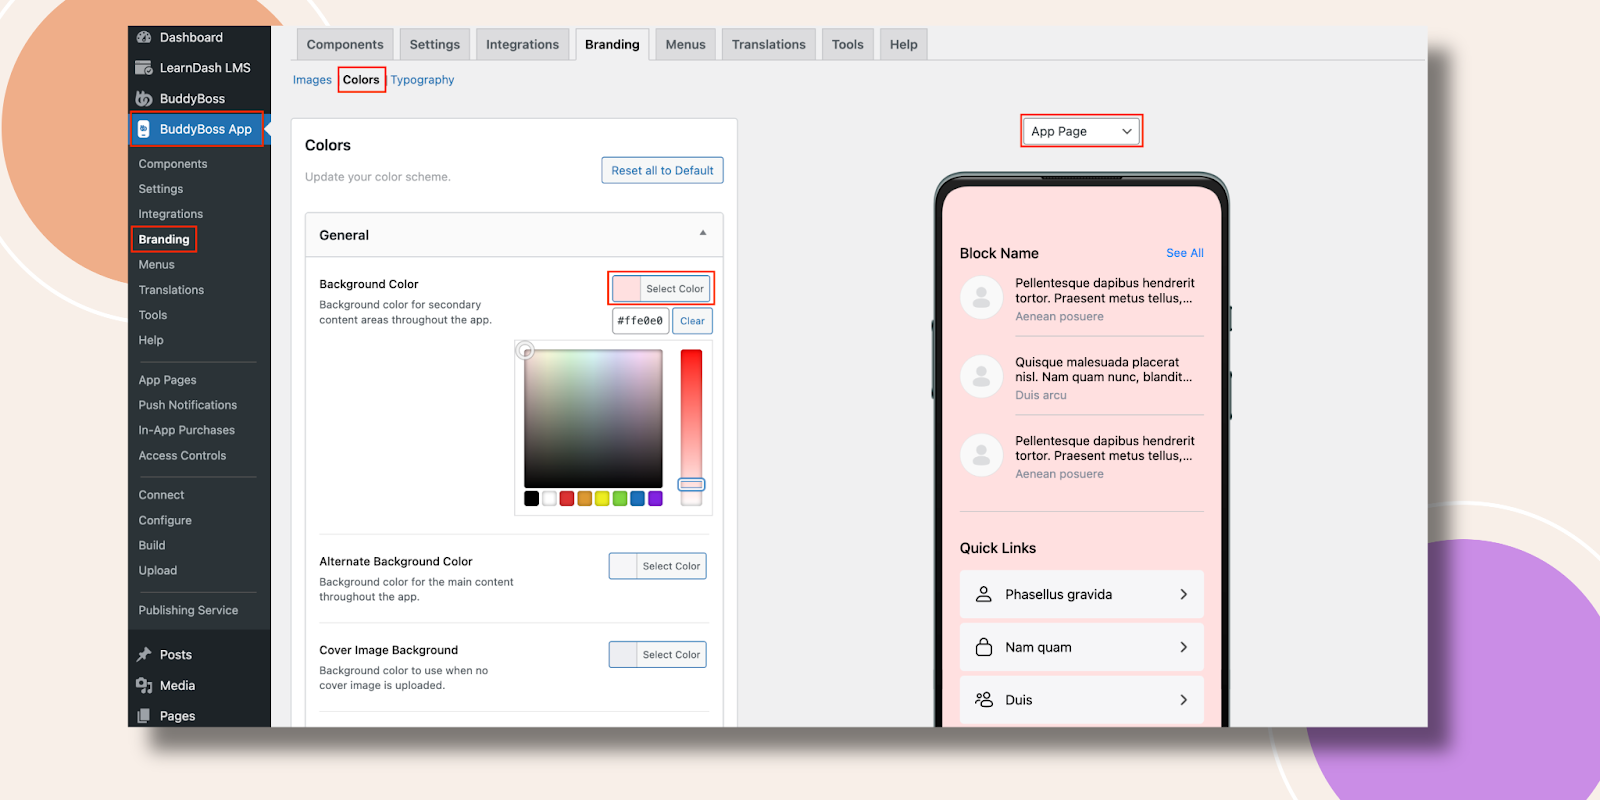
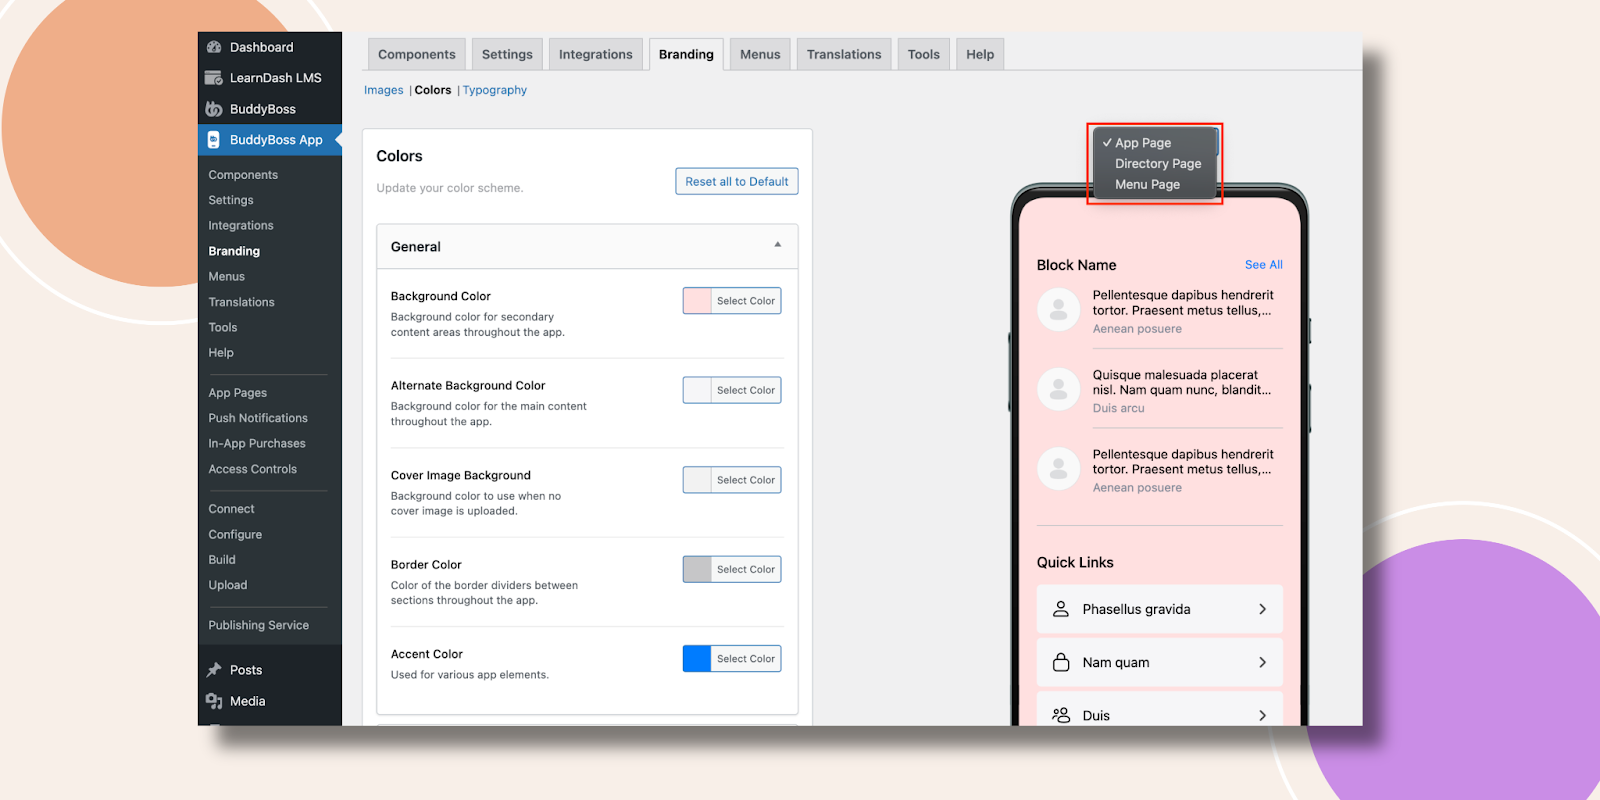
There are more color-changing areas available here, such as Alternate Background Color, Color Image Background, Border Color, and Accent Color. Apart from the App Page, you can see the Directory Page and Menu page as well.
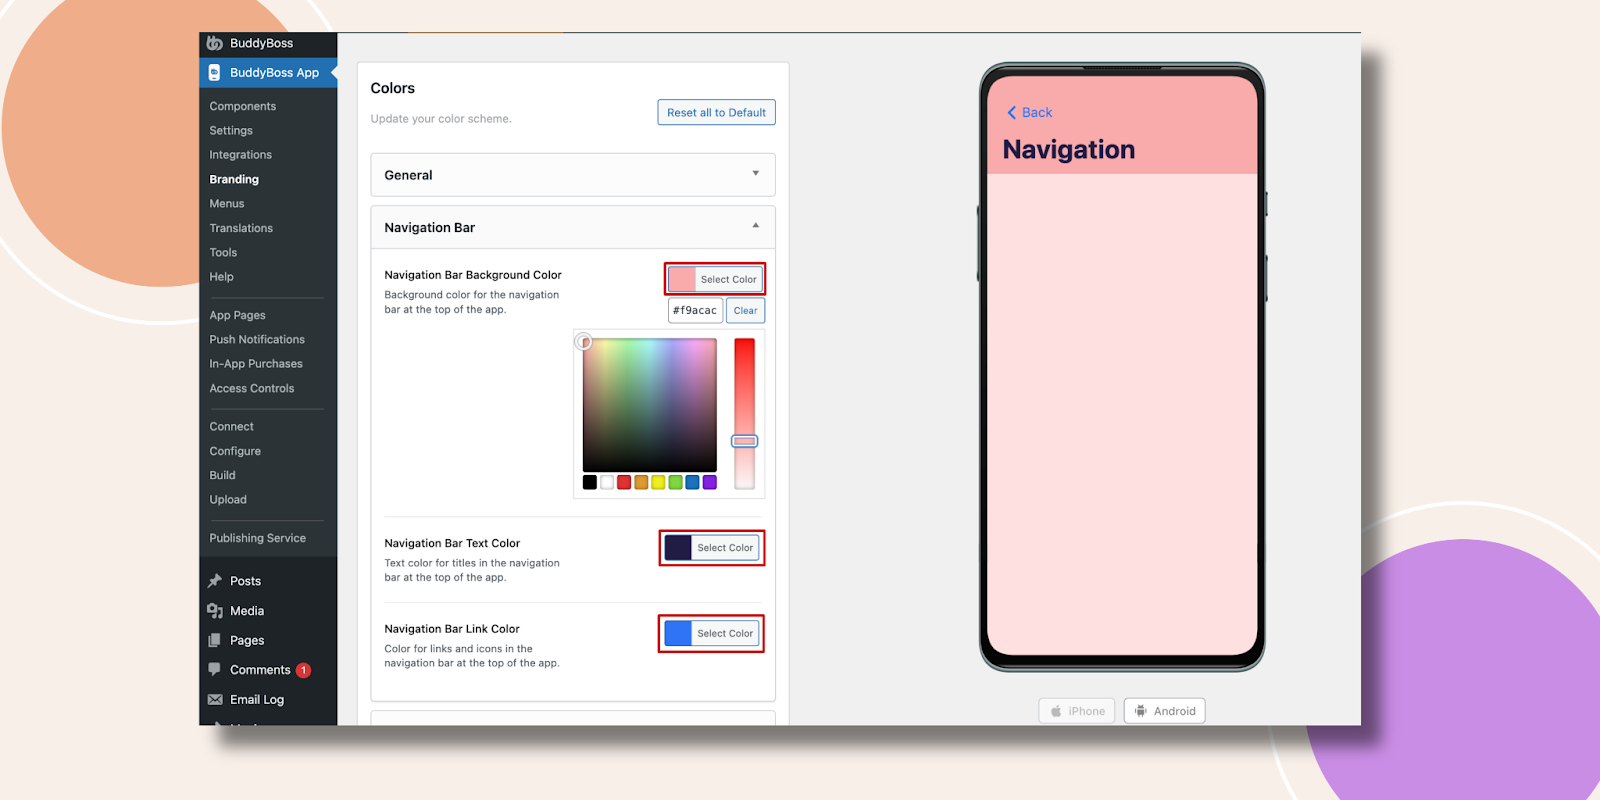
In the Navigation Bar, change the color of the Navigation Bar Background Color, Navigation Bar Text Color, and Navigation Bar Link Color.
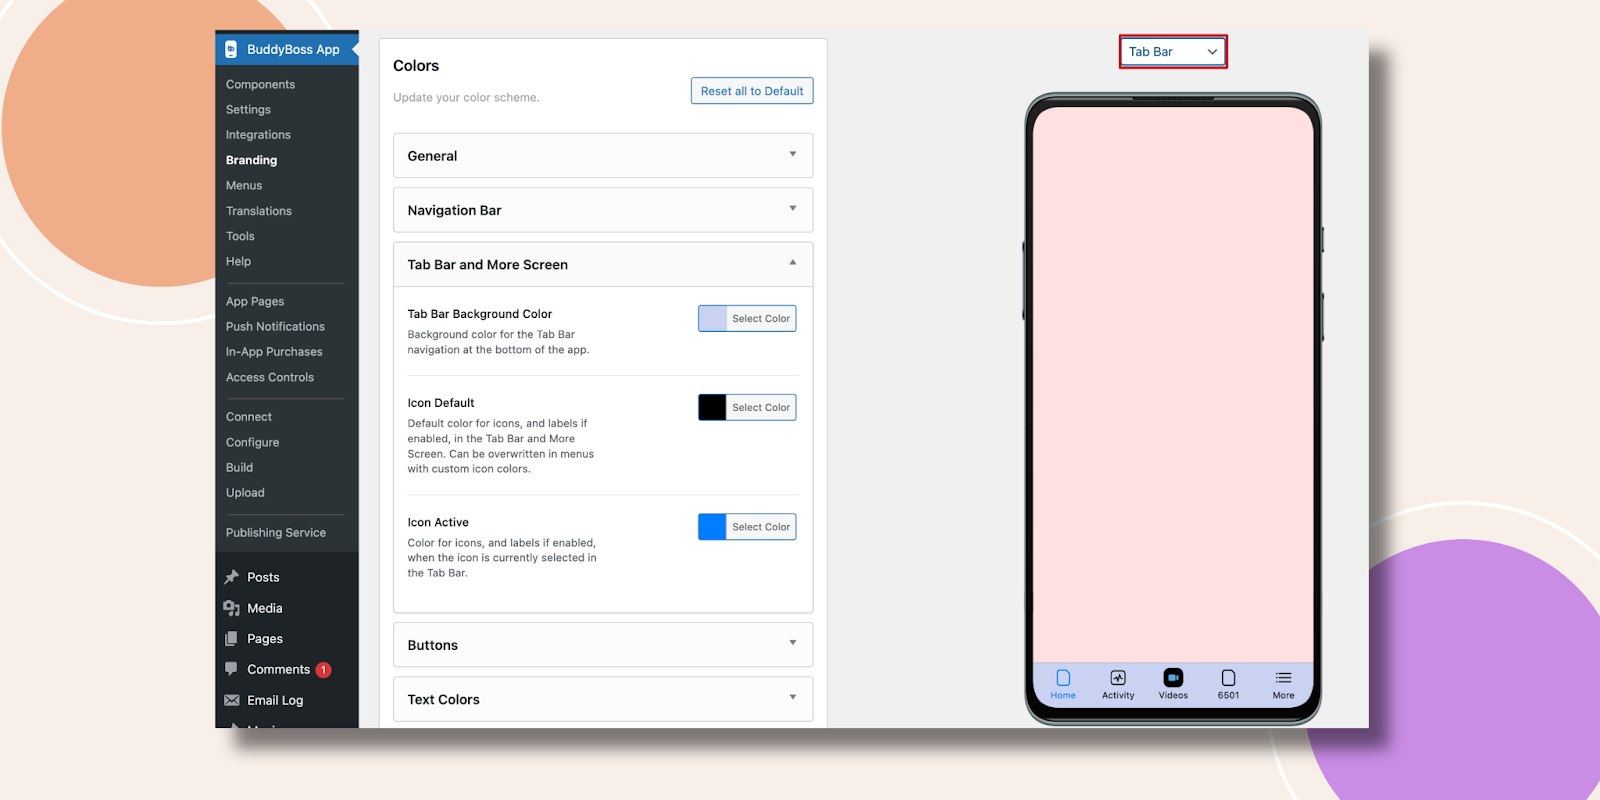
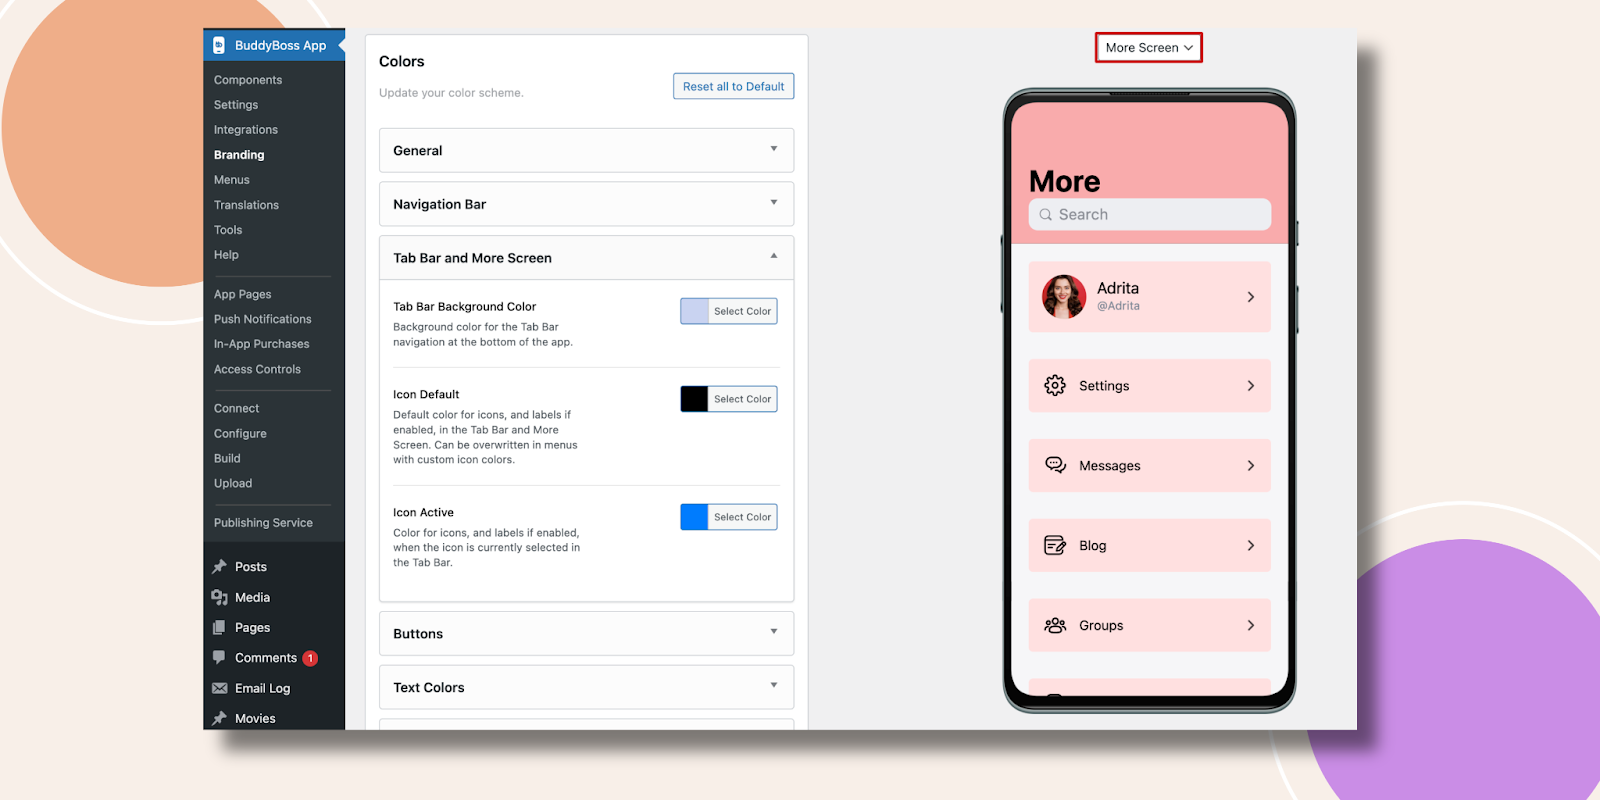
After that change the color of the Tab Bar and More Screen section. You can change the color of the Tab Bar Background Color, Icon Default, and Icon Active. On the right side currently, you are watching the Tab Bar.
Here is the More Screen for you.
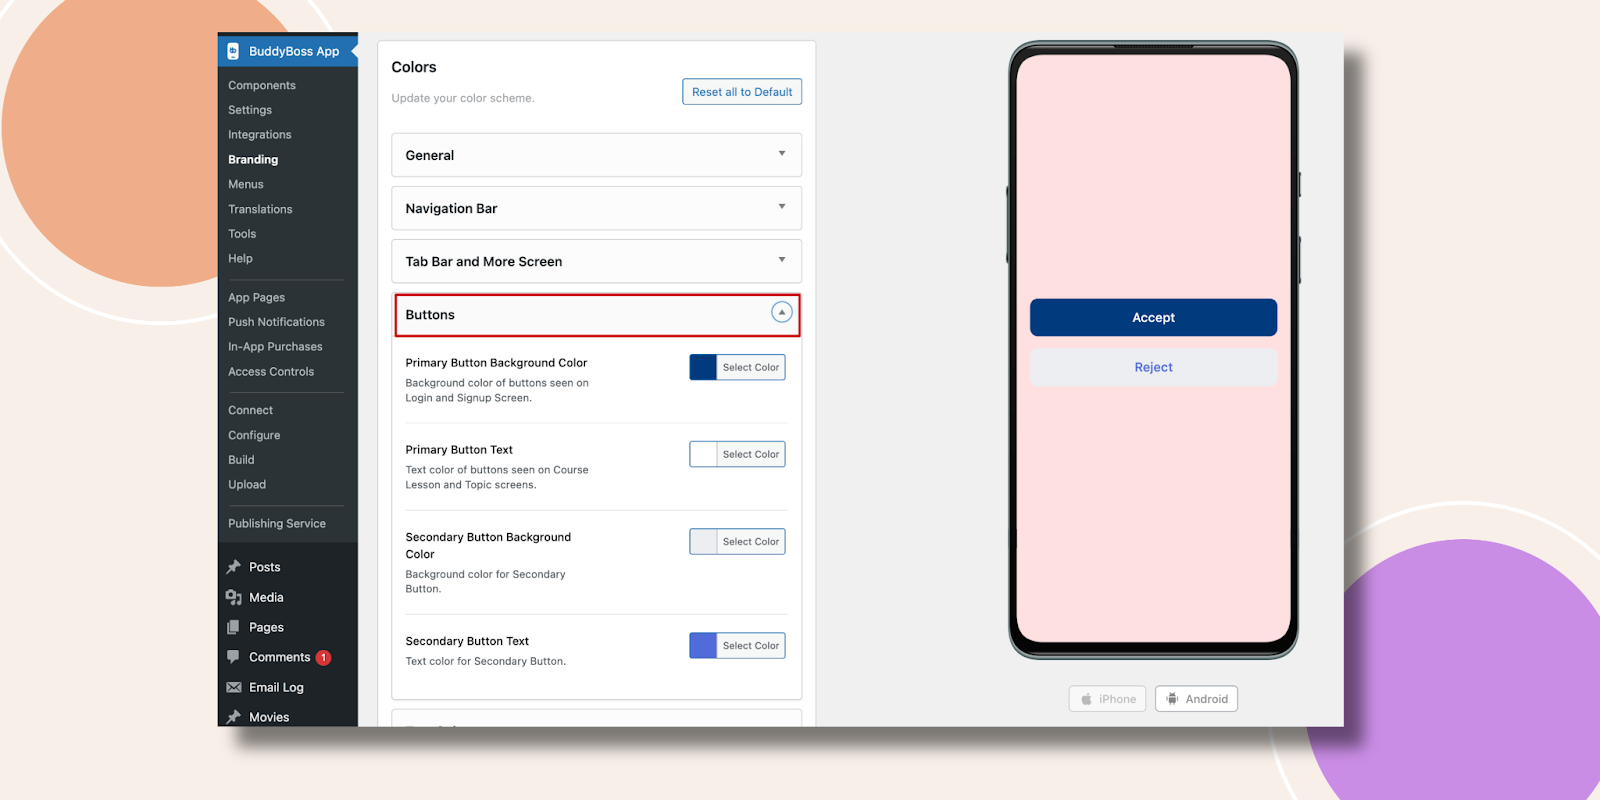
In the Buttons section, you are able to alternate the color of the Primary Button Background Color, Primary Button Text, Secondary Button Background Color, and Secondary Button Text.
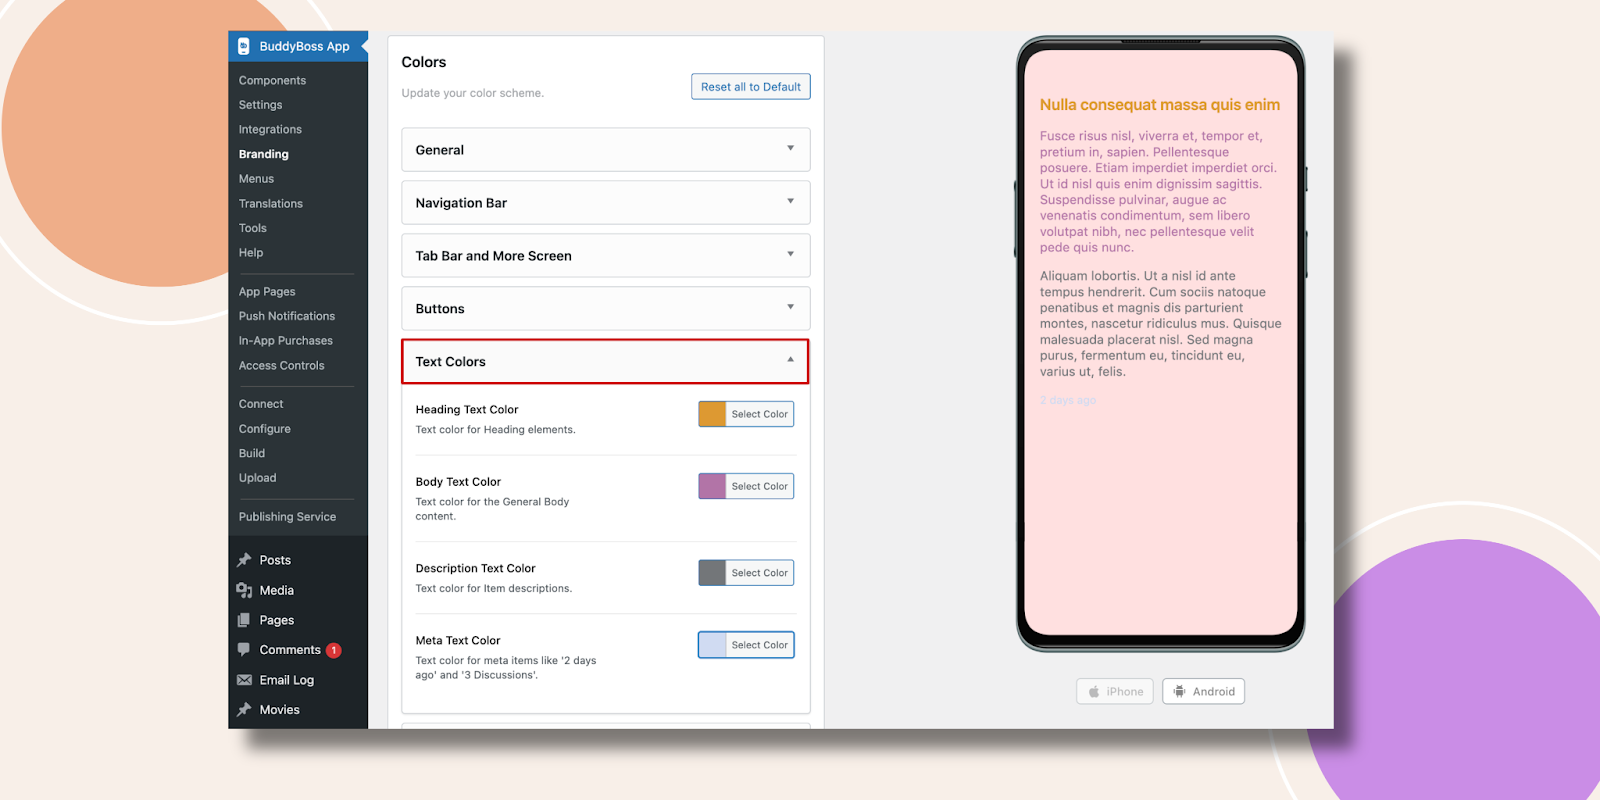
In the same way, we are changing Text Colors. Heading Text Color, Body Text Color, Description Text Color, and Meta Text Color can be changed here.
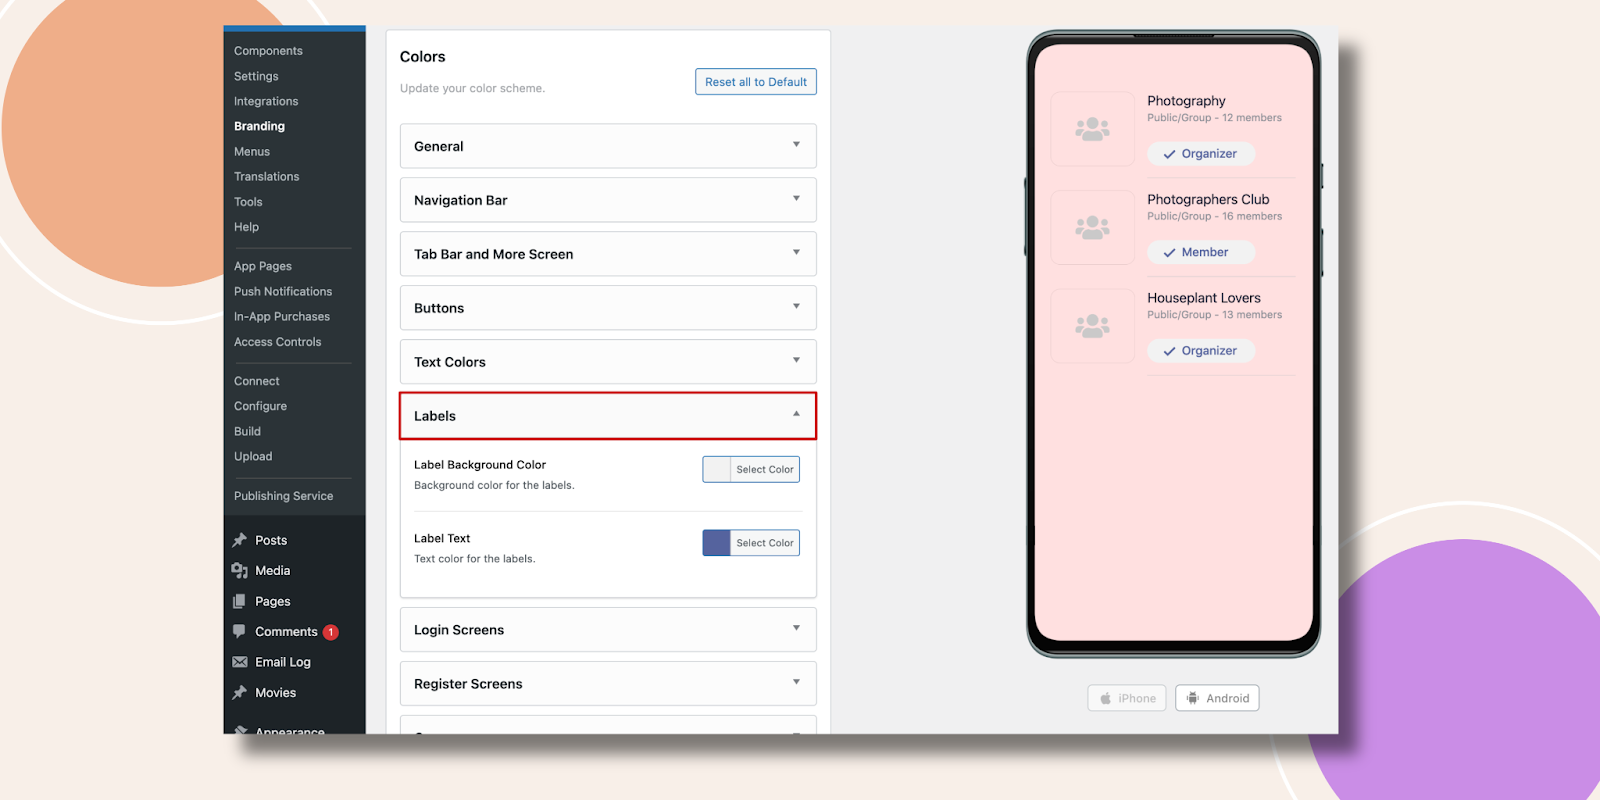
Labels are essential to show the designation of a person. That’s why we have the Label Background and Label Text option.
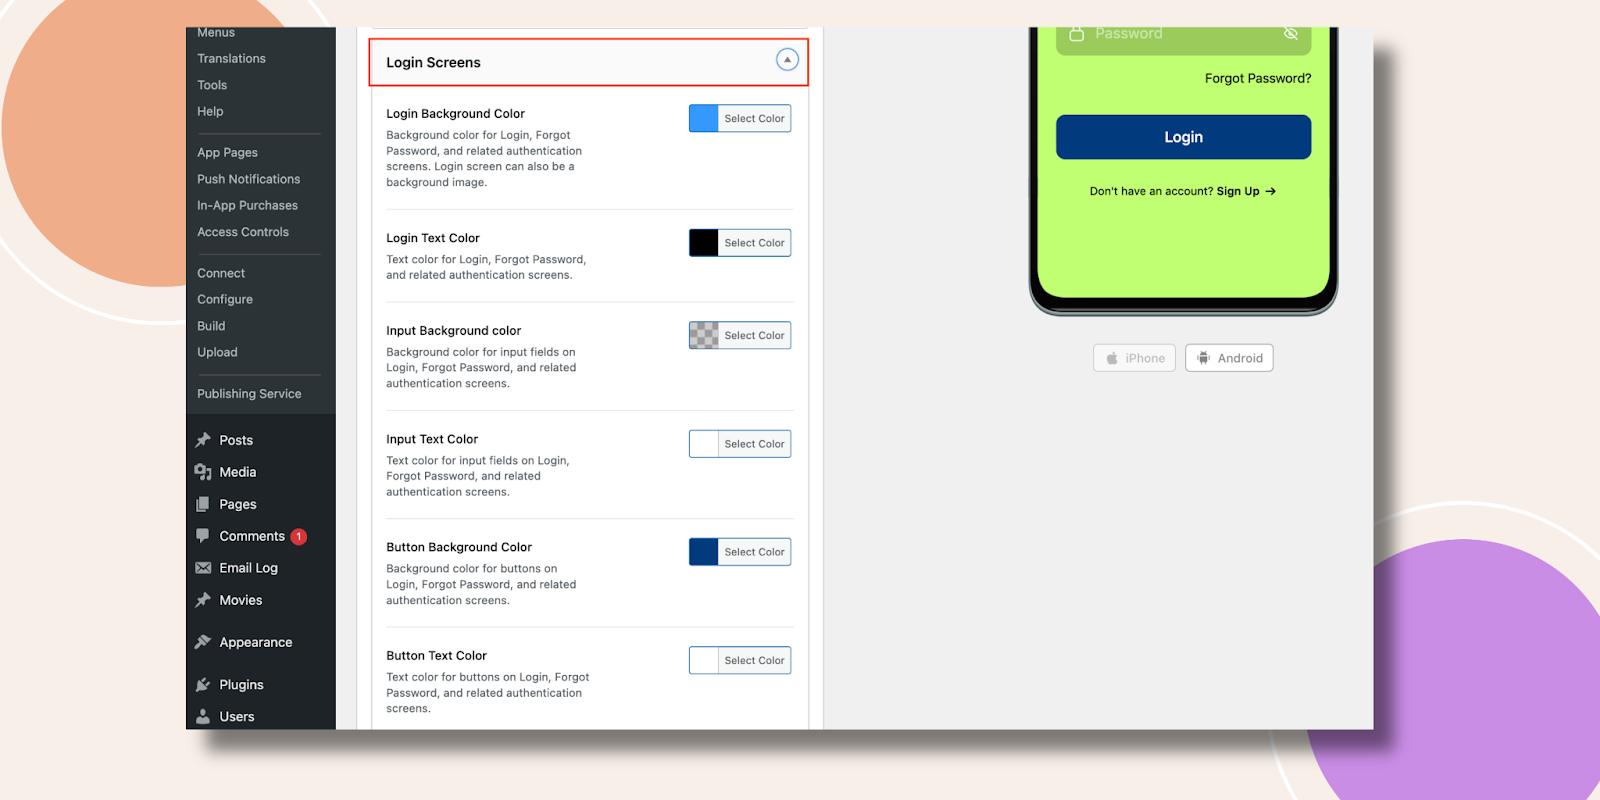
You will find multiple useful color-changing areas in the Login Screens section.
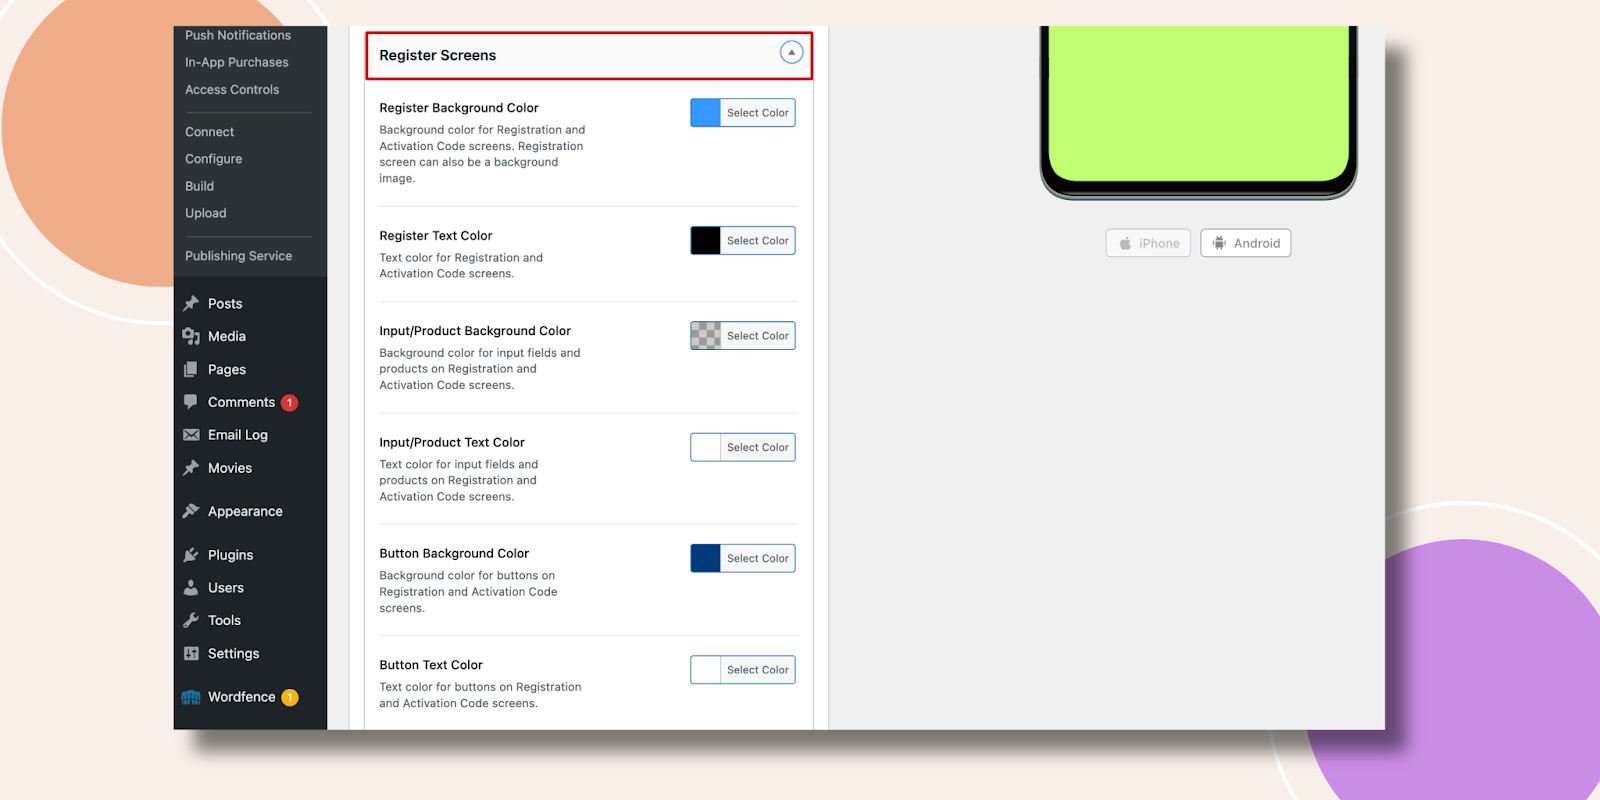
Same as for the Register Screens.
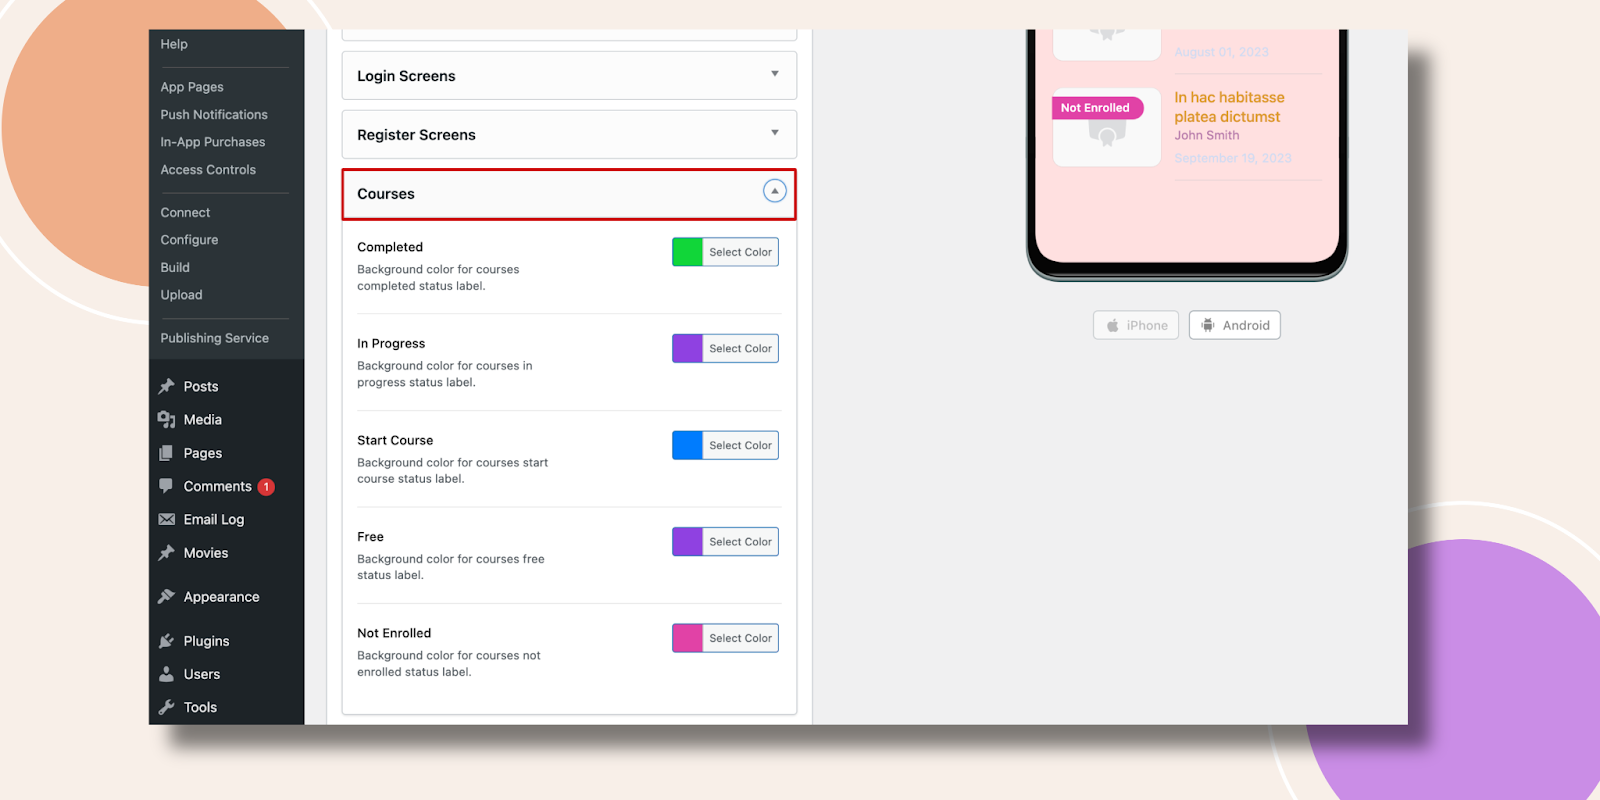
We know you may have a priority of course-based customers. That’s why there is a dedicated Courses section with Completed, In Progress, Start Course, Free, and Not Enrolled color-changing areas.
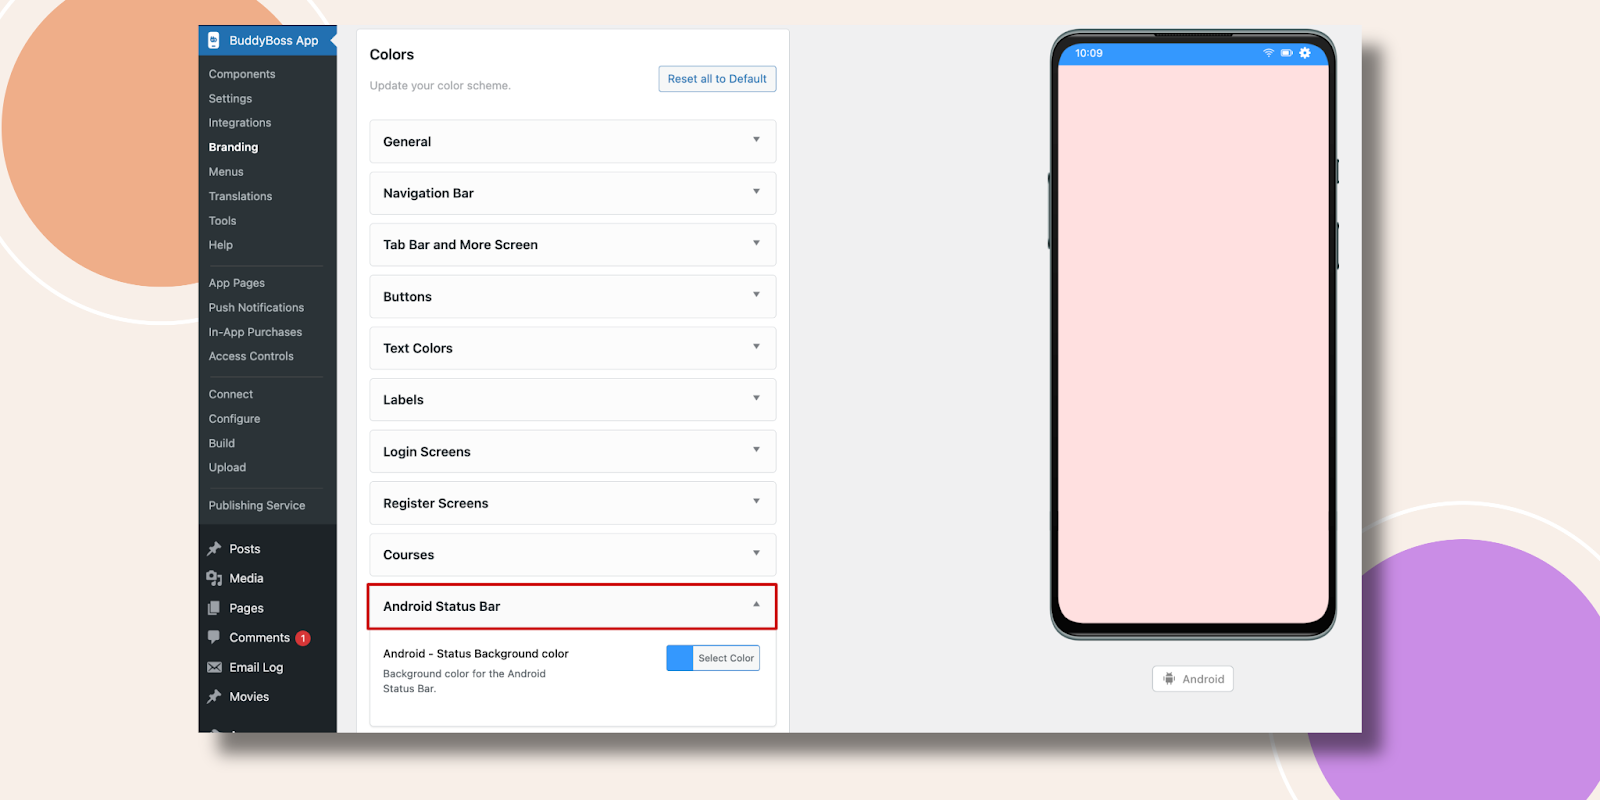
In the Android Status Bar, we have only the Android – Status Background Color. You can check out how this will appear on a customer’s Android phone.
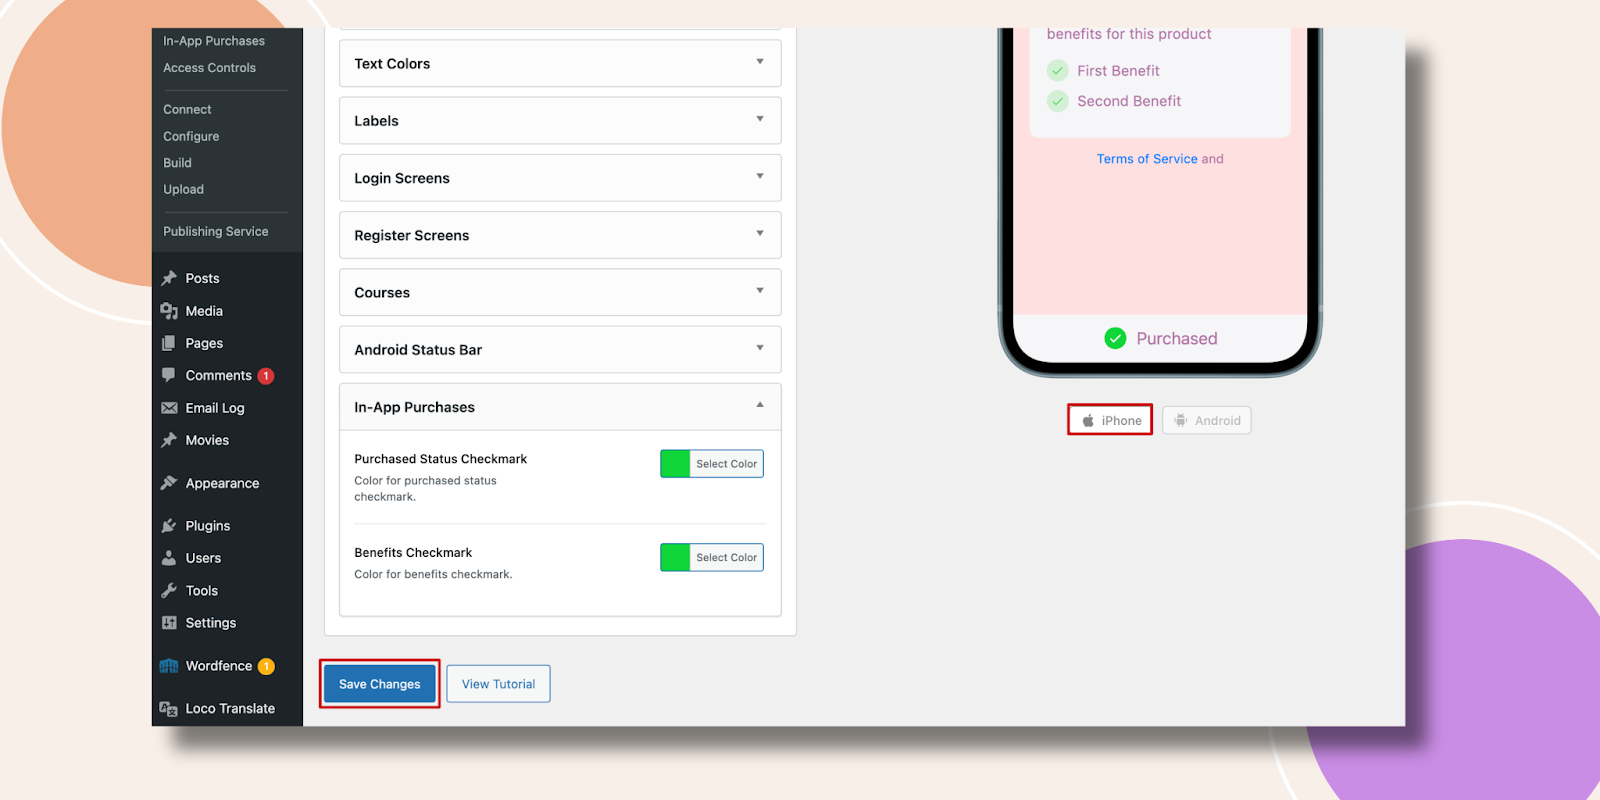
In-app purchases is also an important section for the customers. You can change the color of the Purchased Status Checkmark and Benefits Checkmark area to change your desired color.
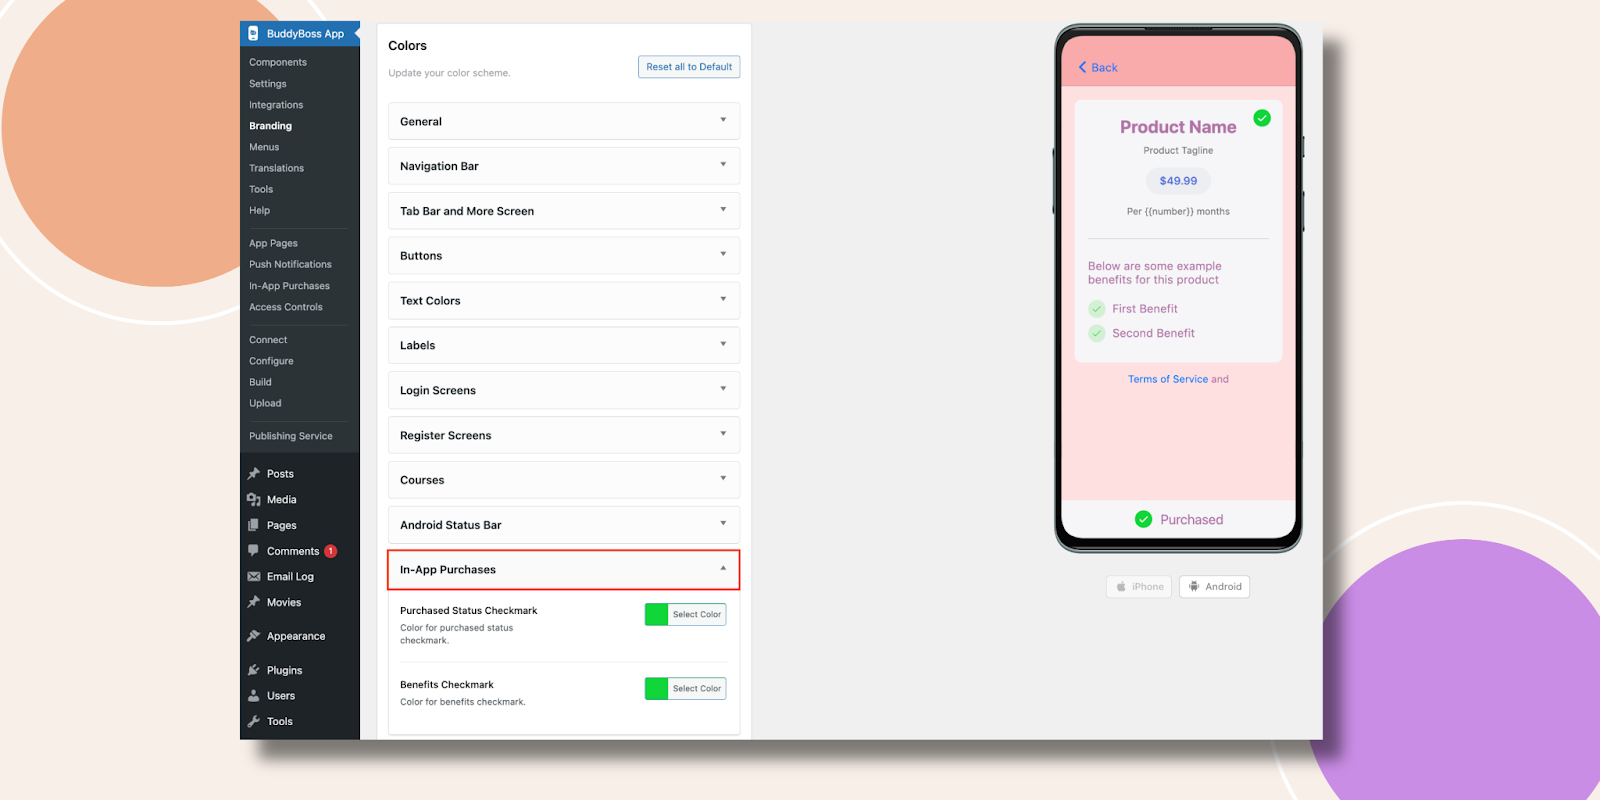
So, till now you are viewing the Android preview. There is an iPhone preview as well. After selecting all the colors don’t forget to press the Save Changes button or all your efforts will go in vain.
Color is crucial for attracting customers by influencing their emotions and perceptions.
It plays a key role in user engagement and app aesthetics, impacting retention and satisfaction. Hope the BuddyBoss App Color feature can assist you in all aspects.