In this tutorial, you will learn you how to configure Access Rules for the BuddyBoss App. Access Rules allow you to restrict which members are able to log into your app, and to restrict access to specific content in the app.
Access Rules will be used to restrict content in the app to either:
- All logged-in members
- Members in specific access groups
When content is restricted in the app, you can specify a default message to show to your members prompting them to complete an action such as login or upgrade their account.
As a site admin, you will be able to setup access rules for:
- General access to the app
- App Pages
- Pages
- Posts
- Courses (LearnDash)
Go to BuddyBoss App > Access Controls to configure Access Rules.
General Tab
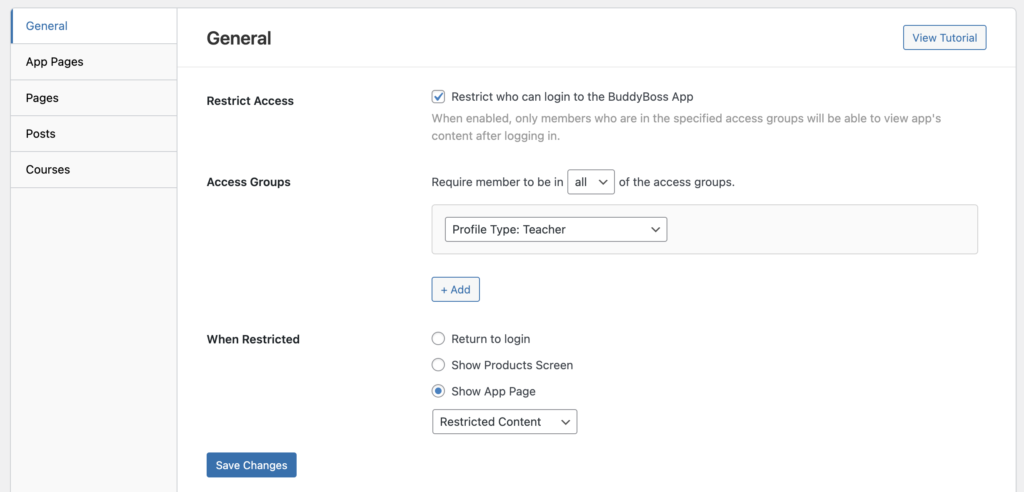
Under the General tab, mark the checkbox for Restrict Access if you want to restrict who can login to your App. When enabled, only members who are in the specified access groups will be able to view the app’s content after logging in.
- Go to the General tab
- Select the Access Group(s) from the dropdown menu. You can click the +Add button to add more access groups as conditions.
- Select the default action when a member is accessing a restricted page/section of your app.
- Return to login
- Show Product Screen
- Show App Page
- Click Save Changes
Note: Enable the Private App setting, under BuddyBoss App > Settings > General > Privacy, to restrict all your app’s content to logged-in members. When enabled, logged-out members will only be able to access the login and registration screens.
App Pages, Pages, Posts
You can create rules to restrict which members can access these sections of your app.
- Go to the App Pages, Pages, or Posts tab
- Click +Add Rule
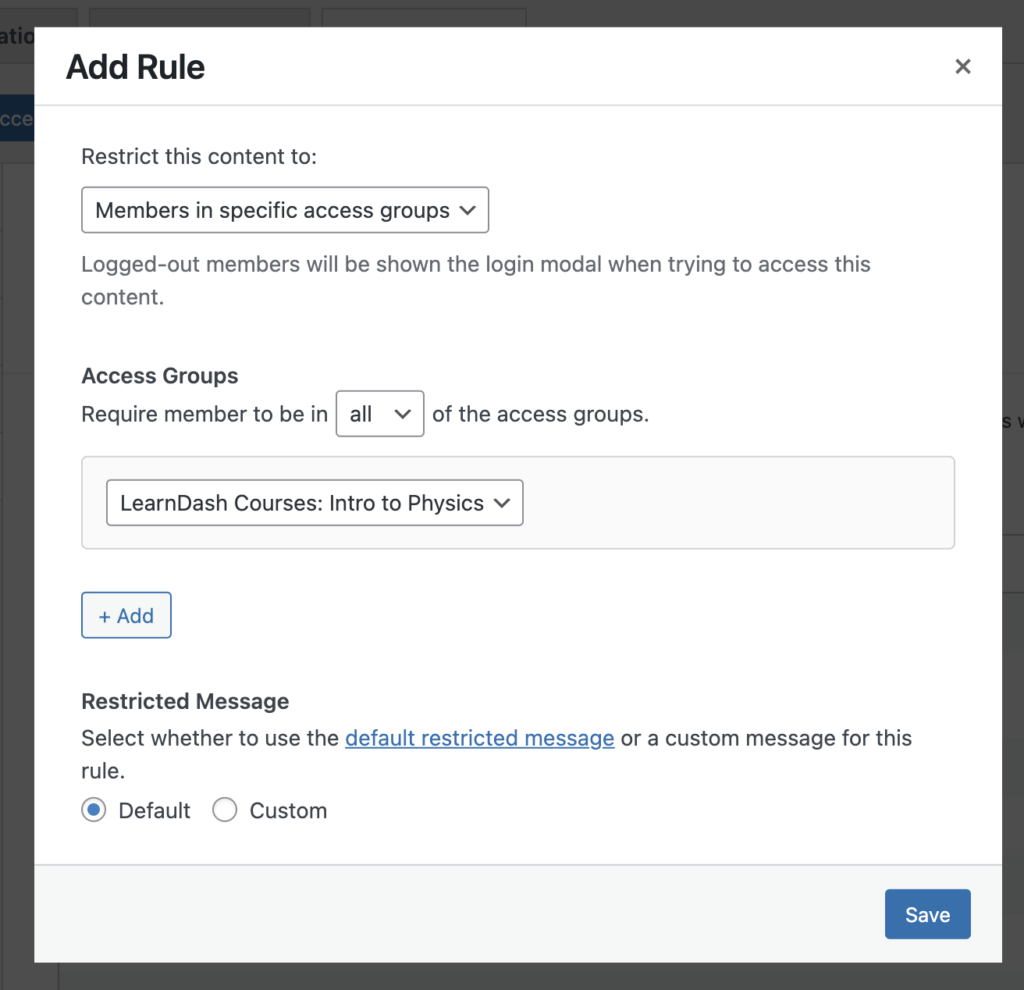
- From the dropdown menu, select to restrict the content to either:
- All logged-in members
- Members in specific access groups.
- Select the group under the Access Groups dropdown menu.
- Select whether to use the Default Restricted Message or a Custom message for this rule.
- If Custom message is selected, enter a title, custom message, select the button action, and enable the option to show a teaser of the content behind the message (Optional).
- Click Save.
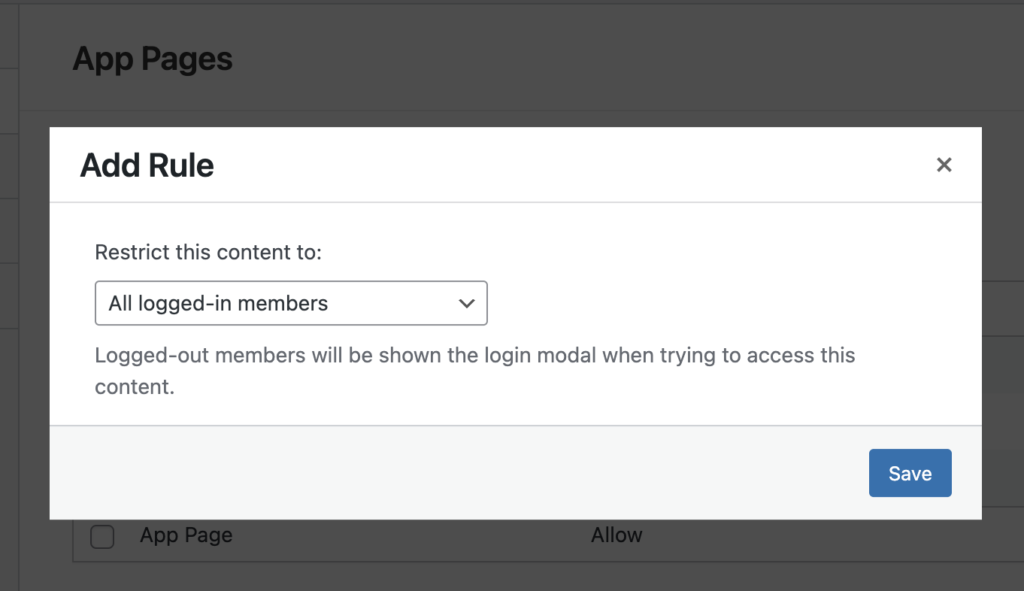
Note: Logged-out members will be shown the login modal when trying to access this restricted content.
Courses
Under the Courses tab, you can create rules to restrict members’ access to specific LearnDash courses, course categories & tags, and all courses.
Courses > Courses
- Go to the Courses tab, and then to the default Courses sub-tab
- Click +Add Rule for the course you want to manage.
- On the dropdown menu, select to restrict the content to either:
- All logged-in members
- Members in specific access groups.
- Select the group from the Access Groups dropdown menu.
- Select whether to use the Default Restricted Message or a Custom message for this rule.
- If Custom message is selected, enter a title, custom message, select the button action, and enable the option to show a teaser of the content behind the message (Optional).
- Click Save.
Note: Logged-out members will be shown the login modal when trying to access this restricted content.
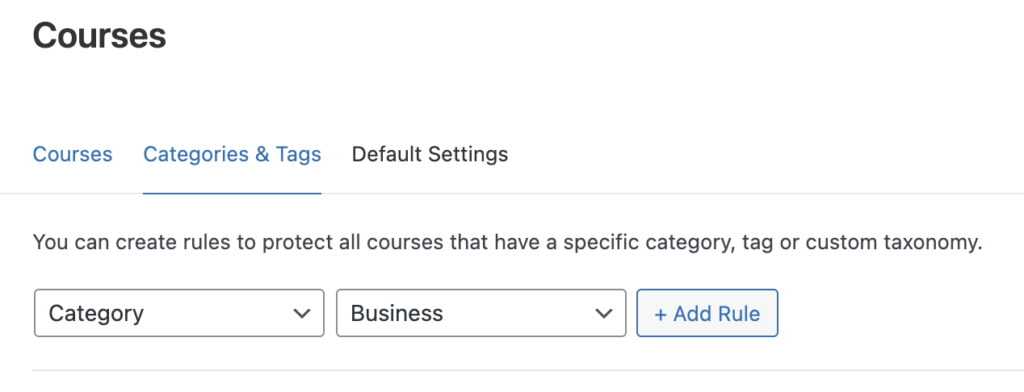
Courses > Categories & Tags
You can also create rules to protect all courses that have a specific category, tag or custom taxonomy. You can create rules for the following:
- Categories
- Tags
- Course Categories
- Course Tags
- Go to the Courses tab, and then to the Categories & Tags sub-tab
- Select the rules for protecting your categories and tags.
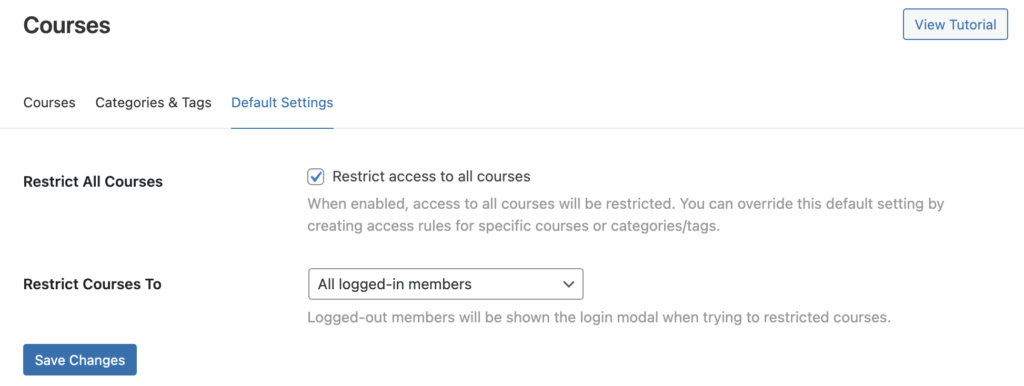
Courses > Default Settings
- Go to the Courses tab, and then to the Default Settings sub-tab
- Mark the checkbox for Restrict All Courses. When enabled, access to all courses will be restricted.
- On the dropdown menu, select to restrict the content to either:
- All logged-in members
- Members in specific access groups.
- Select the group from the Access Groups dropdown menu.
- Select whether to use the Default Restricted Message or a Custom Message for this rule. If Custom message is selected, enter a title, custom message, select the button action, and enable the option to show a teaser of the content behind the message (Optional).
- Select to show or hide restricted courses in the Courses directories.
- Select to show or hide restricted courses in the Courses blocks.