Although BuddyBoss displays in U.S. English by default, the theme has the built-in capability to be used in any language. Every language instance in the theme is tied to a translation file, which can be used to translate the theme into your language of choice.
There are two ways to translate a theme or plugin into another language. You can use a WordPress translation plugin, or you can directly edit the language files using desktop software. I’ll go over both methods in this tutorial.
Introduction
The packaged language files can be found in your theme at /buddyboss/languages/. In there you will see en_US.po and en_US.mo. These are the language files, with the default translation set to U.S. English.

Language Files Explained
Language files are somewhat confusing, so I’ll try my best to help you out here. The first part of the filename displays a naming structure to identify the specific language it is meant to be translated into. en_US stands for English, U.S. You can see all of the various country codes at this resource.
The second part of the filename tells the computer which file to use. The .po extension tells you it is a Portable Object file type, meaning it is the human readable version of the language file. The .mo extension tells you it is a Machine Object file type, meaning it is the machine-optimized version of the language file that the software actually uses. Generally you make your translations in the PO file, and then the MO file is automatically updated when you save the PO file.
Option 1: Translating with a WordPress plugin
Two popular plugins for translating languages are Codestyling Localization and the WPML plugin. In this tutorial I will be using the Codestyling Localization plugin simply because it is free. For this tutorial, we’ll pretend you are translating your copy of BuddyBoss into German.
1. Install and activate the Codestyling Localization plugin.
2. Go to Tools > Localization.
3. Find “BuddyBoss [version]” and click on “Add New Language”.

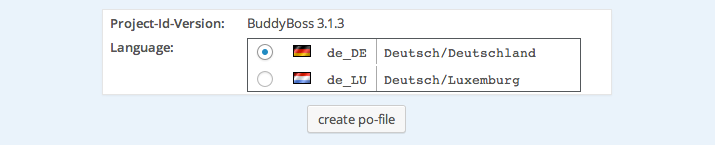
4. Select your country’s radio button and click “create po-file”. At this point a PO file should have been created in the /buddyboss/languages/ folder.
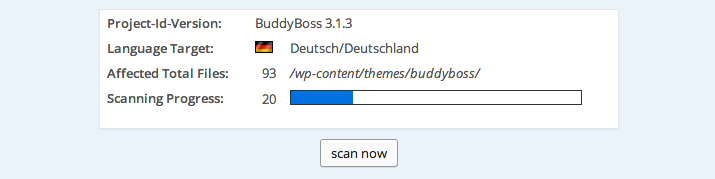
5. For your country, click “Rescan” and then “scan now”.
6. For your country, click “Edit”. This will bring you another page listing the language instances available to be translated.
7. Click on “Edit” in the Actions column for every language instance that you would like to translate.
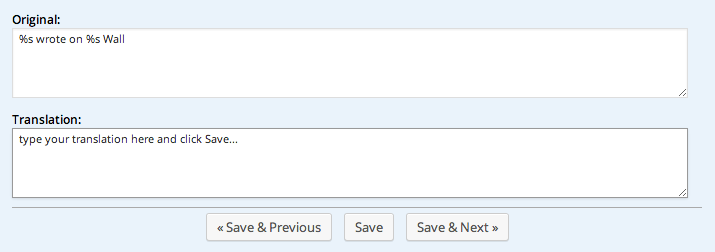
8. Type your translation for each language instance, and click “Save” when you are done with each.
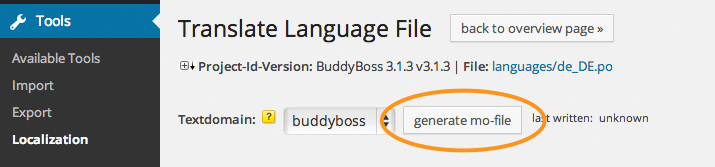
9. Click “generate mo-file”. At this point, you should see a MO file created in the /buddyboss/languages/ folder.
10. Assuming your server is set to German, you should see your German translations appear on the live website now. If you don’t see it working yet, you may need to change your country as specified in wp-config.php to reflect the translation. The default is define('WPLANG', '');. In this example, you would change it to define ('WPLANG', 'de_DE');.
Option 2: Editing language files directly
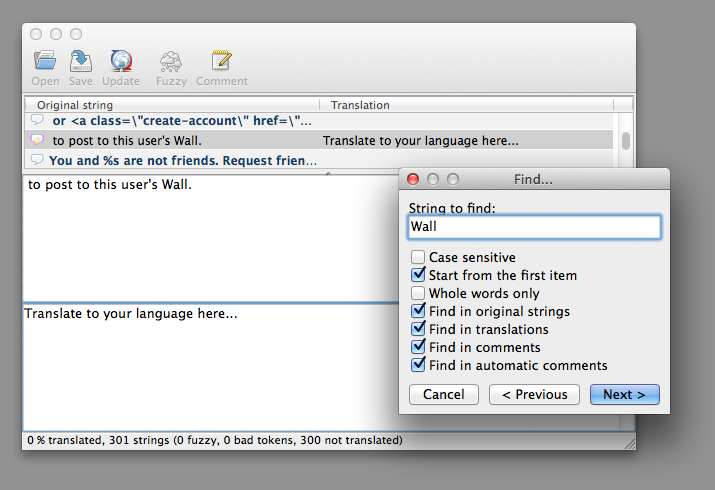
You will need special software to directly edit your PO/MO files. The software I personally use is Poedit for Mac. It’s not glamorous but it gets the job done. You may also consider Pootle (web-based) or GNU Gettext (command shell). The rest of this tutorial will assume you are using Poedit.
Once you have the necessary software installed, you should go ahead and find the PO/MO files from the theme, located at /buddyboss/languages/. Copy these files into your child theme and put them into /buddyboss-child/languages/.
Make sure you see this exact line uncommented in the functions.php file in your child theme: load_theme_textdomain( 'buddyboss', get_stylesheet_directory() . '/languages' );. That line tells WordPress to load your child theme’s language files in place of the parent theme’s language files. If you see the textdomain written as 'buddyboss_child', for this method you will want to change it to read as 'buddyboss'.
Let’s pretend you are translating your copy of BuddyBoss into German. Copy en_US.po and en_US.mo on your local machine and rename them to de_DE.po and de_DE.mo, the German (Deutschland) country codes as specified at this resource. Now open the PO file in Poedit. The software should display a bunch of lines of text which you can translate. Select any line of text, make your translations, and when you hit “Save” your MO file should get auto-updated on your machine.
Once you are finished translating every line of text, confirm that both of your changed files (MO and PO) are in your child theme’s language folder located at /buddyboss-child/languages/ and upload the modifications to your server.
Assuming your server is set to German, at this point you should see your German translations appear on the live website. If you don’t see it working yet, you may need to change your country as specified in wp-config.php to reflect the translation. The default is define('WPLANG', '');. In this example, you would change it to define ('WPLANG', 'de_DE');.