In this tutorial I will teach you how to use the advanced theme options to customize the look and feel of your site (requires BuddyBoss 3.1+).
You can access all of the theme customizer options at Appearance > Customize from your WordPress dashboard. Every time you change a setting, you will see your site dynamically update in the live preview next to the settings. To preview what it would look like on a mobile device, just make your browser window skinny while using the customizer.
If you want a completely unique design, ask about our custom theme and plugin development.
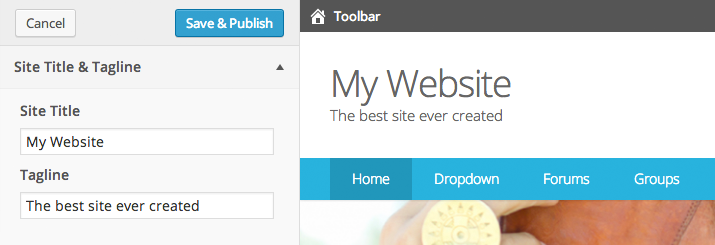
Changing the Site Title & Tagline
If you have not uploaded a logo, your Site Title and Tagline will automatically display where the logo would be.
- Go to Appearance > Customize.
- Open Site Title & Tagline.
- Type your desired text.
- Click Save & Publish.
Adding a Logo
If you upload a logo, it will display instead of the Site Title & Tagline.
- Go to Appearance > Customize.
- Open Logo.
- Click “No Image” so it opens up.
- Under “Drop a file here or select a file“, click “select a file”. Find your logo from your computer.
- Click Save & Publish.
![]()
Your newly upload logo will now be visible on the WordPress login screen as well.
![]()
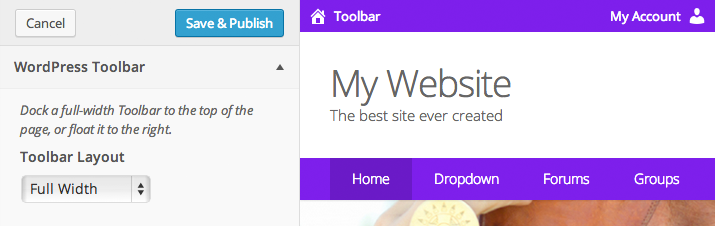
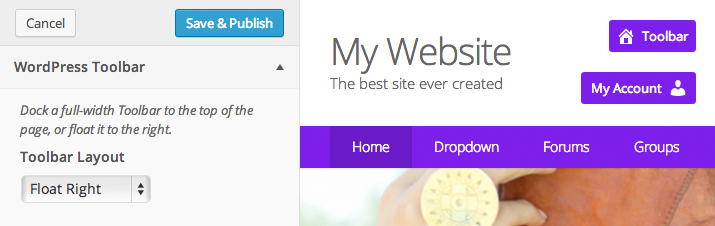
Changing the WordPress Toolbar layout
Starting in BuddyBoss 3.1.1, you can change the toolbar layout via the customizer settings. The two options are Full Width, which is similar to the default WordPress Toolbar, or Float Right which will dock the Toolbar to the right side of the screen.
Fluid Width
- Go to Appearance > Customize.
- Open WordPress Toolbar.
- Select “Fluid Width” which should be the default.
- Click Save & Publish.
Float Right
- Go to Appearance > Customize.
- Open WordPress Toolbar.
- Select “Float Right”.
- Click Save & Publish.
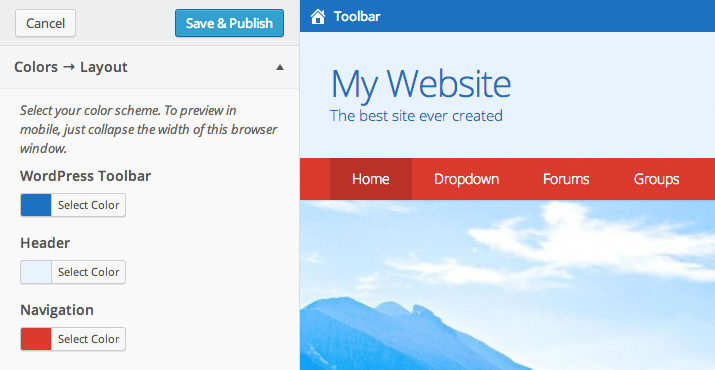
Customizing Colors
You can easily change the colors for all of the major elements of your site.
- Go to Appearance > Customize.
- Open Colors → Layout, or Colors → Text.
- For each element you want to adjust, select your desired color using the color picker.
- Click Save & Publish.
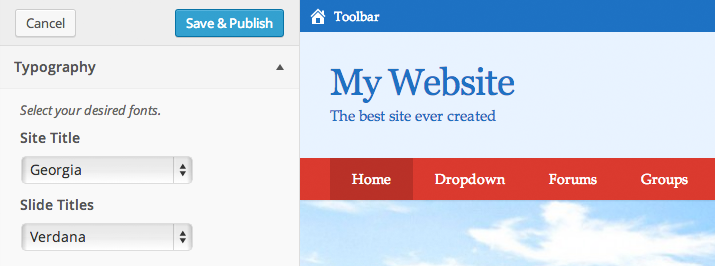
Customizing Fonts
You can easily change the fonts for all of the major elements of your site.
- Go to Appearance > Customize.
- Open Typography.
- For each element you want to adjust, select your desired font using the font dropdowns.
- Click Save & Publish.
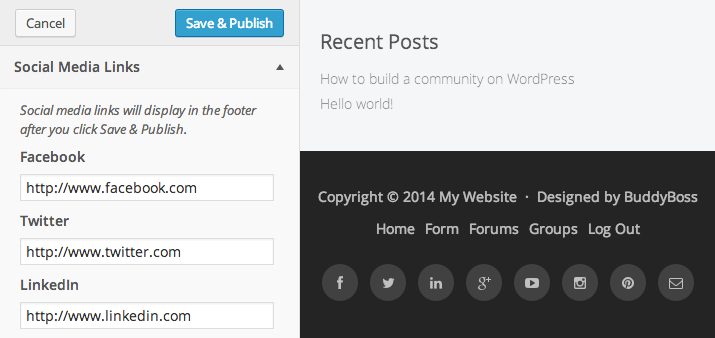
Adding social media links to your footer
You can easily social media links (Facebook, Twitter, etc.) into your site’s footer. For this particular section, you will only see the preview update after clicking Save & Publish.
- Go to Appearance > Customize.
- Open Social Media Links.
- Enter your social media link for each icon that you want to display.
- Click Save & Publish.
Pro Tip: Deactivating the color and font styles
The color and font options are automatically outputted as inline styles into the HTML of your website. If you inspect the HTML you will see them in <style type=”text/css”> [styles] </style>. Even if you have not used the customizer, it will still output the default colors into the HTML, which will generally override styles set for the same CSS attributes in your child theme.
If you are making a lot of custom CSS edits you may wish to disable the customizer’s CSS output entirely. This is easy to do. Just add this function into your child theme’s functions.php file:
// Remove customizer CSS output
add_action( 'after_setup_theme', 'remove_buddyboss_customizer_