
Did you know that more than 70% of viewers on YouTube use the platform to solve a problem? Today, almost all businesses use videos to bring traffic to their business and guide their users on how to use their products.
But when it comes to course creation, a lot of planning and hours of development are needed when working with videos.
To keep it simple, this post will show you what you should do when making a training video. This is a deep topic so be sure to read through to properly know how to create a video-based course for your audience of all skill levels.
Why Does Making a Training Video Matter?

Companies, Educational Institutes, and even small businesses use videos to reach out to a wider audience as it helps to bring in more customers. Tech companies such as Google and Amazon’s AWS invest heavily in videos as it enables them to sell more of their services to their users.
Below is a detailed discussion of why everyone are increasingly using videos for their business:
Visual Learning
Being visual is always the best option to teach an audience. As of today, videos are a common way to teach visually. It also allows to teach with minimal risk.
For example, in the image below, you can see that the US military uses Virtual Reality to train their soldiers. It is another form of video format used to train an audience.

I am not saying you need to use virtual reality unless it is in your budget but the point is, videos do a better job of training an audience because they are more visual.
Engagement
Videos are more engaging as they can grab the learner’s attention for a longer period. This is because videos have so much going on music, introduction, examples, images and so much more within just one video.
Pace Control
When making video tutorials and publishing them on your platform, you will be surprised that learners often delay completing courses or even take longer than usual to complete their courses. If your videos are pre-recorded then your audience will be able to complete your course at their own pace.
Also with a video-based course, it is easier to go back to where they left off. Users on a video platform can pause, rewind, or re-watch segments of the video to grasp the content fully.
Global Reach
If your video courses are taught in English then you face higher chances for reaching a global audience. Any marketing efforts you make will enable you to reach people all over the world. This means more chances for sales.
Another reason for a bigger reach out to an audience is that videos are accessible anywhere and anytime.
When Coursera was founded by Daphne Koller and Andrew Ng in 2012, it was a simple learning platform. Today this very platform has expanded to more than 7000 campuses, businesses, and governments with 113 million learners. So when you make quality courses and market them you will also get millions of users.
Scalability
Making videos is not just cost-effective, it is a scalable format that can be reused repeatedly.
For example, you can trim a 5-minute video down to a minute or less and post it on social media such as Instagram. I myself have used old clips to turn them into trial videos for newer projects to generate sales.
For course creation, you can use old videos in a new course if it is suitable for your audience. This saves you time and energy instead of creating one from scratch.
What Other Cases Include Making a Training Video?

Although videos are going to be a big factor in your coaching business. There are many more ways to incorporate them into your business. Have a look at the ideas below:
Hootsuite
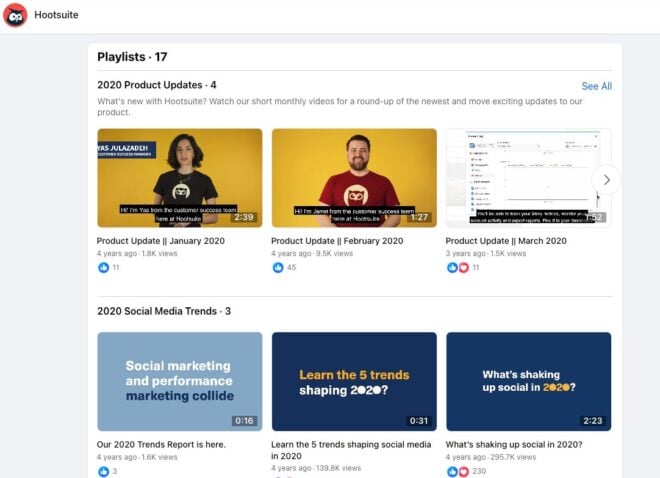
HOOTSUITE instructs their course viewers about how to market to their audience by using Facebook’s live features. They created several short videos on social media to teach their audience on Facebook Live such as having confidence and planning a live session. The firm uses animation, texts, and images to teach its audience.
Lenovo Partnership
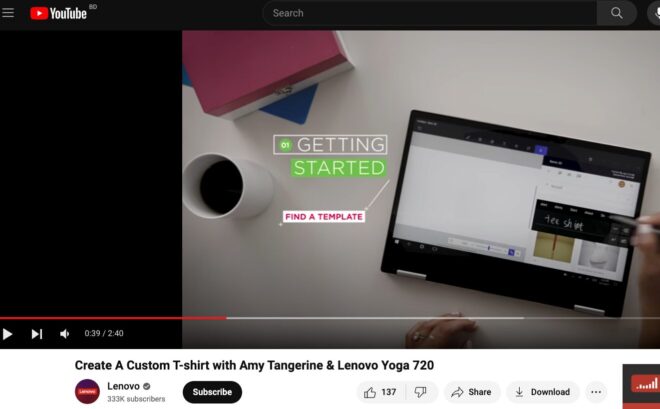
To boost their sales of laptops, Lenovo partnered with Amu Tangerine, an artist on how to design a t-shirt on the Lenovo laptop and then print it onto a t-shirt.
The video tutorial was shown in less than 3 minutes by using only 3D Paint, a common application that is by default available in all Windows Operating Systems. As you can see, Lenovo promoted its laptop differently by showing a video tutorial on how to print a t-shirt rather than by talking about the features of the laptop alone.

Google is already a top cheery when it comes to training its global audience. Yet, it does not stop itself from publishing newer videos on how businesses and content creators can rank their content.
The snapshot below is an example of Google’s channel for training users to better understand how its search engines work to rank quality content.
Use Tools to Save Time When Making a Training Video
Below are tools you should use to speed up your video production for course development.
Large monitor
a big part of your course development is video editing. Video editing can be a pain in the neck. Getting a large monitor will ease your task as it helps to edit faster.
Video Editing Software
You must invest in video editing software to record and edit your course. We recommend using Camtasia as it is easy to use for any beginners. Camtasia is popular with most instructors.
Of course, you can use other video editing tools such as Final Cut Pro, Adobe Premier, and so on.
Canva or Google Slides
You will present most of your content through slides.
We recommend using ready-made slides to save hours of slide preparation. You only want to focus on editing text content on an already-designed slide.
Do not spend time editing designs. Just choose a set of ready-made slides and start working on the text of your topic. Therefore, invest in Canva Pro if you are looking for designed slides. Canva Pro also has images and videos that you can add to your slides to make your course more lively.
You can also use Google Slides but it is limited in having a variety of designed slides. Still, there is no harm in using Google Slides. It is a perfect choice for those on a tight budget.
If you are confident in your presentation, explanation, and guidance then there is a chance your audience will overlook your slides lacking some colors. However, it is best not to continue this in the long term.
Document editing tools
This will be needed mainly for your course planning.
You can do this on paper but it will get complicated as you plan your lesson’s scripts, summary, and explanation. So get used to an online document tool as it will help make tracking your lessons far easier than when using paper.
How to Record Training Videos for an Online Course

1. Set the Identity of your Course
Before you create your videos for your course, you must do course research. Start by choosing a particular niche. It could be anything depending on your expertise. Such as cooking, tech, business, health, and even makeup.
It is always better to create courses based on the field you are experienced in. Since course development is a time-consuming process, selecting a course based on your experience will only help you speed up the course development process.
Of course, you can create a course on a completely different niche but this will require you to start from scratch by learning and experiencing the niche as a beginner. This approach is an extremely time-consuming process, but it is certainly possible.
Below are some examples of topics based on some niches.
- Tech: Front-end development, back-end development, Data Science, Machine learning.
- Cooking: Pastry, Desert, Baking, Grilling, etc.
- Health: Hygiene, Surgery, Nursing,
- Beauty: Makeup, Skincare, Aesthetician activities
- Video Production: Motion Graphics, Animation, Video Editing.
- Content Creation: Content Marketing, Video Content, Blogging, Email Content.
Don’t forget to also identify the target audience for your course. Do not ever create a course on a topic that does not have an audience. You can check out our post on How to Identify Target Audiences for Your Online Course
2. Set the Course Outline
After setting the identity of your course, your next task is to create a course outline. This is the main backbone of your course. The outline of a course sets the requirements of the course, learning outcomes, the introduction, assignment, conclusion, lessons, modules, etc.
A proper course outline will not only help you but also help your students track their progress and communicate to your learners what this course is all about.
Your course outline will be the first thing your audience will judge before they decide to buy. It is also the blueprint for you to create your course you will be constantly referring to this structure when creating your video tutorials.
We have a full detailed post on what is the best way to outline your online course. So please do check this out on how to create your course outline.
3. Setup your Environment
If you plan to show your face, then you need to make sure your background looks neat and tidy. If you are a professional or making training videos on your company’s behalf then you need to take into account how your background looks. And don’t forget to look your best when creating the videos.
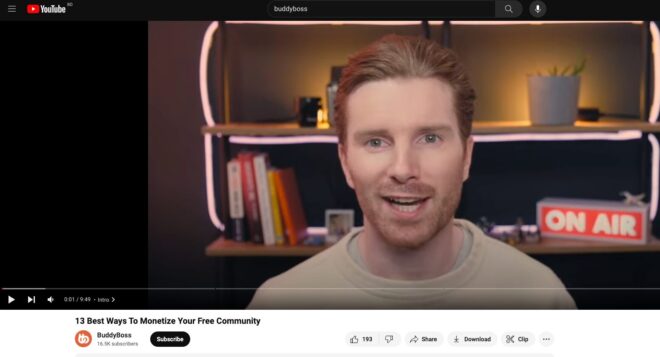
Have you watched a video from the BuddyBoss YouTube Channel ? Well, this is the standard way of addressing our audience when it comes to publishing videos.
Since you will be spending a long time in front of your camera make sure you have your table, laptop, and lighting ready so you can film yourself.
You will most likely be creating videos that are pre-recorded then you will need to ensure your environment is quiet so your audience will be able to focus on what you are saying.
4. Plan, Research, and Prepare Content
Now that you have your environment ready. Now comes the most important step. At this stage, you will be using your course outline to plan and present the content of your video.
Begin by creating a script for your introduction. Read over the script a few times so you can remember the points clearly. Then record yourself and present your topic based on your course outline.
Do not feel frustrated if you are trying several times to record yourself. It is normal for a course creator to spend the whole day recording 1-2 modules of a course.
Brian Dean, the founder of Backlinko also talked about reading the scripts over and over again and taking several shots of himself talking about a topic. One video on his YouTube channel required one whole day and this was before he upgraded his production. So do not be hard on yourself if you feel your efforts are slow.
For each module, prepare a script and any other materials that will be presented together such as slides or a a screencast showing your steps. You need to practice using the script and the materials. Remember to film yourself as you practice. Who knows there may be a shot that was just perfect.
You can also use a teleprompter if you want to conduct a course by reading from the script. This can make your video recording alot easier. It also minimizes the number of times you need to repeat the same shot for a module of your course.
In this way, complete each lesson of your course. After taking the right shot, remember to review, check, and edit where needed.
5. Publish Your Video
After you have fully created, edited, checked, and edited your videos. It is now time to publish your course.
There are several options. You can choose to upload to YouTube or another course platform such as Udemy or Coursera. However, there are some drawbacks to this. YouTube will get you views but not a source of income if your channel does not have enough subscribers.
Course platforms such as Udemy will get you sales provided you do the right marketing but even then there will be a very high chance that your target audience will be attracted elsewhere to other mature courses with better reviews and ratings.
This is a major problem with such platforms. Beginners and new courses face stiff competition from other published courses.
So you can consider your very own course website with a ready-made website. Your website will be ready in minutes! You can start publishing your course right away without any competition and maximize your revenue.
Have a look at the BuddyBoss solution if you are looking to upload all your courses on your course website.
5. Stay in Touch with your Audience
After publishing your course, you have to make sure to keep in touch with your audience. It is more essential if you publish your first course.
One prime way to keep in touch with your audience is to have your own membership community. This is a long-term solution if you are looking to upload many courses on your website and get extra traffic and early sales who are your followers.
With your community, your marketing efforts become more easy to sell your courses. You get traffic not only from your social media, google but also from your own community.
Besides your new courses, you can re-publish old courses again to your community. This is a strategy popular when there are new members who are not aware of the old courses that may be still relevant. Check out the demo site if you would like to explore the community membership feature.
FAQ on Making a Training Video
1. How can I minimize mistakes when I record training videos
It is easy to overlook mistakes when recording a video.
Remember to review your videos over and over. You can also get someone else to review your videos. You can get valuable feedback and make edits where needed.
If you do get someone to review your course videos, ask them if they can understand your lessons and especially your explanation.
Now, if your explanation is not easily understood, you will lose your audience before they reach the end of your course.
2.How much should I invest in a Video Editing Tool?
If your course involves making a training video, then you only need to make sure you have the Camtasia software installed as part of your investment for your videos.
Also, another tool you will need is Canva. With this, software you can go a long way by using the free version.
As per hardware tool you may need to invest in a quality webcam. You can use this camera on your desktop computer. If you are already using a laptop, then there is no need to buy a webcam.
3.How do I know I will see success with my Videos?
The BuddyBoss YouTube Channel has a separate playlist where users share their experience in creating video courses. I promise you that all of the users of BuddyBoss have said the same thing-consistency is the key to success.
And if you maintain the quality of the content, the search engines automatically work in your favor.
4.How to Sell Educational Videos Online ?
You can sell your courses online by having a membership community by BuddyBoss. Having a membership community ensures that your followers will return to your membership site to access more courses. This is a great way to list your courses.
If you are using the BuddyBoss site to start your online community, you also get a mobile app to list your courses. No need to customize your site. Everything will be made ready.
As discussed previously, having your membership site eliminates competition from other course creators. But by having your site, you eliminate the need to worry about competition as your site will list only course resources belonging to you.
5. How can I keep track of my video courses?
When creating courses, there will be many videos and courses all around your computer files. To keep track of your videos you can use project management tools.
It is not necessary to use project management tools.
But if you need help remembering, scheduling, and organizing your work you can make use of a project management tool. These tools can also be used to collaborate with other people if your courses are being done as a team.
Examples of project management tools include Asana, Trello, Wrike, Clickup, and Teamwork.
If your business is a beginner, then you can start with Google Sheets.
Pathao, a ride-sharing company in Bangladesh initially used Google Sheets to track their progress before moving to a professional management tool.
6. Do I need a high-end computer to create a course?
Video editing tools tend to slow down a computer’s performance. This is true if you are using software that is installed on your computer/laptop. Video editing software and the videos alone quickly take up alot of space especially if you will be creating videos countless videos.
So invest in a strong computer that has good storage, RAM, and processor. If you want to keep it simple, just invest in a Macbook Pro with at least 16GB RAM and 1TB storage space.
If the Macbook holds the recent M1 or M2 chip then that is even better! Macbooks are highly recommended for video editing and video creation.
Conclusion
If this is your first time creating a course topic, then create a course on a topic you are most experienced in. You can also pick a topic that is easy to work with. Starting this way will quickly help you to get started.
But remember to properly set your course outline as you will be using it to create your video content of your course. And if you are unsure how to go through this, then you can create shorter videos to make the process more simple.
Check out our website if you want to find out more about how to create courses for your coaching business. We have a whole team guiding and helping instructors start their own coaching businesses.