The biggest problem facing online course creators is member retention.
For independent coaches, corporate trainers, and educational institutions alike, course completion rates are all-important indicators of success.
If course completion is low, learners aren’t receiving the benefits of your eLearning content.
If they’re not seeing benefits, they aren’t going to stick with you.
For any learning business, that means lost revenue. Independent coaches need that revenue to survive and to grow; trainers see that lost revenue in thousands of dollars worth of inefficiency; and universities will endure poor course evaluations, lower grades, less satisfaction among students and so on.
If users are failing to complete courses, you know you need to address some aspect of your delivery.
BuddyBoss.com has plenty of tips for eLearning design and implementation.
But if your eLearning content is strong, you’ve done all your homework on branding, niche, content and web design, you need to look at improving enthusiasm and engagement.
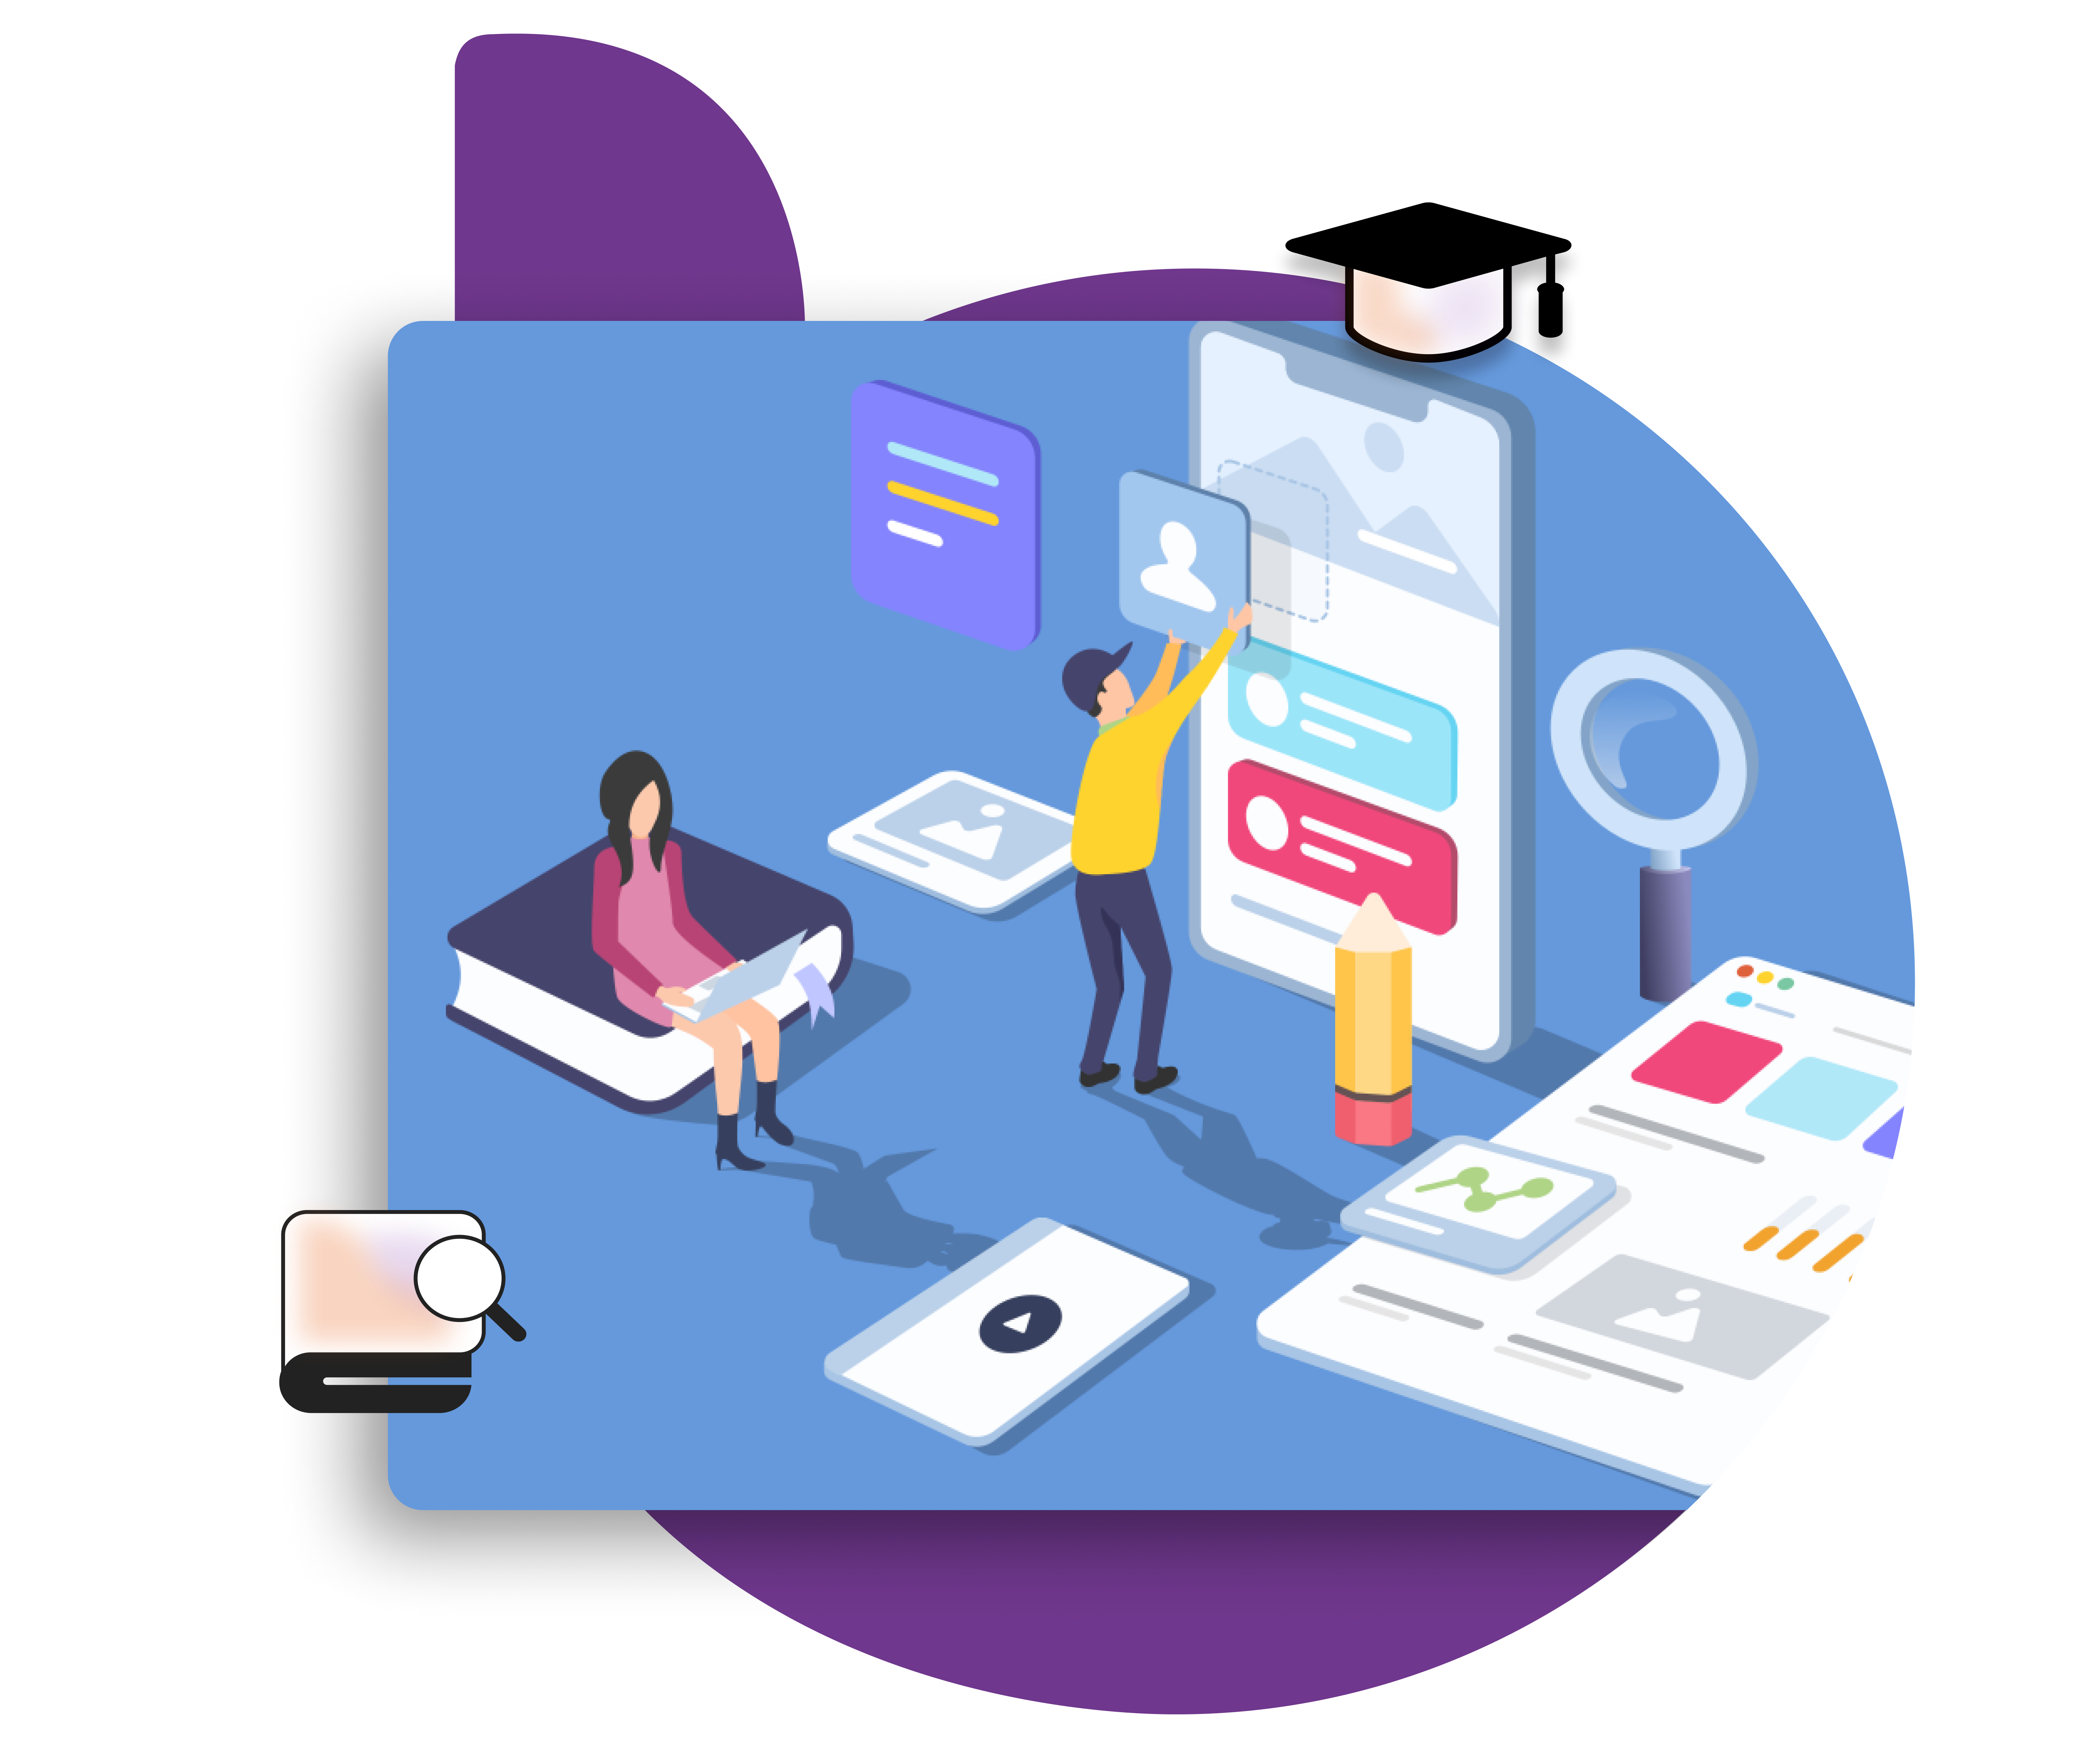
The most powerful solution for striking directly at the heart of the engagement problem is mobile technology.
We go in-depth on the benefits of mobile on the AppBoss.com blog.
The purpose of this article is to give step-by-step instructions on creating a mobile app for your LearnDash eLearning program.
We have been doing responsive design and eLearning on the web as a company for many years, recently with a huge focus on mobile learning because we understand that this area is a huge driver of in the industry.
We’ve built dozens of apps, eLearning websites for clients, undertaken the publishing process many times, and we are highly familiar with the ins and outs.
Who this post is for
Read through this guide if you’re a business owner or a corporate trainer who runs a LearnDash site. We’ll show you every step of creating a mobile app to optimize your education services.
II. Understanding the Process of Creating a Mobile App for your LearnDash site

This guide is for anyone who will be managing a mobile app development effort for their business.
Before we start building an app, and putting together a team or hiring an agency to build it for us, we need to first have an good understanding of the full process and what it entails.
This will tell us what we need in terms of tools, human resources or services.
Even if we hire an agency to do it, it is still very useful to know the full process, as we will be going through that process with the developer.
Planning your App
The needs of users differ depending on whether they’re accessing a website or a mobile app.
There’s no need for you to cram every feature of your website into your mobile app; for example, your website should have your brand assets for marketing and partnerships, but why would you need those taking up space on your students’ and members’ mobile app?
Do you need detailed reporting on the app, or can your admins access that from a desktop instead?
If the goal of your app is to provide mobile learning, then all you need are course features; if your objectives also involve engagement, then you need social features and forums – but not anything and everything, just what your users need on-the-go.
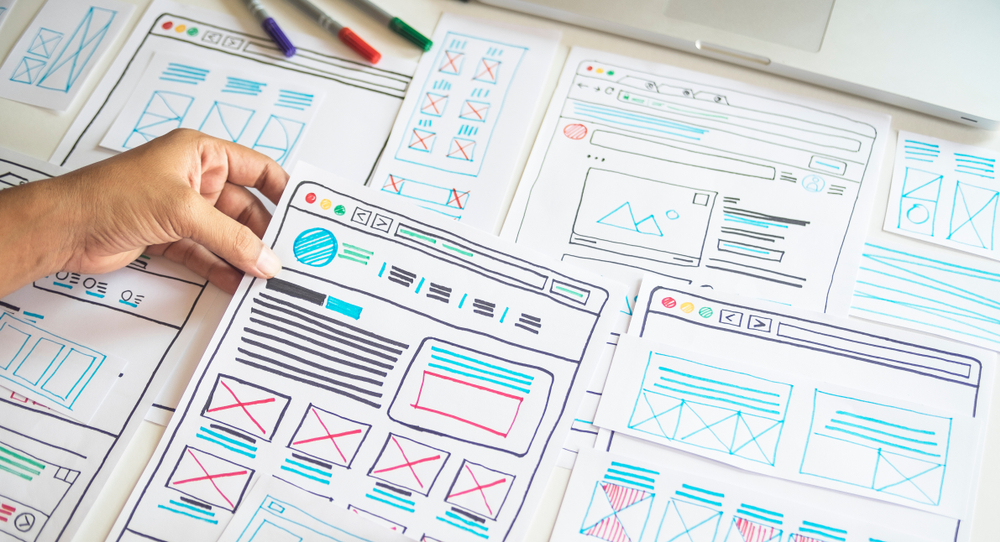
Wireframing your App
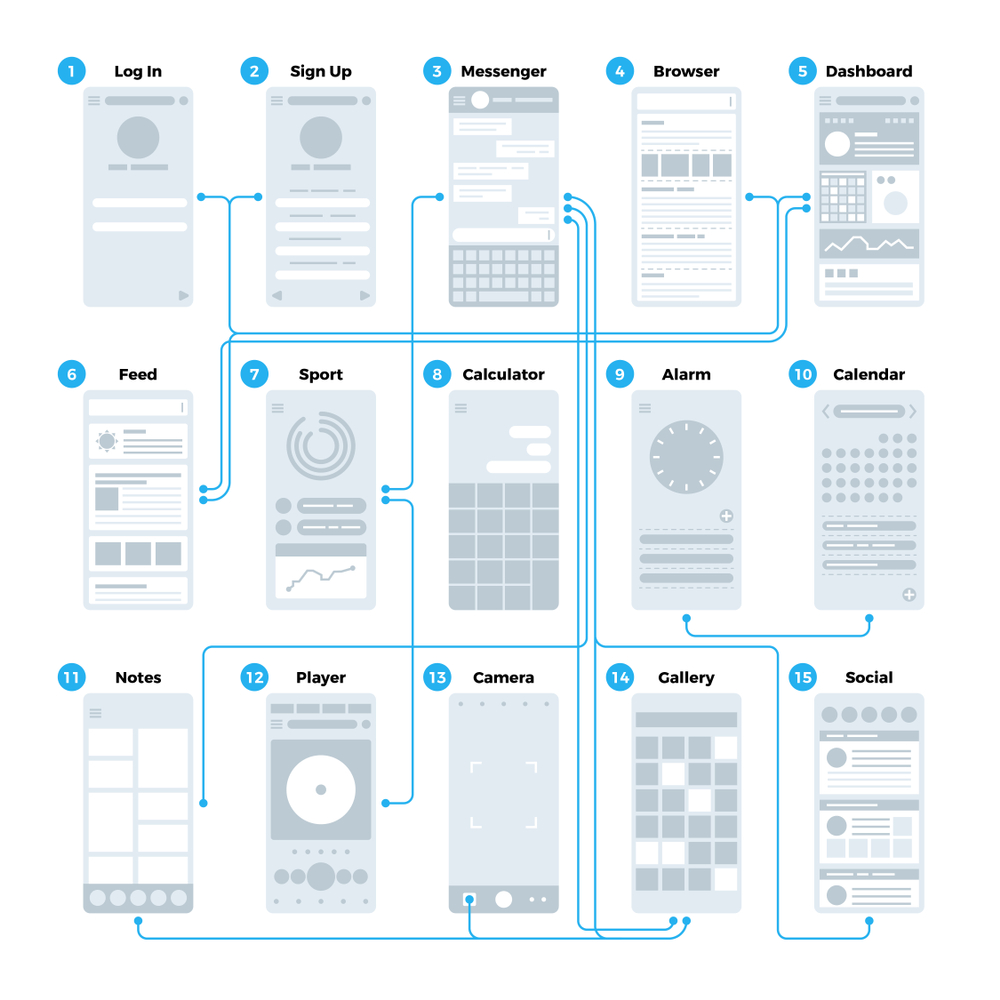
Wireframing is essentially rendering the various screens your app will display, and any functions. Think of it like a blueprint.
People approach wireframing differently.
You might do this by hand sketching, then creating something in a program; you might skip straight to a mockup on a program like Sketch.
You should choose the way that feels right for you. The point is mainly to ensure you don’t encounter extra costs and difficulties, because you’ll already know what your app looks like and how it works.
If you take the step of creating something visually appealing, you might also have an edge if you decide to present the project to a business investor early on.

There are not major differences between wireframing for Android and iOS.
A good wireframe will translate to both device formats.
At BuddyBoss and AppBoss, our wireframing tool of choice is Moqups.
Other choices include:
- LucidChart
- Mockplus
- Gliffy
- Balsamiq Mockups
- Wireframe CC
- Mockflow
- Wireframe Sketcher
- Canva
Designing Standards to follow (Material Design, iOS Design Guidelines)
Because design requirements are pretty extensive, we’re going to give you some general tips on themes and principles. But not to worry – for a detailed, technical explanation, our blog has you covered.
iOS Design Themes

Clarity:
- Legible text at every size
- “Precise and lucid” icons
- Functionality informs and motivates design with subtle adornments
- Important content is highlighted
- Interactivity is always conveyed
Deference:
- Content fills the screen
- Hint at more with translucency
- Minimal use of
Depth:
- Distinct visual layers
- Realistic motion to convey hierarchy
- Design Principles
Purpose: To maximize reach
Aesthetic integrity: How does appearance and behaviour integrate with function, i.e. captivate with fun and engaging design or focus with subtle purpose-driven design.
Consistency:
- Standardized text elements
- Familiar icons
- Familiar functions that people expect
- Uniform terms
Direct manipulation rules:
- How users rotate the screen etc.
- Use gestures to affect the content shown
- Immediate visible feedback
Use “Metaphors:”
- Move screens to expose content
- Toggling, switches, sliders mechanisms that are familiar in real life.
- Let the user be in control
- A balance between constraints
- Easy to cancel actions even when they’ve started
- Familiar and predictable elements
Android (Material Design)

Theming:
Good news – if you’re using Sketch for your designing, wireframing and sketching, there’s a plugin that helps you customize your existing brand asset library to fit better with Material Design, called Material Plugin.
Nevertheless, you’ll want a grasp of the basics to begin with. We go in-depth on our blog.
Material Design actually comes with custom theming that you can customize if you wish, or just use straight out of the box. Button shapes, element colour, typography and so on can all be adjusted to suit your brand theming.
Components:
Buttons, bars, navigation elements, shapes, progress indicators, and more; there’s a pretty long list of components that will make up your Material Design UI.
Finding Inspiration:
While you’re thinking about design standards, you can check out websites like Dribble and Behance for ideas. Tons of designers feature their apps on sites like these.
Since you’re going to need to know about apps that are competing with yours in the eLearning space, you should also look at some of them. What do they look like? What are their key features?
The industry standards for creating app design mockups for UI and UX development are Sketch and Photoshop.
Each has advantages and disadvantages, and if you’re undertaking design yourself, you may find one or the other is just a better fit.
Remember, both are workflow tools – they won’t teach you design. If you’re hopeless as a designer, you might want to outsource the work.
Sketch pros and cons
First and foremost, Sketch is a leaner tool. Photoshop is far more versatile – but Sketch is purpose-built for quickly mocking up wireframes and complex designs.
Sketch is only for Mac. If you’re coordinating with PC users, you may hit a snag when they can’t use your files.
Sketch is easy to learn in a few hours with tutorials, especially if you are familiar with Photoshop – the interfaces are similar.
Sketch is a vector-based tool. Files will be smaller and look good on all devices.
Sketch has specific plugins for UI/UX design. Photoshop has plugins, but many are for photo editing.
Photoshop Pros and Cons
Photoshop files are compatible with MacOS and Windows.
Photoshop allows finer modification of objects. It’s easier to make small tweaks.
Photoshop and Illustrator are potentially more stable, as Sketch is newer
For an exhaustive look into the details of each program, check out our blog.
At BuddyBoss and AppBoss, Sketch is the tool of choice.
Creating a Prototype

Prototyping is an important step in your plan. You want to get customer feedback on their needs and test the viability of your product, don’t you?
Not only that, taking this step can save you time and money. By the time you’re ready to code the app, your developer won’t be starting from scratch (although a good development agency can help you with this too).
You can save even more by sending solid wireframes or mockups to your designer and save money there, too, outsourcing only the fine-tuning for which an experienced designer is best relied upon.
InDesign is a good tool for interactivity prototyping.
You can design the interactive flow of the prototype, and even animate transitions between states of the application.
Other tools
There’s no single program that we would call “industry standard” at this time.
However, there are a number of programs you might like to look into including:
- Adobe XD CC 2018
- Proto.io
- Axure
- Origami Studio (FREE)
- Sketch (yes, you can use Sketch – but animation options are limited.)
Pro tip: many of these tools have a free trial period. Try a few out, or even prototype your project for free before moving on to the next stage of development.
Choosing a Technology

Native? Web app? Hybrid? Which development technology is best?
If you aren’t even sure of the differences between these options, here’s a breakdown.
Native app
Native apps are built in a specific language for a specific platform, as opposed to web technologies like HTML, CSS or JavaScript. When you code for Android using Java, or for iOS using Objective C, the resulting app is called “native,” as it uses the platform’s native language.
Web app
A web app is really just a website, displayed in a way that displays on mobile to provide a more rich user experience and respond fluidly. Web apps require an internet connection to run, whereas native apps will work without one (although many features of a native app may require an internet connection to work properly).
Hybrid app
A hybrid app combines elements of native and web apps.
They can be found in app stores, unlike web apps, can incorporate features of the operating system, and can store data on the device.
But, they will likely never run as fast as native apps.
We go into detail comparing the pros and cons of app technologies here on our blog.
The AppBoss team uses React Native to develop fully native apps.
React Native is one of the most popular cross-platform development frameworks that allows you to create native apps for Android and iOS with just one codebase.
React Native apps are really native apps, not web or hybrid apps. They benefit from the above-mentioned benefits of native apps.
React Native, which was created by Facebook, allows app developers to create these native mobile apps with the popular Javascript programming language.
Thus, you can hire a single developer or development team to create native apps that run on both Android and iOS.
React Native also cuts down development time significantly.
With a number of big companies such as Facebook and Tesla making use of React Native for mobile app development, it certainly is one of the better solutions for creating high-quality native apps that provide users with a great experience.
Quality Assurance
A quality assurance process is a must.
Even if the developer tests have been performed, users might interact with the app differently than expected.
Sometimes, another pair of eyes can spot bugs that fall outside of developer logic.
And quality assurance will save money down the road in maintenance, post-launch bug fixes, and all-important trust in your brand.
In fact, crashes and errors after installation can cause many users to delete your app. That’s something you’ll want to avoid. Trust us, the effort and cost now are worth the time and revenue saved in the future.
You should really be spending more time in testing than you do in development!
You can outsource this to a team who specializes in mobile app QA, or if you’re hiring an app development agency, you’ll want to make sure they have that process in hand. Or, you can give it a shot.
Check this space and our blog for full details on how to undertake QA by yourself if you aren’t outsourcing.
Publishing your App on iOS App Sore
Preparing to Publish
You’ll need a Mac computer running the latest version of MacOS, and – for you or your developers – the current release of XCode for turning your app code into an IPA file for the App Store. (At AppBoss, we code in Javascript, then compile to Java and Swift and Objective-C for Android and iOS, respectively. If that makes your head hurt, see our blog for a breakdown of coding lingo.)
It’s a very good idea to familiarize yourself with Apple’s App Store review guidelines. We go deep on our blog.
- Head to developer.apple.com to set up a paid developer account.
- Once registered, you’ll need access to the iTunes connect portal to enrol in the developer program and await confirmation.
- Once confirmed, sign in to the developer account.
- You’ll need to create and sign certificates for your apps, since you want to be able to run them on your own device during development.
- Navigate to Certificates, Identifiers and Profiles and click the “+” to initiate a new certificate signing request.
- When the certificate is ready, download and install it.
- Then, you’ll need to create one for distribution profiles.
- Click “add another” and under Production, select App Store and Ad Hoc button. Go through the same process as before and use the same CSR file, then download and install.
- Click on My Certificates to verify the two certificates are installed.
- Then, you’ll need to register the devices you want to run your apps for testing.
- Click on All Devices, and then the “+”.
- To get the device UDID, use iTunes, plug in your device and select it in iTunes. Click on the serial number and it will display the UDID. Copy and paste into the corresponding field in the developer portal.
- Click continue, confirm, and register the device.
- You can register the devices of testers this way, too.
- Now, you’ll need to set the App ID.
- Click Certificates, IDs and Profiles again and choose App IDs from the Identifiers heading. Click the “+” to add new.
- Fill out the description, then the bundle ID using reverse domain-style string, including the app name at the end.
- Click Continue, then Register. Now you can create provisioning profiles for your app ID.
- You’ll need provisioning profiles to test versions of the app during development, as well as for submitting the app to the app store and beta testers.
- Under the Provisioning Profiles heading, choose All.
- Click “+”.
- Choose iOS App Development, then Continue. Make sure the app’s development ID is displayed, then click Continue.
- Select the certificates you want to include, including those of any team members you want to enable to test the app. Next, select the devices you want to install the app on and Continue.
- Name the profile, and download it.
- Then “Add Another” to create a distribution profile for the App Store. Select App Store, and repeat the same process as with the development profile.
Upload your app
Once your certificates are ready, you can upload your app to your iTunes Connect account.

You can upload your app from XCode to iTunes Connect.
Then the app will be staged at iTunes Connect in the Activity tab. You’ll see the version uploaded there.
Once the build is uploaded, it’s available for testing.
Apple uses Test Flight for app testing, so you and your testers must download the Test Flight app.
You can see your users in AppStore Connect Users under Testers and Groups. To add users to your iTunes Connect account and to specific Test Flight app builds, follow these instructions:
- To invite your QA team members to iTunes Connect: from the iTunes Connect homepage, click Users and Access – then the “+” button – then enter the user’s information including email address. Once they have accepted the invitation in their email inbox, they are registered as a user on your iTunes Connect account and you can give them access to specific tester apps through Test Flight.
- Go to My Apps in your iTunes Connect dashboard and set them up as a tester for a specific app build: go to Test Flight tab, then App Store Connect Users, click the “+” then add via email address. Once they’re added here, they can see all activity for that app, including the information needed to log in to the test version of your app.
Publishing your build

Go to App Store App Information and enter all the info, name of app, privacy policy URL and other information required by the text fields.
Then, fill out the pricing and availability.
In iOS App – Waiting for Review, upload screenshots and promotional text that will show up on the app store.
Upload the build there that you want to submit for review to the App Store.
Then add your personal information to the required fields.
There’s a spot where you can give notes to your testers in App Review Information, and upload pictures if needed too.
Fill out a brief questionnaire on your app’s content, so Apple can assign a content rating.
Then finally, you can select whether you want your app to be automatically or released after passing Apple’s review process in the Version Release section.
If it doesn’t pass, Apple will tell you what needs your attention. Otherwise, your app is now live!
Publishing to Google Play Store
There are a number of options for testing and preparing to publish your app wth Android.
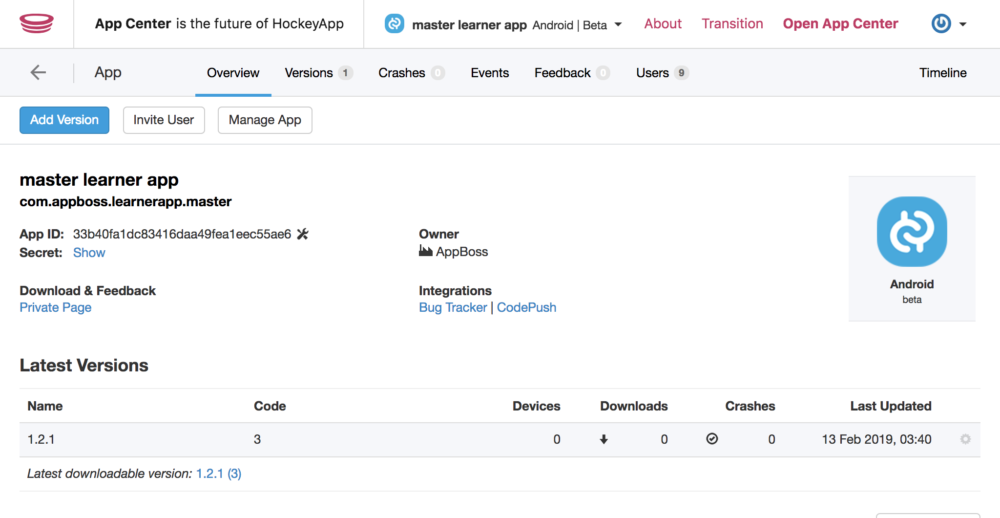
At AppBoss, we use HockeyApp once we have a build and need to begin the QA process.
Some other options include:
- TestFairy
- The Beta Family
- Appaloosa-Store
- AppBlade
- Applause
- Install On Air
- TestingCatalog
In HockeyApp, you can upload your APK file (Android’s equivalent to IPA) and invite people to the account to download your test build, and set their role.
Once the build is cleared by testers, then you can start on the Google Play store.
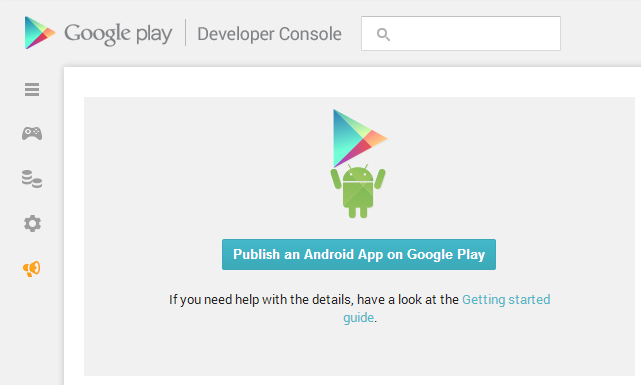
First, set up your developer account.
Then, you can sign in to see your Google Play Console homepage.
In “All Applications,” find the “CREATE APPLICATiON” button and click.
Name your app.
Go to Store Listing and fill out product details.
Add Contact Details.
Fill out Categories and your content rating questionnaire.
Include your screenshots, icon and banner in this section.
You can add your Privacy Policy…but at this stage, it’s not required. Android lets you upload pretty much anything without any review…but for very obvious reasons, lack of a privacy policy is not good for your business.
Add Pricing and Distribution information.
Choose your audience.
Indicate whether your app features ads.
Indicate whether you followed Android’s Content Guidelines (but Google won’t reject your app if you didn’t – it would just get pulled down in future if found to be violating them).
Once that is all set, go to App Releases – Production Track – Manage, create a release, and choose to Opt In or Opt Out of App Signing. (App signatures are just like the certificates you created for your iOS version that ensure you are the owner of your app.)
Then you can upload the APK file.
Note that you need to indicate the SDK target for your app, i.e. that is the minimum version of the Android Operating System on which your app must function.
Instead of having a living person review your app, Google has a system that automatically analyzes your code for minimum configuration settings.
Your app could fail submission if, for example, app permissions are wrong or nonexistent for things like requesting access to your user’s camera, location services etc.
You’ll be alerted to any issues like this in Review.
Then if it’s all good, you can select Rollout to Production. The app will appear on the Google Play Store in a few minutes to an hour.
III. Executing your mobile app project
Working with a Mobile App Development Agency

Understand your needs.
What services do you need? What parts of this process are you confident with tackling by yourself?
It may be tempting to save money on doing, for example, your wireframing and design. Or maybe all you need is design help. If you’re confident, go for it!
If you want full end-to-end service from an agency, make sure you’re clear on the full offerings of the agencies you’re considering.
If you’re looking at an agency that doesn’t have a strong design team in-house, or at least, doesn’t outsource from a reliable designer, you’ll run into headaches.
It’s critical to understand whether agencies have dedicated specialists for each stage of the process.
Since we’re building a LearnDash website, the developer will need a strong background with WordPress too. And if they know LearnDash, so much the better.
Check references
Have a look at the previous clients of agencies you’re considering. Even better, check out the product if you can. A good company should be willing to show off their work with testimonials and case studies.
Budget
This one’s easy. Can they do the work for a price you find reasonable?
Some companies are in high demand, and if they really want to work with you, it might be an indication they believe in your project and are willing to meet your budget requirements in order to keep doing business with you in the future (on things like maintenance and support).
Timeline
Consider your speed-to-market an asset of value. If a development agency seems like a decent fit, but can’t even start your project for months, that’s lost value for you.
Strike a reasonable balance between your enthusiasm to get cracking with an agency that ticks your other boxes while offering a decent bid on your budget.
Company transparency
You’re going to want to filter out BS. Some of these questions can help with that:
- What does your team look like?
- Are the developers your full-time employees? How experienced are they?
- What organizational tools do you use? How is the workflow organized?
- Who is the project manager? How do we communicate? How often or at which stages in the process?
- What do you foresee as our biggest challenges?
If you don’t want to hire an agency, there are a few options.
You can hire contractors.
You can hire freelancers on site like UpWork.
But, it’s tough to guarantee success with these methods. You’ll want to make sure contractors and freelancers have a very reliable work history and know the ins and outs, as well as any customization you require.
You can also consider using an app builder.
App builder technology comes in a number of forms, but usually as an online, DIY development tool for business people who can’t afford development services from an expert or agency.
Popular app builders include:
- Ionic
- Anypoint Platform
- Static Object
- Appy Pie
- Adobe PhoneGap
- GoodBarber
- Xamarin
Building an app via an app builder tool usually involves filling out forms and choosing certain key elements from presets, such as app type, user access format, features and so on.
Pros:
- They’re cheap
- Quick to deploy
- No need to know code
- Many tools to choose from online
Cons:
- Data is not synchronized
- They’ll always be generic
- How “current” they look visually cannot be controlled
- Limited features
- It’ll probably look just like thousands of other apps
If you’re after a high-quality, original app where the features are up to you, it’s not a good idea to choose an app builder.
It’s unlikely these cookie-cutter solutions will be the foundation of a solid mobile-conscious business.
You will not have control over details that make all the difference, like custom pictures, text, appearance and performance.
App builders may be an affordable solution for small businesses who need a specific app with limited functionality.
However, it’s not recommended for anyone planning to push marketing resources into their mobile experience.
Template Apps
Template apps are mostly pre-built apps that can be customized to your needs.
If you’re looking into this option, you must ensure the template app can synchronize content with your LearnDash site.
You’ll also want to check that it is built with the technology that you want to use. When AppBoss builds LearnDash-powered WordPress apps, as mentioned previously, we use React Native.
If you are going to have your own team work on a template app instead of with a development agency, make sure the template product you’re looking at has lots of documentation so your team can learn to work with it.
If it’s just you, you’ll have to look through all the documentation and learn it.
Or, you can hire a team to customize the app to work for your website.
Each options has its pros and cons.
If you’re using an online app builder, then most likely, this option can’t sync with your website content.
The end result is low-quality. An online app builder does not allow enough flexibility to customize your app in a professional way.
If you buy a template and hire a team, that option can work out well, as long as the team knows how to work with that template app and they have all their documentation needed.
If you’re by yourself, you’ll need to have all the knowledge about building and customizing the app. It could take weeks to learn to do properly, but you may still spend all that time trying to learn the documentation and end up with nothing good.
AppBoss and BuddyBoss offer a prebuilt mobile app solution with templates, APIs, and functionality that allows us to speed up your launch significantly beyond the above alternatives.
IV. Conclusion

If you have a good reason for your app to be fully custom, then you should build your own tea or hire a professional development agency.
Reasons could include:
- You intend to grow. Template apps are not very scalable.
- You need flexibility in features like data storage.
- You desire a higher level of control over security.
- You need the app for fairly specific purposes.
- You generally need total control over users and data.
If your app doesn’t have these needs, but you desire a high degree of professionalism and in the appearance and user experience, then going with a customizable template app solution is the right choice for you.
Reasons to go template:
- You need only common features like photo galleries, blogging.
- You need to sync with a simple portfolio or business card website.
- You have a simple eCommerce business.
- A small amount of customization is satisfactory, little or no IT needed.
- You’re on a budget and don’t need high customization, so the price is good.
- You need to deploy quickly and are not concerned about rapid growth.
If your needs can be met by a template app, we can help.


-
 Article
- Planning Your Online Course


Thank you for your sharing. I am worried that I lack creative ideas. It is your article that makes me full of hope. Thank you. But, I have a question, can you help me?