Introduction
App Colors play a crucial role in branding, helping to establish a unique visual identity and enhance readability in your BuddyBoss App. By customizing colors, you can ensure a consistent and engaging user experience. This guide will walk you through the steps to configure App Colors, including setting background hues, button styles, text contrasts, and more.
Tutorial VIdeos
Opening the Color Settings
- In WordPress, navigate to BuddyBoss App > Branding > Colors.
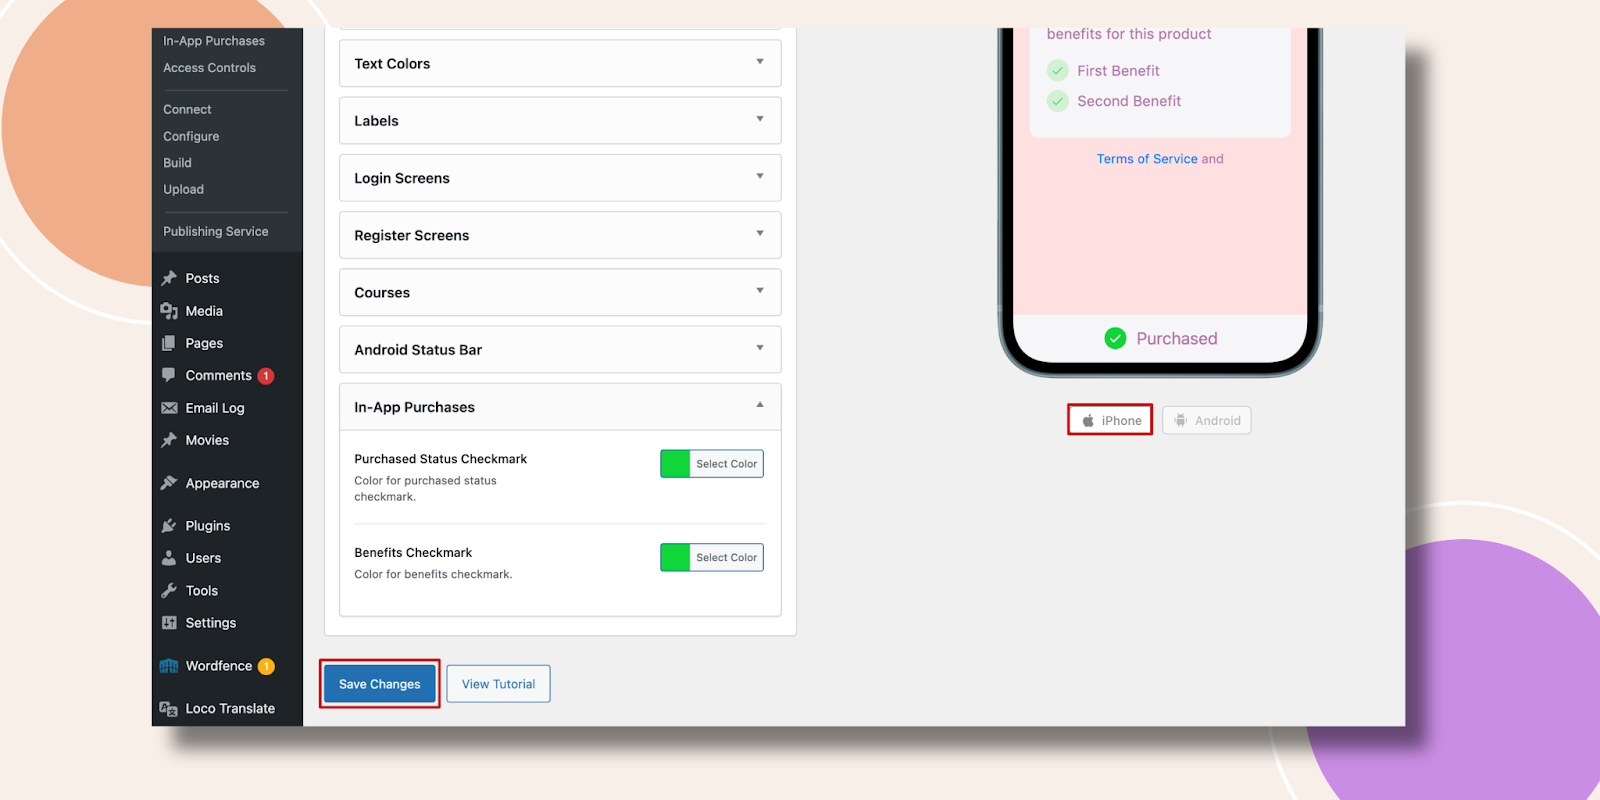
- Confirm the Android preview is active; toggle to iPhone preview at any time.
Configuring General Section Colors
- Under General, click the color swatch for Background Color.
- Enter a hex code or pick from the palette, then click OK.
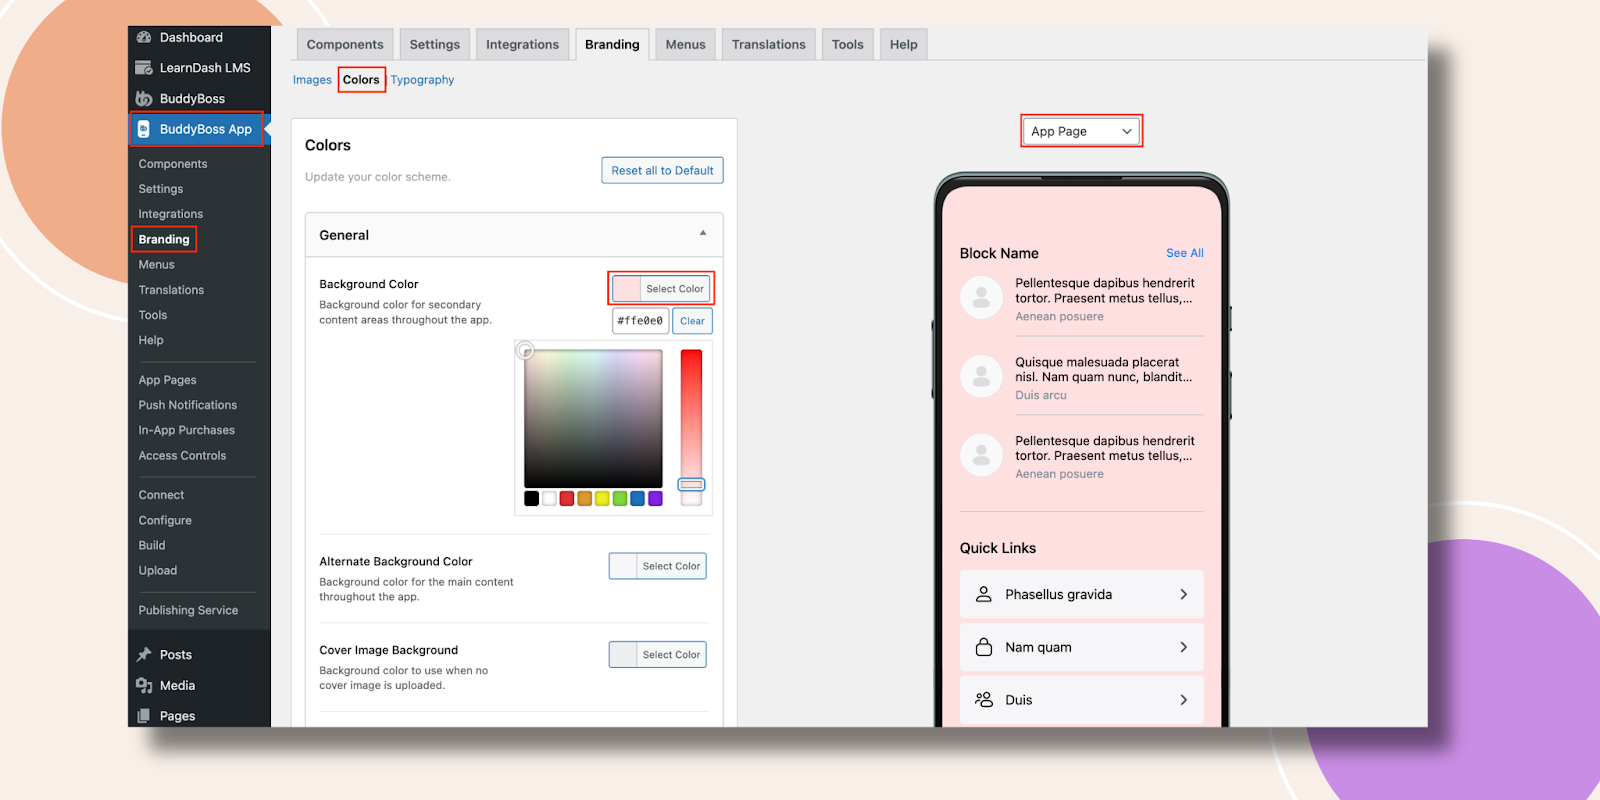
- Repeat for Alternate Background, Color Image Background, Border, and Accent.
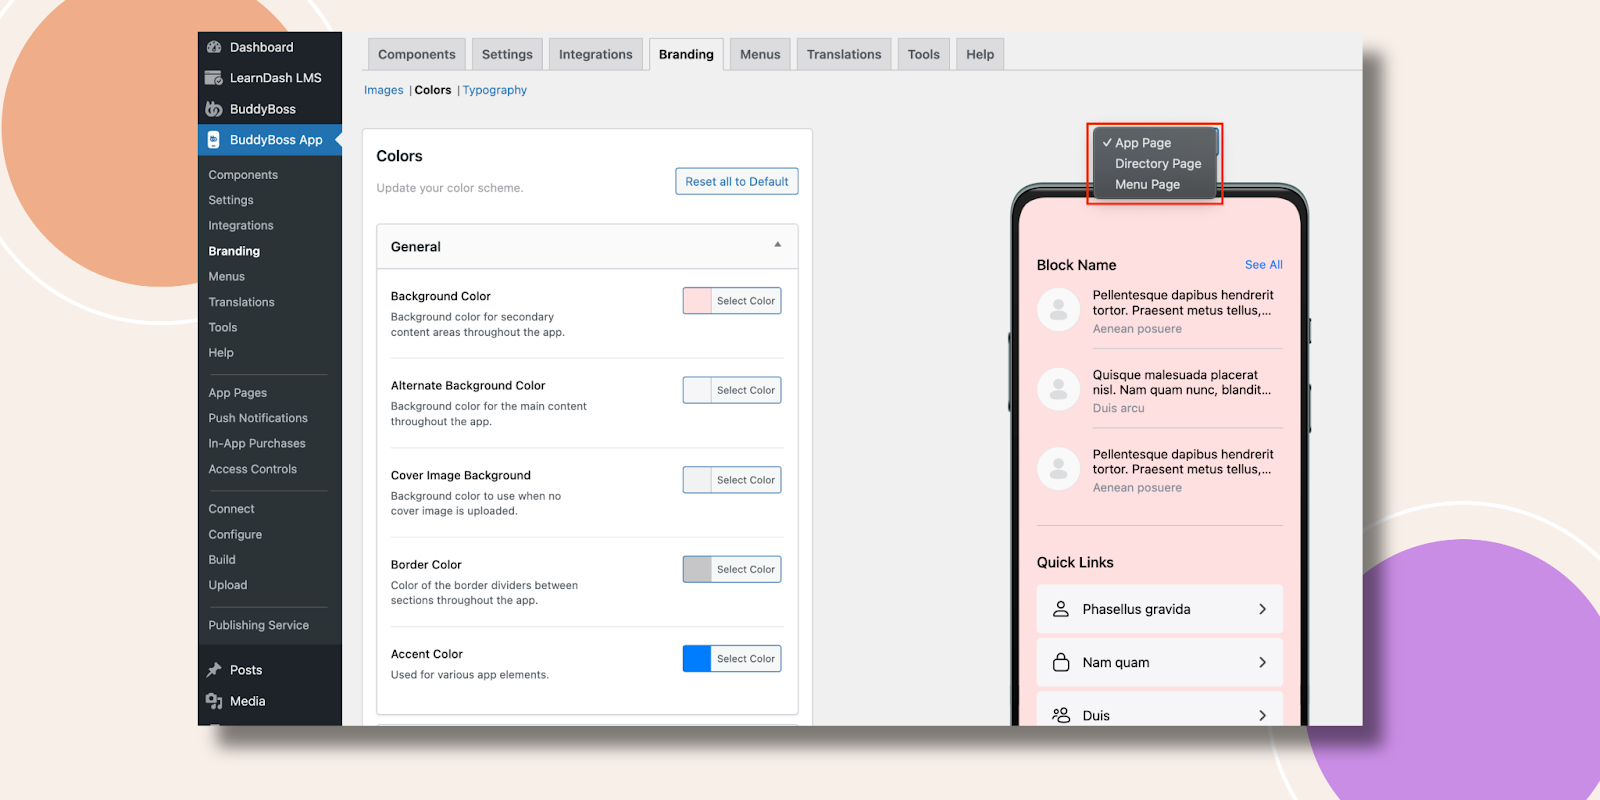
- Observe the App Page, Directory Page, and Menu Page previews update instantly.
Changing Navigation Bar Colors
- In the Navigation Bar, select Background Color and choose your brand hue.
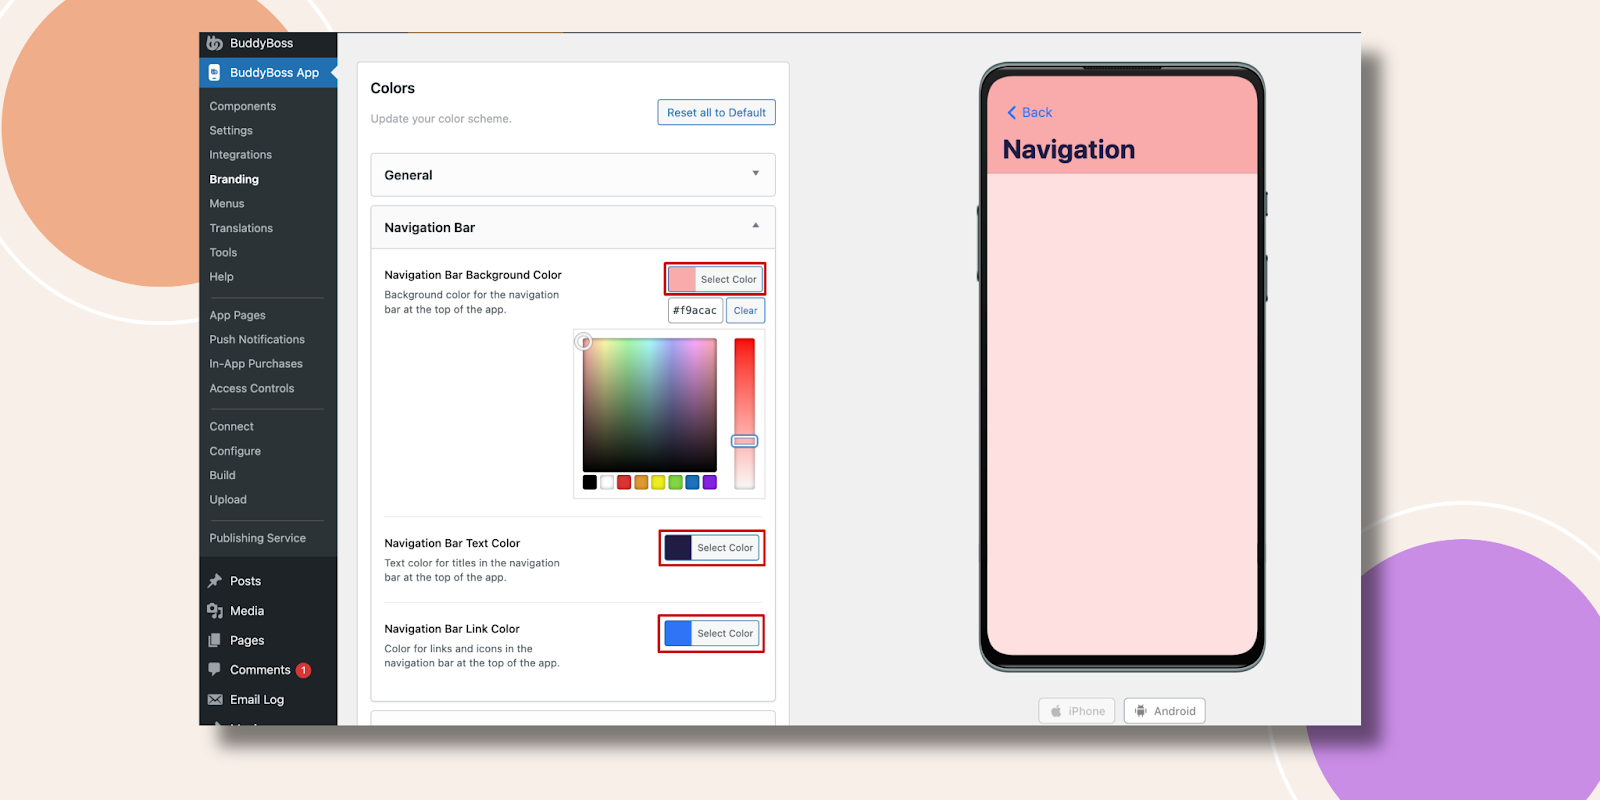
- Pick Text Color for titles and Link Color for tappable elements.
- Watch the mockup reflect your choices.
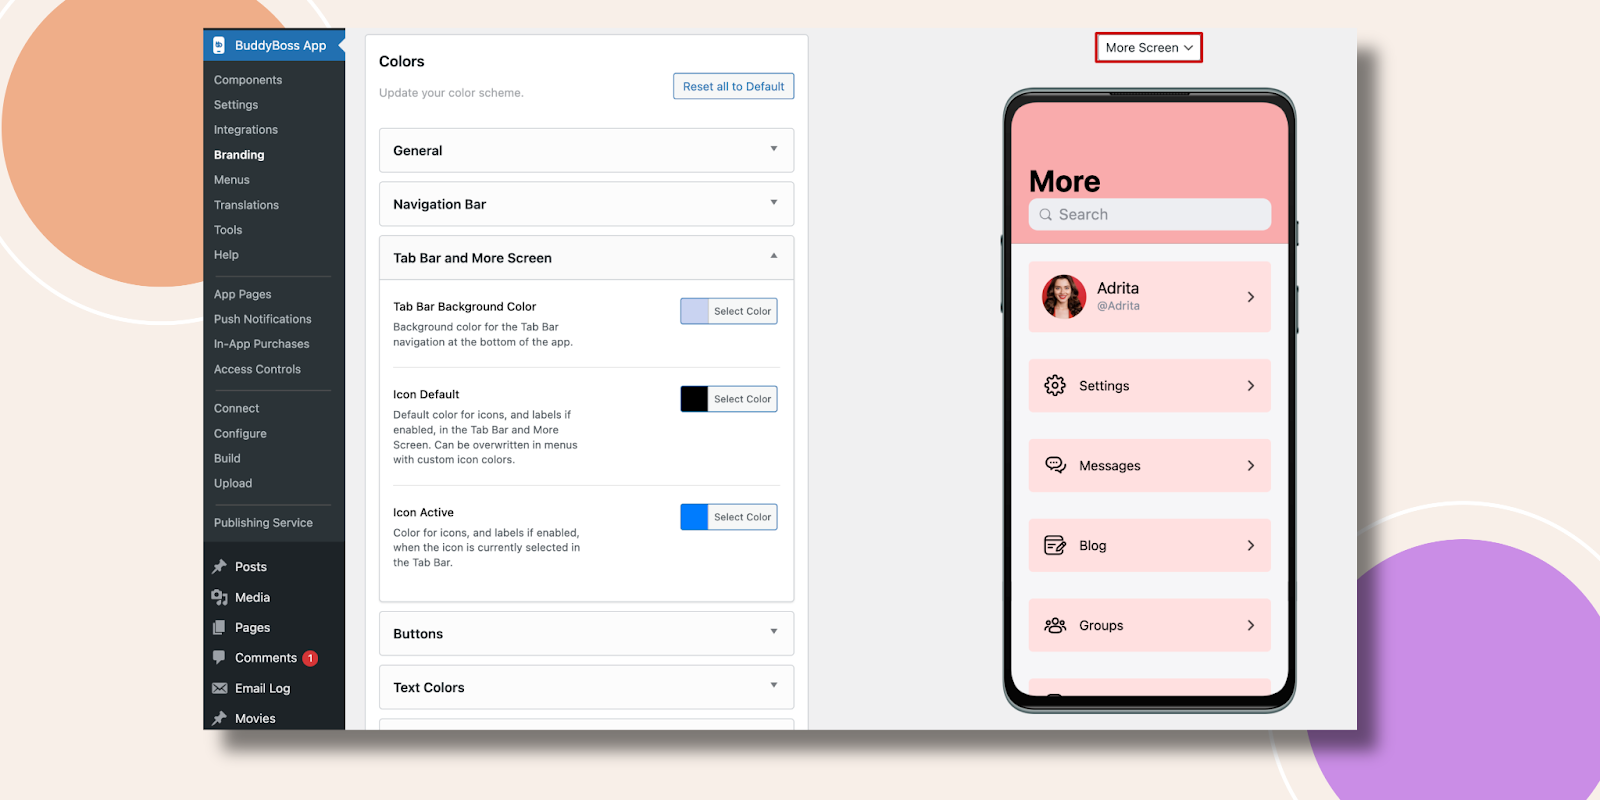
Styling Tab Bar & More Screen
- Under Tab Bar & More, set Tab Bar Background Color.
- Choose Icon Default Color and Icon Active Color.
- Preview the Tab Bar and More Screen designs on the right.

Customizing Buttons
- In Buttons, set Primary Button Background Color and Primary Button Text Color.
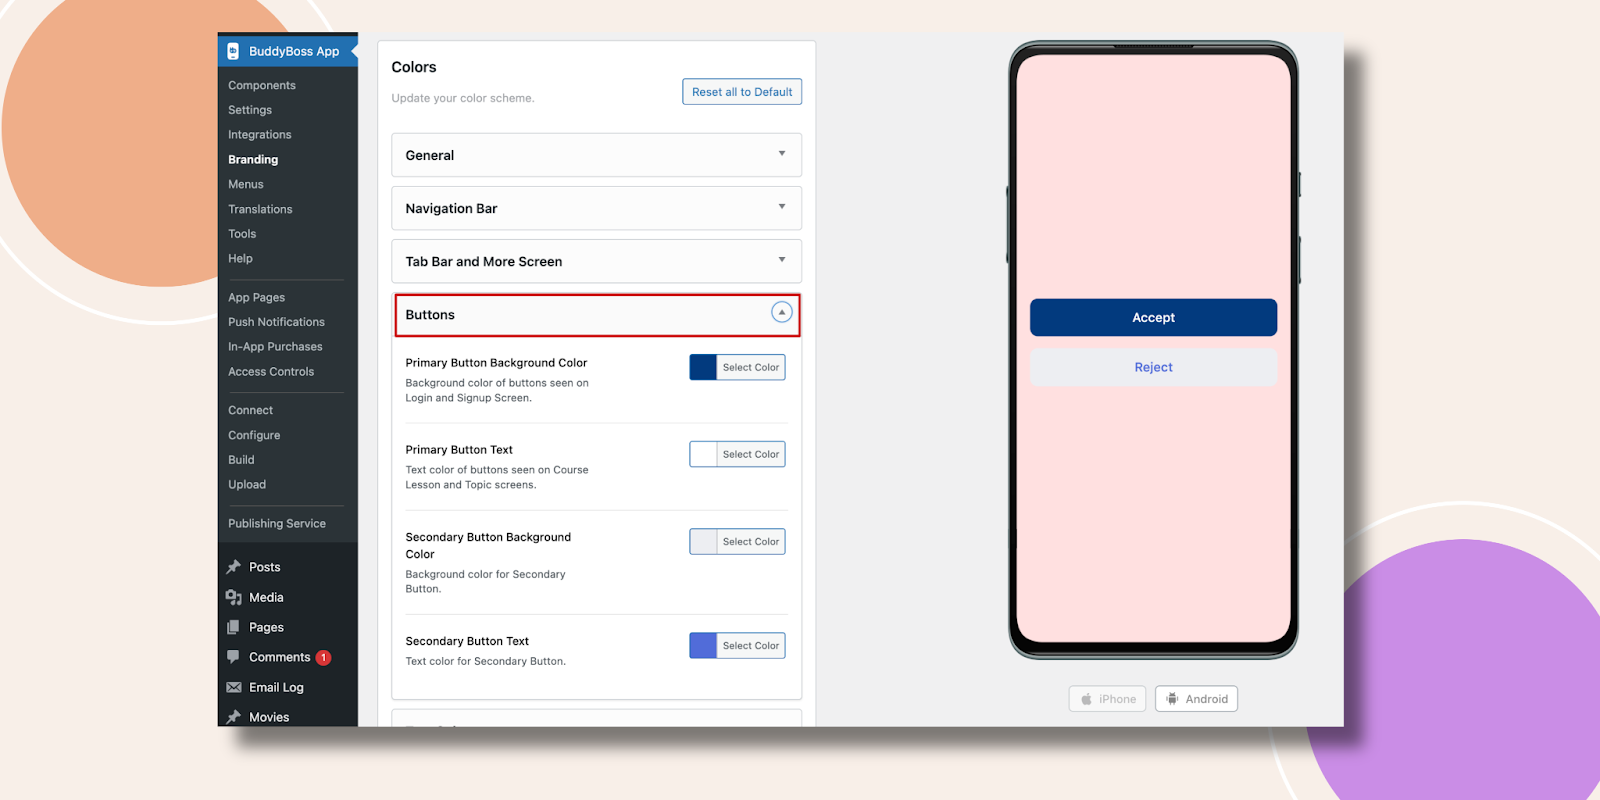
- Repeat for Secondary Button Background and Secondary Button Text.
- Verify the button styles in the preview.
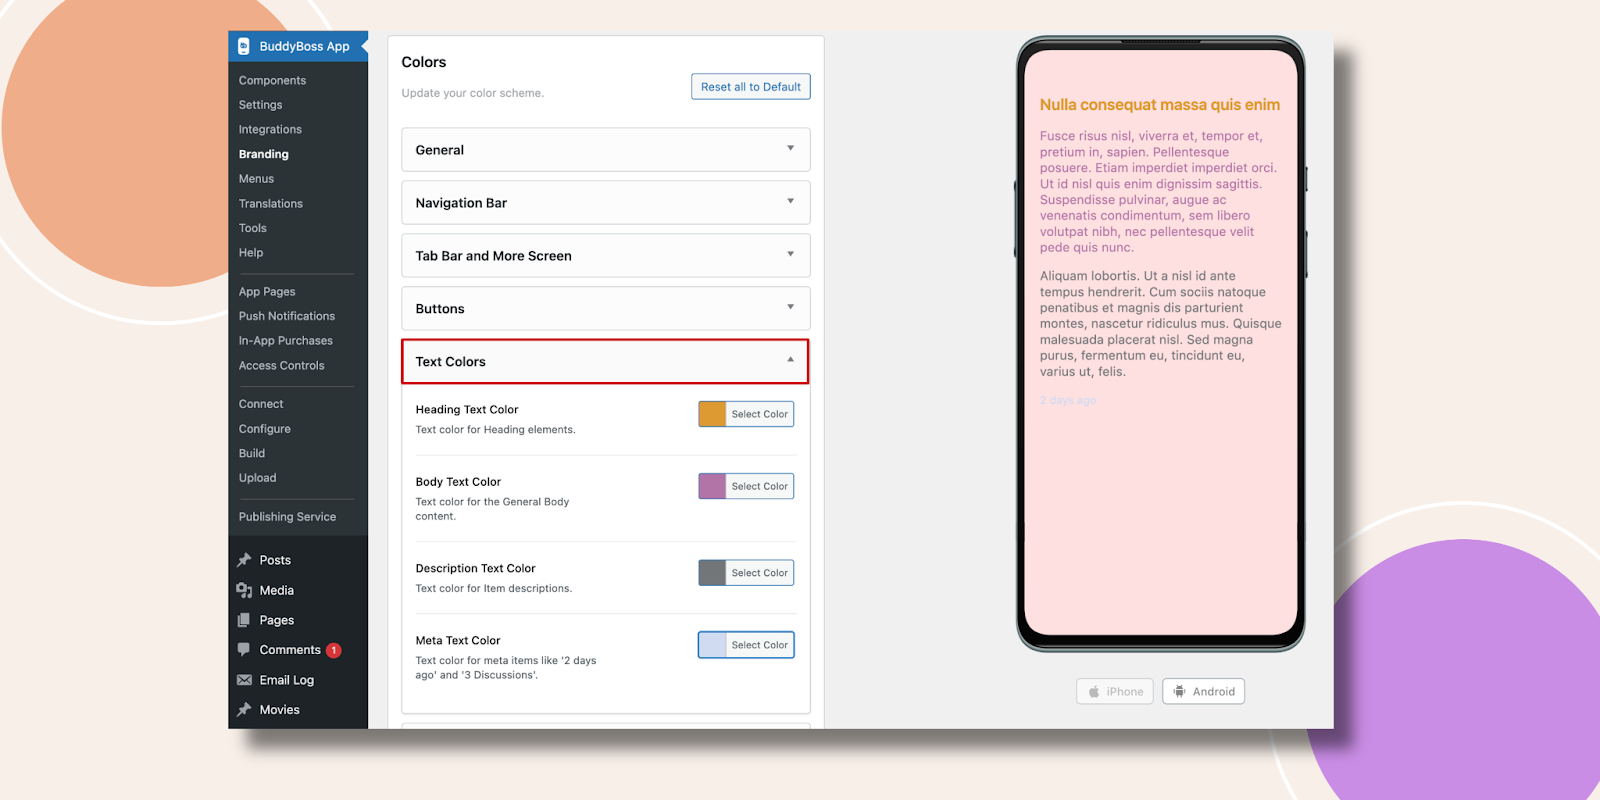
Adjusting Text Colors
- Under Text Colors, select Heading Text Color for H1–H3 styles.
- Choose Body Text Color, Description Text Color, and Meta Text Color.
- Ensure readability across light and dark backgrounds.
Styling Labels
- In Labels, pick Label Background Color.
- Choose Label Text Color for contrast.
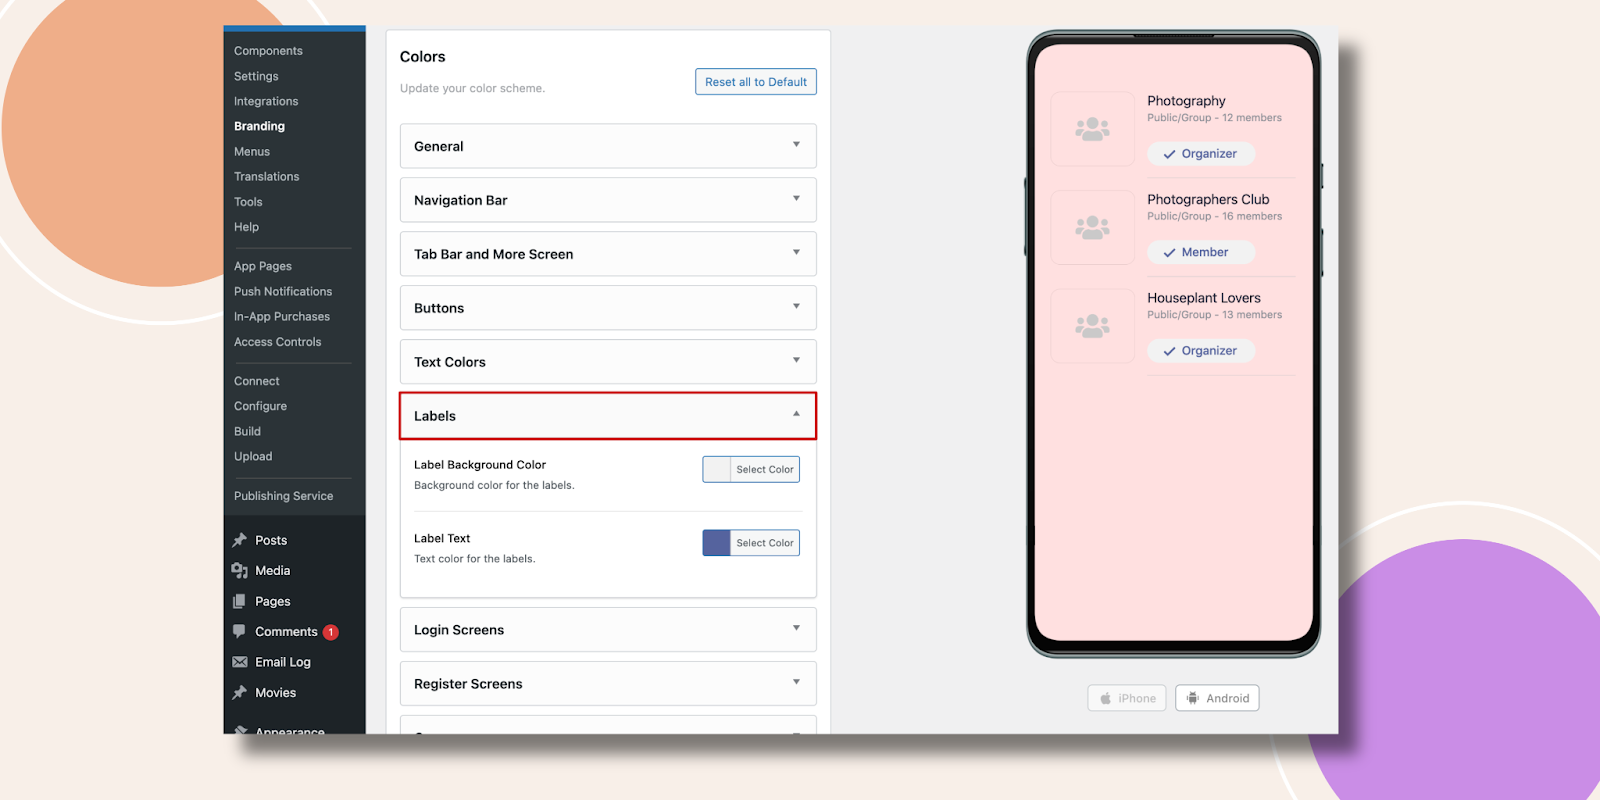
- Confirm label appearance in list and detail previews.
Updating Login Screen Colors
- Scroll to Login Screens.
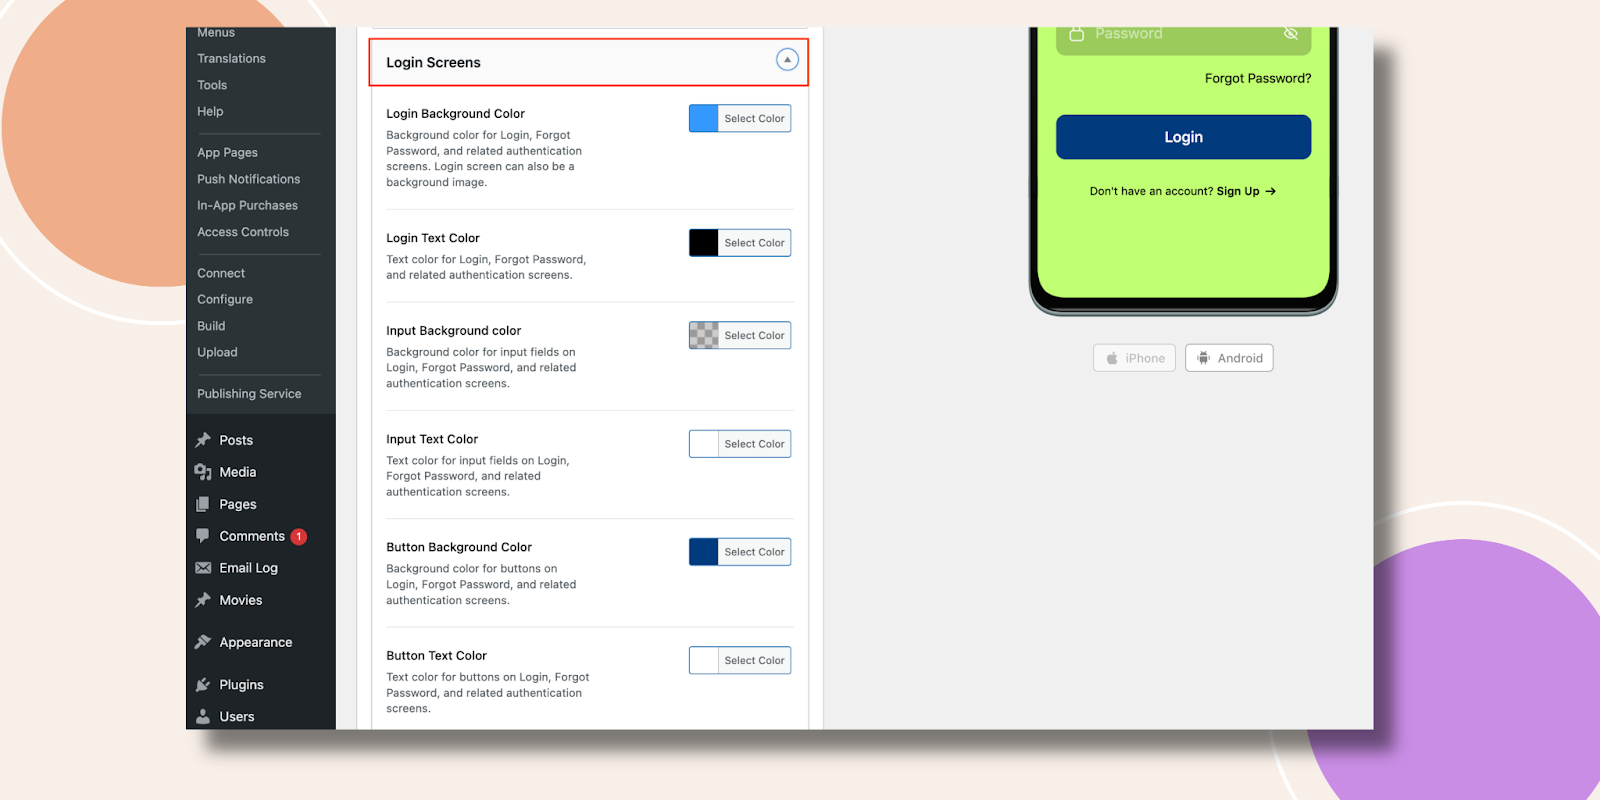
- Adjust any available options, background, field borders, button text, etc.
- Preview both Login and Forgot Password screens.
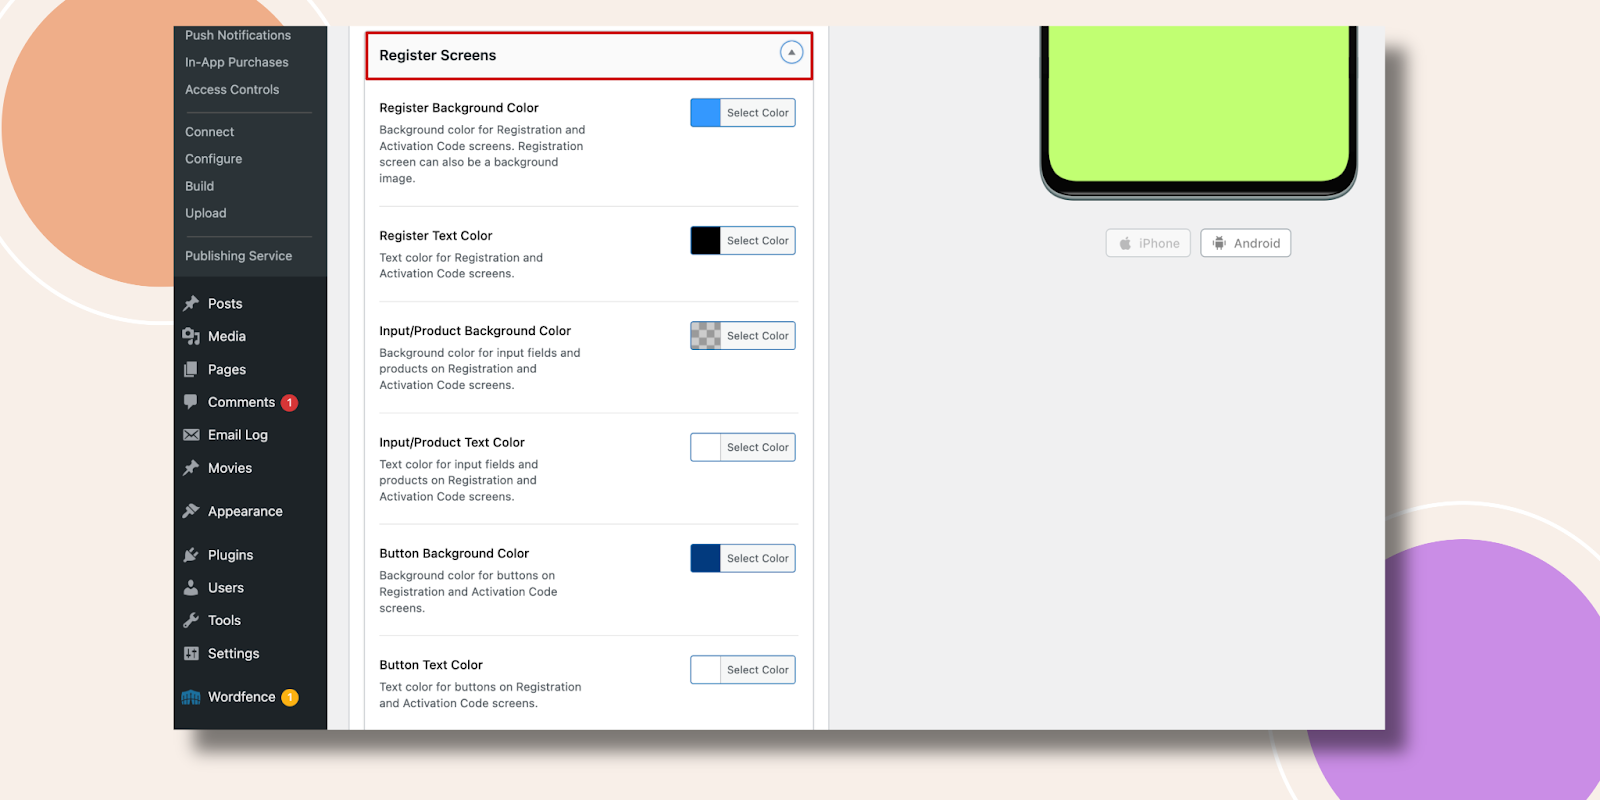
Updating Register Screen Colors
- Under Register Screens, choose colors for input fields, buttons, and backgrounds.
- Verify the Register screen preview matches your branding.
Configuring Course Progress Colors
- In Courses, set colors for Completed, In Progress, Start Course, Free, and Not Enrolled states.
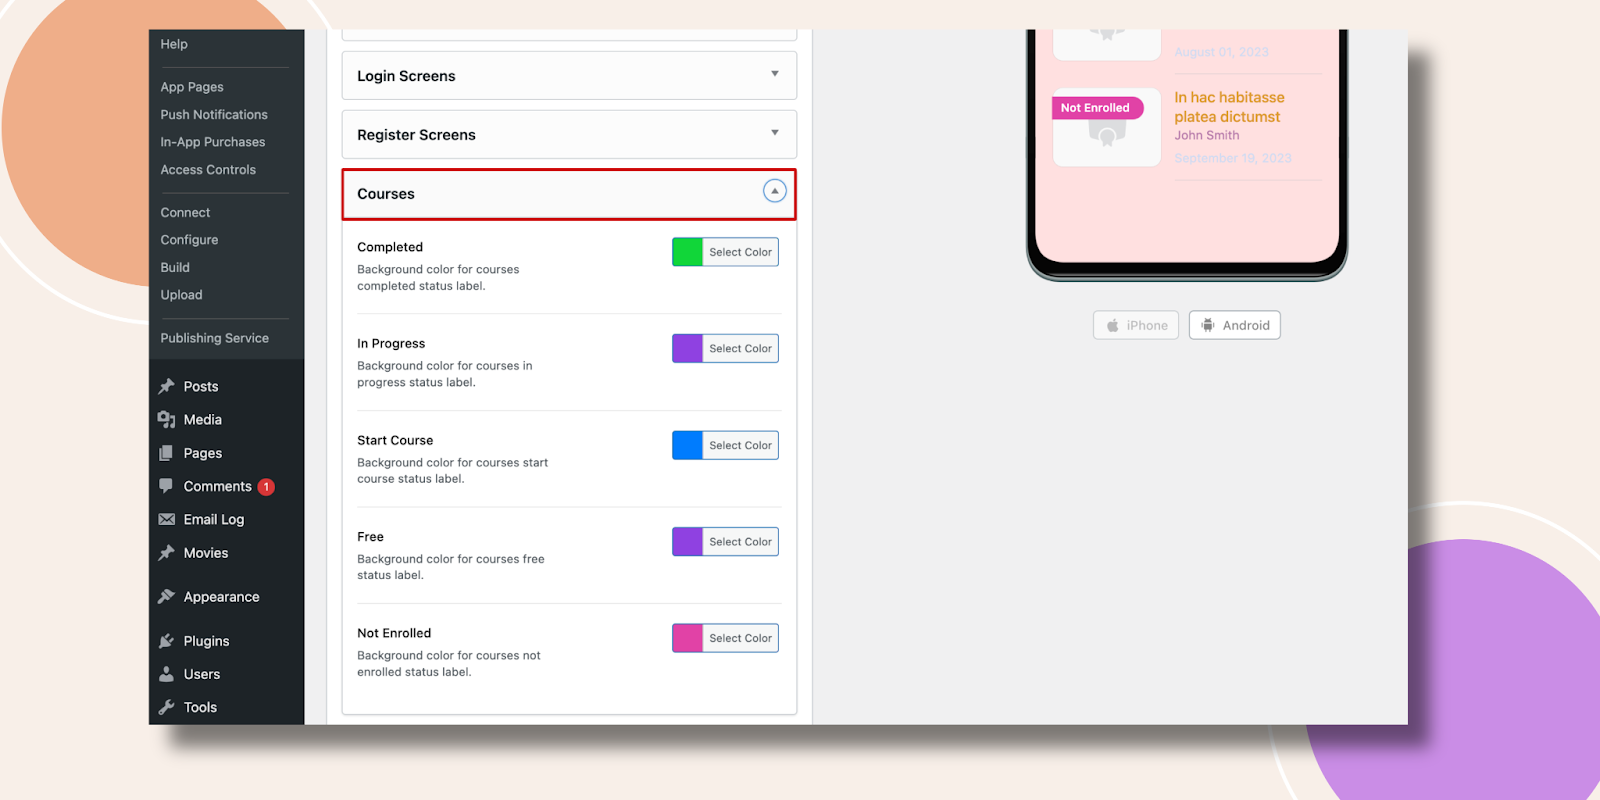
- Check the course list preview to ensure each status displays correctly.
Setting Android Status Bar Color
- Under Android Status Bar, click Status Background Color.
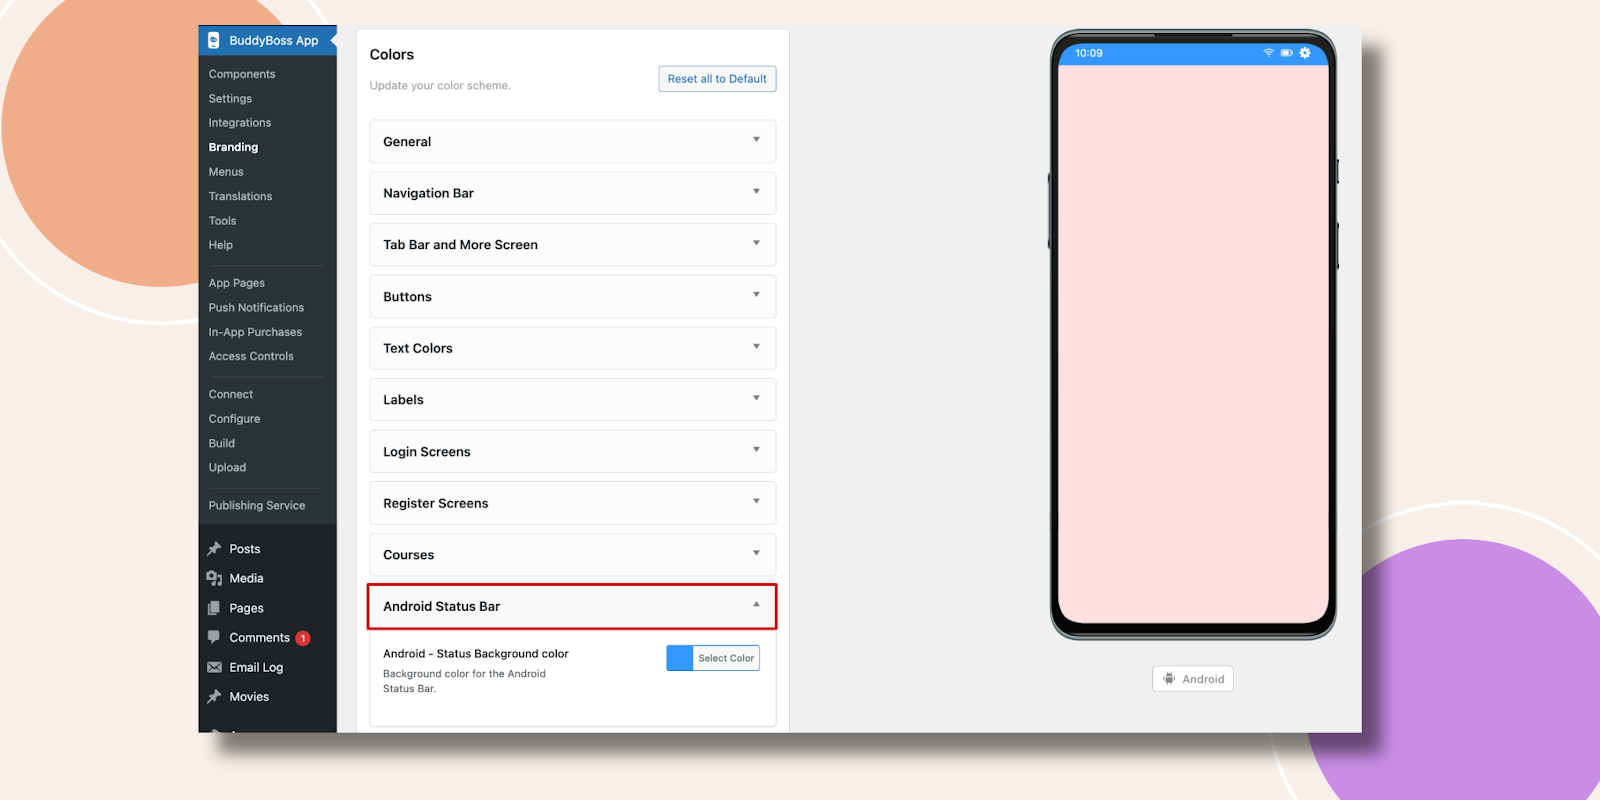
- Preview on the Android mockup to confirm visibility.
Customizing In-App Purchases Colors
- In In-App Purchases, set the Purchased Status Checkmark color.
- Choose Benefits Checkmark color.
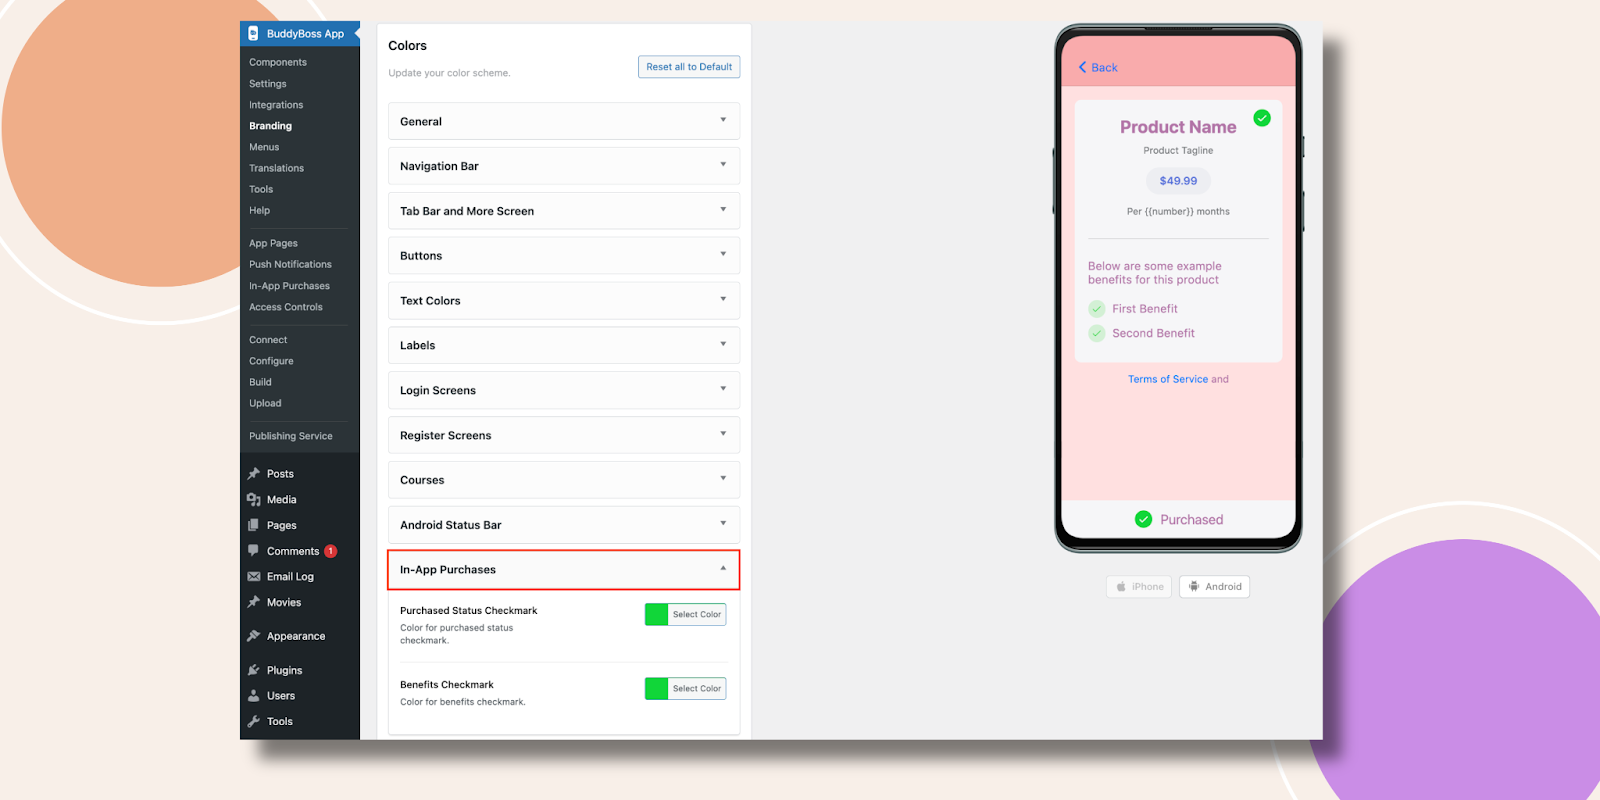
- Preview the purchase screen to verify clarity.
Saving Your Changes
- After configuring all sections, click Save Changes at the bottom of the page.
Troubleshooting and FAQs
Q: Color previews aren’t updating.
A: Click Save Changes, then hard-refresh your browser or clear caching plugins.
Q: Hex code input is invalid.
A: Include the leading # and use a six-digit value (e.g., #1A2B3C).
Q: Changes don’t appear in the app.
A: Force-close and reopen the BuddyBoss App to pull the latest settings.
Q: I don’t see the Android Status Bar option.
A: Ensure you have an active Android configuration under BuddyBoss App > Configure > Android Settings.