Introduction
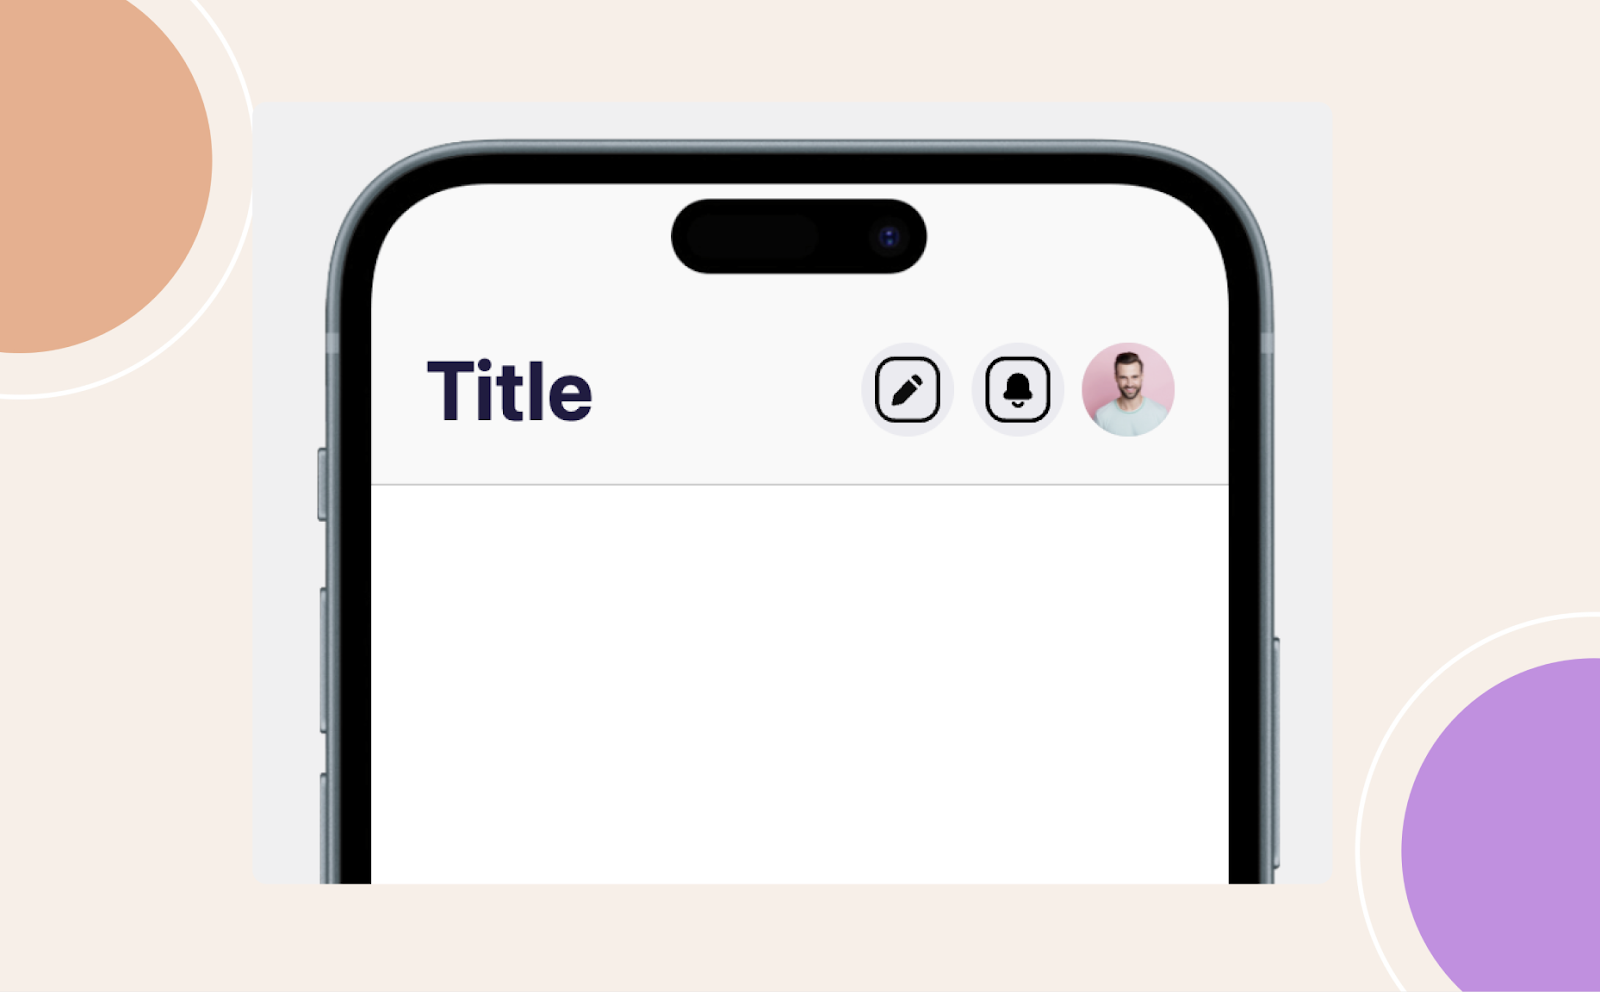
Customizing your header bar and navigation menus elevates usability and reinforces branding in your BuddyBoss App. With the new App Navigation Header, you can relocate the More Menu, add action buttons, and replace their icons, freeing a fifth slot on the Tab Bar and streamlining access to key features.
In this tutorial, you’ll configure header alignment, enable the activity post area, reposition the More Menu, update header icons, and reclaim Tab Bar space for extra items.
Key Features of the App Navigation Header
Customizable Action Buttons: The top header now includes two customizable action buttons.
Relocatable More Menu: The More Menu button can be moved to the top header, allowing an additional menu item on the Tab Bar.
Replaceable Icons: Icons on action buttons, such as Create Post or Add New Group, can now be replaced for better customization.
Accessing Header Bar Settings
- In your Dashboard, navigate to BuddyBoss App > Menus > Header Bar.
- Under Header Bar Settings, select Left Aligned or Hidden for the page header when users scroll.
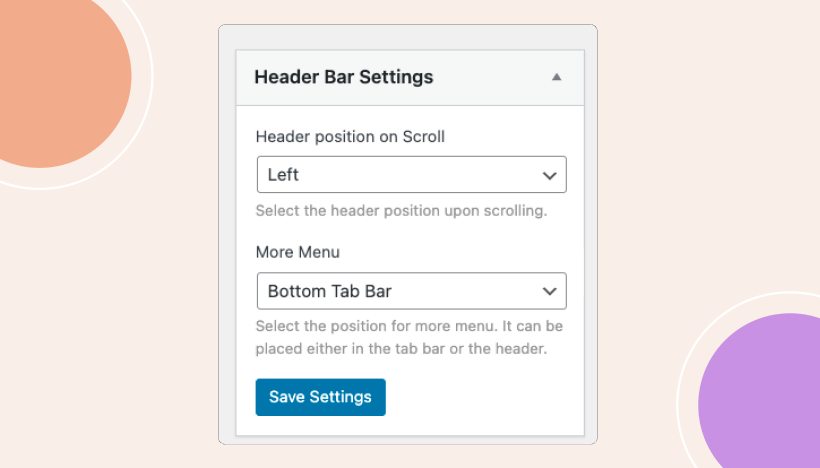
- Click Save Settings.
Configuring the Activity Post Area
- Still in Header Bar Settings, enable Post Area at the top of the Activity Feed.
- Click Save Settings.

Configuring More Menu Placement
- In Header Bar Settings, locate More Menu Placement.
- Choose Tab Bar (default, four items) or Header Bar (frees a Tab Bar slot).
- Click Save Settings.
Why: Moving More Menu to the header lets you add an extra Tab Bar item.
Updating Header Menu Items
- Switch to the Header Bar Menu tab.
- Locate More Menu (user avatar by default):
- Click its dropdown arrow.
- Select Item Icon > Select Icon, then choose or upload a new avatar icon.
- Click Select Icon, then Save Menu.
- Click its dropdown arrow.
- Repeat for Action Buttons (e.g., Create Post, Add New Group, Send Message):
- Click each action item’s dropdown.
- Under Item Icon, click Select Icon to choose or upload your custom icon.
- Click Select Icon, then Save Settings.
- Click each action item’s dropdown.
Updating the Tab Bar Menu
- Switch to Tab Bar Menu.
- Add your freed-up item (e.g., Notifications) by clicking Add to Menu under Core App or Logged In Member.
- Confirm you have no more than four Tab Bar items (excluding the relocated More Menu).
- Click Save Menu.
Troubleshooting and FAQs
Q: The More Menu didn’t move to the header.
A: Return to Header Bar Settings, set More Menu Placement to Header Bar, click Save Settings, then force-close and reopen the app.
Q: The Post area isn’t showing on my Activity Feed.
A: Ensure Post Area is enabled in Header Bar Settings and that Activity is active in BuddyBoss Platform.
Q: Custom header icons look misaligned.
A: Upload icons with transparent backgrounds, crop squarely, and use the Color Fill option to match Tab Bar styling.
Q: I can’t add a fifth Tab Bar item.
A: The Tab Bar supports only four items plus More Menu, ensure More Menu is in the header before adding a fifth item.
Q: Header Bar options are missing.
A: Update both BuddyBoss Platform and BuddyBoss App plugins to the latest versions, then reload Menus > Header Bar.