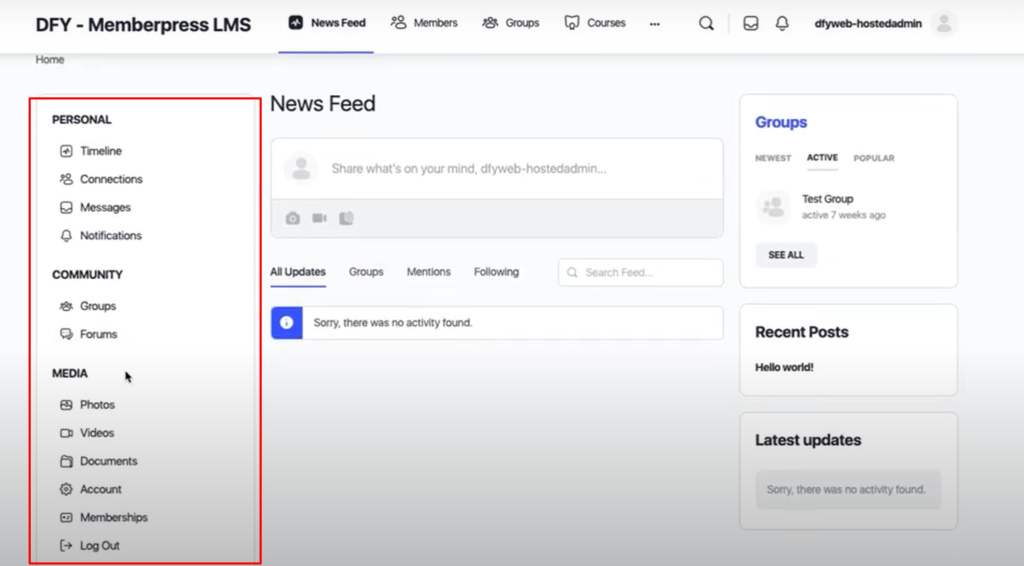
A. How to add widget area sidebar menu
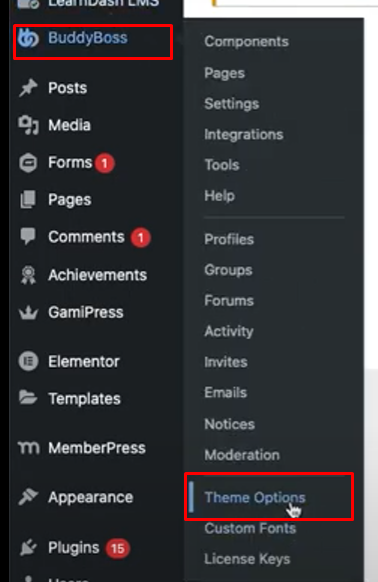
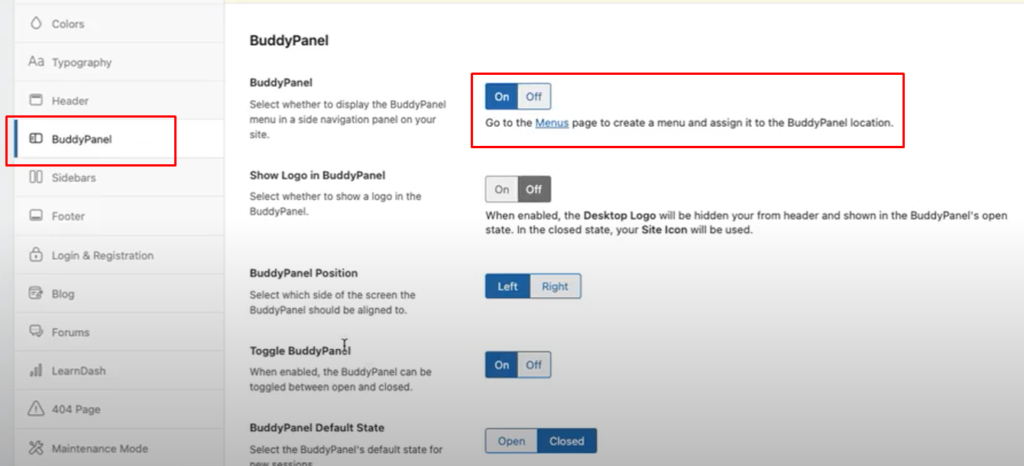
- From the left side menu, go to BuddyBoss > Theme Options
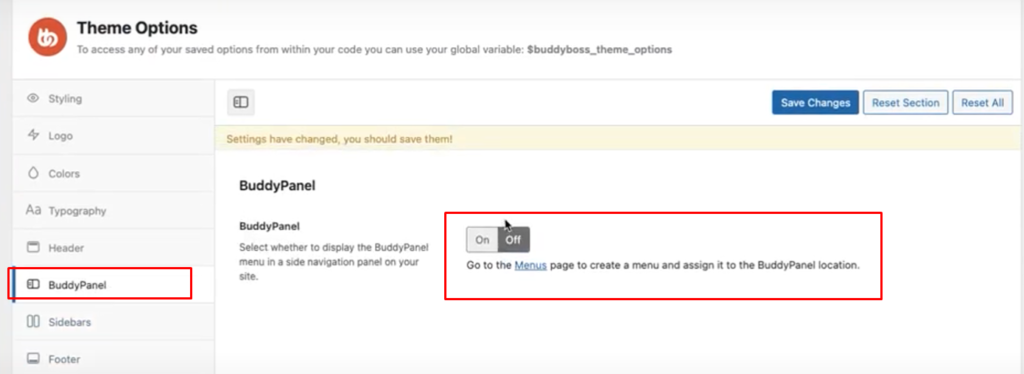
- Go to BuddyPanel and turn it off.
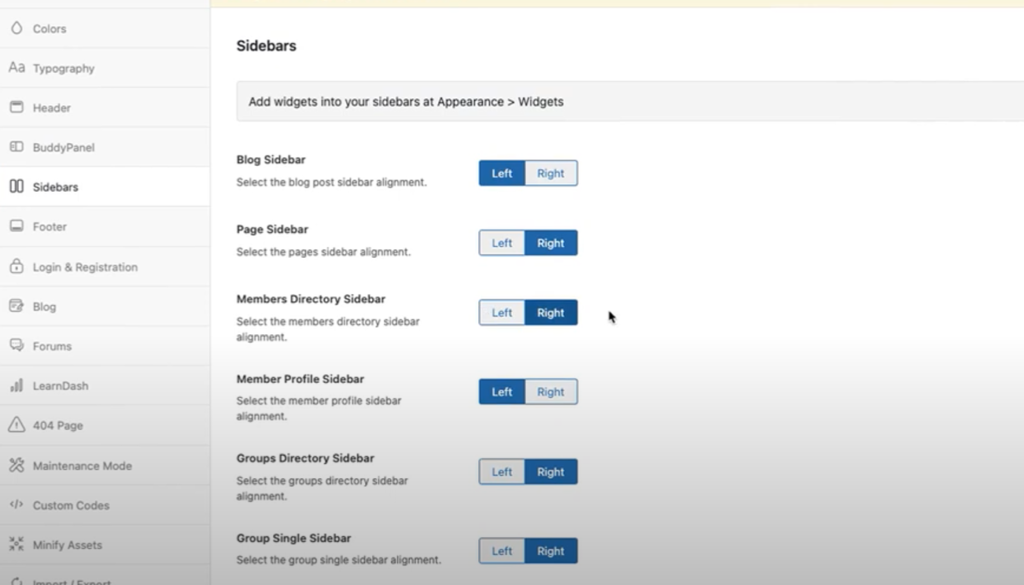
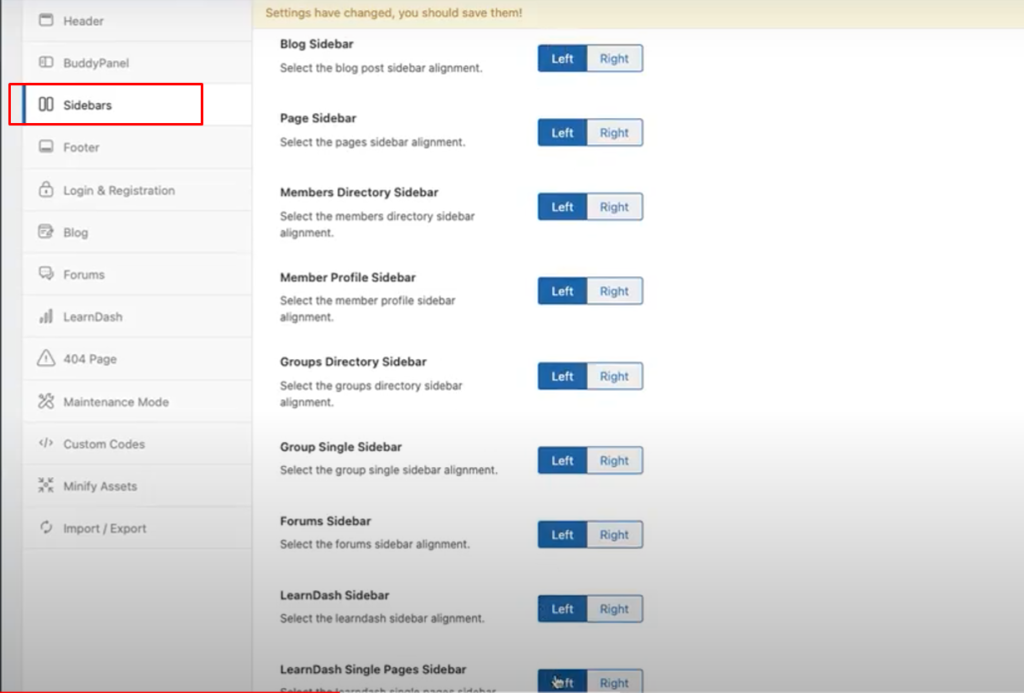
- Go to Sidebars and select the alignment based on your preference
- Click the Save Changes button.
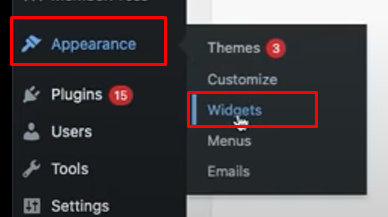
- From the left side menu, go to Appearance > Widgets
- Follow these steps to add the navigation menu:
Important Notes:- This is applicable to all other widgets, EXCEPT for the following:
- Members→User Activity,
- All four (4) Footers
- Inactive Widgets
- For Activity → Directory, you only have to add it on one, choose from left or right
- Add the Navigation Menu by clicking the plus (+) button and selecting the N
avigation menu.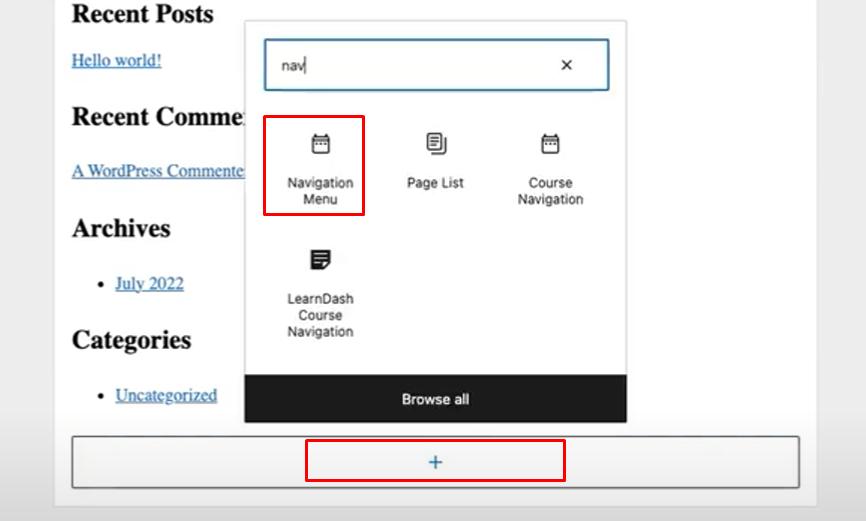
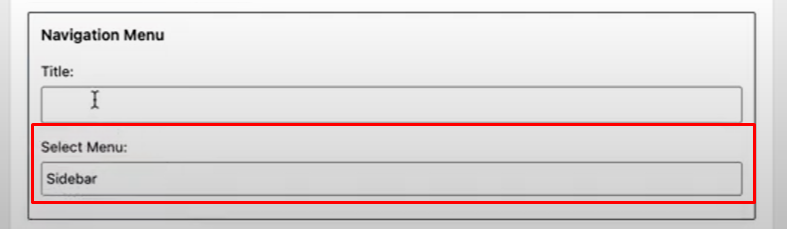
- Select Sidebar from Select Menu dropdown.
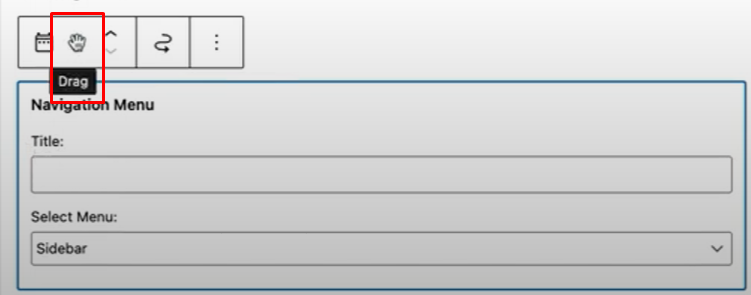
- Drag the widget to the top of each
- Click the update button for each widget.
- This is applicable to all other widgets, EXCEPT for the following:
- Once done updating the widgets, visit the site.
- You should be able to see the Widget Sidebar based on how you have set it up. Visit the different pages of the site to check if the sidebar has been added for all.
Notes:
- For any page related to Learndash, the widget area will be set at the right side by default even if you set it to the left.
- For Members page, the widget for filter results will always be on top of the sidebar by default.
B. How to undo the widget area sidebar menu
- From the left side menu, go to BuddyBoss > Theme Options
- Go to BuddyPanel and turn it ON.
- Go to Sidebars and configure all based on the default setup.
- From the left side menu, go to Appearance > Widgets
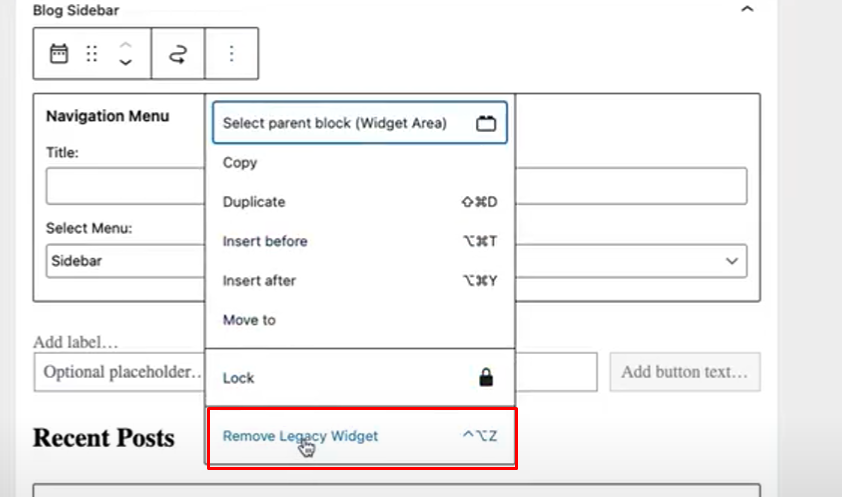
- Select each navigation menu added based on the steps in the Widget Area Sidebar and click Remove Legacy Widget. Click the Update button.