
In this tutorial, you will learn how to customize the layouts of the member directories in the BuddyBoss Platform. You can choose to display various elements for additional information on the member directory and customize the profile action buttons.
Configure Member Directories
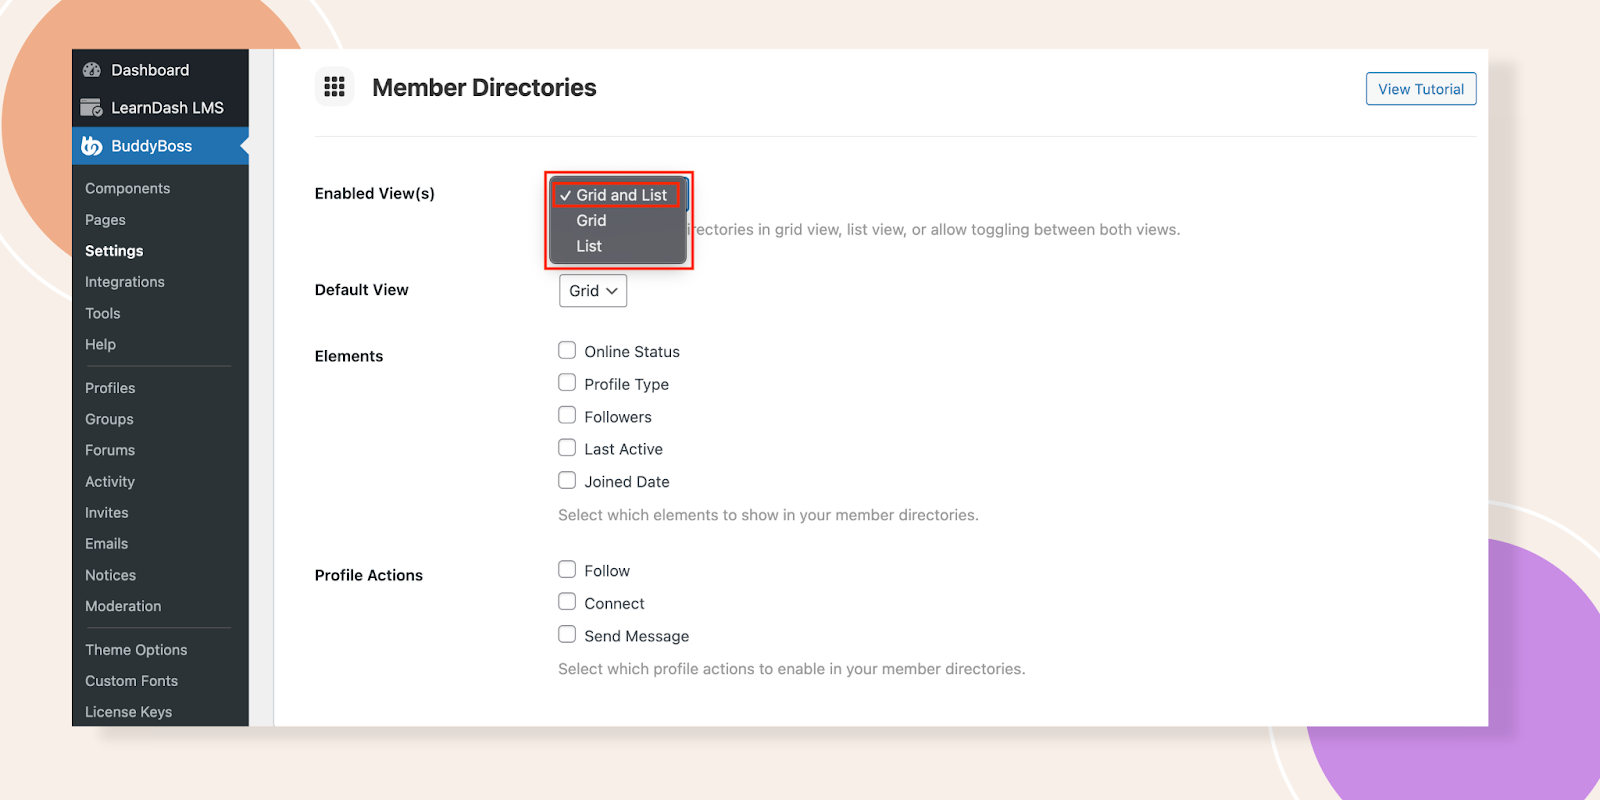
Navigate to BuddyBoss – Settings – Profiles.

Under the Enabled View option, you can display member directories in Grid view, List view, or allow toggling between both views. Here we have chosen Grid and List view. There are some other options like Elements and Profile Actions which we haven’t modified yet. Don’t forget to click the Save Settings button.
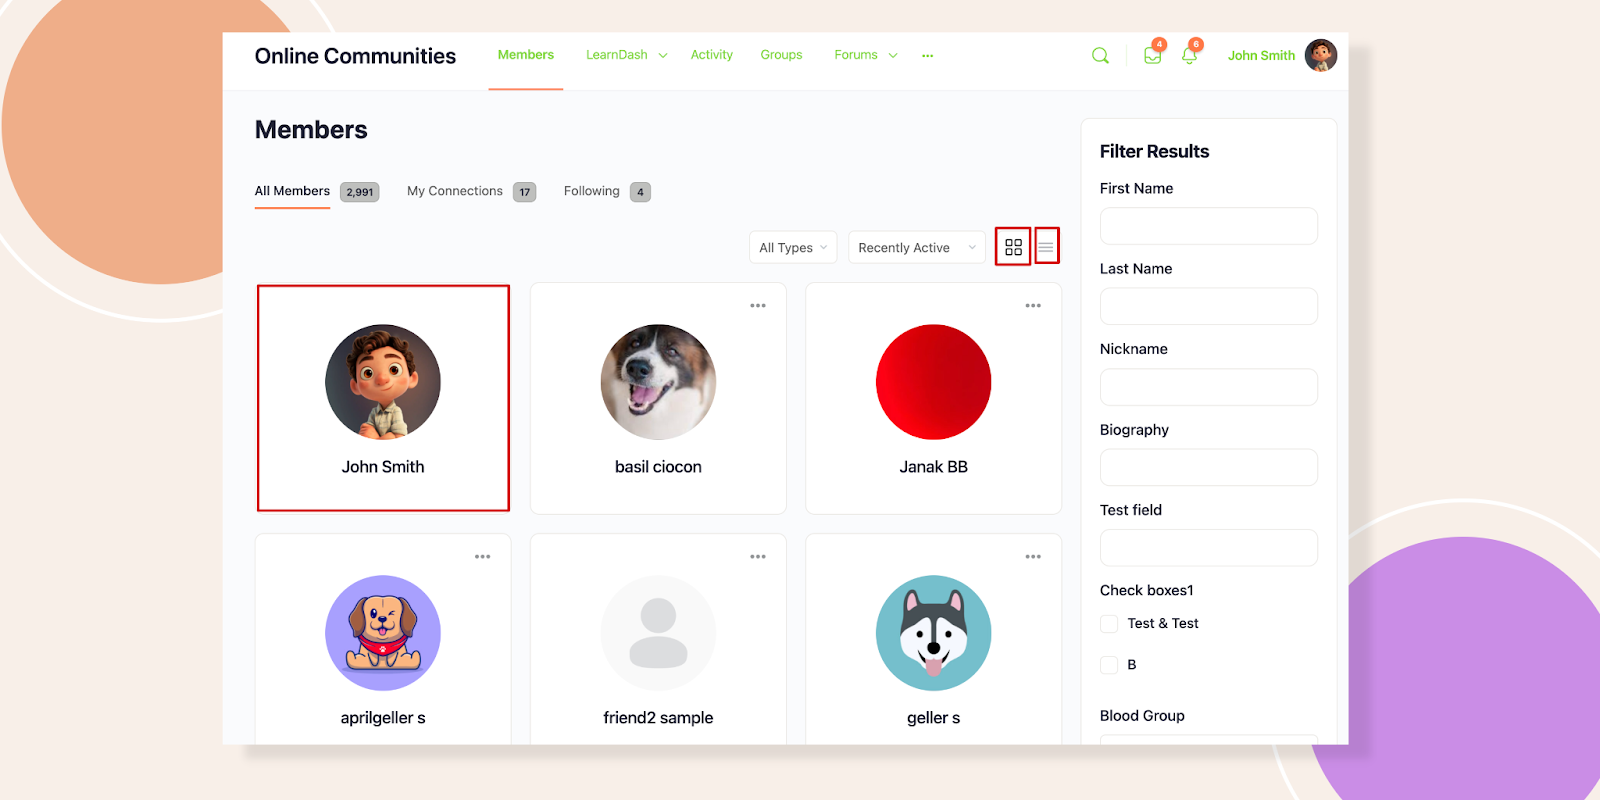
Jump to your Members page you will notice there are two options- Grid and List view is available. And in the member’s profile, there is no additional information.
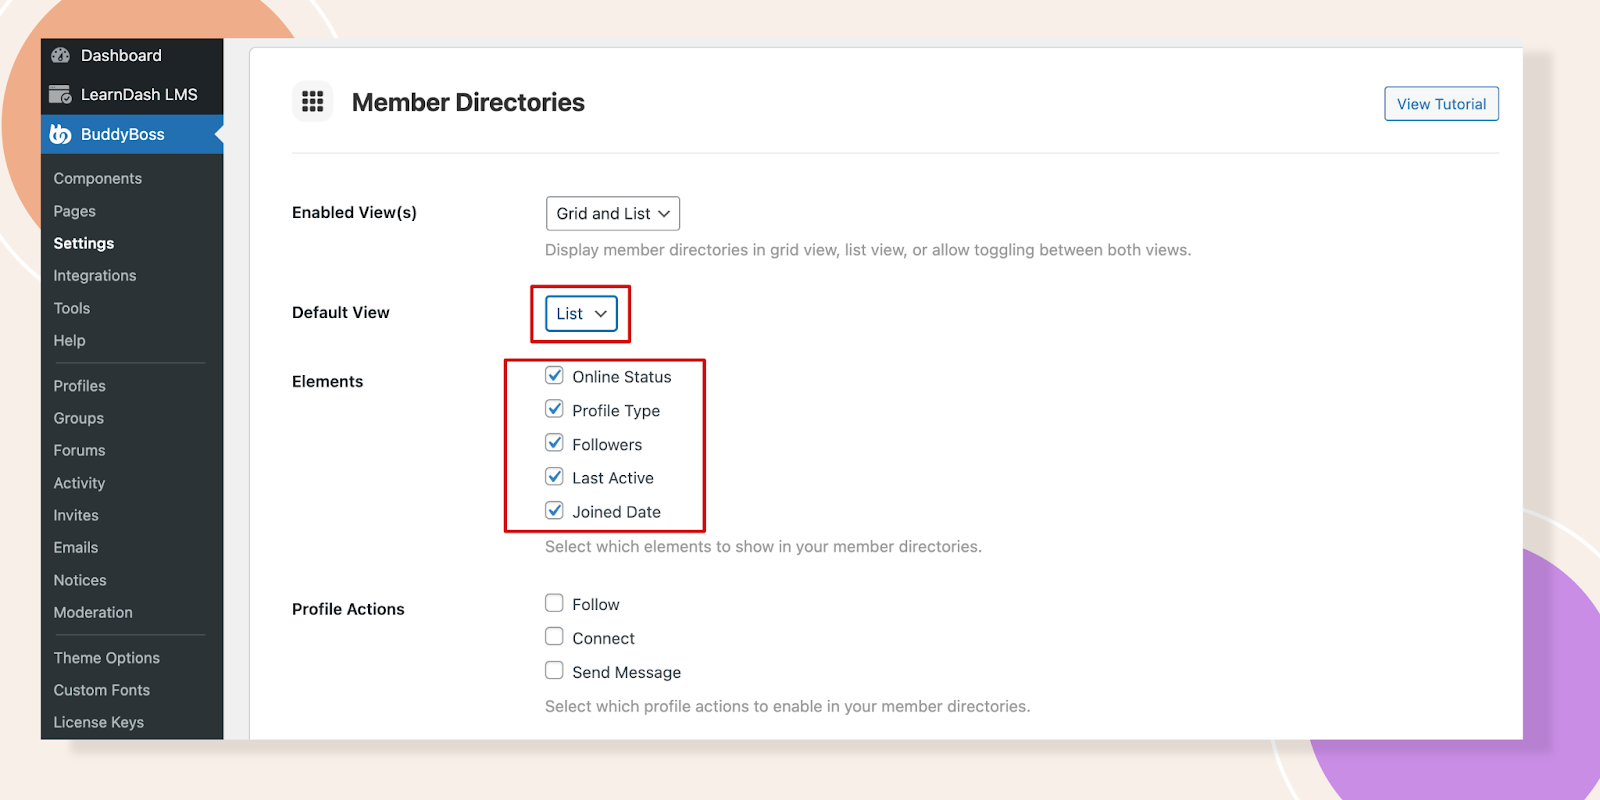
Now let’s select List under Default View and tick all the Elements. Never miss clicking the Save Settings button.
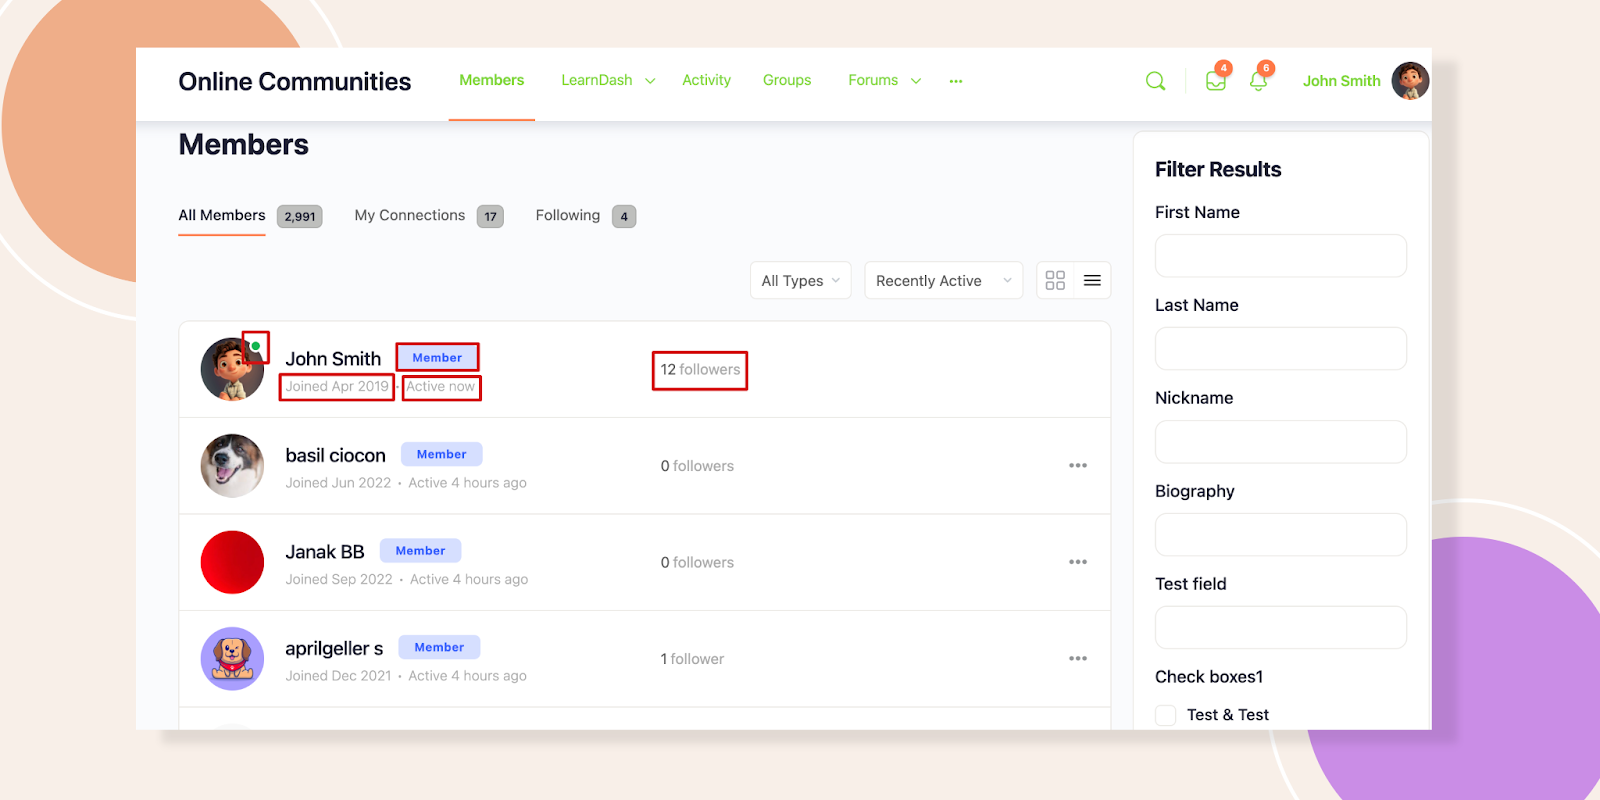
After that, refresh your Members page. You will see the elements here, Online Status, Profile Type, Followers, Last Active, and Joined Date.
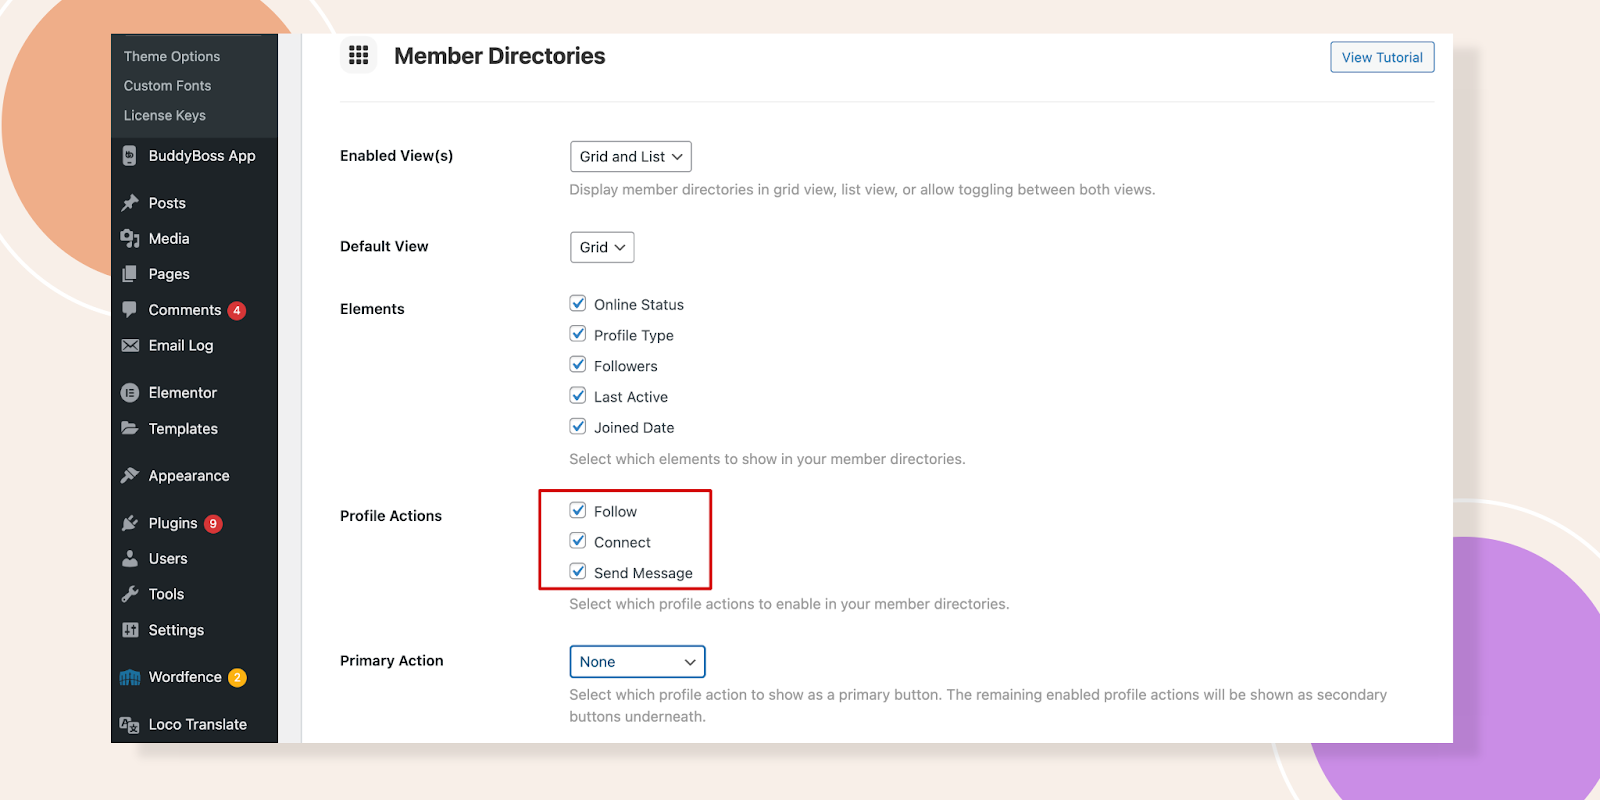
We will now explore the Profile Actions. Under this option let’s tick Follow, Connect, and Send Message. Don’t forget to click the Save Settings button.
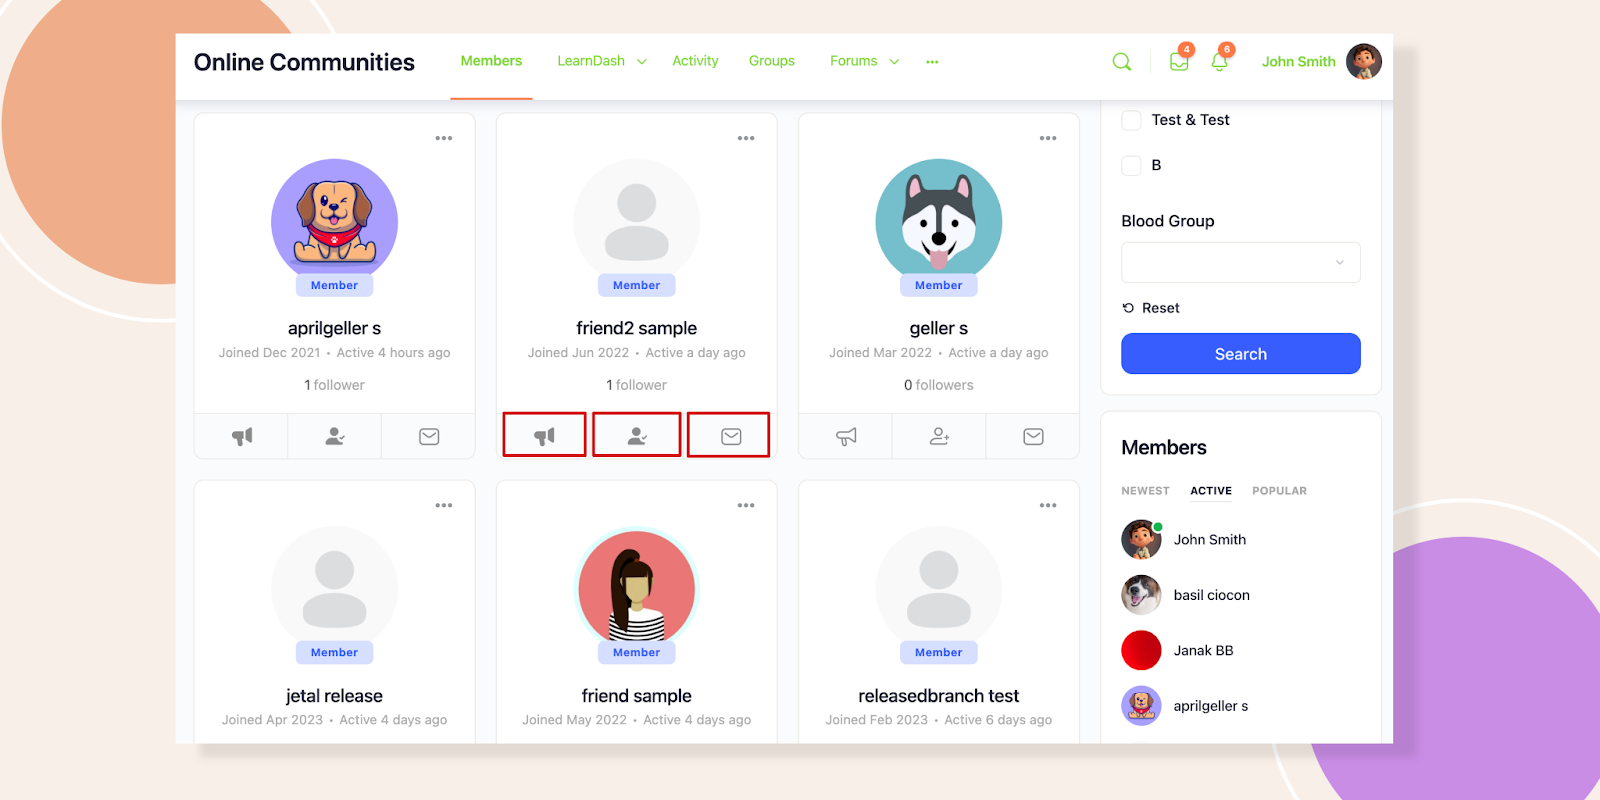
To see the changes you have made, just reload your Members page. Just notice under every profile there are Follow, Connect, and Message options available.
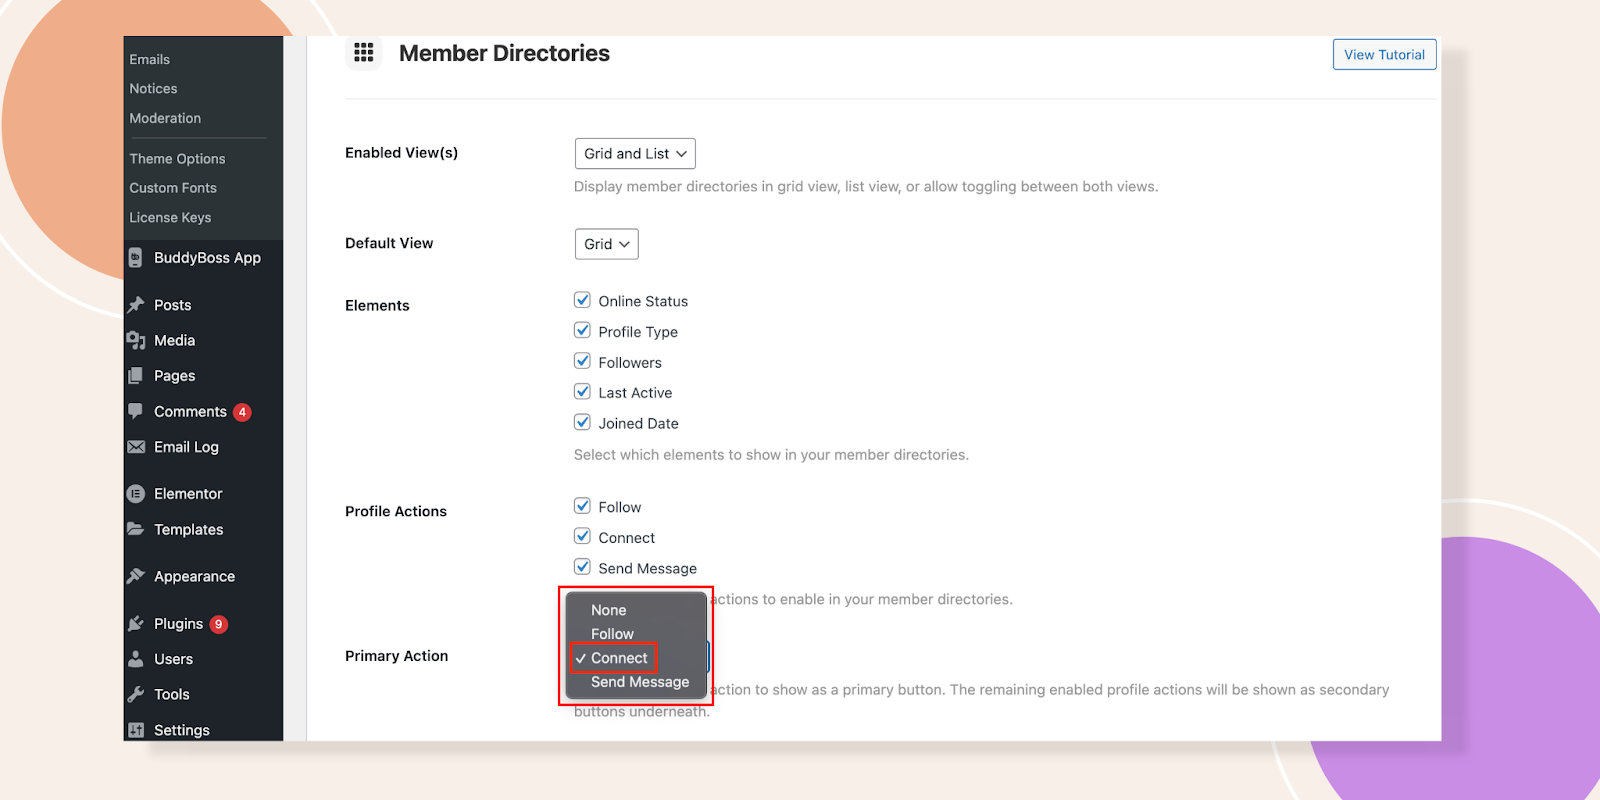
Don’t skip the tutorial! There is another fascinating option called Primary Action. Select which profile action to show as a primary button. The remaining enabled profile actions will be shown as secondary buttons underneath. For instance, we have selected Connect.
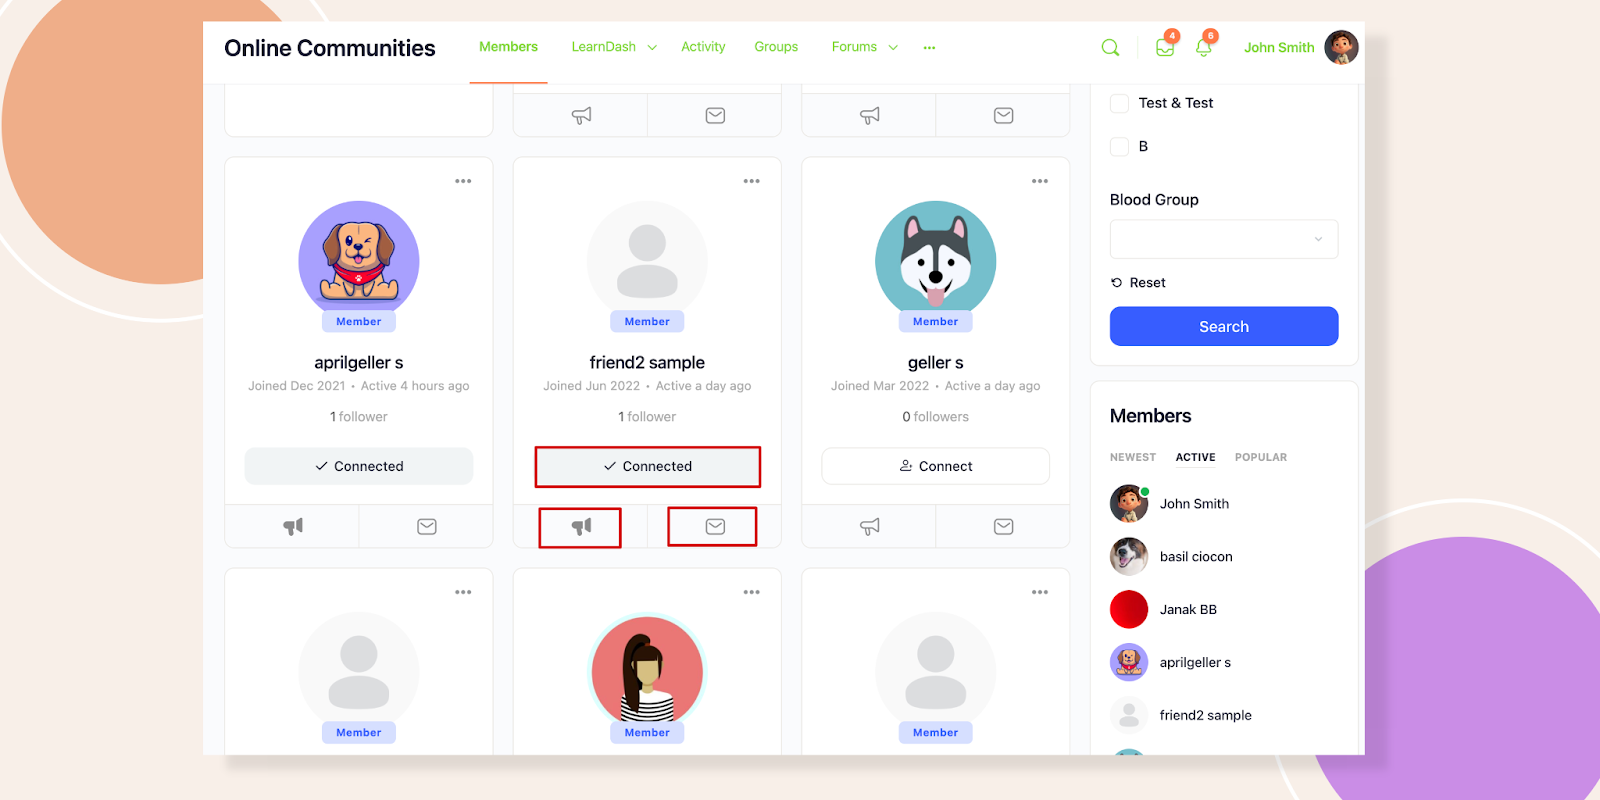
As promised you can see in the frontend (please reload before checking your desired change), that the Connect button is presented as primary, and rest of the two are secondary.
Hope this tutorial helps you out.