WordPress can be installed two ways. You can do it using the “Fantastico” instant WordPress install as provided by certain web hosts. If you are not using a host that has Fantastico or just prefer to do it manually, you can install it via FTP. I will go over both methods below.
Skip to the manual install tutorial.
Installing WordPress using Fantastico
Some web hosts offer a service called Fantastico which allows you to install WordPress in under a minute. We recommend using HostGator as all of their accounts come with Fantastico. This tutorial assumes you have a HostGator account.
Step 1
Log into HostGator’s Web Host Manager (WHM), which is where you can always go to manage your website. You can login to the WHM at http://www.yourdomain.com/whm. Make sure to replace “yourdomain.com” with your actual domain!
Step 2
Navigate to the Fantastico or Fantastico De Luxe icon, which will be under the section titled Software / Services.

Click the icon. Then navigate to the “WordPress” link on the left.

Then click the link that says “New Installation.”

Step 3
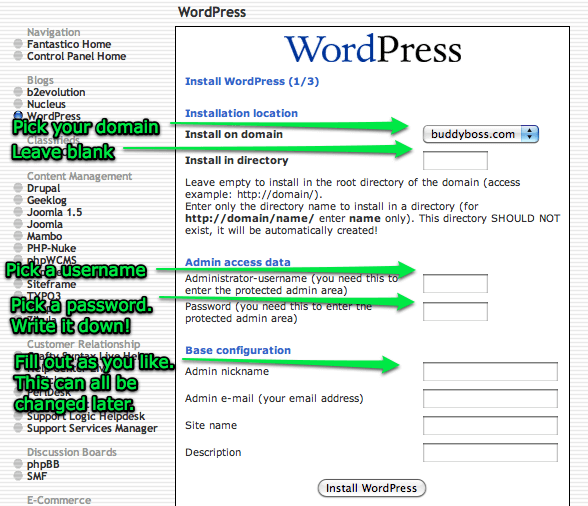
Pick the domain you’d like to install WordPress on from the domains available in the dropdown. You can leave “Install in directory” blank. Enter a username and password and fill out the remaining info.

Click “Install WordPress” when you are ready. Wait a few seconds and… that’s it! WordPress is now installed.
Log in with the username and password you just created at http://www.yourdomain.com/wp-admin (replacing yourdomain.com with the actual domain).
Installing WordPress manually (via FTP)
Installing WordPress manually takes longer and requires more of a technical background, but it gives you more control. I always install WordPress manually so I can upload all of my favorite plugins (including BuddyPress) and themes with the WordPress files all at once.
Things you will need:
- Access to your web server (via FTP)
- A text editor
- An FTP Client (I recommend Transmit for Macs, FileZilla for Windows)
- Your web browser of choice
Step 1
Download the most recent WordPress package. Unzip it on your computer.
Step 2
Create a MySQL database on your web server. Create a user who has privileges to access and modify the database. You may need to assign the user to the database after creating it. Make sure to write down the name of the database, the database username, and the database password.
Step 3
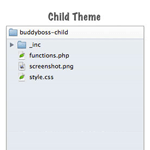
Upload the WordPress files to your web server. They should all be in the root domain (assuming your website will be located at the root domain). You want to upload the files that are in the wordpress folder you just unzipped, but not the actual folder titled “wordpress.”
Step 4
Find the file called wp-config-sample.php and rename it to wp-config.php. You will be using this file to connect your website to the MySQL database you just set up. Open wp-config.php in a text editor and fill in your database details from Step 2. Save the file.
- DB_NAME : Name of the database you created in Step 2.
- DB_USER: The username you created in Step 2.
- DB_PASSWORD: The password for that username, which you created in Step 2.
- DB_HOST: The hostname of your database server (usually just “localhost”, including HostGator sites).
Step 5
Run the WordPress installation script by going to your domain in a web browser. It should automatically take you to http://yourdomain.com/wp-admin/install.php. Enter your site’s name, your email address, and create a username and password (make sure to write them down!). Finish the installation and login with the username and password you just created.
That’s all. Enjoy using WordPress!
Want us to install WordPress for you? Contact us today and we’ll be happy to help out.