Introduction
Organizing your LearnDash courses with categories helps learners find relevant content quickly. This guide explains how to assign categories to your courses and enable the category filter in the BuddyBoss Theme so visitors can browse by category.
Assign Course Categories
- In your WordPress admin, go to LearnDash LMS > Courses.
- Hover over the course you want to categorize and click Edit.
- In the Course Settings panel on the right, scroll to Course Categories.
- To create a new category, click Add New Category, enter its name, and click Add New Category again.
- To assign an existing category, simply check its box under Course Categories.
- Click Update to save your changes.
Enable the Categories Filter
- In your WordPress admin, navigate to Appearance > Theme Options > LearnDash.
- Toggle Show Categories Filter to On.
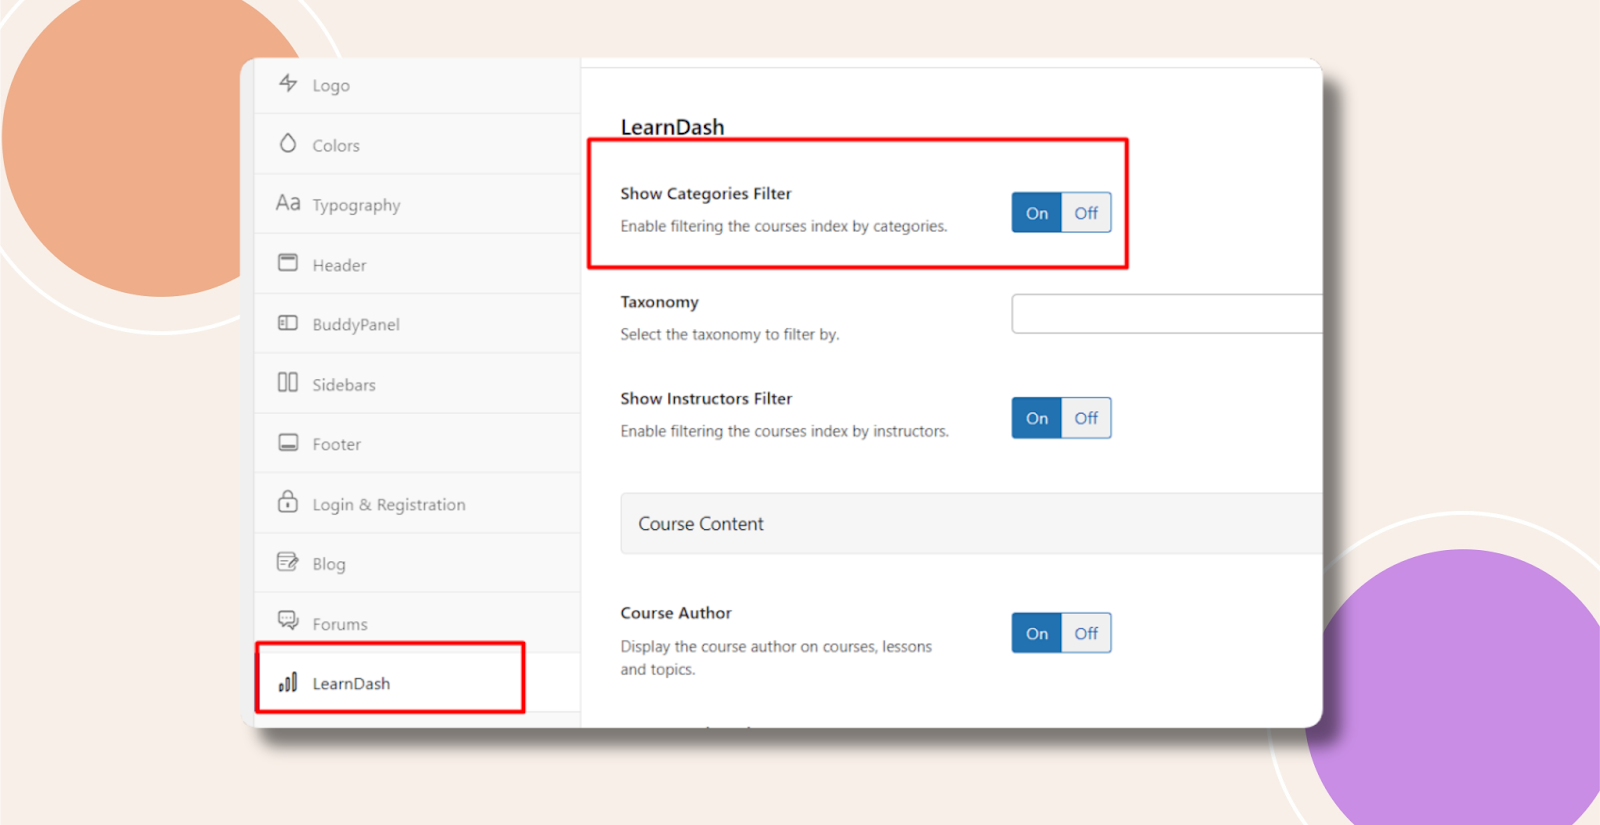
- Click Save Changes.
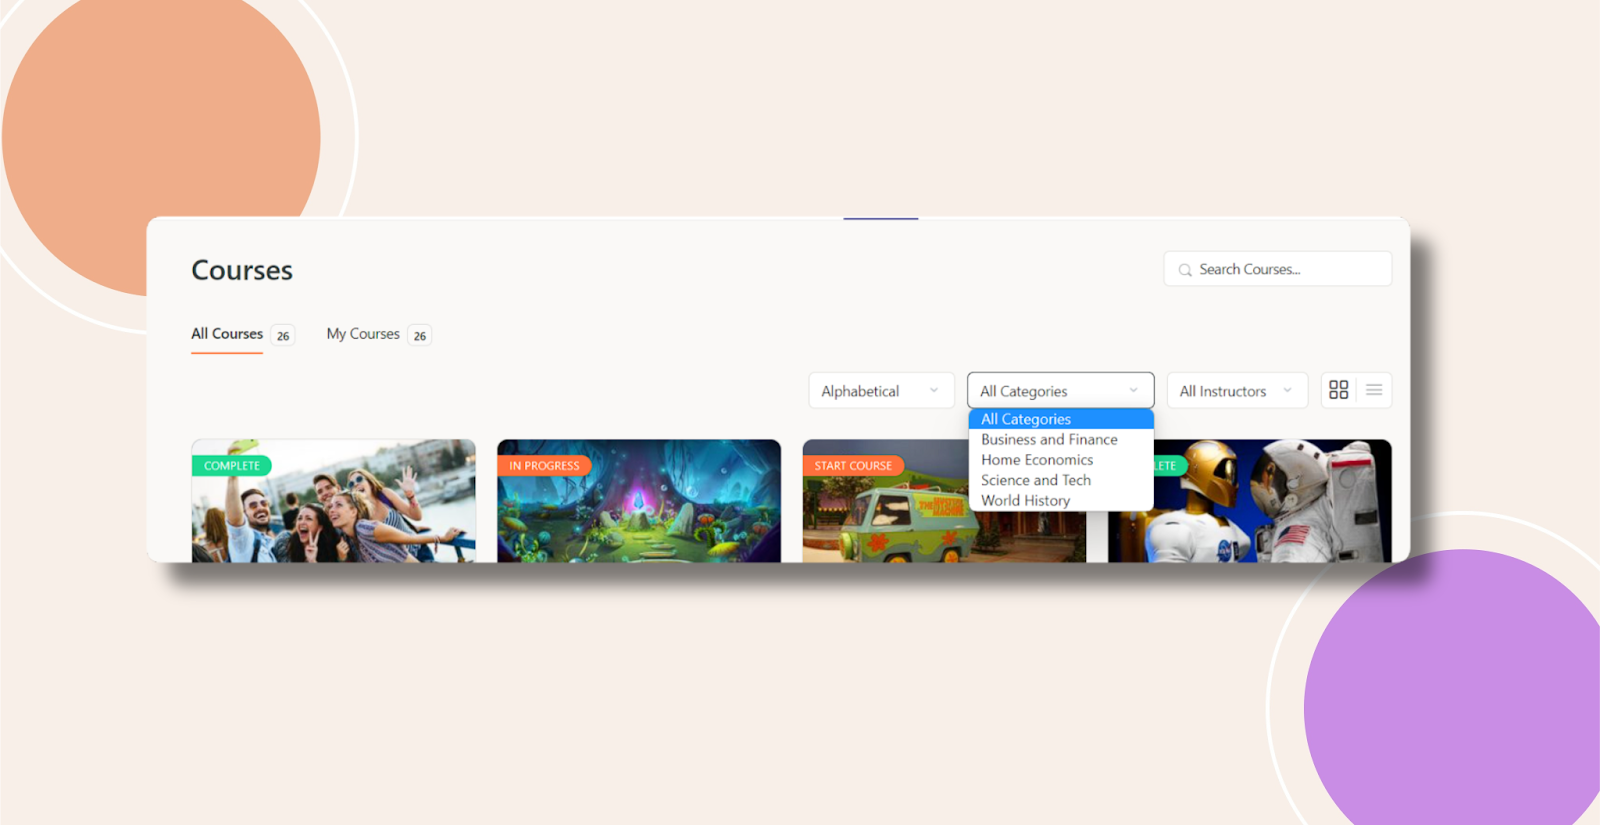
Once enabled, learners will see a category filter atop your Courses page, allowing them to narrow the course list by category.
Troubleshooting and FAQs
Q: I don’t see the Course Categories panel—what should I check?
A: Ensure you’re running LearnDash 3.0+ and that no custom code has disabled the taxonomy UI.
Q: The category filter isn’t appearing—what did I miss?
A: Confirm Show Categories Filter is enabled under Appearance > Theme Options > LearnDash, then clear any site cache.
Q: Can I hide empty categories?
A: BuddyBoss will only display categories assigned to at least one course. To remove unused ones, delete them under LearnDash LMS > Course Categories.
Q: Will this affect my course URLs?
A: No. Course slugs remain unchanged; categories only add a filtering UI and archive pages at /course-category/<slug>/.