Introduction
The full header option uses the entire width of the page and sits above the Buddy Panel. When enabled, any logo in the Buddy Panel is hidden and instead appears in the header. This article explains how to enable the full-width header option in your BuddyBoss theme, what visual changes to expect, and where to find the setting in your WordPress dashboard.
Enable Full-Width Header
- Open your WordPress dashboard.
- Navigate to BuddyBoss > Theme Options.
- Select the Header tab.
- Choose the Full Width Header option.
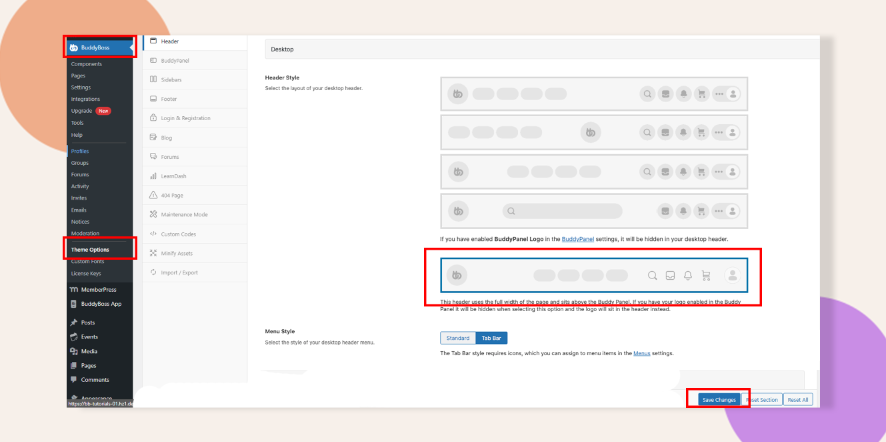
- Click Save Changes.
Sample Screenshot:

Troubleshooting and FAQs
Q: I don’t see the Full Width Header option.
A: Make sure you’re running the latest version of the BuddyBoss theme and clear any caching plugins.
Q: My site still shows a narrow header after enabling.
A: Clear your browser cache and any server‑side caches, then reload the page.
Q: My logo remains in the Buddy Panel.
A: Verify you have no custom CSS forcing the panel logo to display; the full header option hides it automatically.