In this tutorial I will teach you how to configure the basic options for the BuddyBoss theme (version 3.0+). To view all of the options for BuddyBoss, just navigate through the other tutorials listed on this page.
Setting up custom menus
- Go to Appearance > Menus.
- Create a new menu and add all desires pages into that menu.
- Drag and drop to reorder pages. Click “Save Menu”.
- Click “Manage Locations” and set your new menu to the desired location.
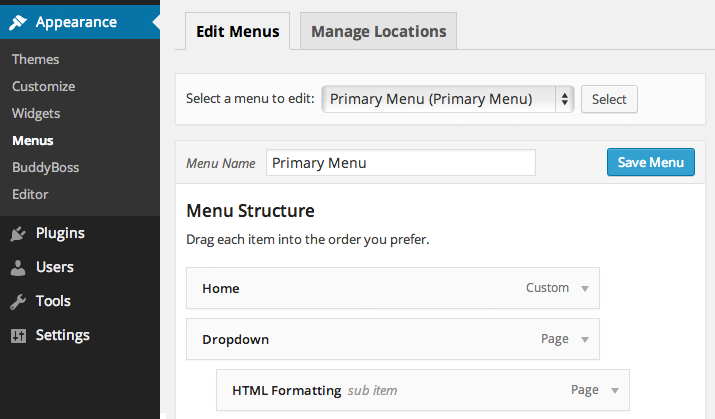
BuddyBoss comes with four menu locations:
- Primary Menu — shows up in the header
- Footer Menu — shows up in the footer
- Profile: Extra Links — shows up in all BuddyPress user sidebars
- Group: Extra Links — shows up in all BuddyPress group sidebars
You can drag and drop menus into an indented position to get drop downs for the “Primary Menu” location.
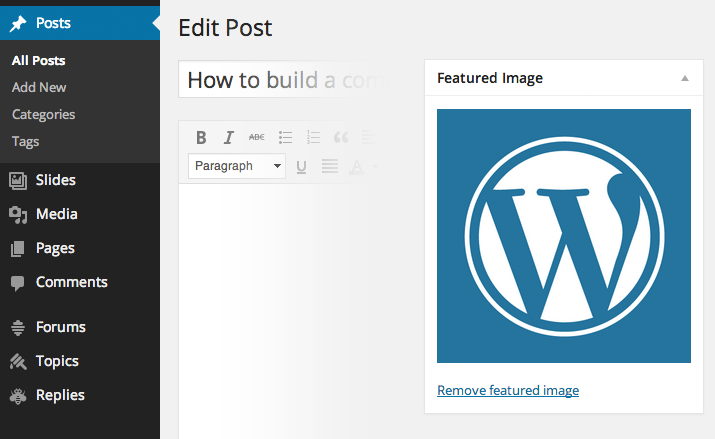
Adding featured images to blog posts
- In the WordPress Dashboard, go to Posts and select a post to edit.
- Under “Featured Image” in the right column, click “Set featured image”.
- Upload your image into the media uploader, and then click “Set featured image”.
- Click to “Update” your blog post.
- Now when you view your blog index, you will see your uploaded image featured for this post
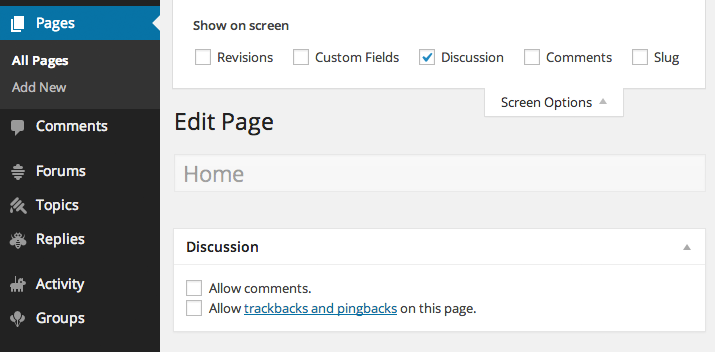
Removing comments on individual pages
By default, all new pages will have a comments box. You may want to change this behavior.
- From the front-end, navigate to the page you want to edit.
- Click “Edit Page” in the Toolbar at the top.
- Open “Screen Options” from the top and check the “Discussion” option.
- Scroll down on the page to the Discussion section, and uncheck “Allow comments”.
Allowing users to create accounts
This is only relevant if you are using the BuddyPress plugin.
1. Go to Settings > General. Select “Anyone can register” under Membership.

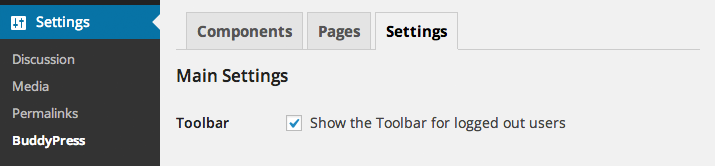
2. Go to Settings > BuddyPress > Settings. Make sure “Show the Toolbar for logged out users” is set to “Yes”.
Changing the default user avatar
BuddyBoss comes with an attractive custom avatar that can replace the default WordPress “Mystery Man”.
- Go to Settings > Discussion in your Dashboard.
- At the bottom of the page, set Default Avatar to “BuddyBoss Man”.
- Click “Save Changes”.
![]()
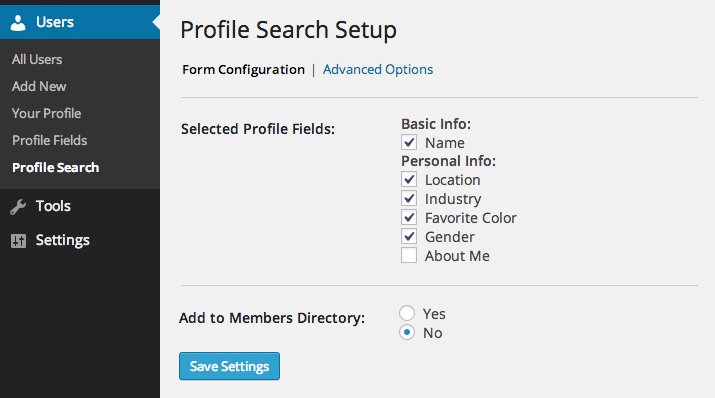
Configuring advanced member search
This is only relevant if you are using the BuddyPress plugin.
- Install the “BP Profile Search” plugin.
- Go to Users > Profile Search.
- “Search Form Header” and “Toggle Form” are not relevant. Whatever you put in there will not be used as those options are only for the hard-coded option. BuddyBoss is using the widget provided with the plugin.
- Check all of the profile fields you would like to be searchable. How to set up profile fields →
- Leave “Add to Members Directory” unchecked. We will be using the widget instead.
- Click “Save Changes”.
- Navigate to Appearance > Widgets.
- Add the “BP Profile Search” widget to your desired widget area (usually Members → Directory).